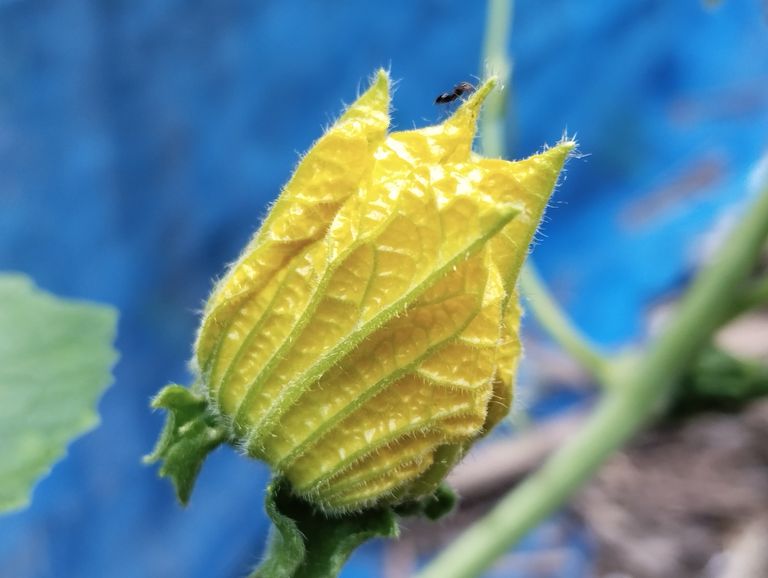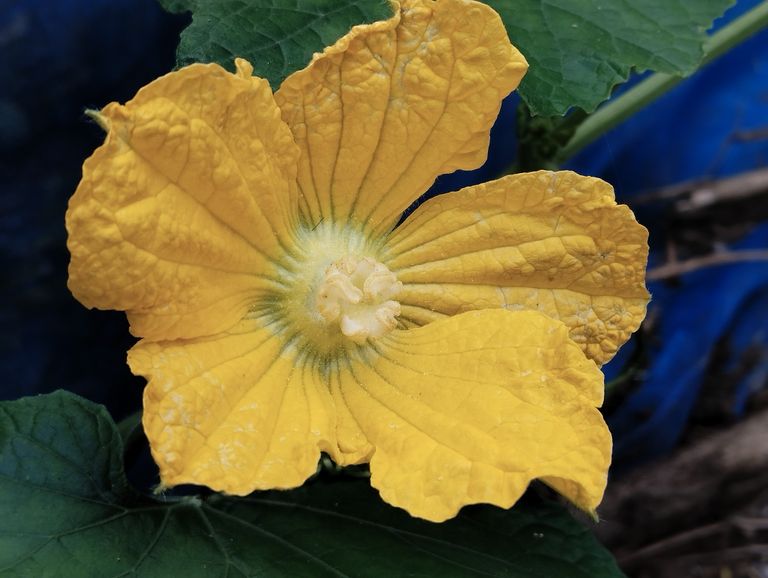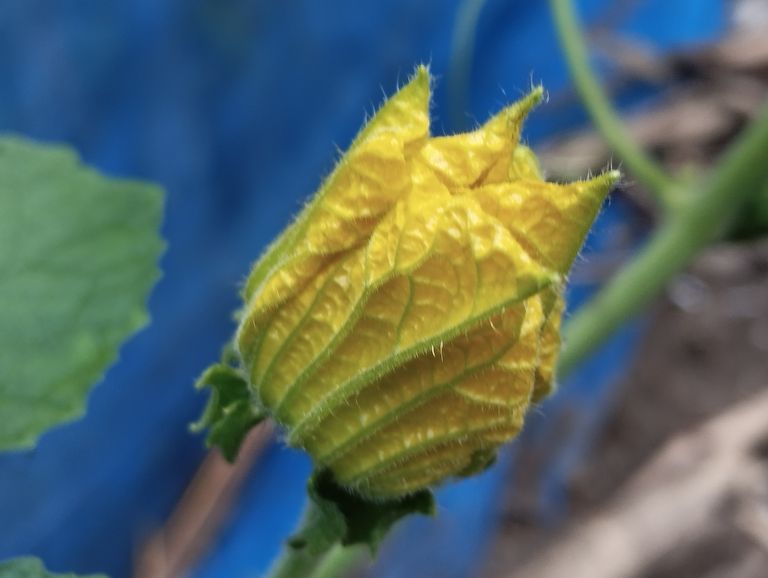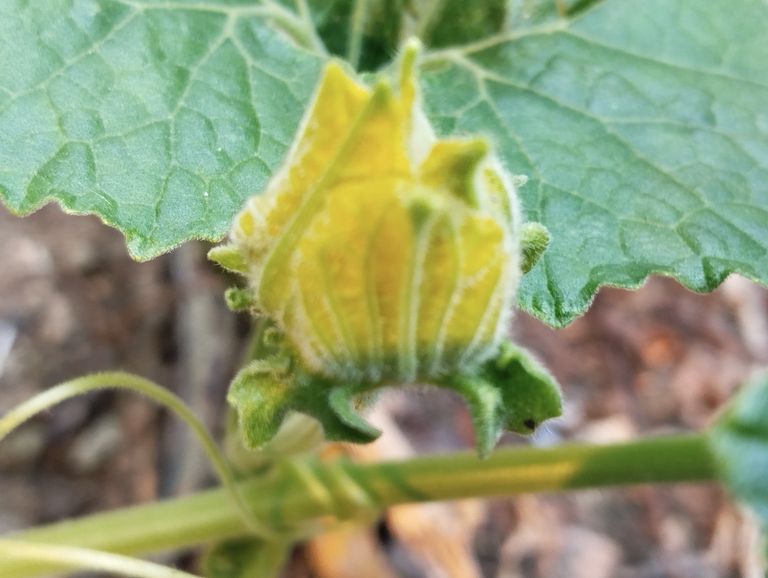
Chal Kumro Phul Bhaji Bengali Pumpkin Flower Fritters Recipe.
If you're a fan of Bengali cuisine, you’ve likely heard of or tried “Chal Kumro Phul Bhaji,” also known as Bengali Pumpkin Flower Fritters. This delicacy is prepared using fresh pumpkin flowers, a delightful ingredient often overlooked in many kitchens. With a simple batter and deep-frying technique, these fritters offer a crispy texture and unique flavor that’s sure to please.
What is Chal Kumro Phul Bhaji?
In Bengali households, “Chal Kumro Phul Bhaji” is a popular dish, especially during the summer and early autumn when pumpkin flowers are in season. It’s a unique, vegetarian side dish that’s light, crispy, and pairs wonderfully with rice. Pumpkin flowers are delicate, slightly sweet, and have a taste similar to zucchini blossoms. The dish is also vegan-friendly, making it suitable for a variety of diets.
Benefits of Pumpkin Flowers
Not only are pumpkin flowers tasty, but they’re also nutritious. They are rich in vitamins A and C, essential for good vision and immunity. Additionally, these flowers are low in calories and contain antioxidants that help combat inflammation.
Ingredients
To prepare this delicious Bengali snack, you’ll need:
12-15 fresh pumpkin flowers (chal kumro phul)
1 cup chickpea flour (besan)
1 tbsp rice flour (optional for extra crispiness)
1 tsp turmeric powder
1 tsp red chili powder (adjust to taste)
Salt to taste
Water (for the batter)
Oil for deep-frying (mustard oil is traditional, but you can use any)
Preparing the Pumpkin Flowers
- Cleaning the Flowers: Start by thoroughly cleaning the pumpkin flowers. Gently wash them under cold water to remove any dirt or insects. Trim the stem and remove the pistil inside each flower to avoid any bitterness.
- Drying the Flowers: After washing, gently pat the flowers dry with a clean kitchen towel. It’s important to ensure the flowers are as dry as possible to help the batter adhere well.
Making the Batter
- Mix the Dry Ingredients: In a mixing bowl, combine the chickpea flour, rice flour, turmeric powder, red chili powder, and salt.
- Add Water: Gradually add water while whisking until you achieve a smooth, medium-thick batter. The consistency should be thick enough to coat the flowers but not too runny. Adjust salt and spices according to your taste.
Frying the Fritters
- Heat the Oil: Heat oil in a deep pan over medium heat. Mustard oil brings an authentic Bengali flavor, but you can use other oils if preferred.
- Coat the Flowers: Dip each flower into the batter, ensuring it’s well-coated on all sides.
- Fry Until Golden: Gently place the battered flowers in the hot oil. Fry for about 2-3 minutes on each side, or until they turn golden and crispy. Be careful not to overcrowd the pan, as it can reduce the oil temperature and make the fritters soggy.
- Drain the Fritters: Once golden, remove the fritters from the oil and place them on a paper towel-lined plate to absorb excess oil.
Serving Suggestions
Chal Kumro Phul Bhaji is best enjoyed hot, straight out of the pan. These fritters make an excellent appetizer, or they can be served as a side dish with steamed rice and dal for a complete Bengali meal. A squeeze of lemon juice or a sprinkle of chaat masala on top can add an extra burst of flavor.
Tips for Perfect Fritters
Choose Fresh Flowers: For the best flavor and texture, use fresh pumpkin flowers. Wilted or old flowers can be bitter and won’t crisp up as well.
Control Batter Consistency: If the batter is too thick, it may make the fritters heavy. If it’s too thin, it won’t adhere well. Aim for a smooth, thick batter that clings to the flowers without being too thick.
Fry in Small Batches: Overcrowding the pan can make the oil temperature drop, causing the fritters to absorb more oil and become soggy.
Variations and Additions
Spices: You can add a pinch of garam masala, cumin powder, or ajwain seeds to the batter for an added depth of flavor.
Vegetables: Sometimes, chopped green chilies or finely chopped onions are added to the batter for a spicier version.
Herbs: Fresh coriander leaves can be added to the batter for a slight herby note.
Nutritional Information (per serving)
While the exact nutritional content will vary depending on the size of the flowers and frying oil absorbed, here’s an approximate value for a single serving:
Calories: 150-200 kcal
Protein: 4g
Fat: 10g
Carbohydrates: 12g
Fiber: 2g
The Cultural Significance of Pumpkin Flower Fritters
In Bengali culture, making use of seasonal ingredients like pumpkin flowers is a cherished tradition. These fritters are often prepared as a part of festive meals or simply to celebrate the arrival of fresh blooms in the garden. The humble chal kumro phul bhaji holds a nostalgic value for many Bengalis, bringing back memories of family gatherings and the rustic flavors of home-cooked meals.
Conclusion
Chal Kumro Phul Bhaji is a simple, delicious way to savor the flavors of Bengali cuisine. With minimal ingredients and an easy method, you can create these crispy fritters that are sure to impress. Whether you're cooking for family or simply indulging in a Bengali-inspired snack, these pumpkin flower fritters are worth trying. Enjoy the earthy, floral flavors of pumpkin flowers in each bite This blog post brings a bit of Bengal into your kitchen. Try it out, and let the crispy, golden Chal Kumro Phul Bhaji become a new favorite in your culinary repertoire

Here's a 4,000-character blog in English on collecting chal kumra (winter melon) seeds and preserving them.
Collecting and Preserving Winter Melon Seeds (Chal Kumra)
Winter melon, known as chal kumra in Bengali, is a versatile vegetable commonly grown across Asia, particularly in Bangladesh and India. Beyond being a delicious and nutritious ingredient, winter melon is valued by gardeners for its high yield and easy-to-grow nature. Collecting and preserving seeds from winter melon is a sustainable way to ensure a continuous supply for future planting seasons. Let’s explore the steps involved in harvesting, drying, and storing chal kumra seeds effectively.
Why Save Winter Melon Seeds?
Before we get into the process, let’s discuss why saving seeds is beneficial for gardeners and farmers:
- Cost-Effective: Seed saving reduces the need to purchase seeds every year.
- Adaptation: Seeds collected from locally grown winter melons are more adapted to local climates and soils.
- Self-Reliance: By growing from saved seeds, gardeners become less dependent on commercial seeds.
- Quality Control: Saving seeds from the best plants ensures desirable traits, like size, taste, and yield.
Step 1: Selecting the Right Melon
Seed-saving success starts with choosing the right melon. The ideal winter melon for seed collection is:
Fully ripe (often larger and has a thicker rind).
Free from disease and pest damage.
Well-shaped and representative of desired traits.
Winter melon becomes fully mature in about 100-120 days, depending on the variety and climate. Look for a melon that feels heavy, with a deep color and a slightly waxy surface—this indicates that the seeds inside are mature and ready for harvesting.
Step 2: Harvesting Seeds
- Cut the Melon: Use a sharp knife to cut the melon in half lengthwise. Be careful to avoid cutting into the seed cavity.
- Scoop Out the Seeds: Using a spoon, scoop out the seeds and pulp from the center. Place them in a clean bowl.
- Separate Seeds from Pulp: The seeds will be embedded in a sticky pulp. To separate them, fill the bowl with water, gently rub the seeds, and allow them to sink. The viable seeds will sink to the bottom, while the pulp and any immature seeds will float to the surface. Pour off the water and floating debris, repeating until the seeds are clean.
Step 3: Drying the Seeds
Proper drying is crucial to prevent mold and prolong seed viability. Follow these steps:
- Initial Drying: Spread the cleaned seeds on a paper towel or a clean cloth. Pat them dry gently.
- Sun Drying: Place the seeds in a single layer on a tray or screen and leave them in a warm, dry, shaded place with good air circulation. Avoid direct sunlight, which can damage the seeds. Leave them for 5-7 days, turning them occasionally to ensure even drying.
- Testing for Dryness: After a week, test the seeds by trying to snap one in half. If it breaks cleanly, they are dry enough for storage. If it bends, leave them to dry for a few more days.
Step 4: Storing the Seeds
Once fully dried, winter melon seeds need proper storage to remain viable for the next growing season:
- Choose the Right Container: Store seeds in an airtight container, such as a glass jar or a plastic bag. For added protection, use a moisture-absorbing packet or a small amount of rice to prevent humidity.
- Label the Container: Mark the container with the date and type of seed to ensure you remember when and what you stored. This helps track the seeds’ age, as they are best used within 2-3 years for optimal germination rates.
- Store in a Cool, Dark Place: Seed storage should be in a cool, dry, and dark location. A pantry or cupboard away from direct sunlight works well. Avoid storing seeds in places with fluctuating temperatures, like garages or sheds.
Step 5: Testing Seed Viability
Before planting season, it’s a good idea to test the seeds’ viability:
- Germination Test: Place a few seeds between moist paper towels and seal them in a plastic bag. Keep the bag in a warm place and check in a week. If most seeds sprout, your batch is viable.
Tips for Successful Winter Melon Seed Collection
- Avoid Hybrid Varieties: If possible, collect seeds from heirloom or open-pollinated varieties. Hybrid seeds may not produce plants with the same characteristics as the parent.
- Cross-Pollination Concerns: If growing multiple gourd varieties, prevent cross-pollination by spacing plants far apart or growing only one type. This ensures genetic purity in the saved seeds.
- Repeat the Process Each Year: Consistent seed-saving helps adapt the plants to your local environment, increasing their resilience.
Final Thoughts
Collecting and preserving winter melon seeds is an enjoyable, rewarding process that promotes self-sufficiency and sustainability. With a bit of patience, you can create a seed bank of your favorite chal kumra plants, tailored to thrive in your garden’s unique conditions. Seed saving not only connects you with traditional gardening practices but also supports biodiversity by preserving unique plant varieties. So, the next time you harvest a winter melon, save some seeds and experience the joy of planting your own.

The Right Time to Add Sun-Dried Lentil Dumplings to Ash Gourd Curry: A Complete Guide
In traditional Bengali cuisine, one of the beloved dishes that brings out the regional flavors is the ash gourd curry with sun-dried lentil dumplings, known as chholar dal-er bori. This dish captures the essence of home cooking, offering a balance of earthy vegetables, warming spices, and the unique texture of the sun-dried dumplings.
But when is the best time to add these bori to your curry to ensure maximum flavor and the right texture? Let's dive into the process and learn the art of adding lentil dumplings to ash gourd curry.
- Understanding Ash Gourd and Lentil Dumplings in Bengali Cuisine
Ash gourd, or chalkumro in Bengali, is a versatile vegetable known for its mild flavor and slightly spongy texture. When cooked, it absorbs the flavors of the spices and other ingredients beautifully. Lentil dumplings, on the other hand, add an extra layer of richness and a slight crunch that enhances the dish.
In Bengali households, adding bori to vegetable curries is a practice that has been passed down for generations. These dumplings are sun-dried in advance, giving them a unique texture and flavor that can elevate any curry. However, timing is key.
- Preparing the Ash Gourd Curry Base
To ensure that the lentil dumplings enhance the curry, it’s important to get the base right. Here's how to prepare it:
Step 1: Heat mustard oil in a pan, add whole spices like bay leaves, dried red chilies, and cumin seeds.
Step 2: Add finely chopped ash gourd and sauté until it starts releasing water.
Step 3: Add turmeric powder, salt, and a pinch of sugar. Cover and let it cook until the ash gourd becomes tender.
This base should be nearly ready before you add the dumplings.
- Preparing the Dumplings Before Adding to the Curry
The bori are traditionally made with chholar dal or split Bengal gram. They are sun-dried and stored for later use. While some people prefer to add them directly to the curry, roasting them slightly beforehand brings out a nuttier flavor and enhances their texture. Here’s how to prepare them:
Step 1: Heat a small amount of mustard oil in a separate pan.
Step 2: Add the bori and lightly fry them until they turn golden brown. Be careful not to burn them.
Roasting the dumplings gives them a crispy exterior, which helps them hold up better in the curry.
- The Best Time to Add Lentil Dumplings to Ash Gourd Curry
The ideal time to add the bori is when the ash gourd is almost cooked but still holds a bit of firmness. Follow these steps to get the timing just right:
- Monitor the Ash Gourd: Once the ash gourd is tender but not fully soft, you’re ready to add the dumplings.
- Add the Dumplings: Place the fried bori into the curry. Stir gently to mix them in with the ash gourd.
- Simmer Together: After adding the bori, cover the curry and let it simmer on low heat for 5-7 minutes. This allows the dumplings to soften slightly as they absorb the flavors of the curry.
- Finishing Touches and Serving Suggestions
Once the curry has simmered with the bori, it’s time to add the final touches. Some people like to garnish with a touch of ghee or a sprinkle of garam masala for added aroma. This step is optional but can enhance the flavors further.
Serve the ash gourd curry with hot steamed rice or luchi (Bengali-style puffed bread) for a complete meal. The combination of soft ash gourd and slightly chewy dumplings provides a delightful contrast that is sure to be a hit.
Final Tips for Perfect Ash Gourd Curry with Lentil Dumplings
Avoid Overcooking the Dumplings: If they are simmered for too long, the bori can become too soft and lose their shape. Stick to 5-7 minutes of simmering.
Balance the Salt: Dumplings can absorb a lot of salt from the curry, so be mindful of seasoning adjustments.
Experiment with Spices: Some people like to add ginger paste, green chilies, or cumin powder to enhance the curry's flavor.
With these tips and tricks, you’ll master the art of adding sun-dried lentil dumplings to ash gourd curry and create a dish that’s both comforting and flavorful. Enjoy cooking this Bengali classic.

Here's a 4,000-character blog in English on collecting chal kumra (winter melon) seeds and preserving them.
Collecting and Preserving Winter Melon Seeds (Chal Kumra)
Winter melon, known as chal kumra in Bengali, is a versatile vegetable commonly grown across Asia, particularly in Bangladesh and India. Beyond being a delicious and nutritious ingredient, winter melon is valued by gardeners for its high yield and easy-to-grow nature. Collecting and preserving seeds from winter melon is a sustainable way to ensure a continuous supply for future planting seasons. Let’s explore the steps involved in harvesting, drying, and storing chal kumra seeds effectively.
Why Save Winter Melon Seeds?
Before we get into the process, let’s discuss why saving seeds is beneficial for gardeners and farmers:
- Cost-Effective: Seed saving reduces the need to purchase seeds every year.
- Adaptation: Seeds collected from locally grown winter melons are more adapted to local climates and soils.
- Self-Reliance: By growing from saved seeds, gardeners become less dependent on commercial seeds.
- Quality Control: Saving seeds from the best plants ensures desirable traits, like size, taste, and yield.
Step 1: Selecting the Right Melon
Seed-saving success starts with choosing the right melon. The ideal winter melon for seed collection is:
Fully ripe (often larger and has a thicker rind).
Free from disease and pest damage.
Well-shaped and representative of desired traits.
Winter melon becomes fully mature in about 100-120 days, depending on the variety and climate. Look for a melon that feels heavy, with a deep color and a slightly waxy surface—this indicates that the seeds inside are mature and ready for harvesting.
Step 2: Harvesting Seeds
- Cut the Melon: Use a sharp knife to cut the melon in half lengthwise. Be careful to avoid cutting into the seed cavity.
- Scoop Out the Seeds: Using a spoon, scoop out the seeds and pulp from the center. Place them in a clean bowl.
- Separate Seeds from Pulp: The seeds will be embedded in a sticky pulp. To separate them, fill the bowl with water, gently rub the seeds, and allow them to sink. The viable seeds will sink to the bottom, while the pulp and any immature seeds will float to the surface. Pour off the water and floating debris, repeating until the seeds are clean.
Step 3: Drying the Seeds
Proper drying is crucial to prevent mold and prolong seed viability. Follow these steps:
- Initial Drying: Spread the cleaned seeds on a paper towel or a clean cloth. Pat them dry gently.
- Sun Drying: Place the seeds in a single layer on a tray or screen and leave them in a warm, dry, shaded place with good air circulation. Avoid direct sunlight, which can damage the seeds. Leave them for 5-7 days, turning them occasionally to ensure even drying.
- Testing for Dryness: After a week, test the seeds by trying to snap one in half. If it breaks cleanly, they are dry enough for storage. If it bends, leave them to dry for a few more days.
Step 4: Storing the Seeds
Once fully dried, winter melon seeds need proper storage to remain viable for the next growing season:
- Choose the Right Container: Store seeds in an airtight container, such as a glass jar or a plastic bag. For added protection, use a moisture-absorbing packet or a small amount of rice to prevent humidity.
- Label the Container: Mark the container with the date and type of seed to ensure you remember when and what you stored. This helps track the seeds’ age, as they are best used within 2-3 years for optimal germination rates.
- Store in a Cool, Dark Place: Seed storage should be in a cool, dry, and dark location. A pantry or cupboard away from direct sunlight works well. Avoid storing seeds in places with fluctuating temperatures, like garages or sheds.
Step 5: Testing Seed Viability
Before planting season, it’s a good idea to test the seeds’ viability:
- Germination Test: Place a few seeds between moist paper towels and seal them in a plastic bag. Keep the bag in a warm place and check in a week. If most seeds sprout, your batch is viable.
Tips for Successful Winter Melon Seed Collection
- Avoid Hybrid Varieties: If possible, collect seeds from heirloom or open-pollinated varieties. Hybrid seeds may not produce plants with the same characteristics as the parent.
- Cross-Pollination Concerns: If growing multiple gourd varieties, prevent cross-pollination by spacing plants far apart or growing only one type. This ensures genetic purity in the saved seeds.
- Repeat the Process Each Year: Consistent seed-saving helps adapt the plants to your local environment, increasing their resilience.
Final Thoughts
Collecting and preserving winter melon seeds is an enjoyable, rewarding process that promotes self-sufficiency and sustainability. With a bit of patience, you can create a seed bank of your favorite chal kumra plants, tailored to thrive in your garden’s unique conditions. Seed saving not only connects you with traditional gardening practices but also supports biodiversity by preserving unique plant varieties. So, the next time you harvest a winter melon, save some seeds and experience the joy of planting your own.