Hello everyone, and welcome to my blog.
It's my pleasure to bring to you'll another interesting content which If you pay attention you will learn something important.
I have been in the cryptocurrency and blockchain space since late 2019 and for sure, I have made lot's of costly mistakes following my various explorations. Following my experience, I can be allowed to say that I have paid some of the costly prices and that explains why I will continue sharing educative contents which will help guide and educate us on the various crypto and blockchain concepts.
Today, we will be looking at how to connect MetaMask to Binance Smart Chain.
The MetaMask wallet is known for sending and receiving Ethereum-based cryptocurrencies. This creates a wide range of impression that it is only used in performing Ethereum based activities and connecting to DApps using its compatible built-in browser.
Today, I will be showing us that the MetaMask can be configured to be compatible with Binance Smart Chain and can be used to perform BSC transactions.

The Binance Smart Chain is a blockchain technology which was developed by Binance and it similar to Ethereum but different due to it's high transaction speed and lower transaction cost. This advantages is what that has led to its constant growth of activity as users constantly seek to perform efficient transactions at lower cost.
Unlike the Ethereum blockchain which it's native token (ETH) is used in paying for transaction fees, gas fees in Binance Smart Chain are paid using BNB which is the native token of the more centralized blockchain.
You will start by installing the MetaMask wallet using Google playstore for andriod users or Apple store for IOS users.
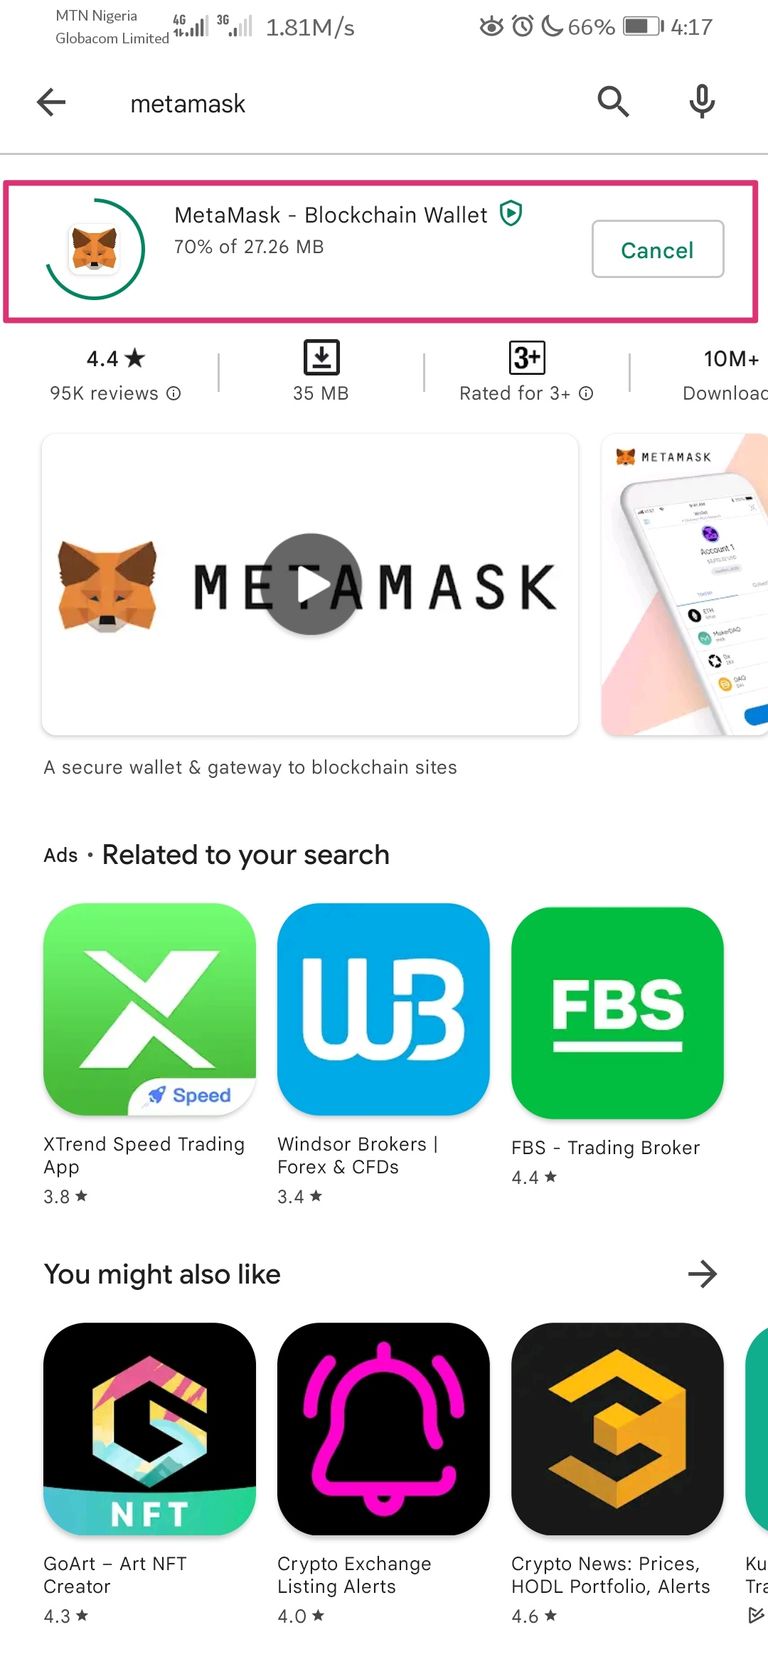
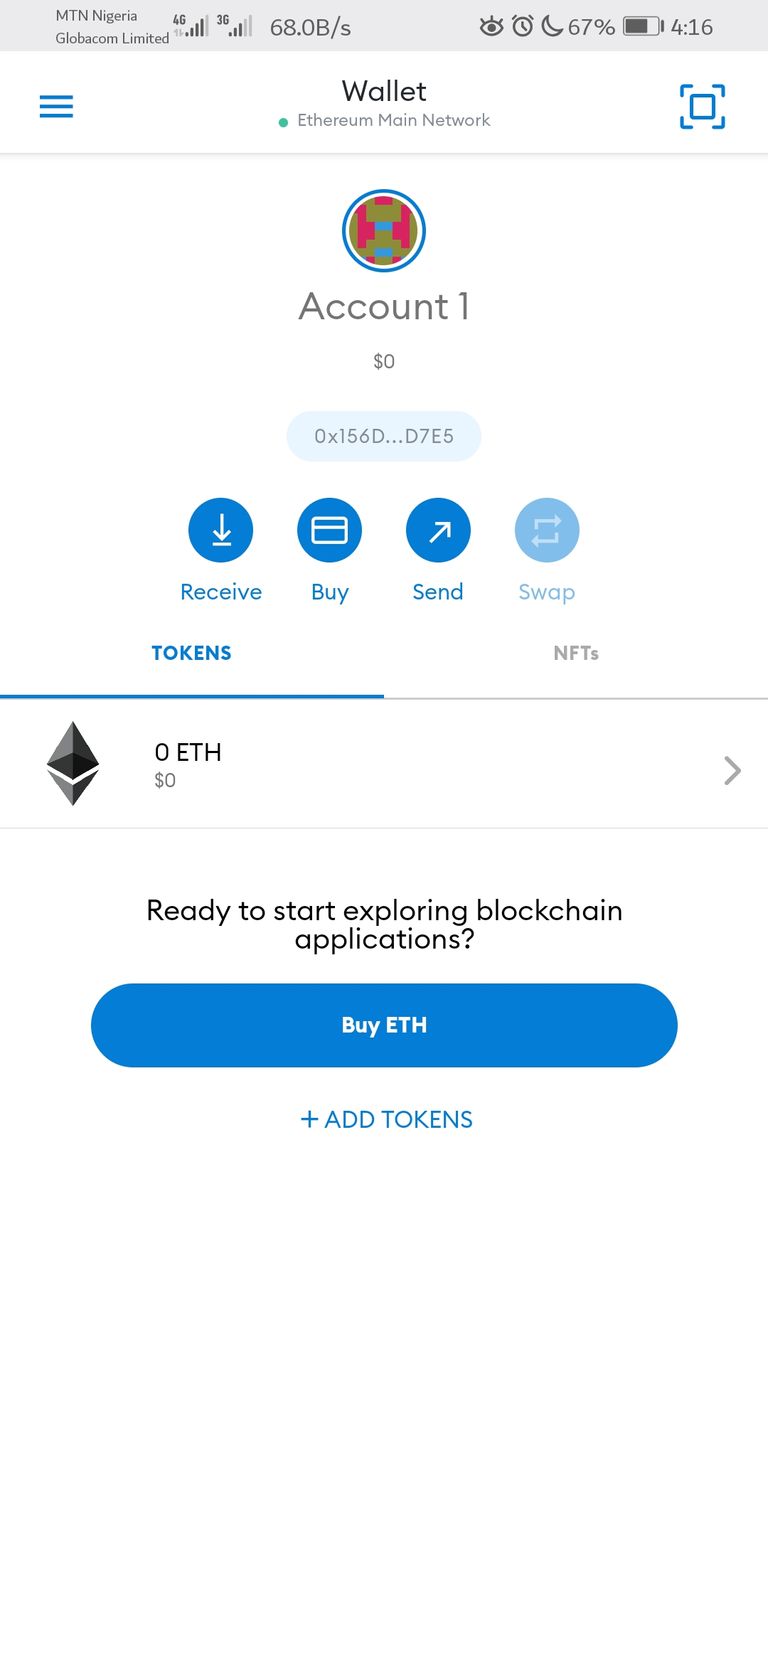
From the above you will see that the MetaMask wallet is still basically on the Ethereum network and can't be used to perform non-ethereum based cryptocurrency transactions.
So, we you will move to configure the MetaMask wallet by first clicking on "settings" after which you click on "network".
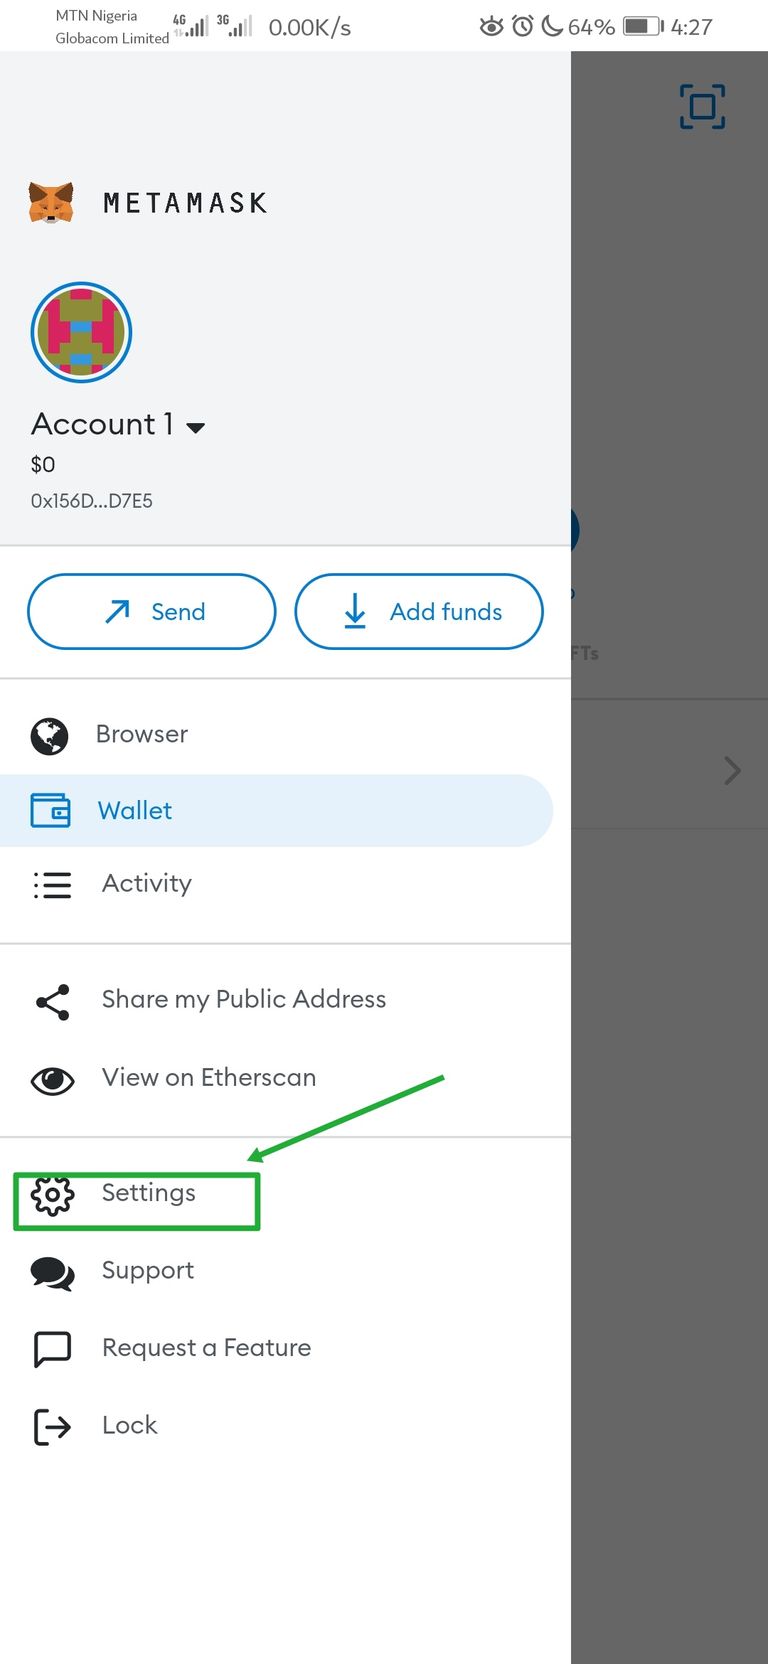
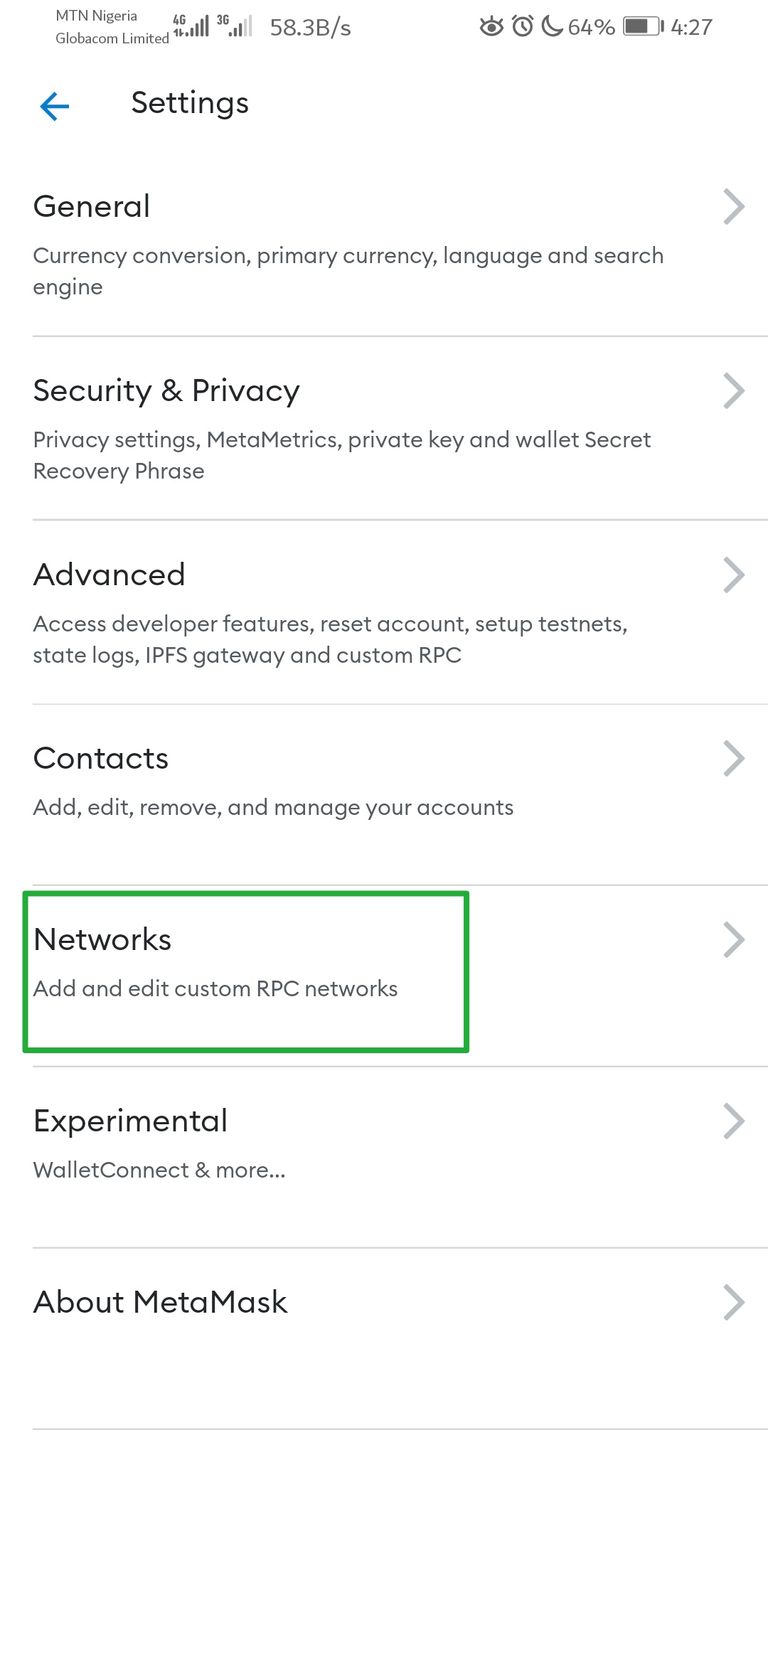
After clicking on "network", various network options will be displayed and clearly the BSC network isn't among the options. So what you will do is to click on "Add network" in other to manually add the BSC network.
It is also important to note that there are two different BSC networks which are the mainnet and the testnet but for the purpose of this lesson, I will be adding the testnet network. You can easily get the testnet network details by looking it up on Google.
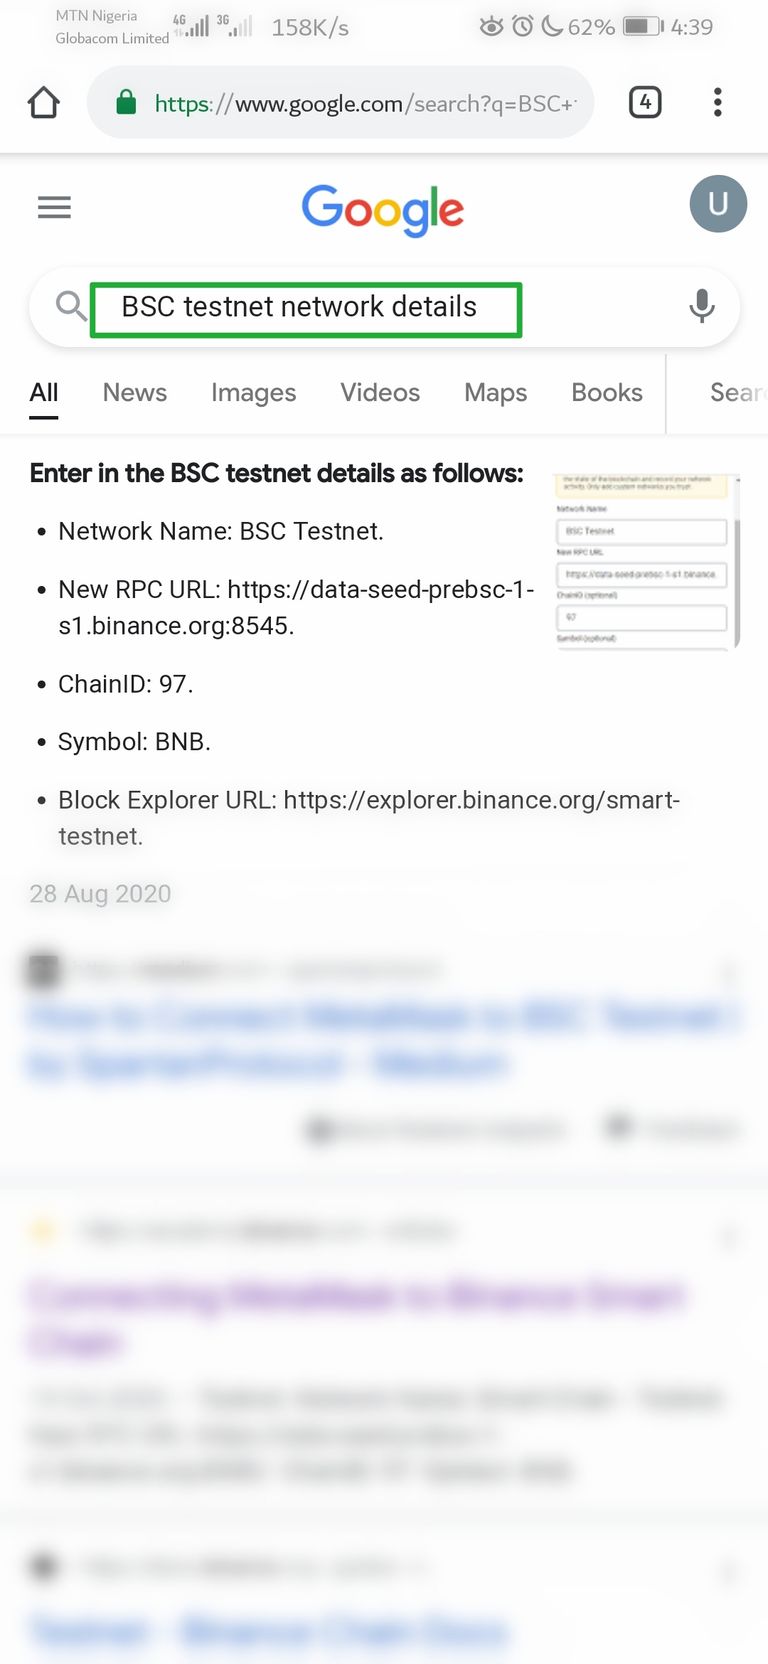
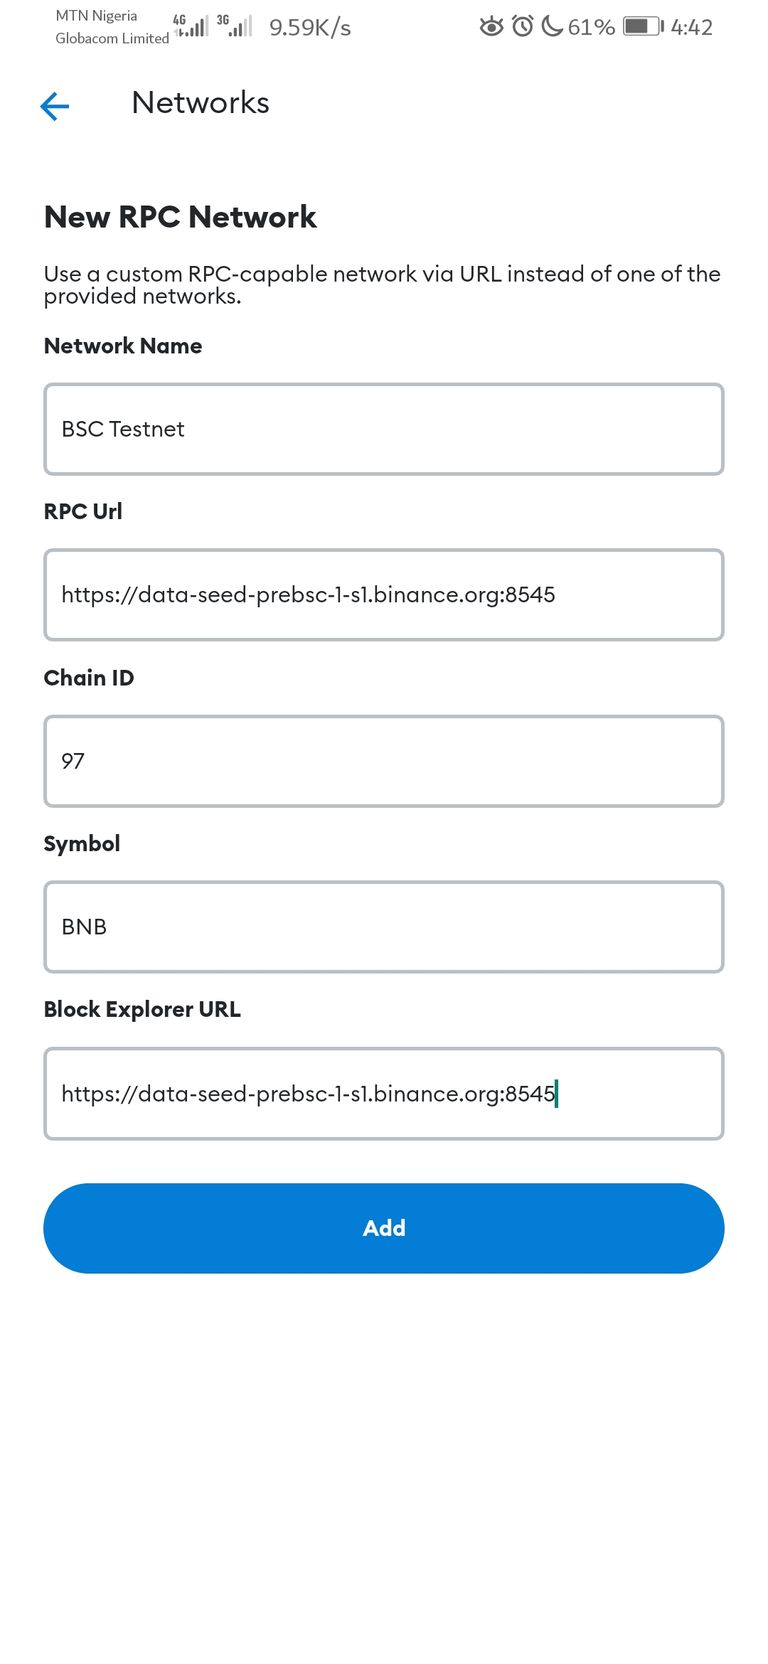
After inputting the network details, click on "Add" and confirm the changes and the BSC network will be added.
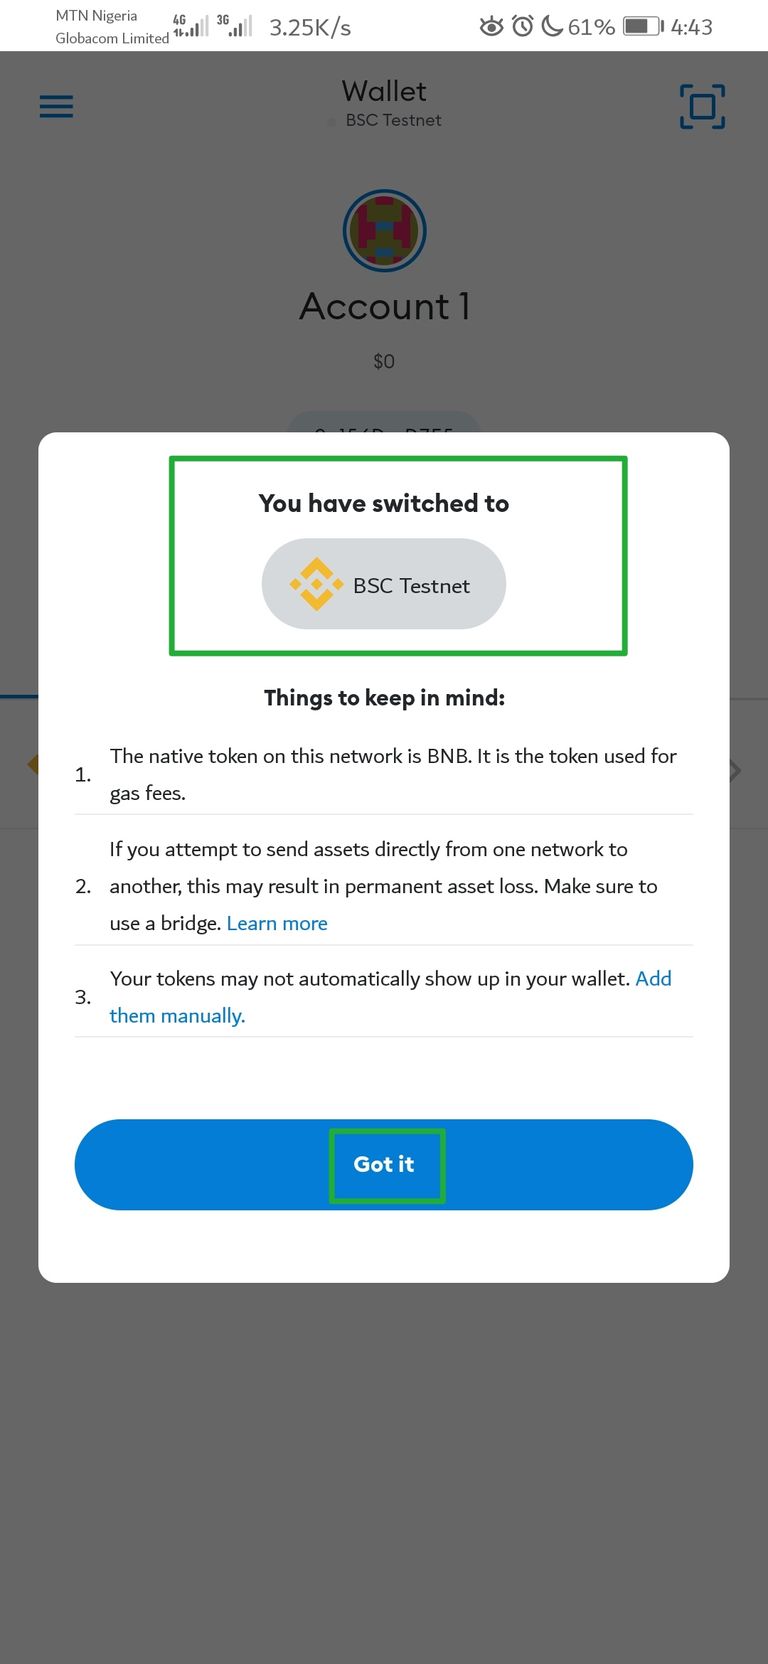
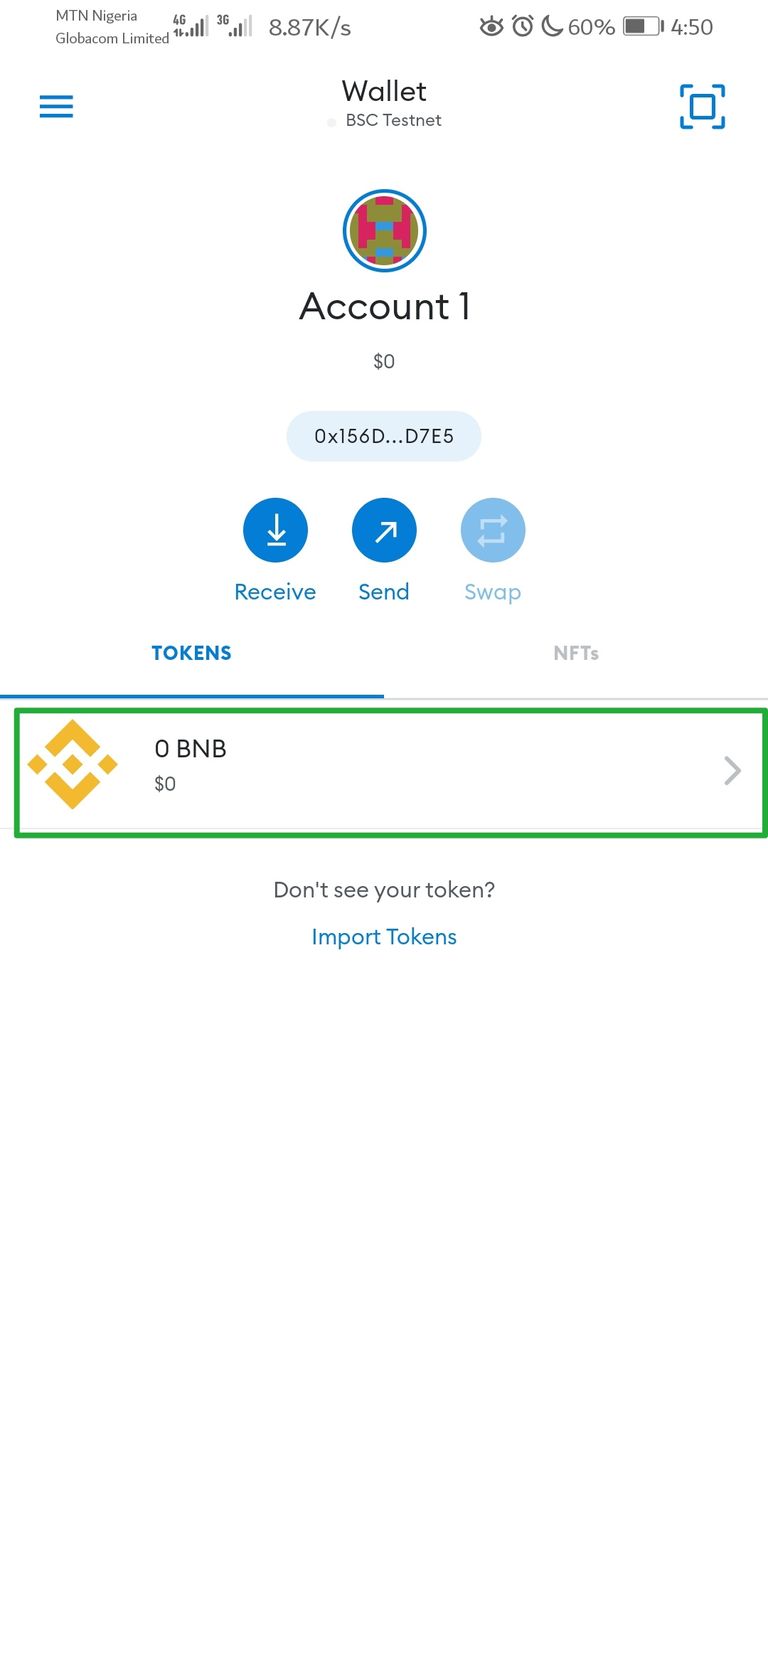
Now that you have successfully configured the MetaMask to Binance Smart Change, let's make a BSC transaction.
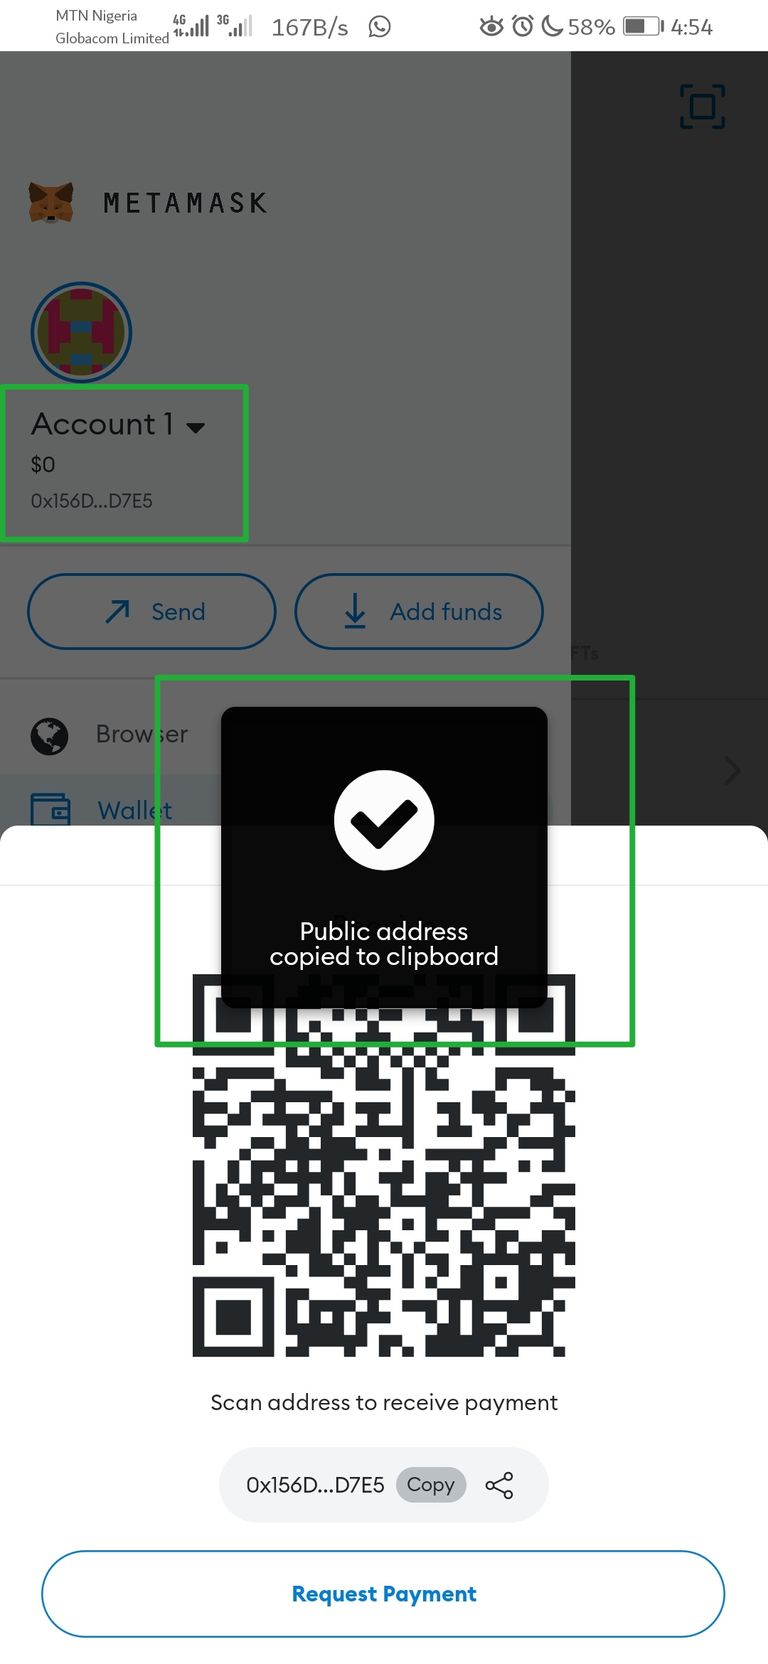
In other to make a transaction, you will be needing some BNB or BSC token. Therefore copy your testnet BNB address and past it on Binance Smart Chain Faucet. You can find the BSC faucet by simply looking it up on Google.
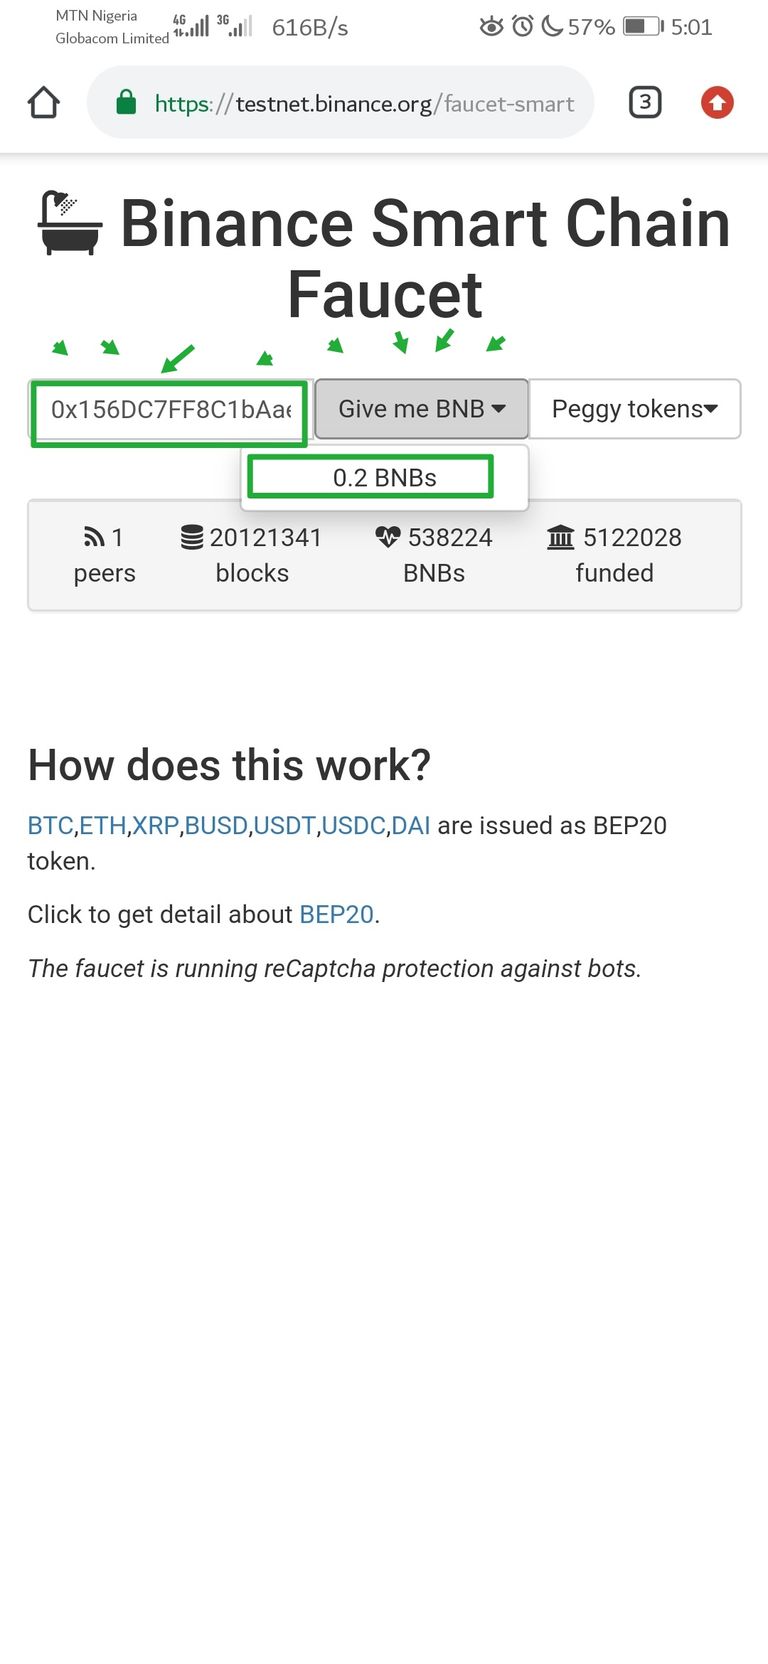
On the BSC Faucet, input your wallet address and click on give me BNB. An option of 0.2 BNBs which is currently the daily maximum will be shown, click on it to get funded.
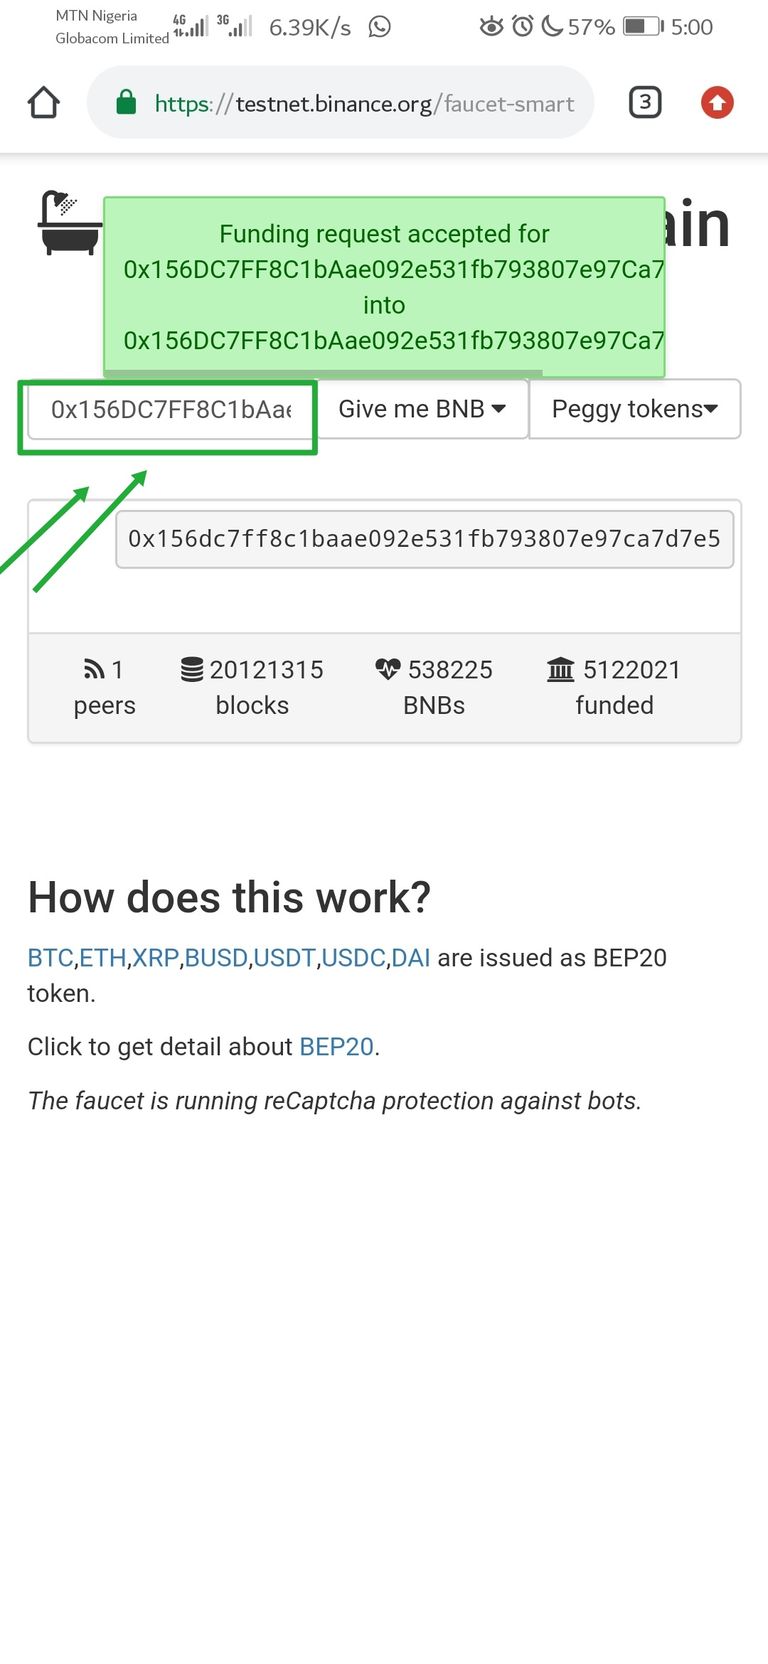
After clicking on the 0.2BNB, the finding will be accepted then you will have to wait for about 15 minutes for it appear in your MetaMask wallet.
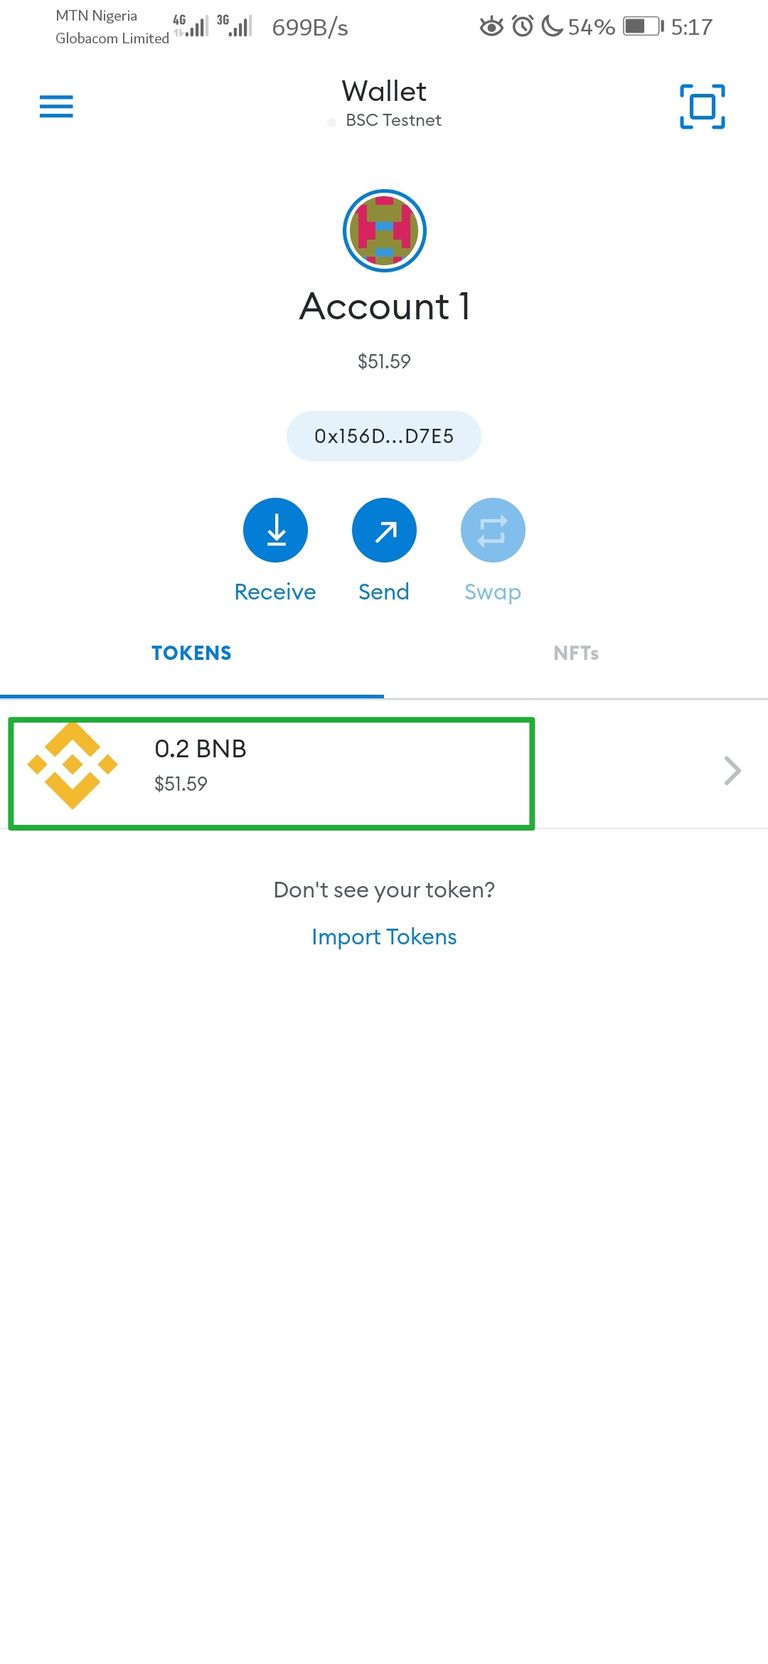
In other to make a transfer, you will need to have an extra wallet that you will be sending to. For the purpose of this lesson I will be creating another wallet on the same MetaMask account.
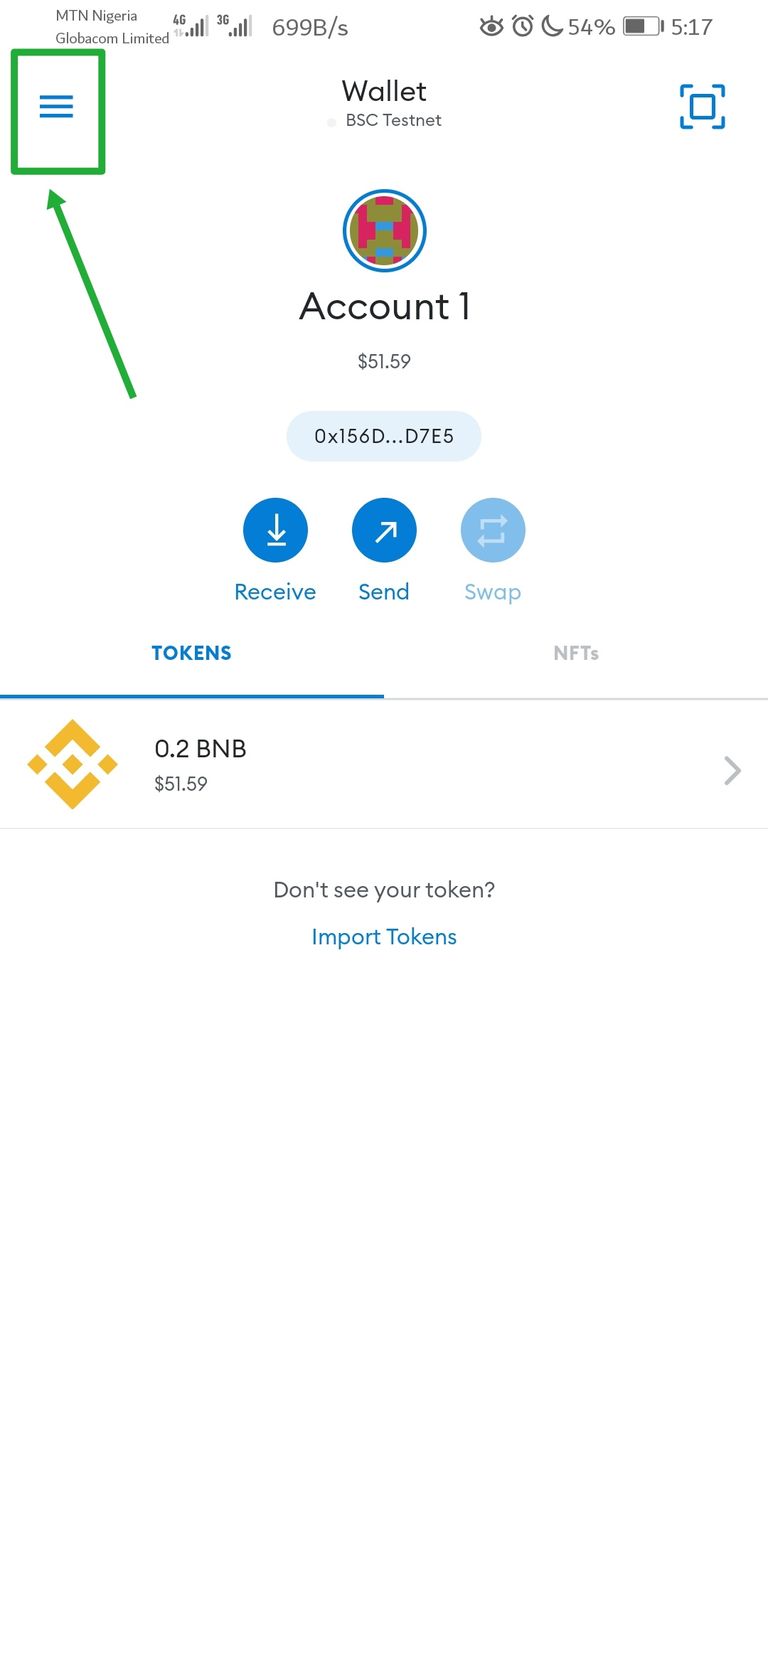
To create an wallet, click on the three horizontal line and click on "create wallet". You can create as many as possible but just an extra one will be OK.
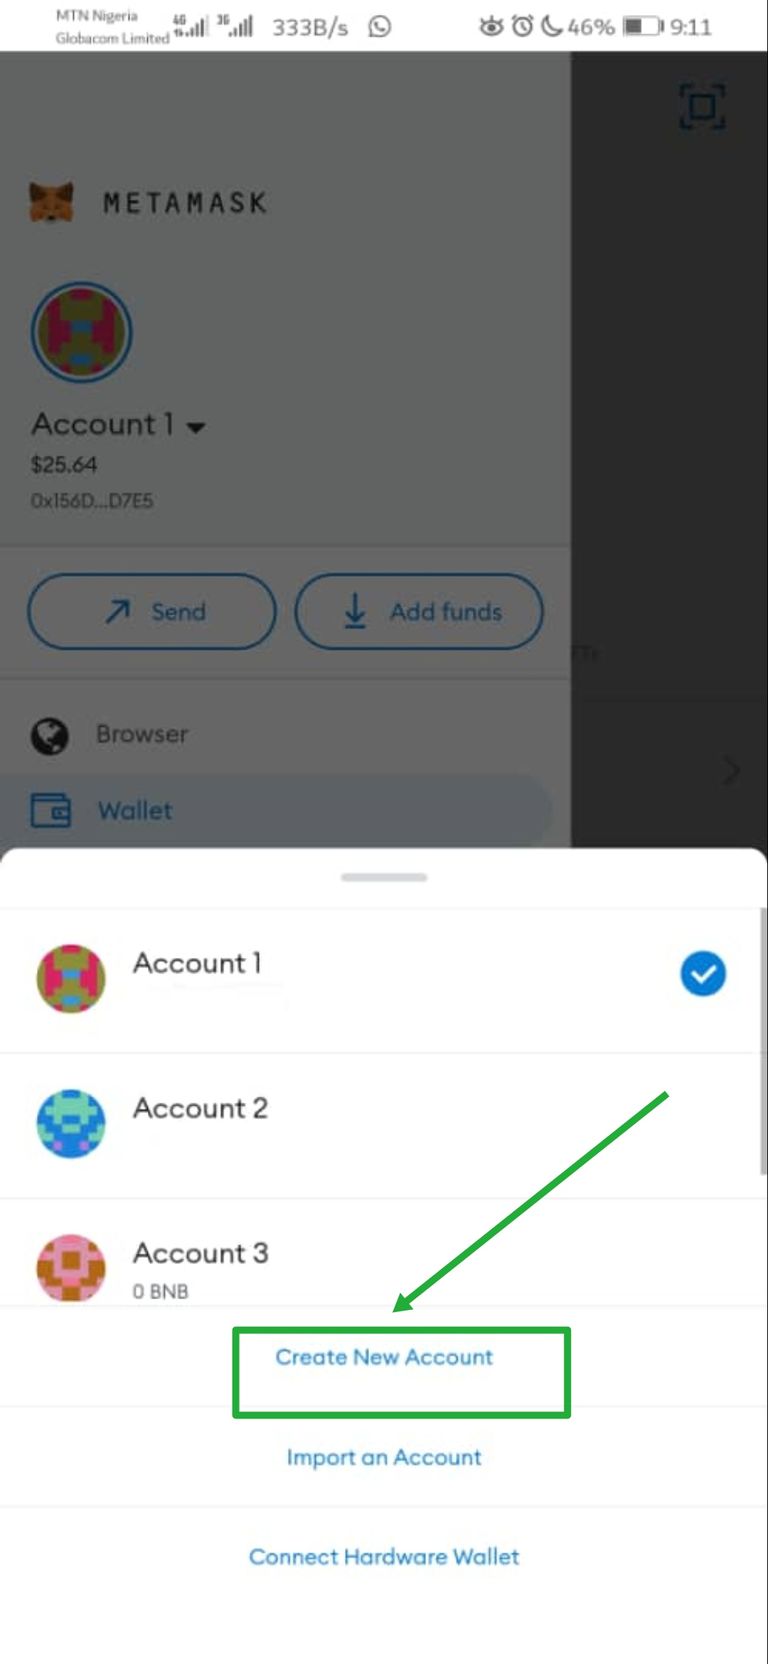
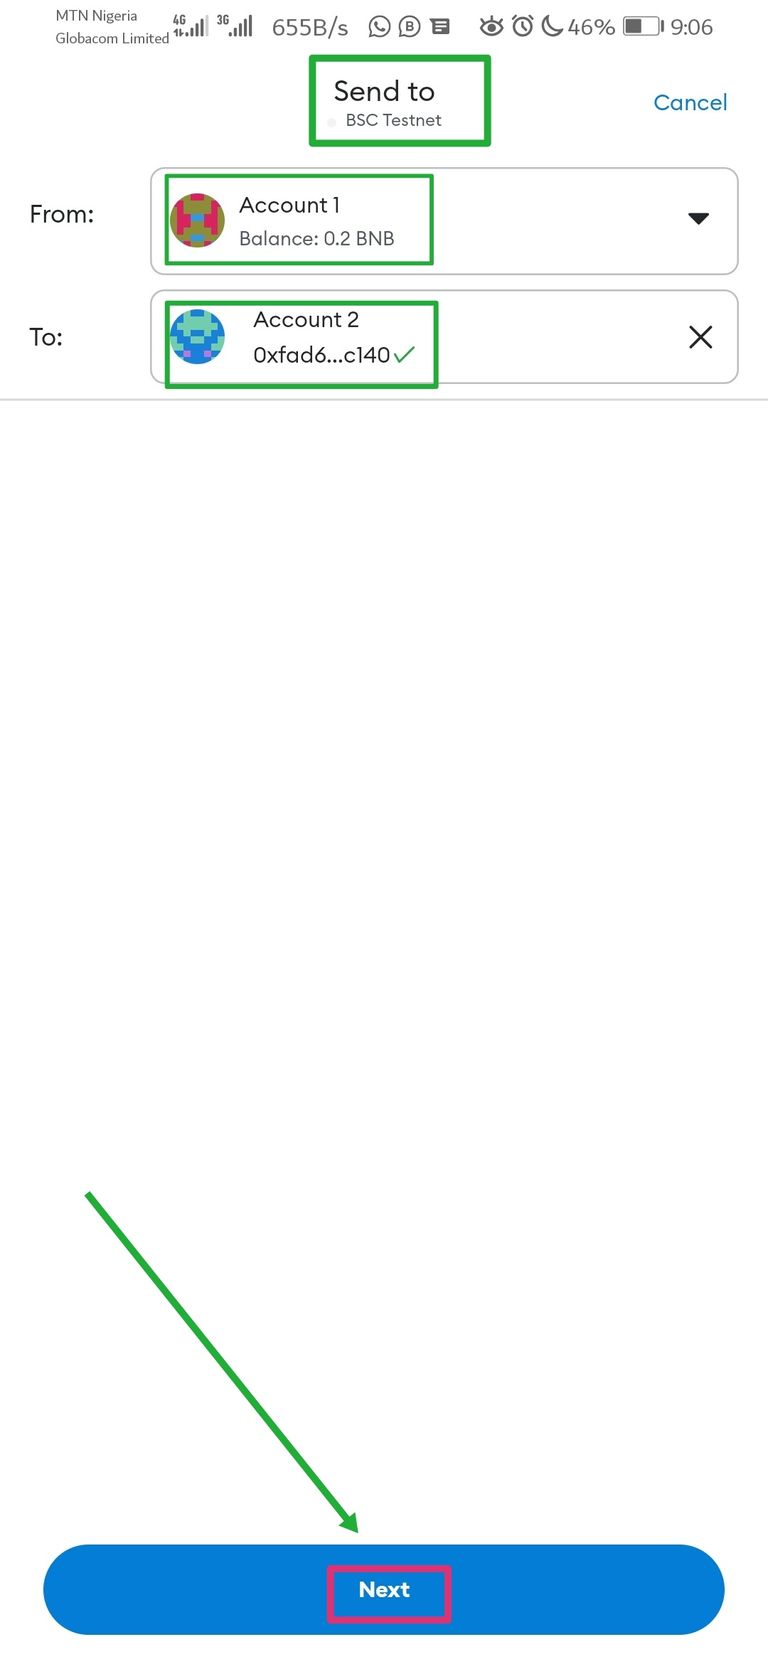
After creating an extra wallet "wallet 2" you will move to transferring by entering the wallet address as the recipient wallet and which you click on "next". On the next front, you will have to enter the amount of BNB you wish to transfer and click "next".
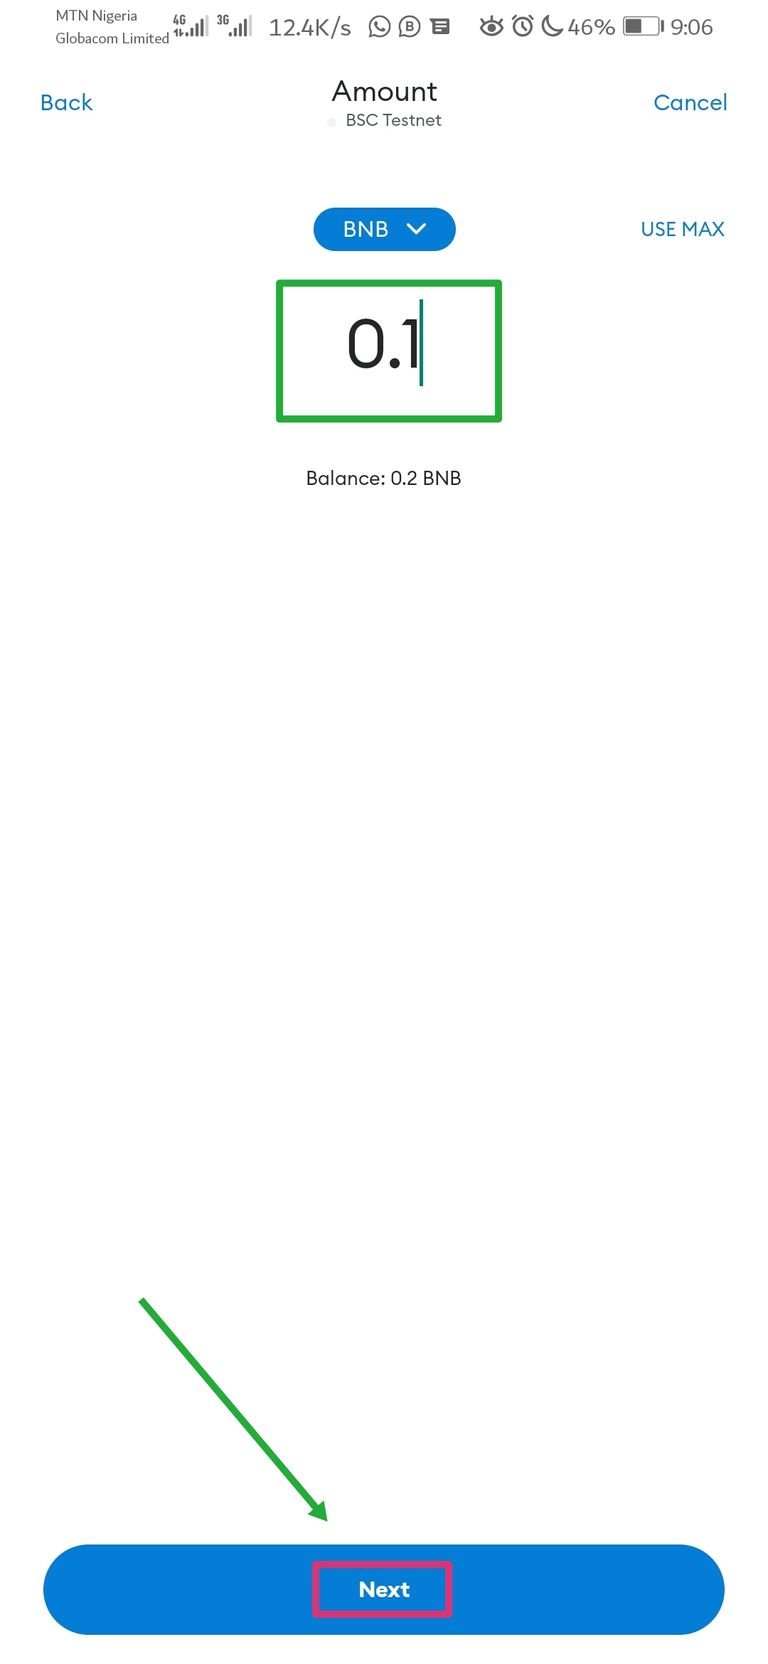
After clicking on "next", an estimated gas fee will be displayed which you will have to confirm if you are OK with it. You will confirm by clicking "send" after which the transaction will be initiated.

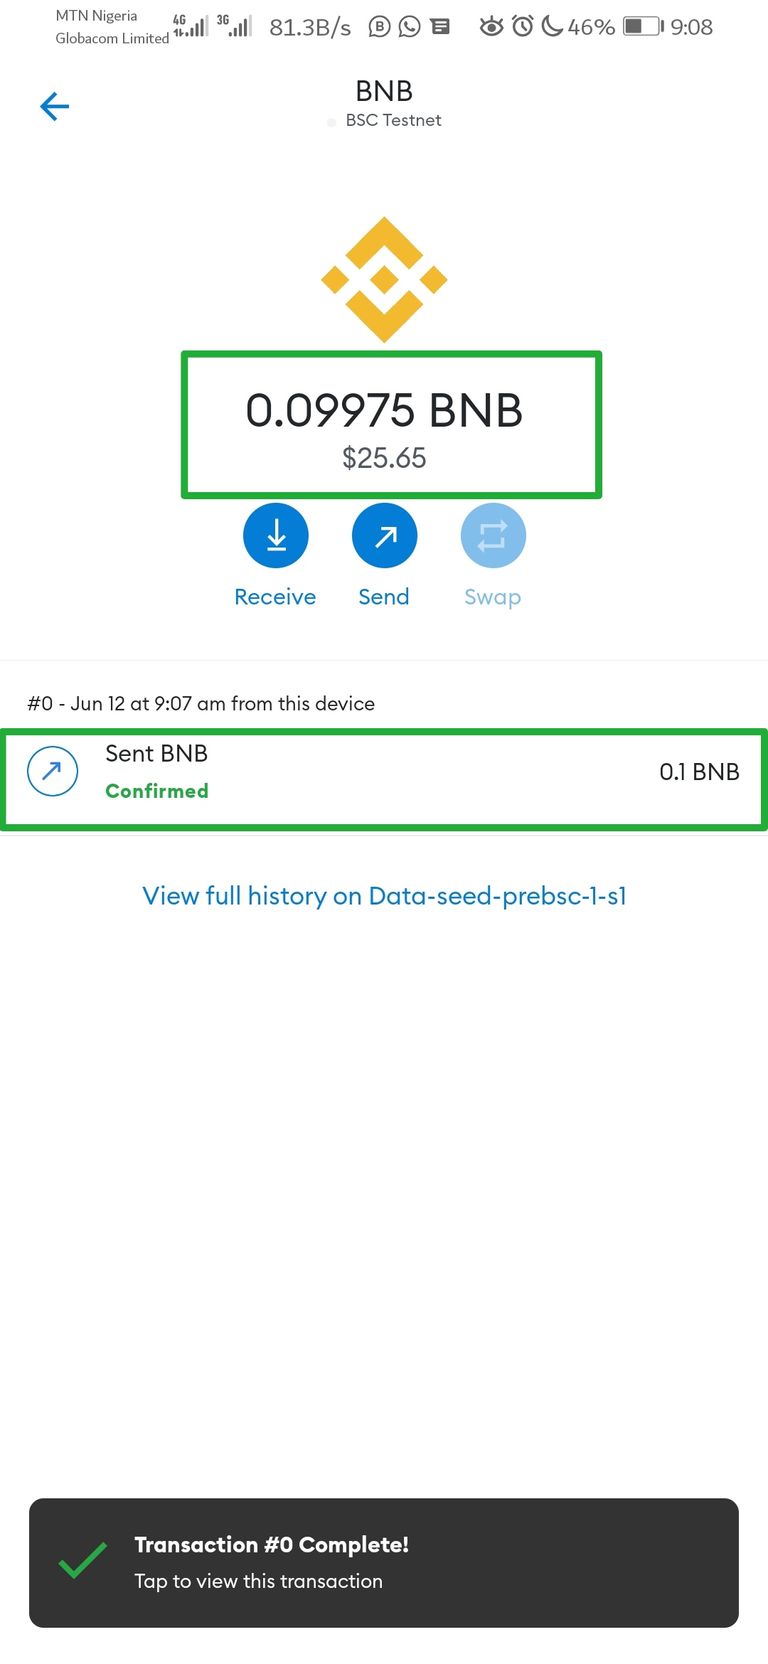
Once the transaction has been initiated, it will only take a free minutes before it will be completely confirmed and it will appear in the recipient wallet.
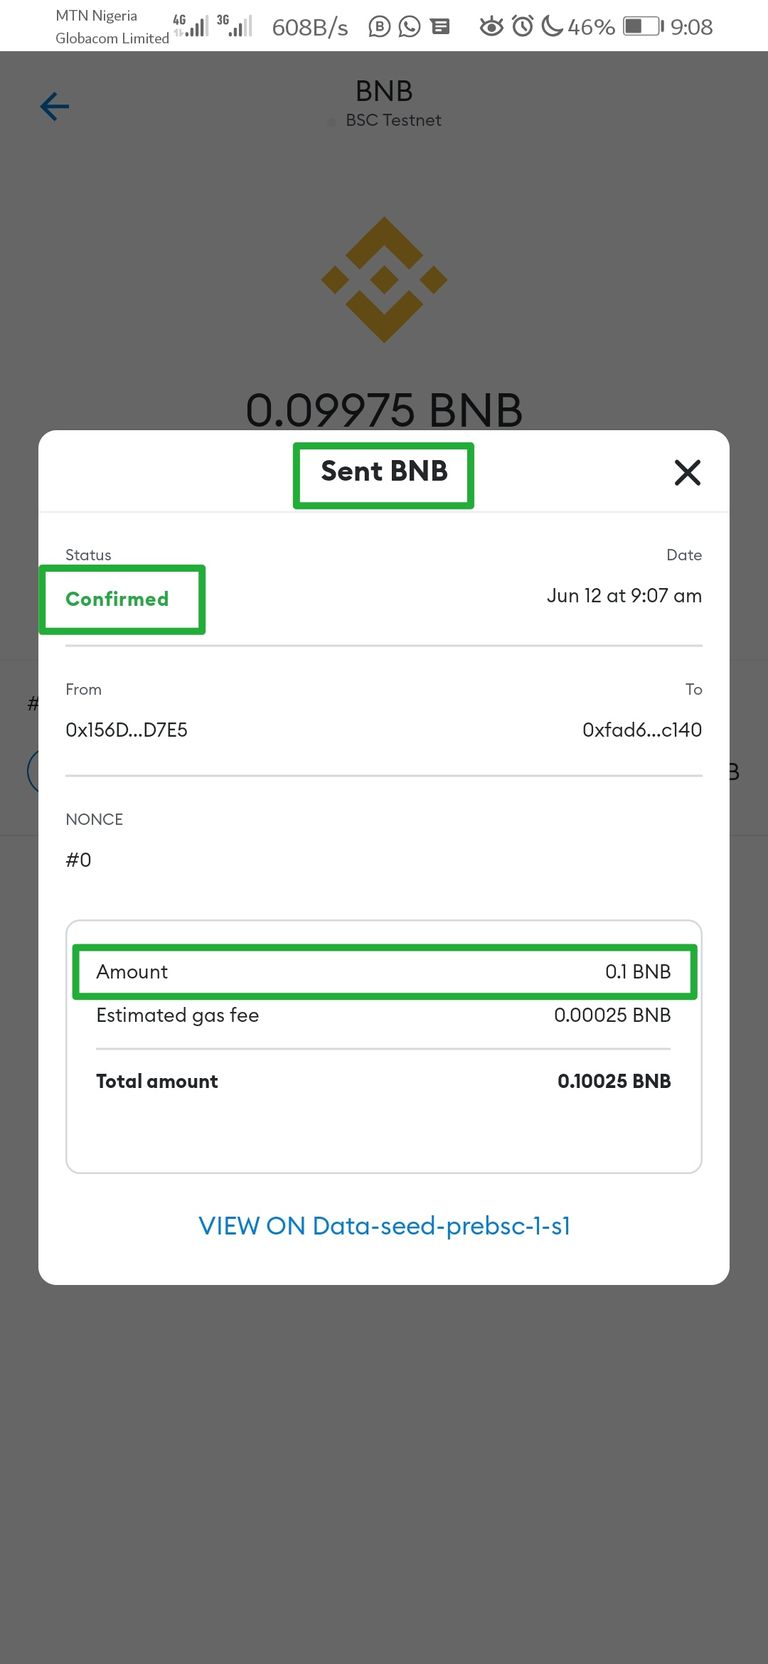
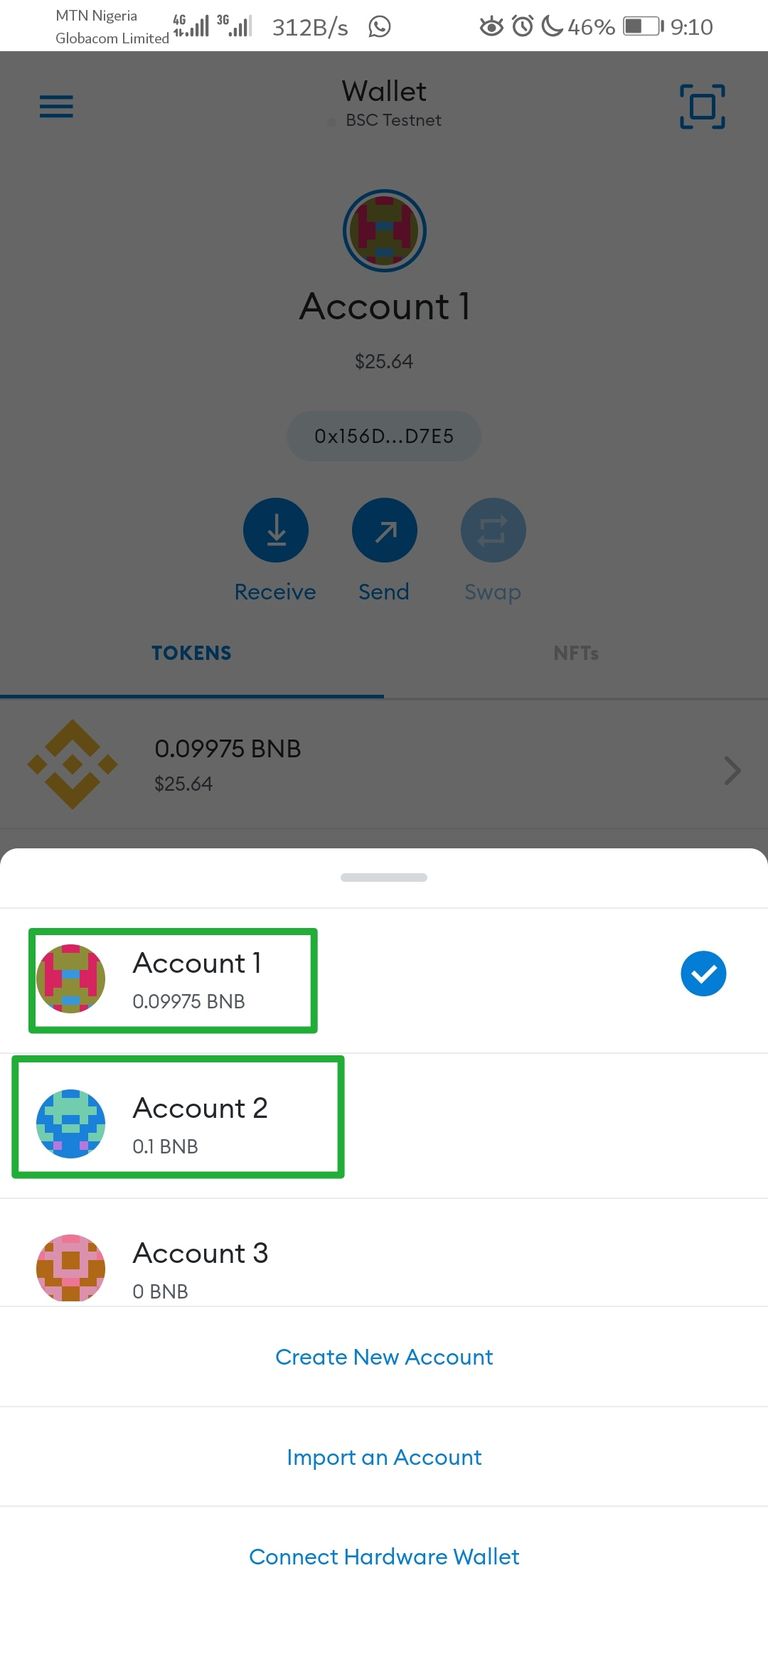
From the above we will see that 0.1BNB has been successfully transferred at a very low cost of 0.0025 BNB which is not even up to 1 cent.
NOTE: The BSC testnet network works similar to the mainnet network with the only difference being that the BNB tokens on the testnet network are worthless and cannot be spent. But everyother activity is exactly the same so the activities we have just carried out are all valid and can be exactly applied to the mainnet network.
Summary,
We have successfully configured the MetaMask wallet to support the Binance Smart Chain network and we can now proceed with interacting with the BSC blockchain including connecting to various DApps built on BSC blockchain using MetaMask.