High dynamic range
Alto rango dinámico
There is an eternal discussion among many photography lovers about how to edit an image, two large groups, the purists of the image and those of us who like to work with them in more creative and complex ways. Personally, I find myself in either of the two ways of seeing and working with them. In this idea I have done a work for high dynamic range with a series of parallel effects highlighting some parts where I was interested and shading and darkening others. I have a series of editions made with this same concept and I am looking for that stamp that characterizes and defines this way of creating an image moving to a more artistic side. Depending on what I work or publish for, the ways of processing my images vary depending on what I want to express and in this case it is a clear example of a complete personalized editing process with Photoshop CC.
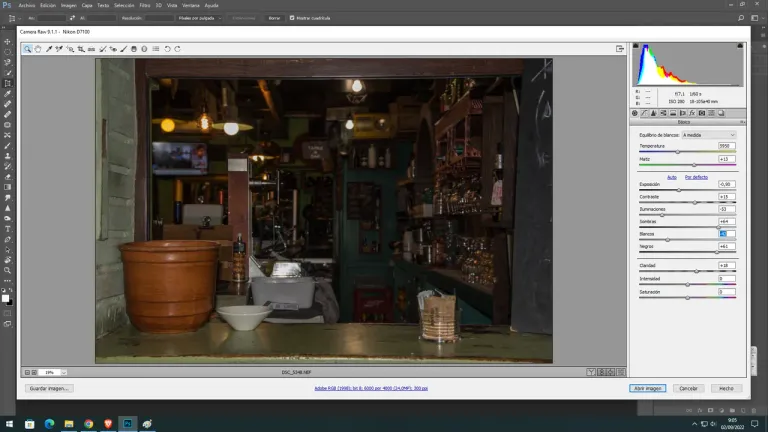
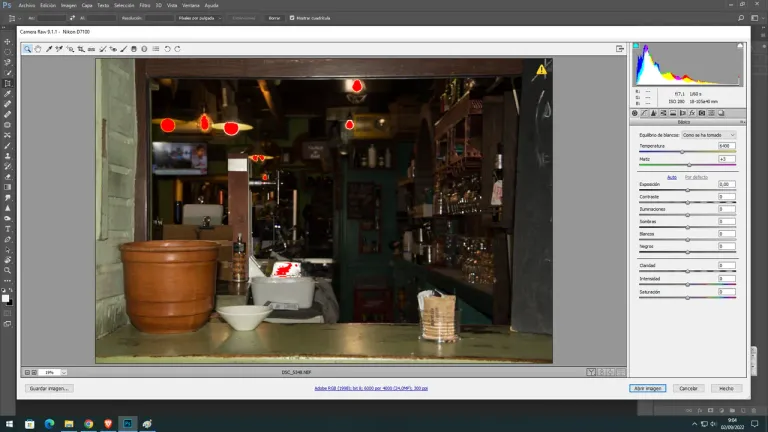
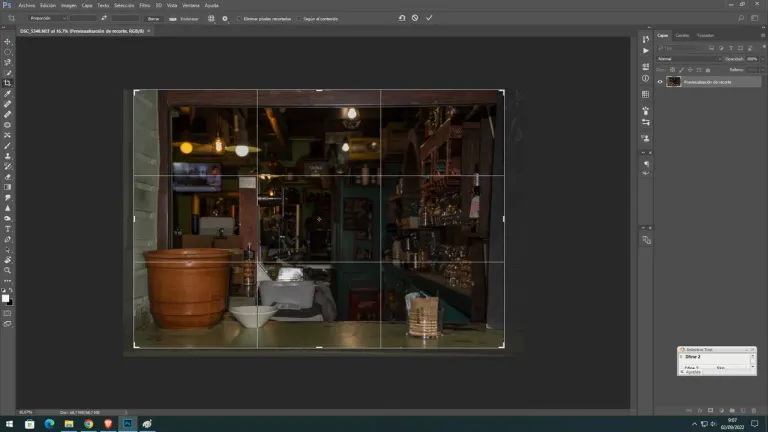
The process begins with the choice of one of my images taken in RAW format, raw. This format collects all the data and modifiable parameters of an image, usually it would be a matter of taking and saving this raw image. This way of not compressing the image allows extensive modification since many of these options are lost when compressing, by reducing that size in data. Then I process the image with the "camera RAW" filter, this filter allows a complete process of the laboratory where it can be modified. As I am going to pass an HDR filter process later, the parameters that I configure at the moment are low since the high range will give me an elevation of the tones and a clarity and sharpness that I must counteract. First, I proceed to resize the image since it would weigh too much to upload it to the platforms.
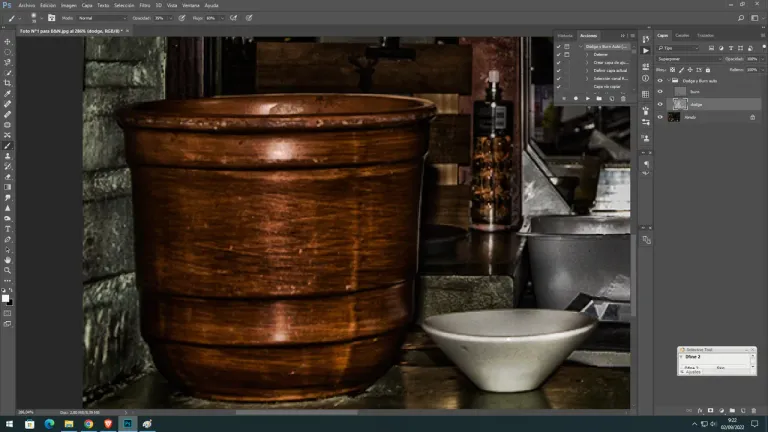

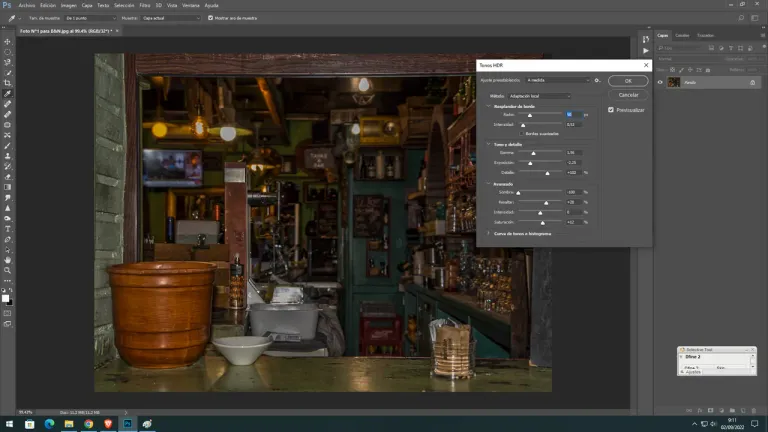
At this point and with some experience in this type of HDR filters, it is when I modify and convert my image. The use of this filter must be careful since it is quite powerful and if it is not used well, the image is out of my idea about this most creative part. It is here where I move some parameters and ranges until I get the result that I want and that I think is what I intend to show. The main thing for me in this case is to mark some targets of the image and make them much sharper and at the same time blur others that, like the human eye, can be lost by not focusing on them due to lack of interest. In this way, it is possible to take the observer to the exact points where I want them to notice, since that is the purpose of this process.
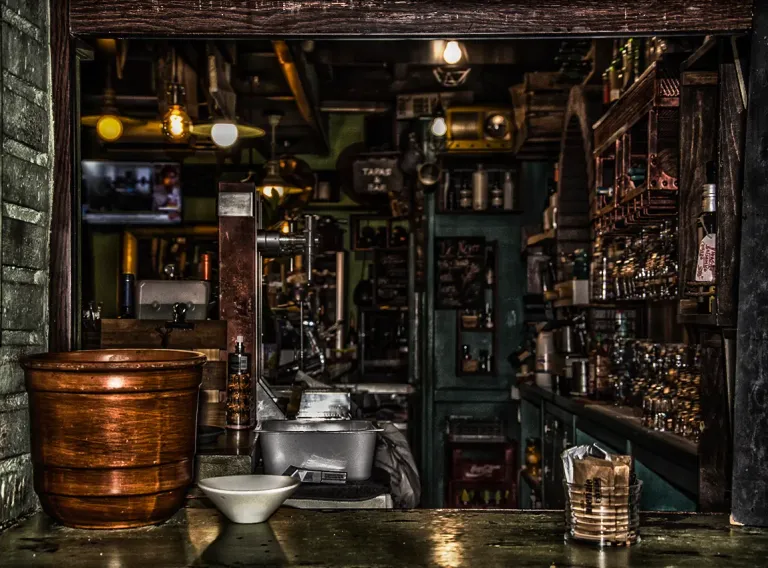
When I already have the HDR filter applied, I proceed to convert and modify my image in a whitening and cleaning process. This is one of the parts that I like the most about this creative process since I manage to give the image contrast and darkness, which is what I want. This concept of work then leads me to use light and shadow brushes to highlight or illuminate some parts to give it that sense of volume. I also shade others to look for the same effect.
Hay una eterna discusión de muchos amantes de la fotografía sobre la manera de editar una imagen, dos grandes grupos, los puritas de la imagen y a los que nos gusta trabajarlas de maneras más creativas y complejas. Personalmente me encuentro en cualquiera de las dos maneras de verlas y de trabajarlas. En esta idea he realizado un trabajo para alto rango dinámico con una serie de efectos paralelos resaltando algunas partes donde me interesaba y sombreando y oscureciendo otras. Tengo una serie de ediciones realizadas con este mismo concepto y busco ese sello que caracteriza y defina esta forma de crear una imagen pasándose a un lado más artístico. Según para que trabajos o publicaciones las maneras de procesar mis imágenes varía en función a lo que quiero expresar y en este caso es un ejemplo claro de un proceso completo de edición personalizada con Photoshop CC.
El proceso comienza con la elección de una de mis imágenes tomada en formato RAW, en bruto. Este formato recoge todos los datos y parámetros modificables de una imagen, habitualmente se trataría de tomar y guardar esta imagen en bruto. Esta forma de no comprimir la imagen permite una amplia modificación ya que al comprimir se pierden muchas de estas opciones, al disminuir ese tamaño en datos. Seguidamente proceso con el filtro “camera RAW” la imagen, este filtro permite un proceso completo del laboratorio donde poder modificarla. Como voy a pasar luego un proceso de filtro HDR los parámetros que configuro en estos momentos son bajos ya que el alto rango me dará una elevación de los tonos y una claridad y nitidez que debo contrarrestar. Primeramente procedo a redimensionar la imagen ya que pesaría demasiado para subirlas a la plataforma.
En este punto y con alguna experiencia en este tipo de filtros de HDR es cuando modifico y convierto mi imagen. El uso de este filtro debe ser cuidadoso ya que es bastante potente y si no se usa bien la imagen queda fuera de mi idea sobre esta parte más creativa. Es aquí donde muevo algunos parámetros y rangos hasta obtener el resultado que me apetece y que creo queda como lo que pretendo mostrar. Lo principal para mí en este caso es marcar algunos objetivos de la imagen y hacerlos mucho más nítidos y a la vez desenfocar otros que, como la vista humana, se pueden perder al no enfocarnos en ellos por falta de interés. Así se puede conseguir llevar al observador a los puntos exactos donde pretendo que se fijen ya que esa es la finalidad de este proceso.
Cuando ya tengo el filtro de HDR aplicado procedo a convertir y modificar mi imagen en un proceso de blanqueado y limpieza. Esta es una de las partes que más me gusta de este proceso creativo ya que consigo darle un contraste y oscuridad a la imagen que es lo que deseo. Este concepto de trabajo me da luego pie a usar pinceles de luz y sombras para resaltar o iluminar algunas partes para darle esa sensación de volumen. También sombreo otras para buscar el mismo efecto.
Para terminar con este tutorial he usado un filtro para blanco y negro con un pequeño empuje hacia el contraste fuerte. Este resalta la iluminación, respeta la gama de grises y consigue quee las sombras sean mucho más pronunciadas, saludos amigos.
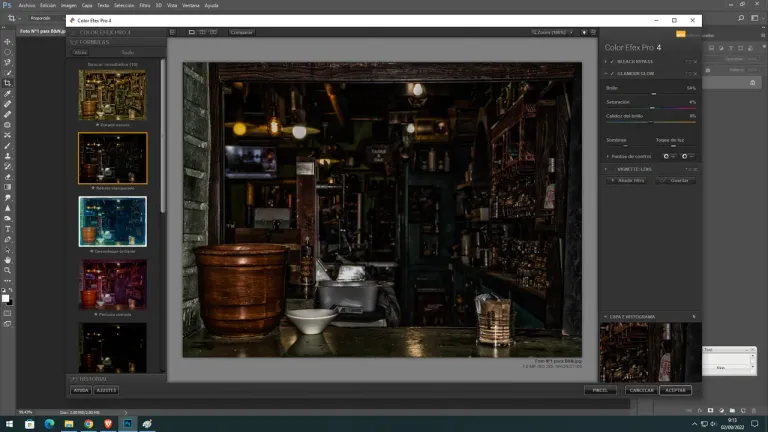
Image ©oscarps. All Rights Reserved.
Original content by @oscarps