
En mis post anteriores había hecho referencia a los pasos iniciales en la creación de un bonsai de enero comenzando con la Limpieza y la Poda:
| Cómo crear un bonsai de enebro paso a paso: Limpieza y Poda. / How to create a juniper bonsai step by step: Cleaning and Pruning. [ESP/ENG] | 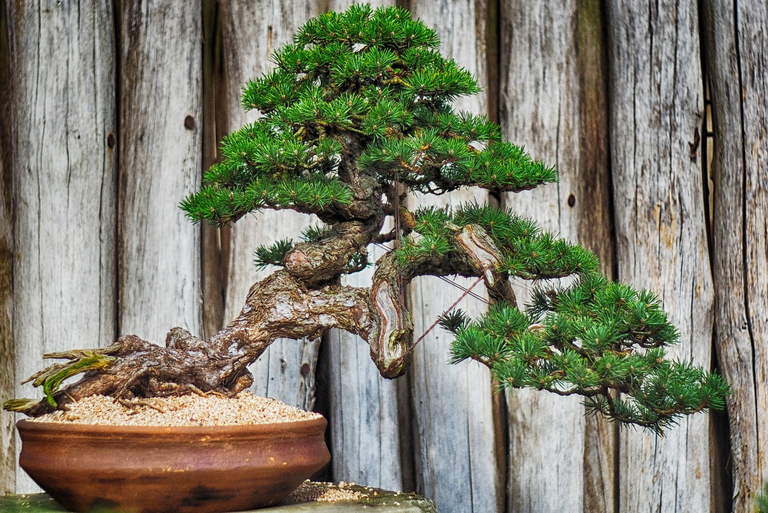 |
|---|
para seguir con la aplicación del alambre para modelarlo, ténica conocida como Alambrado del Bonsai:
| Cómo crear un bonsai de enebro paso a paso: Alambrando el bonsai. / How to create a juniper bonsai step by step: wiring the bonsai. [ESP/ENG] | 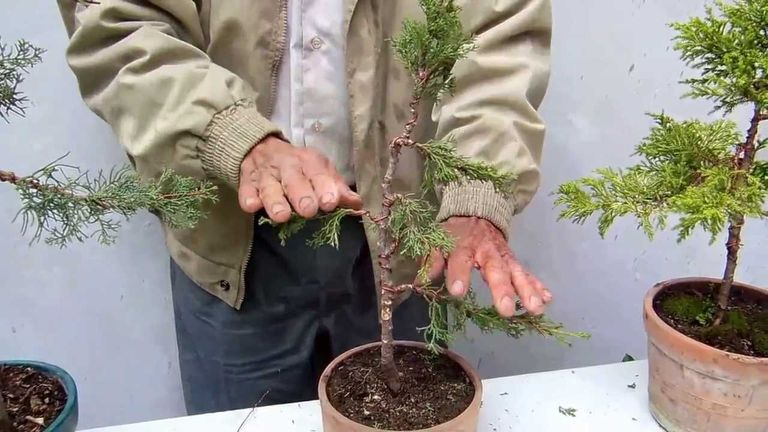 |
|---|
Una vez que hemos alambrado el bonsai con cuidado dándole la forma deseada llega la hora de colocarlo en una maceta adecuada.
Los árboles de crecimiento rápido deben replantarse cada dos años (a veces incluso cada año), mientras que los árboles más viejos y maduros deben replantarse en un plazo de 3 a 5 años.
No trasplante de acuerdo con un patrón, pero revise sus árboles a principios de la primavera, retirándolos cuidadosamente de la maceta.
Normalmente, el trasplante debe realizarse a principios de la primavera, cuando el árbol aún está inactivo. De esta forma se minimiza el efecto traumático de trasplantar un árbol, ya que todavía no tiene que mantener la vegetación madura. El trasplante a principios de la primavera también asegurará que cualquier daño causado a las raíces sea reparado tan pronto como el árbol comience a crecer.

Once we have carefully wired the bonsai giving it the desired shape, it is time to place it in a suitable pot.
Fast-growing trees should be replanted every two years (sometimes including every year), while older, more mature trees should be replanted within 3 to 5 years.
Don't transplant according to a pattern, but check your trees in early spring, carefully removing them from the pot.
Typically, transplantation should be done in early spring, when the tree is still dormant. In this way, you minimize the traumatic effect of transplanting a tree, since you do not yet have to maintain mature vegetation. Transplanting to princes of the spring will also ensure that any damage done to the roots is repaired as soon as the tree begins to grow.
Con una varita comenzamos quitando la tierra vieja, comenzando por los lados y la parte inferior de la planta. Trate de evitar dañar las raíces durante la operación.
Al trasplantar los pinos, deje intacta al menos la mitad del pan de raíz para proteger las micorrizas esenciales para la supervivencia de la planta.
Con la ayuda de unas tijeras, cortamos las raíces que sean demasiado largas. Podar no más del 30% de todas las raíces.
En este caso replantamos la planta en la misma maceta.
Preparamos la maceta tapando los orificios de drenaje con la red.
Las redes están aseguradas con el alambre.
También disponemos un hilo adicional que usaremos más adelante para anclar la planta a la maceta.
Primero agreguemos una capa ligera de suelo de grano grueso como lapillus, grava o akadama, que sirven como capa de drenaje.
With a wand we begin by removing the old soil, starting with the sides and the bottom of the plant. Try to avoid damaging the roots during operation.
When transplanting pines, leave at least half of the root loaf intact to protect the mycorrhizaes essential for the plant's survival.
With the help of scissors, we cut the roots that are too long. Prune no more than 30% of all roots.
In this case we replant the plant in the same pot.
We prepare the pot by covering the drainage holes with the net.
The nets are secured with wire.
We also have an additional thread that we will use later to anchor the plant to the pot.
First let's add a light layer of coarse-grained soil like lapillus, gravel, or akadama, which serve as a drainage layer.
Luego agregamos una capa ligera de tierra Bonsai.
Colocamos la planta en su maceta.
Usamos el alambre dispuesto previamente para mantener la planta en su lugar.
Agregamos tierra Bonsai alrededor de la planta.
Utilizamos los palillos para comprimir la tierra alrededor de las raíces, asegurándonos de llenar todas las bolsas de aire alrededor de las raíces.
Regamos abundantemente.
Then we add a light layer of Bonsai soil.
We place the plant in its pot.
We use pre-arranged wire to hold the plant in place.
We add Bonsai soil around the plant.
We use the toothpicks to compress the soil around the roots, making sure to fill all the air pockets around the roots.
We water abundantly.
Posted from https://blurtlatam.intinte.org