Desde hace varios años soy un apasionado de bonsái y si bien es una práctica milenaria en la cual crear y desarrollar una planta lleva mucho tiempo (es decir, muchos años) trato de ir aprendiendo y aplicando mis conocimientos a algunas pequeñas plantitas que he ido desarrollando. Algunas han sobrevivido y otras no, pero todos los días aprendo algo nuevo. En este tutorial veremos como se hace la aplicación del alambre o alambrado del bonsái como se lo conoce en la jerga popular.

For several years I have been passionate about bonsai and although it is an ancient practice in which creating and developing a plant takes a long time (that is, many years), I try to learn and apply my knowledge to some small plants that I have been developing. . Some have survived and some have not, but every day I learn something new. In this tutorial we will see how to apply the bonsai wire or wiring as it is known in popular jargon.
Alambrado del Bonsai. / Bonsai Wiring.
El alambrado del bonsai es una de las tareas más importantes a la hora de querer darle una forma a nuestro bonsai.
Es decir que forma tendrá como planta definitiva.
Si queres tener un érbol con la forma clásica deberemos alambrar cada rama con estilo y una forma determinados.
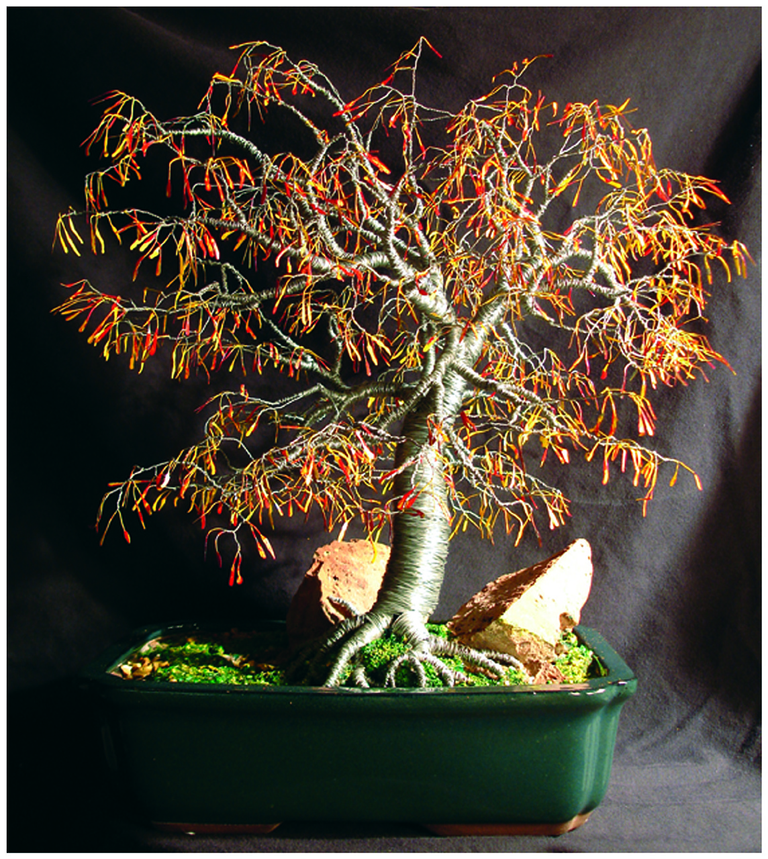
Si, en cambio, queremos personalizar el estilo y darle, por ejemplo, una forma de cascada (Cascade-style) o de ramas movidas por el viento (Slant-style) la tarea será completamente diversa.
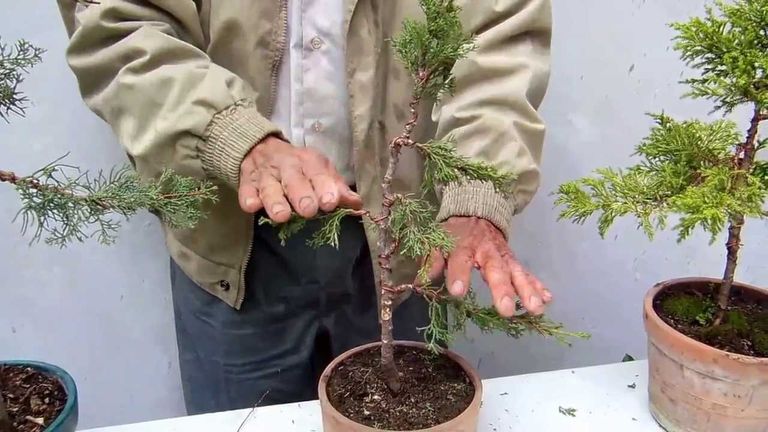
En el ejemplo que estamos desarrollando a nuestro enebro le daremos la forma del árbol tradicional, así como lo vemos en la naturaleza.
The wiring of the bonsai is one of the most important tasks when it comes to wanting to give a shape to our bonsai.
That is to say, what shape it will have as the final plant.
If you want to have a tree with the classic shape, we will have to wire each branch with a certain style and shape.
If, instead, we want to customize the style and give it, for example, a form of waterfall (Cascade-style) or branches moved by the wind (Slant-style) the task will be completely different.
In the example that we are developing to our juniper we will give it the shape of the traditional tree, just as we see it in nature.
El alambrado paso a paso. / The wiring step by step.
El alambre que debemos utilizar es el alambre de cobre. Su espesor variará según las dimensiones de cada rama.
Tenemos que tener en cuenta que la rama tardará unos meses en tomar la forma definitiva. Por lo tanto hasta no estar seguros de ello no podemos quitar el alambre.
Es preferible a veces dejar el alambre colocado un tiempo más ante la duda y no retirarlo antes.
Comenzamos alambrando el tronco que es la parte más robusta de la planta, de abajo hacia arriba sujetándolo con firmeza pero con cuidado.
The wire that we must use is the copper wire. Its thickness will vary according to the dimensions of each branch.
We have to bear in mind that the branch will take a few months to take its final form. Therefore until we are sure ** we cannot remove the wire. **
It is sometimes preferable to leave the wire in place for a longer time when in doubt and not remove it before.
We start by wiring the trunk that is the most robust part of the plant, from the bottom up, holding it firmly but carefully.
Los períodos para efectuar esta tarea varían según el tipo de planta y la parte de la misma que vamos a alambrar.
Por ejemplo para alambrar el tronco es conveniente hacerlo mientras la planta está en reposo. El tronco debe ser alambrado en su totalidad, es decir hasta llegar a la copa como vemos en la imagen.
Si, en cambio, decidimos alambrar ramas nuevas podemos hacerlo en su período de crecimiento, es decir primavera. De esta manera las ramas a medida que vayan desarrolándose se irán adaptando más fácilmente a su nueva forma. Incluso podremos guiarlas en su crecimiento, algo que no podemos hacer por ejemplo con el tronco.
Podemos comenzar con un alambre de 1-2 mm para las ramas y de 3-4 mm para el tronco.
Si el tronco es grueso y la torsión es pronunciada es conveniente envolverlo con rafia antes de alambrar para evitar dañarlo.
Dejar siempre un espacio libre entre el alambre y el tronco o la rama
The periods to carry out this task vary according to the type of plant and the part of it that we are going to wire.
For example, to wire the trunk it is convenient to do it while the plant is at rest. The trunk must be wired in its entirety, that is, until it reaches the crown as we see in the image.
If, on the other hand, we decide to wire new branches, we can do it in their growth period, that is, spring. In this way, the branches will adapt more easily to their new shape as they develop. We can even guide them in their growth, something that we cannot do with the trunk, for example.
We can start with a 1-2 mm wire for the branches and 3-4 mm for the trunk.
If the trunk is thick and the twist is pronounced, it is advisable to wrap it with raffia before wiring to avoid damaging it.
Always leave a free space between the wire and the trunk or branch.
Es importante usar pinzas y tijeras lo suficiente afiladas para que los cortes (ya sea en la planta o en el alambre) sean netos. Cuanto menos manipulación y movimientos sifra la planta mucho mejor será para su desarrollo. Sobretodo la parte relativa a sus raíces.
El paso sucesivo será comenzar con la torsión del bonsai. Es en este etapa cuando comenzamos a darle la forma verdadera, aquella que hemos elegido. La elasticidad del alambre de cobre nos permitrá efectuar torsiones más o menos pronunciadas sin dañar mínimamente la planta.
It is important to use tweezers and scissors sharp enough so that the cuts (either on the plant or on the wire) are clean. The less manipulation and movements the plant takes, the better it will be for its development. Especially the part related to its roots.
The next step will be to begin with the twisting of the bonsai. It is at this stage that we begin to give it the true form, the one we have chosen. The elasticity of the copper wire will allow us to make more or less pronounced twists without minimally damaging the plant.
En esta primera parte nos hemos dedicado a alambrar el tronco del bonsai dándole una forma ligeramente inclinada.
Hemos hecho un alambrado simple (ya que existe también la técnica del alambrado doble).
Para alambrar las ramas partimos desde el tronco o desde la copa y en este caso una parte de la planta tendrá un alambrado doble, la parte desde donde comenzamos.
Si iniciamos desde la rama misma corremos el riesgo de romperla o no sujetarla adecuadamente.
We have made a simple wiring (since there is also the technique of double wiring).
And this is the final presentation of the wired log.
To wire the branches we start from the trunk or from the crown and in this case a part of the plant will have a double wiring, the part from where we started.
If we start from the branch itself, we run the risk of breaking it or not holding it properly.
Fuente imagen inicial del post / Source initial image of the post: Centro Bonsai.
| Blogs, Sitios Web y Redes Sociales / Blogs, Webs & Social Networks | Plataformas de Contenidos/ Contents Platforms |
|---|---|
| Mi Blog / My Blog | The Ancient Art of Bonsai. |
| Red Social Twitter / Twitter Social Network | @hugorep |