Finding the IP address on a Windows 10 PC is quite very easy and simple to do, but before I show you how to find your IP address on your Windows 10 PC, let’s, first of all, know what an IP address means.
An IP (Internet Protocol) address is an address that uniquely identifies computer systems on a network or internet in order to communicate between themselves. To share files over a network, the IP addresses of the systems involved have to be known so as to make sure the file gets to the correct computer system. Computer systems use these protocols to communicate between themselves.
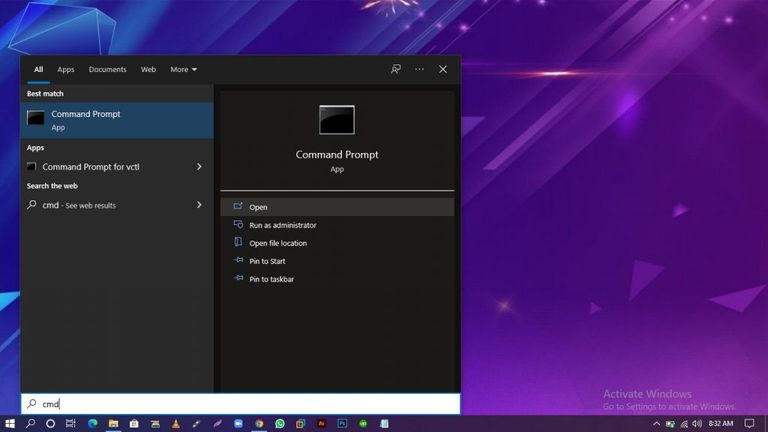
One of the simplest ways to check your IP address on your Windows 10 PC is using the Windows command prompt.
- Click on the search icon/space on your taskbar, type “cmd” to search for the Windows command prompt, and then click “Open” to launch it.
- When the command prompt launches, simply type in “ipconfig” (without quotes)
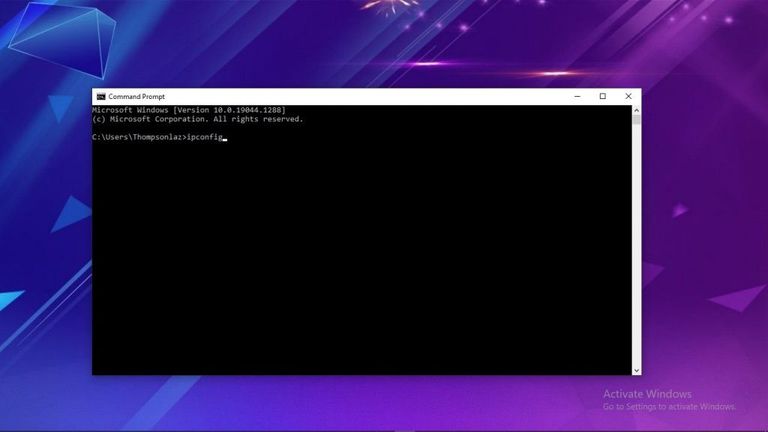
- Press Enter on your keyboard, and it will display all your available network adapters.
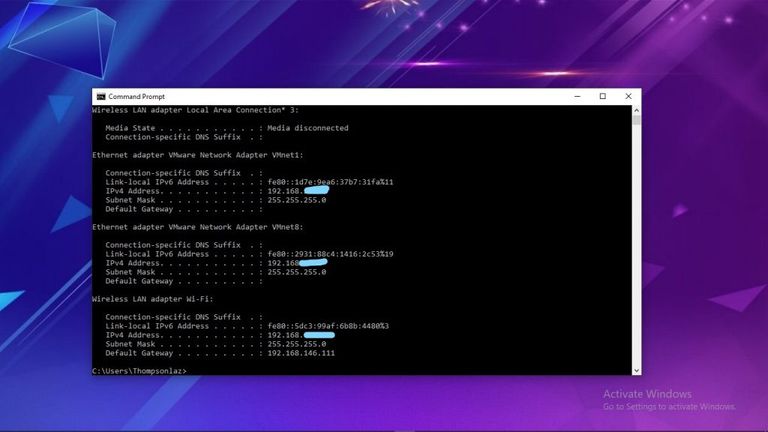
- If you’re connected to a wireless network, your IP address will be displayed under “Wireless LAN adapter Wi-Fi”, but if connected via ethernet cable, you can find it under “Ethernet adapter Ethernet”
Thank you so much for stopping by and for your continuous support. In my next post, I'll show you how to do it using Windows settings.
Also, keep in touch with Blurtconnect-ng family on Telegram and Whatsapp