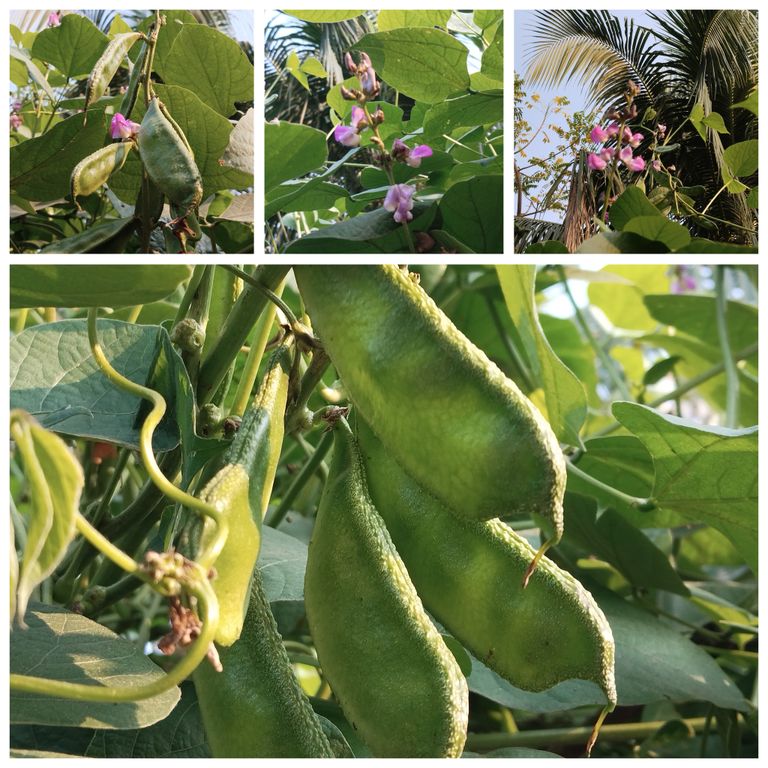
Hybrid Seed Cultivation Using Trellis Method.
The trellis method, widely known as "Macha Paddhoti" in Bengali, has emerged as an innovative and sustainable farming practice, especially for cultivating hybrid seeds. This technique involves growing plants vertically using a support system like bamboo, ropes, or nets. It is particularly suitable for creepers and climbers such as cucumbers, gourds, and hybrid vegetables. This method optimizes space, enhances yield, and improves crop health.
What is the Trellis Method?
The trellis method involves constructing a vertical structure to train plants to grow upward rather than spreading on the ground. This method uses materials such as:
Bamboo poles
Wires or nets
Wooden stakes
These supports help the plants climb, ensuring better sunlight exposure and air circulation.
Why Choose the Trellis Method for Hybrid Seeds?
Hybrid seeds are engineered to produce higher yields, better quality, and resistance to diseases. Using the trellis method for cultivating these seeds maximizes their potential. The combination of vertical farming and hybrid seeds offers the following advantages:
- Efficient Space Utilization: Ideal for small-scale farmers.
- Higher Yields: Vertical growth allows plants to receive more sunlight, resulting in better fruiting.
- Disease Prevention: Keeping plants off the ground reduces fungal and bacterial infections.
- Ease of Harvesting: Fruits and vegetables are easily visible and accessible.
- Improved Quality: Minimizes physical damage to crops, enhancing their market value.
Steps to Cultivate Hybrid Seeds Using the Trellis Method
- Site Selection and Preparation
Choose a location with good sunlight and proper drainage. Prepare the soil by tilling and adding organic compost or fertilizers to enhance fertility.
- Construction of the Trellis
Install sturdy poles (e.g., bamboo or metal) at regular intervals in rows.
Stretch a net or wires horizontally between the poles at different heights.
Ensure the structure can withstand wind and the weight of mature plants.
- Seed Selection and Sowing
Opt for hybrid seeds from a reliable source. Follow these steps:
Soak the seeds overnight for better germination.
Sow them at appropriate depths, keeping a distance of 1-2 feet between plants.
- Care and Maintenance
Watering: Provide adequate water, avoiding over-saturation. Drip irrigation is ideal.
Fertilization: Use balanced fertilizers rich in nitrogen, phosphorus, and potassium.
Pruning: Remove weak or unnecessary shoots to direct energy toward fruit production.
- Pest and Disease Management
Monitor crops regularly for pests like aphids and diseases such as powdery mildew. Use organic pesticides or integrated pest management techniques to protect the plants.
- Harvesting
Harvest the fruits when they are ripe and of optimal size. Ensure timely collection to encourage continuous flowering and fruiting.
Crops Suitable for Trellis Cultivation
The trellis method is versatile and supports various hybrid crops, including:
Cucumbers
Bitter gourd
Ridge gourd
Tomatoes
Beans
Benefits of the Trellis Method
The trellis method has revolutionized agricultural practices by offering multiple benefits:
Increased Crop Density: More plants can be grown in a smaller area.
Reduced Labor Costs: Less time is spent weeding and harvesting.
Environmental Sustainability: Promotes efficient use of resources and reduces soil erosion.
Market-Ready Produce: Enhances the visual appeal and shelf-life of fruits and vegetables.
Challenges and Solutions
Initial Investment: Building a trellis can be costly.
Solution: Use locally available materials like bamboo to reduce expenses.Maintenance: Trellis structures require periodic upkeep.
Solution: Regularly inspect and repair the support system.Pest Infestation: Crops grown in the trellis method can attract pests.
Solution: Employ biological pest control and companion planting.
The trellis method for hybrid seed cultivation is a game-changer for modern agriculture. It not only ensures higher yields but also promotes sustainable farming practices. By adopting this method, farmers can maximize their profits while contributing to food security and environmental conservation. With proper planning and execution, the trellis method can transform traditional farming into a more efficient and productive system.

The Benefits of Eating Figs: A Nutritional Powerhouse
Figs, also known as "Anjeer" in some cultures, are a delicious and highly nutritious fruit that has been enjoyed for centuries. Whether consumed fresh or dried, figs are packed with essential nutrients and health benefits that make them a fantastic addition to any diet. Here’s a detailed look at why figs deserve a place on your plate.
- Rich Source of Nutrients
Figs are low in calories but loaded with vital nutrients, including:
Fiber: Improves digestion and promotes a healthy gut.
Vitamins: Rich in Vitamin A, Vitamin K, and several B vitamins that support skin, eye, and overall health.
Minerals: Contains calcium, potassium, magnesium, and iron, essential for bone strength, muscle function, and blood production.
- Improves Digestive Health
Figs are an excellent source of dietary fiber, which helps:
Relieve constipation by promoting bowel regularity.
Prevent digestive disorders like irritable bowel syndrome (IBS).
Maintain a healthy gut microbiome.
- Supports Heart Health
The potassium content in figs helps regulate blood pressure by balancing sodium levels. Additionally, the fruit’s high fiber content lowers bad cholesterol (LDL), reducing the risk of heart disease. Antioxidants in figs also prevent oxidative stress, further promoting cardiovascular health.
- Enhances Bone Health
Figs are rich in calcium and magnesium, two minerals essential for maintaining strong bones and teeth. For those who do not consume dairy products, figs are a great alternative for meeting daily calcium needs.
- Boosts Immune System
The antioxidants, including polyphenols and flavonoids, in figs strengthen the immune system by combating free radicals. This helps reduce the risk of chronic diseases and infections.
- Aids in Weight Management
The high fiber content in figs keeps you feeling full for longer, reducing the tendency to overeat. They are also naturally sweet, making them a healthier alternative to sugary snacks.
- Promotes Healthy Skin
The vitamins and antioxidants in figs support skin health by preventing premature aging and improving skin elasticity. The fruit’s anti-inflammatory properties may also help treat conditions like acne and eczema.
- Helps Manage Blood Sugar Levels
Although figs are naturally sweet, they have a low glycemic index, meaning they release sugar slowly into the bloodstream. This makes them a good snack option for people with diabetes when consumed in moderation.
- Improves Reproductive Health
In traditional medicine, figs have been used as a natural remedy to enhance fertility and sexual health. They are rich in iron, which is essential for reproductive function and hormonal balance.
- Natural Energy Booster
Figs provide a quick energy boost due to their natural sugars like glucose, fructose, and sucrose. This makes them an ideal snack for athletes or anyone needing an instant energy lift.
How to Incorporate Figs into Your Diet
- Snacks: Eat dried figs as a quick snack or mix them with nuts.
- Breakfast: Add chopped figs to oatmeal, yogurt, or smoothies.
- Desserts: Use figs in cakes, tarts, or as a topping for ice cream.
- Salads: Combine fresh figs with leafy greens, goat cheese, and a balsamic glaze.
- Savory Dishes: Use figs in meat or poultry recipes for a touch of sweetness.
Precautions
Figs are high in natural sugars, so consume them in moderation to avoid weight gain or spikes in blood sugar.
People with a latex allergy should avoid figs as they may cause allergic reactions.
Excessive consumption can lead to digestive discomfort.
Figs are not only a treat for the taste buds but also a treasure trove of health benefits. Including them in your diet can improve digestion, heart health, bone strength, and much more. So, whether you enjoy them fresh, dried, or cooked, make figs a regular part of your nutritional journey.
Delicious Sim Bhaji Recipe: A Perfect Bengali Dish
Sim Bhaji, a beloved Bengali vegetable stir-fry, is a simple yet flavorful dish made primarily with hyacinth beans, locally known as "sim." This delightful recipe is perfect as a side dish to complement rice and dal or flatbreads like roti or paratha. If you’re looking for a light and nutritious meal that’s easy to prepare, this Sim Bhaji recipe is just what you need.
Ingredients
To serve 4, you’ll need:
Hyacinth beans (sim) - 250 grams (washed and trimmed)
Potatoes - 1 large, diced into small cubes
Mustard seeds - 1/2 teaspoon
Dry red chili - 1 (optional, for heat)
Turmeric powder - 1/2 teaspoon
Red chili powder - 1/4 teaspoon (optional)
Salt - to taste
Sugar - 1/2 teaspoon (optional, for a hint of sweetness)
Oil - 2 tablespoons (preferably mustard oil for authentic flavor)
Water - 1/4 cup (if needed for cooking)
Instructions
Step 1: Prepare the Ingredients
- Wash the hyacinth beans thoroughly and remove the stringy edges using a knife. Cut them into 2-3 inch pieces.
- Peel and dice the potato into small cubes to ensure even cooking.
Step 2: Cook the Sim Bhaji
- Heat mustard oil in a pan or kadhai until it begins to smoke lightly. This step enhances the flavor of the oil. Reduce the heat to medium.
- Add mustard seeds and let them splutter. For extra flavor, toss in the dry red chili.
- Add the diced potatoes and sauté for 2-3 minutes until they start to turn golden.
- Toss in the hyacinth beans and mix well.
- Add turmeric powder, red chili powder (if using), salt, and sugar. Stir to coat the vegetables evenly with the spices.
- Cover the pan with a lid and cook on low heat for about 10 minutes, stirring occasionally. If the mixture seems too dry, sprinkle a bit of water to prevent sticking.
Step 3: Check for Doneness
- Once the potatoes and beans are tender, remove the lid and increase the heat to evaporate any excess moisture.
- Taste and adjust seasoning as needed.
Step 4: Serve the Sim Bhaji
Transfer the Sim Bhaji to a serving bowl. Garnish with freshly chopped coriander if desired. Serve hot with steamed rice, dal, or roti for a wholesome Bengali meal.
Tips for the Perfect Sim Bhaji
- Use fresh beans: Fresh hyacinth beans have a natural sweetness and crisp texture, which enhance the dish's flavor.
- Customize spices: Adjust the chili according to your spice tolerance. Adding a pinch of garam masala towards the end can also elevate the taste.
- Oil choice: Mustard oil adds authenticity, but you can substitute it with any neutral cooking oil if needed.
- Additional vegetables: Add other vegetables like carrots or eggplants for variety.
Why You’ll Love Sim Bhaji
Sim Bhaji is not just a dish; it’s a comfort food that brings back memories of homely Bengali kitchens. Its simplicity, coupled with its health benefits, makes it an ideal addition to your weekly meal plan. Hyacinth beans are rich in dietary fiber, vitamins, and minerals, making this dish both tasty and nutritious.

A Delicious Bangladeshi Side Dish: Sim Bharta (Hyacinth Bean Mash)
Introduction
Sim Bharta, or Hyacinth Bean Mash, is a traditional Bangladeshi side dish that boasts a rich, earthy flavor with a touch of spice. It's a simple, nutritious dish often paired with rice and other Bengali classics. Known for its minimal ingredients and robust taste, Sim Bharta is a staple in rural households and a comforting addition to any meal.
In this blog, we'll explore the origins, nutritional benefits, and step-by-step instructions to prepare this humble yet flavorful dish.
The History of Sim Bharta
Sim Bharta originates from the countryside of Bangladesh, where fresh, locally grown vegetables are central to the cuisine. "Bharta," meaning mashed or crushed, is a common preparation method that enhances the natural flavors of vegetables, fish, or lentils with minimal cooking. The simplicity of this dish reflects the agrarian lifestyle and the reliance on fresh, seasonal produce.
Nutritional Benefits
Hyacinth beans, the star ingredient, are packed with nutrients. They are:
High in Protein: Essential for muscle repair and growth.
Rich in Fiber: Supports digestion and regulates blood sugar.
Loaded with Vitamins: Such as Vitamin A and C, which boost immunity.
Low in Calories: A great choice for weight management.
When combined with mustard oil, onions, and green chilies, the dish offers a wholesome balance of healthy fats, antioxidants, and flavor.
Ingredients for Sim Bharta
To serve 4:
200g hyacinth beans (Sim)
2 tablespoons mustard oil
1 medium onion, finely chopped
2-3 green chilies, finely chopped
Salt to taste
Step-by-Step Preparation
- Clean and Boil the Beans
Wash the hyacinth beans thoroughly.
Boil them in a pot with water and a pinch of salt until tender (approximately 15-20 minutes).
Drain the water and let the beans cool slightly.
- Mash the Beans
Using a mortar and pestle or a fork, mash the beans into a coarse paste.
- Prepare the Seasoning
Heat mustard oil slightly (do not overheat to retain its pungent flavor).
Mix the mashed beans with the mustard oil, chopped onions, and green chilies.
Add salt to taste and mix thoroughly.
- Serve
Transfer the Sim Bharta to a serving bowl.
Pair it with steamed rice, dal, or any curry of your choice.
Tips for the Perfect Sim Bharta
Always use fresh hyacinth beans for the best flavor.
Adjust the number of green chilies according to your spice tolerance.
Mustard oil is a key ingredient; avoid substituting it as it provides an authentic taste.
Why Sim Bharta Deserves a Place on Your Table
Sim Bharta is more than just a side dish—it's a celebration of simplicity and tradition. Its earthy flavors complement a variety of main courses, making it versatile and appealing. Whether you're hosting a traditional Bengali feast or looking for a nutritious vegetarian option, this dish is sure to delight.
Sim Bharta is a beautiful representation of Bangladesh's culinary heritage. Its rustic preparation and bold flavors remind us of the beauty in simplicity. So, the next time you crave an authentic, nutritious, and easy-to-make dish, try Sim Bharta—you won’t be disappointed.
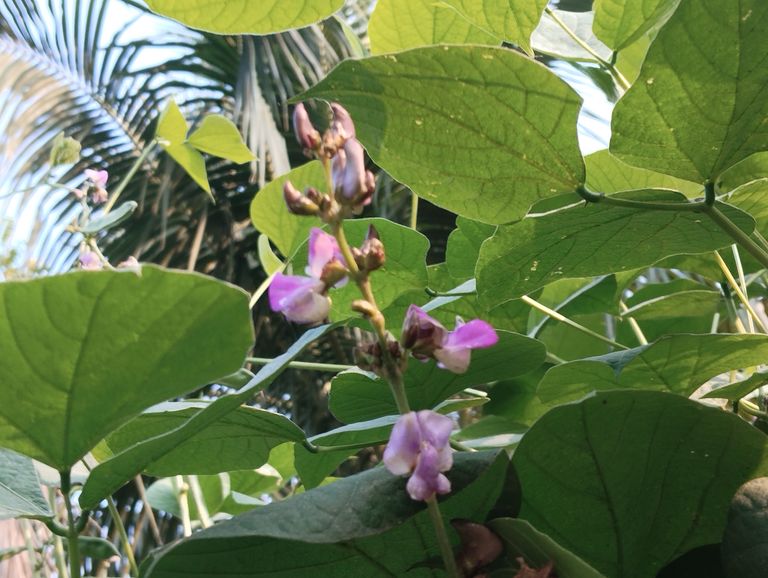
Proper Method for Planting Bean Seeds
Planting bean seeds (commonly known as “sim” in Bengali) requires proper preparation and techniques to ensure healthy growth and a bountiful harvest. Beans are one of the most versatile and nutritious crops, making them a favorite among home gardeners and commercial farmers alike. Here’s a step-by-step guide to planting bean seeds the right way.
- Selecting the Right Variety of Beans
Beans come in different varieties, such as pole beans, bush beans, runner beans, and lima beans. Choose a variety suitable for your region, soil type, and climate. Consider factors like yield, disease resistance, and growth habits when selecting seeds.
- Choosing the Right Location
Beans grow best in sunny areas with at least 6–8 hours of direct sunlight daily. Ensure the location is sheltered from strong winds to protect the plants as they grow. Beans thrive in well-drained soil with a slightly acidic to neutral pH level (6.0–7.5).
- Preparing the Soil
Proper soil preparation is crucial for the healthy growth of beans:
Loosen the soil: Use a spade or hoe to till the soil to a depth of 6–8 inches. This improves aeration and allows roots to grow freely.
Add compost or organic matter: Enrich the soil with well-rotted compost or organic manure to enhance fertility.
Ensure proper drainage: Beans dislike waterlogged conditions. If the soil retains too much water, consider raising the planting beds.
- Seed Preparation
Soaking the seeds before planting can speed up germination:
Soak the seeds in water for 6–12 hours to soften the outer shell.
Avoid soaking for too long, as this can cause the seeds to rot.
- Planting the Seeds
Follow these steps for successful planting:
Spacing: Plant the seeds 1–2 inches deep in the soil, with a spacing of 2–4 inches between seeds. Leave at least 18–24 inches between rows to ensure proper air circulation.
Planting pole beans: Install support structures like poles, trellises, or fences before planting, as these beans require something to climb.
Bush beans: These varieties do not require support but need more spacing between plants.
- Watering
Water the soil lightly after planting the seeds to ensure moisture for germination.
Keep the soil consistently moist but avoid overwatering, which can cause fungal diseases or seed rot.
- Mulching
Apply a layer of mulch around the base of the plants to retain soil moisture, suppress weeds, and regulate soil temperature. Use straw, dried leaves, or grass clippings as mulch.
- Fertilizing
Beans typically fix nitrogen in the soil, reducing the need for heavy fertilization. However:
Apply a balanced fertilizer during the early growth stages if the soil is deficient in nutrients.
Avoid high-nitrogen fertilizers, as they can encourage excessive foliage growth at the expense of bean production.
- Weed Management
Keep the planting area free from weeds, especially during the early stages of growth. Hand-pulling weeds or using a hoe can prevent competition for nutrients and water.
- Pest and Disease Control
Common pests: Aphids, bean beetles, and cutworms are frequent pests. Use organic insecticides or neem oil to manage infestations.
Diseases: Watch for signs of rust, powdery mildew, or bacterial blight. Use disease-resistant varieties and ensure good air circulation around plants.
- Supporting Pole Beans
As pole beans grow, guide their vines to climb the support structures. Regularly check and adjust the vines to prevent them from tangling or falling.
- Harvesting
Beans are usually ready for harvest 50–70 days after planting, depending on the variety:
Pick beans when they are firm, crisp, and have reached their full size.
Regular harvesting encourages continuous production.
Additional Tips for Success
Rotate bean crops every year to prevent soil depletion and minimize the risk of diseases.
Practice companion planting by growing beans alongside crops like corn, squash, or carrots for mutual benefits. Avoid planting beans near crops like onions and garlic, which may inhibit their growth.
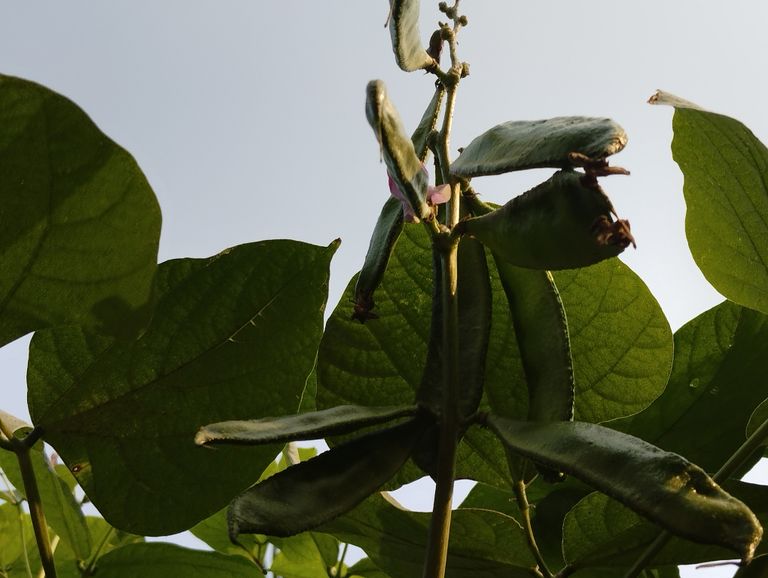
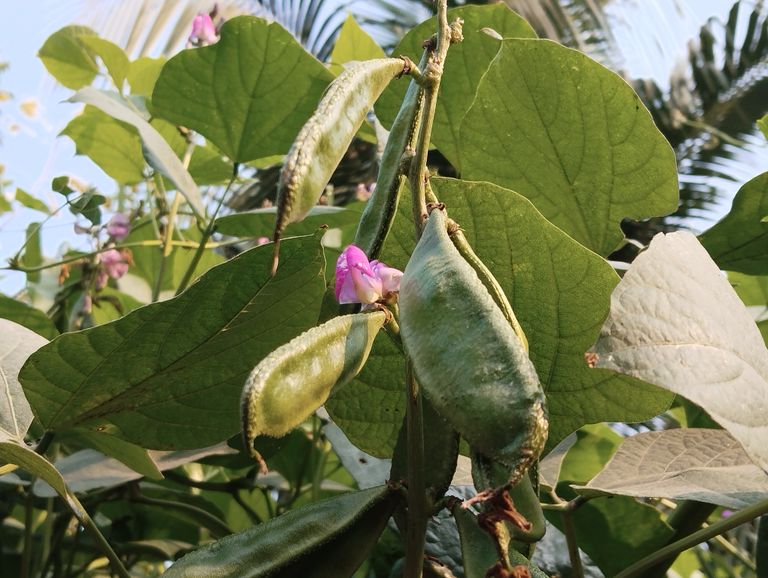
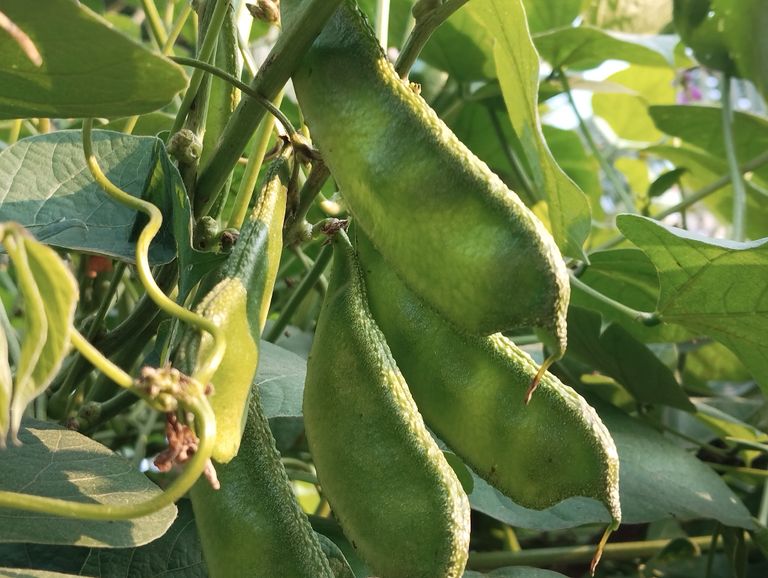
These photographs you took are of professional quality. I like seeing these photographs of yours.