The Beauty of the Rooster Flower.
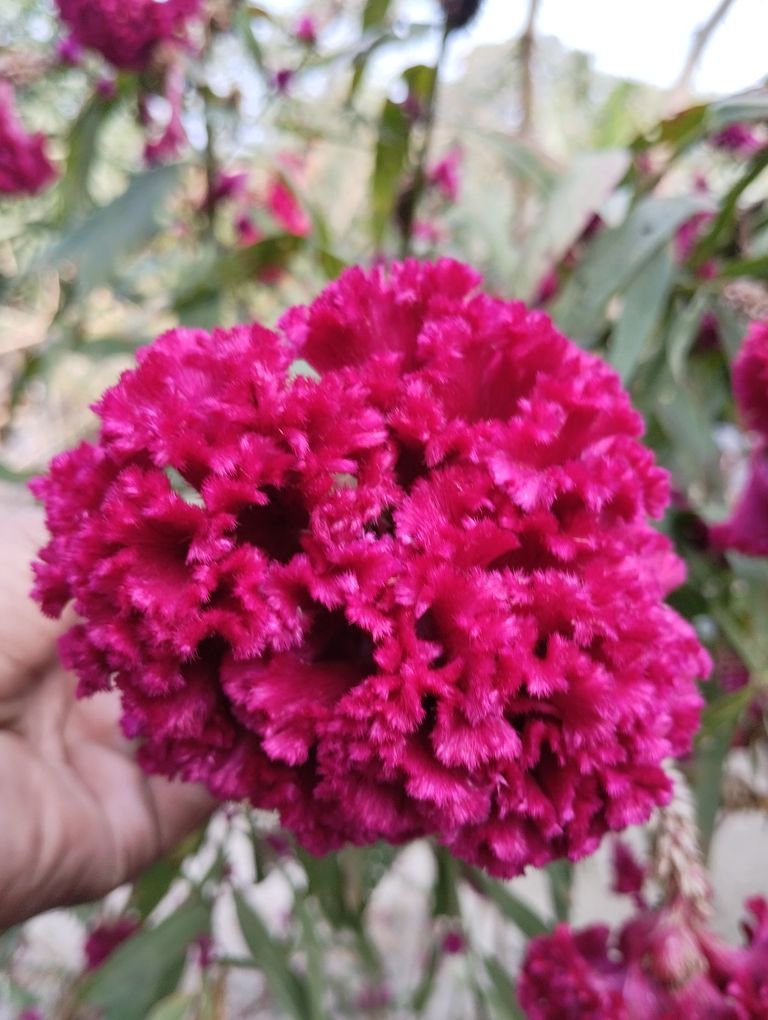
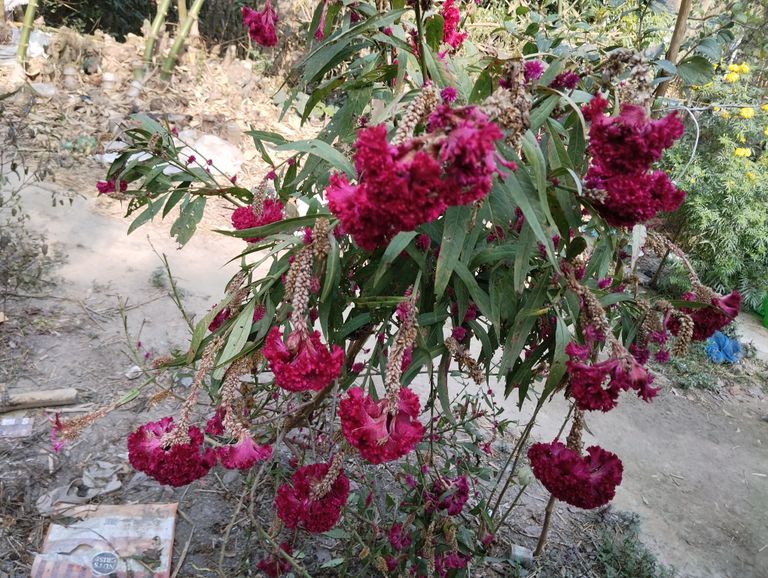
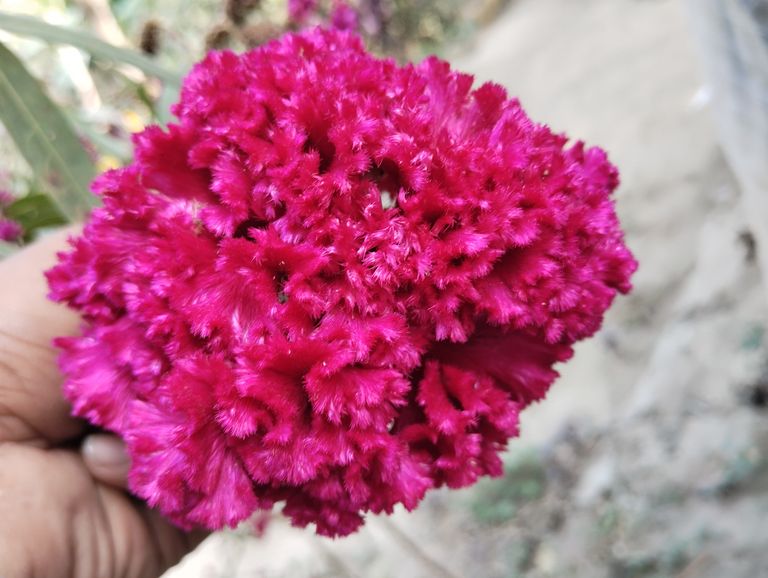
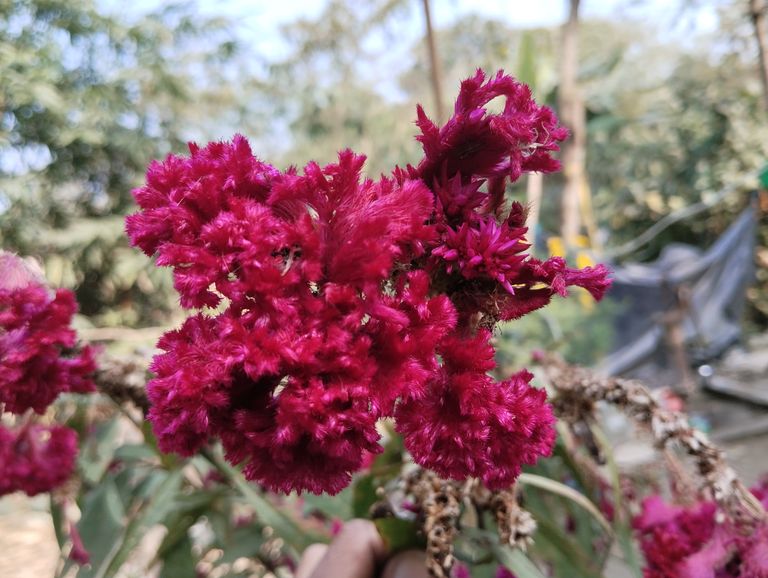
Nature is an endless source of wonder, offering countless sights that captivate the human soul. Among its countless creations, the Rooster Flower—known in Bengali as মোরগ ফুল—stands out as a unique and enchanting beauty. With its vibrant colors and intricate patterns, the rooster flower is more than just a plant; it is a testament to the creative genius of nature.
In this blog, we will dive deep into the fascinating world of the rooster flower, exploring its origins, characteristics, cultural significance, and the reasons why it continues to mesmerize people around the globe.
Origins and Characteristics of the Rooster Flower
The rooster flower, commonly known as Cockscomb, belongs to the Amaranthaceae family. Scientifically referred to as Celosia cristata, this annual plant is native to tropical regions, particularly in Asia and Africa. Its name, "rooster flower," comes from its resemblance to the comb of a rooster.
What makes the rooster flower truly mesmerizing is its unusual structure and vibrant colors. The flower’s crest-like formation features velvety folds that ripple across its surface, creating a stunning visual texture. The colors of these blooms range from fiery reds, oranges, and yellows to softer shades of pink and creamy white. The brilliance of these colors is enhanced when the flowers are kissed by sunlight, creating a radiant display that is hard to ignore.
Cultural and Symbolic Significance
The rooster flower is more than just a pretty sight—it holds symbolic significance in many cultures. In Bengali culture, the মোরগ ফুল is cherished for its association with vitality and festivity. Its vibrant red hues are often linked with celebration, passion, and energy, making it a popular choice for home gardens, festivals, and ceremonial decorations.
In Chinese culture, the flower represents immortality and enduring beauty. It is often used in traditional artwork, embroidery, and decorations, symbolizing prosperity and longevity. During festivals like the Chinese New Year, the rooster flower is a common sight, as it is believed to bring good luck and positive energy into homes.
Uses and Benefits of the Rooster Flower
The beauty of the rooster flower is complemented by its practical uses. While it is primarily grown as an ornamental plant, it also offers several benefits:
- Ornamental Value: The vibrant colors and striking appearance of the rooster flower make it a favorite in gardens and floral arrangements. It thrives in both outdoor gardens and indoor pots, adding a touch of elegance and vibrancy to any space.
- Culinary Uses: In some regions, particularly in Africa, the young leaves and stems of the plant are used as a nutritious vegetable. Rich in vitamins and minerals, they are often cooked in stews or soups.
- Medicinal Properties: Traditional medicine in certain cultures makes use of the plant's leaves and seeds to treat ailments like diarrhea, inflammation, and skin infections. Its antioxidant properties are believed to promote overall health and wellness.
- Dried Flower Arrangements: The rooster flower is a favorite among florists for creating long-lasting dried flower arrangements. Once dried, the blooms retain their vibrant colors and unique texture, making them perfect for decorative purposes.
Growing and Caring for Rooster Flowers
If you’re captivated by the beauty of the rooster flower, consider growing it in your garden. Here’s a simple guide to help you:
- Planting: Rooster flowers thrive in warm climates with plenty of sunlight. They prefer well-drained soil enriched with organic matter. Seeds can be sown directly into the soil during the spring or early summer.
- Watering: These flowers require moderate watering. Ensure the soil is moist but not waterlogged, as excessive water can cause root rot.
- Fertilizing: Use a balanced fertilizer every few weeks to promote healthy growth and vibrant blooms.
- Pest Control: While relatively hardy, rooster flowers can be susceptible to pests like aphids. Regularly inspect your plants and use natural pest control methods if needed.
- Pruning: Deadhead the flowers regularly to encourage new blooms and maintain the plant’s overall health.
The Rooster Flower in Art and Literature
The unique appearance of the rooster flower has inspired artists, poets, and writers throughout history. In Bengali literature, the মোরগ ফুল is often mentioned as a symbol of vitality and beauty. Its vibrant red color is likened to the energy of life, making it a recurring motif in poetry and songs.
Artists have also been drawn to the flower's intricate patterns, often incorporating it into paintings and textile designs. The velvety texture and rich hues of the rooster flower make it a perfect subject for artistic expression.
The rooster flower is a true marvel of nature. Its vibrant colors, unique shape, and cultural significance make it a standout among flowers. Whether you admire it in a garden, use it in a festive decoration, or incorporate it into your artwork, the rooster flower never fails to leave an impression.
As we celebrate the beauty of the rooster flower, let us also appreciate the diverse wonders of nature that surround us. Each flower, tree, and plant tells a story of resilience, creativity, and life. The rooster flower, with its bold and striking presence, reminds us to embrace the vibrancy of life and find joy in the small yet extraordinary details of the world around us.

Sure! Here's a 4000-character blog titled "Growing Marigolds in Pots: A Complete Guide":
Growing Marigolds in Pots: A Complete Guide
Marigolds, with their vibrant orange and yellow blooms, are among the most popular flowers for home gardens. Not only are they visually appealing, but they are also easy to grow, even for beginners. If you’re looking to grow marigolds in pots, this guide will walk you through everything you need to know to create a thriving container garden.
Why Grow Marigolds in Pots?
Growing marigolds in pots offers several advantages:
- Space-saving: Perfect for small spaces, balconies, or patios.
- Mobility: You can move pots around to ensure they get enough sunlight.
- Pest Control: Marigolds are natural pest repellents, making them great companions for vegetable gardens.
Choosing the Right Pot
Selecting the correct pot is crucial for the healthy growth of marigolds:
Size: A pot with a diameter of 8-12 inches works well for most marigold varieties. Larger pots can accommodate multiple plants.
Material: Clay or terracotta pots are ideal as they provide good aeration and prevent waterlogging.
Drainage: Ensure the pot has drainage holes to prevent water from accumulating and causing root rot.
Best Soil for Marigolds
Marigolds thrive in well-draining soil that is rich in nutrients. Use a mix of garden soil, compost, and sand in a 2:1:1 ratio. Adding organic matter like cow dung or vermicompost can further enhance soil fertility.
Selecting the Right Marigold Variety
There are two main types of marigolds you can grow:
- African Marigolds: Larger flowers, taller plants, and ideal for big pots.
- French Marigolds: Smaller, bushier plants that are perfect for compact spaces.
Choose seeds or seedlings based on the size of your pot and the look you desire.
Planting Marigolds in Pots
- Sow the Seeds: Fill your pot with soil, leaving 1-2 inches from the top. Sow the seeds about 1/4 inch deep and 2 inches apart.
- Watering: After planting, water the soil lightly to keep it moist but not soggy.
- Sunlight: Place the pot in a location that gets at least 6-8 hours of sunlight daily.
Watering and Feeding
Watering: Marigolds prefer slightly dry soil. Water the plants only when the top inch of soil feels dry. Avoid overwatering, as it can lead to fungal diseases.
Fertilizing: Use a balanced liquid fertilizer once every two weeks during the growing season. Avoid over-fertilization, as it can promote foliage growth at the expense of flowers.
Caring for Marigolds
- Deadheading: Regularly remove faded blooms to encourage more flowers and keep the plant tidy.
- Pest Control: While marigolds repel many pests, aphids and spider mites can sometimes attack. Use organic neem oil spray to tackle infestations.
- Pruning: Trim back any yellowing leaves or overgrown stems to maintain a healthy shape.
Common Problems and Solutions
Leggy Plants: If your marigold plants become tall and spindly, it may be due to insufficient sunlight. Move the pot to a sunnier location.
No Flowers: Over-fertilizing can lead to lush foliage but no blooms. Cut back on nitrogen-rich fertilizers.
Harvesting Seeds
One of the joys of growing marigolds is collecting seeds for future planting. Allow a few flowers to dry on the plant, then gently remove them to collect the seeds inside. Store the seeds in a cool, dry place for the next planting season.
Creating Beautiful Displays
Marigolds look stunning when paired with other plants. Consider combining them with herbs like basil or vegetables like tomatoes for a functional and decorative container garden. You can also mix different marigold varieties for a vibrant display of colors and sizes.
Marigolds are one of the easiest and most rewarding flowers to grow in pots. With minimal effort, you can enjoy their cheerful blooms throughout the season. Whether you’re a gardening novice or an experienced green thumb, marigolds will add beauty and life to your space. Start planting today, and watch your marigolds thrive.

How to Collect Rooster Flower Seeds (Celosia)
Rooster flowers, commonly known as Celosia, are prized for their vibrant, flame-like blooms and easy maintenance. These flowers not only enhance garden aesthetics but also produce seeds that can be harvested for future planting. In this blog, we'll guide you step-by-step on how to collect rooster flower seeds efficiently and ensure their viability for your next gardening season.
What is the Rooster Flower (Celosia)?
The rooster flower, scientifically known as Celosia, belongs to the Amaranthaceae family. It comes in various species, such as:
Celosia cristata (Cockscomb) – Known for its velvety, crested flowers.
Celosia argentea (Plume) – Popular for its feathery, plume-like blooms.
Celosia spicata (Wheat Celosia) – Resembling wheat heads with its unique form.
These flowers thrive in warm climates and bloom in a range of colors, including red, yellow, orange, and pink.
When to Collect Celosia Seeds
Seeds should be collected at the end of the growing season, typically in late summer or early autumn. As the flowers begin to dry out and fade, this is a sign that they are ready for seed harvesting. Avoid collecting seeds from flowers that are still fresh, as the seeds may not be fully mature.
Materials Needed
A pair of scissors or garden shears
A paper bag or small container
A clean, dry cloth or paper towel
Airtight storage containers or seed envelopes
Step-by-Step Guide to Collecting Rooster Flower Seeds
- Choose Healthy Plants
Select plants with the most vibrant and healthy blooms for seed collection. Avoid plants with signs of disease or pests, as this could impact seed quality.
- Wait for Flowers to Dry
Allow the flower heads to dry completely on the plant. You'll notice the vibrant blooms turn brown and papery, indicating that the seeds are ready for harvesting.
- Cut the Flower Heads
Use scissors or garden shears to cut the dried flower heads. Handle them gently to prevent the seeds from scattering.
- Extract the Seeds
Place the dried flower heads on a clean cloth or paper towel. Carefully rub or crush the flower heads to release the tiny seeds. Celosia seeds are small, black, and shiny, making them easy to identify.
- Separate Seeds from Debris
Use a sieve or gently blow on the mixture to separate the seeds from the chaff. Ensure only the seeds remain for storage.
- Dry the Seeds
Spread the seeds on a paper towel and leave them in a cool, dry place for 2-3 days. This step ensures that any residual moisture is removed, preventing mold during storage.
- Store the Seeds
Place the dried seeds in an airtight container or seed envelope. Label the container with the seed type and collection date. Store the seeds in a cool, dark, and dry location. Properly stored seeds can remain viable for 2-3 years.
Tips for Better Seed Collection
Harvest seeds during a dry day to avoid moisture contamination.
Label your seed envelopes with the specific Celosia variety for organized planting.
Avoid plastic bags for long-term storage, as they can trap moisture and cause mold growth.
Planting Rooster Flower Seeds
When planting season arrives, soak the seeds in water for a few hours before sowing to improve germination rates. Sprinkle the seeds on well-draining soil, lightly cover them with a thin layer of soil, and water gently. In 10-15 days, you'll see seedlings emerge, ready to grow into stunning rooster flowers.
Collecting rooster flower seeds is a simple and rewarding process. By following these steps, you can ensure a continuous supply of Celosia for your garden. Not only does this save money, but it also allows you to share the beauty of these vibrant flowers with friends and family. Happy gardening.
Leaf Diseases in Rooster Flowers (Celosia): Causes, Identification, and Solutions
The rooster flower, also known as Celosia, is a beautiful and vibrant plant prized for its bright, feathery blooms resembling a rooster's comb. However, like all plants, it can fall victim to various leaf diseases, which can affect its health and beauty. In this blog, we will explore common leaf diseases that affect rooster flowers, their causes, and effective solutions to keep your plants thriving.
- Common Leaf Diseases in Rooster Flowers
Rooster flowers are generally hardy, but they can suffer from several diseases, especially in unfavorable conditions. The most common leaf diseases include:
A. Powdery Mildew
Symptoms: White or gray powdery patches appear on the leaves and stems. The affected leaves may curl, yellow, or dry out.
Causes: Caused by fungal spores, usually in humid conditions or overcrowded plants with poor air circulation.
Solutions:
Improve air circulation by spacing plants adequately.
Avoid overhead watering to keep leaves dry.
Use fungicides or neem oil spray to treat affected plants.
B. Leaf Spot Disease
Symptoms: Brown, black, or yellow spots appear on leaves, sometimes with a halo-like ring. Severe cases may cause leaves to drop prematurely.
Causes: Bacterial or fungal pathogens thrive in warm, moist conditions.
Solutions:
Remove infected leaves to prevent the spread of the disease.
Apply copper-based fungicides or organic treatments.
Ensure proper drainage to reduce excess moisture.
C. Blight
Symptoms: Rapid wilting and browning of leaves, starting from the edges. It may also affect the stems and blooms.
Causes: Caused by fungal pathogens, often due to overwatering or wet weather.
Solutions:
Prune infected parts and dispose of them properly.
Avoid watering in the evening to let plants dry overnight.
Use a systemic fungicide for severe infections.
D. Rust
Symptoms: Orange or reddish-brown pustules appear on the underside of leaves. It may lead to leaf deformation and eventual leaf drop.
Causes: Fungal infection facilitated by high humidity and poor air circulation.
Solutions:
Remove and destroy infected leaves.
Apply sulfur or fungicide to prevent further spread.
Avoid overcrowding plants to ensure proper airflow.
- Prevention Tips for Healthy Rooster Flowers
Preventing diseases is always better than curing them. Here are some essential tips to keep your rooster flowers healthy:
Plant in Well-Drained Soil: Ensure the soil is not waterlogged to prevent fungal growth.
Adequate Spacing: Space plants properly to allow good air circulation and prevent the spread of diseases.
Regular Inspection: Check your plants regularly for early signs of disease and take immediate action.
Watering Practices: Water at the base of the plant and avoid wetting the leaves. Water in the morning to allow the plant to dry during the day.
Fertilization: Use balanced fertilizers to provide essential nutrients that boost the plant's immunity.
Rotate Crops: If you are planting Celosia in a garden, practice crop rotation to prevent soil-borne diseases.
- Natural Remedies for Leaf Diseases
For gardeners who prefer organic solutions, here are some natural remedies for treating leaf diseases:
Neem Oil Spray: Mix neem oil with water and a few drops of liquid soap. Spray it on the affected areas to kill fungal spores and pests.
Baking Soda Solution: Mix 1 teaspoon of baking soda with 1 liter of water and spray it on the leaves to combat fungal infections.