In my opinion DOS is hacking which prevents other users from doing activities on the network. Here I will demonstrate DOS on a wifi using CommView for WIFI on Windows.
Downloading CommView
Download the program first and install. It is recommended on the developer's website http://www.tamos.com .
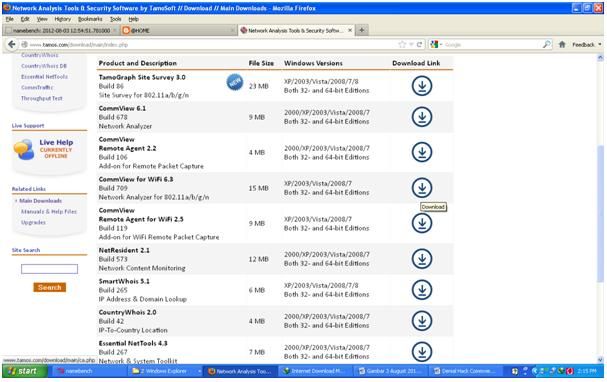
Figure 1. Downloading the CommView for Wifi 6.3 software
Installing CommView
Run the program that you just downloaded or extracted immediately.
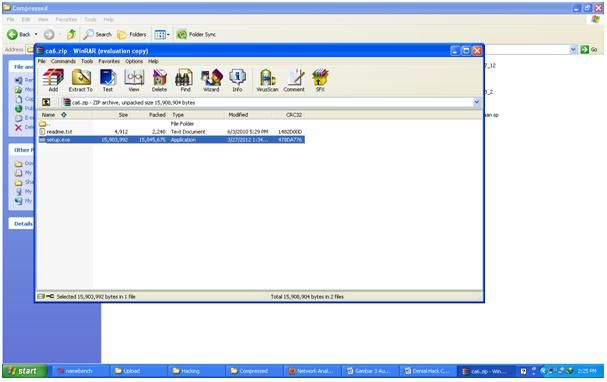
Figure 2. Running Setup.exe CommView
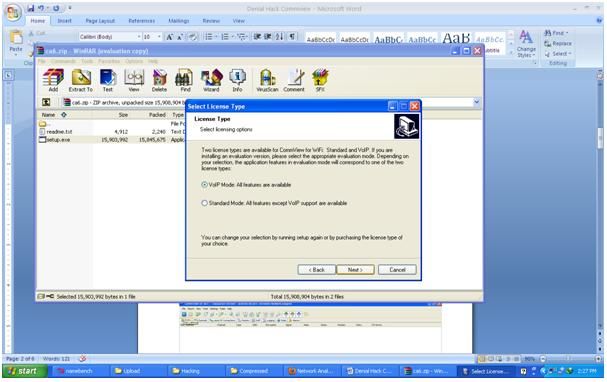
Figure 3. Installing CommView, follow the command during installation.
After installing the software you need to install the driver from the existing commview in the packet installer (usually). Select the wireless adapter that suits you. (if you don't support it, you can't). If true, the device manager will look like this:
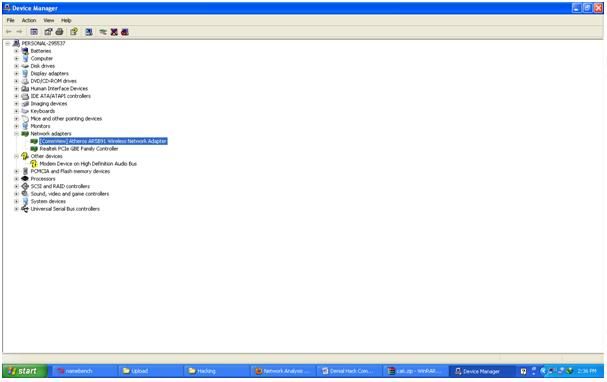
Figure 4. There is the words "commview" on the wireless adapter
Starting DOS on a Wifi
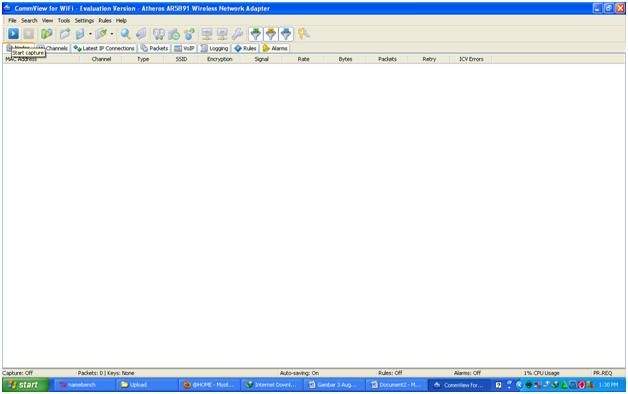
Figure 5. Display CommView, open commview for wifi (don't connect to a wifi first).
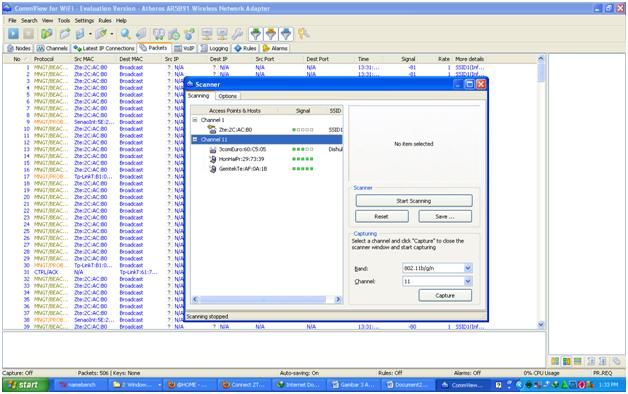
Figure 6. Select Channel 11 to capture packets. Click the "Start Capture" button on the tab (looks like the "play" button), click the start scanning button, then select the channel (for which you want to capture wifi) to capture the packet, then click the capture button.
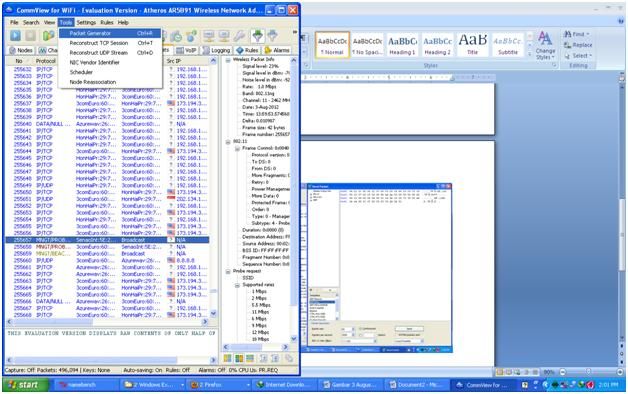
Figure 7. Open the packet generator, click the packet tab to see, while waiting to open the packet generator in "tools > packet generator".
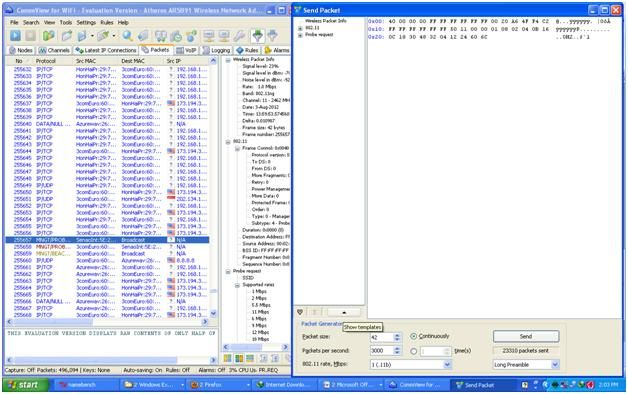
Figure 8. Pressing the show template button, click the "show template" button located in the lower-left part of the packet generator.
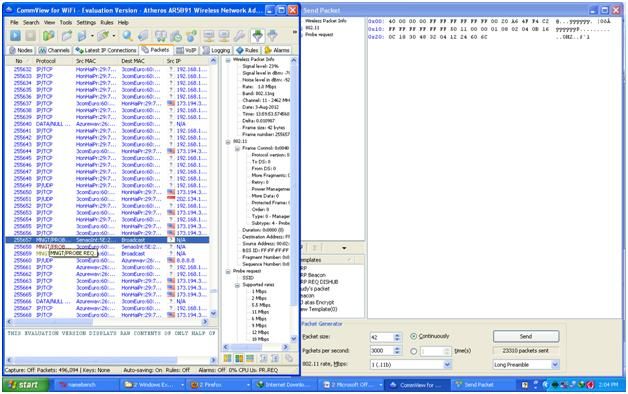
Figure 9. Looking for a request packet, look for the "Request" packet addressed to the access point. Here my packet is named "MNGT \ PROBE REQ". The name of the packet bias is different, I suggest looking for something called REQ and trial and error. You need to study the field of telecommunications for more knowledge.
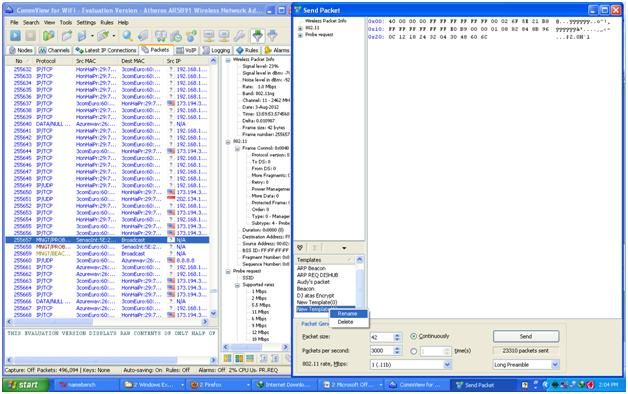
Figure 10. Drag to the packet generator template, drag and drop (click, hold, place) on the template. I renamed the packet by right-clicking "rename".
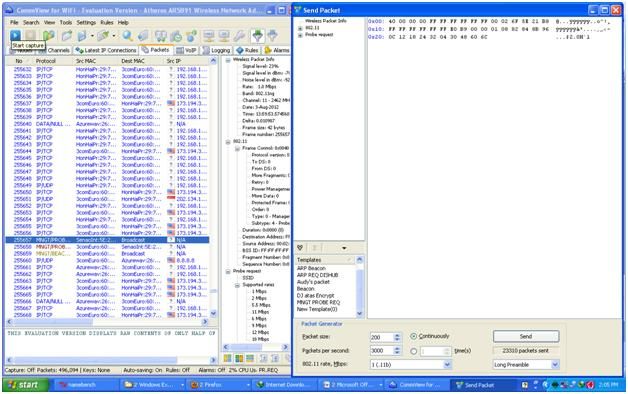
Figure 11. Capture again, here I do "stop capture" so it is easy to choose a packet. Next you will send this packet to your access point service. Here I change the packet size to 200, sending 3000 packets / second continuously. In order to click on the "send" button you have to start "capture" again on that channel.
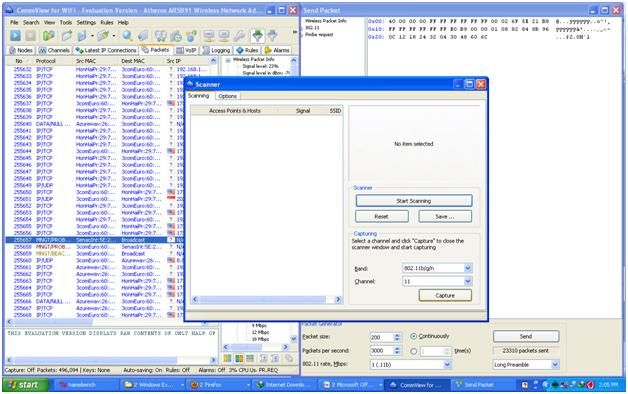
Figure 12. Capturing the packet again on channel 11.
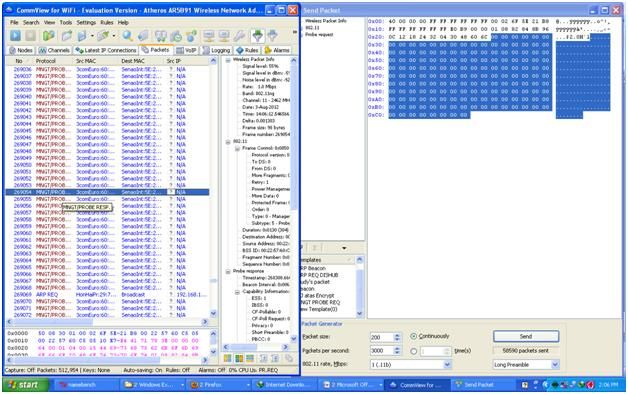
Figure 13. Access point sends a lot of responses, if you are right then you will receive a packet of very correct and continuous "Response" packets. Here the name "MNGT / PROBE RESP". I see my colleagues can not access the Internet or download.
Opinion
I think that happened because I sent a lot of "requests" (requests) to access the network and responded with "respond" (responses). Because access point is too busy sending "responses" to me, I don't have time to do anything else. The burden on access point becomes very much or even too much.
Reference
Mirror
- https://www.publish0x.com/0fajarpurnama0/denial-of-service-dos-on-wifi-using-commview-windows-xrvvnl?a=4oeEw0Yb0B&tid=blurt
- https://0fajarpurnama0.github.io/pentest/2020/04/09/dos-using-commview-windows
- https://medium.com/@0fajarpurnama0/denial-of-service-dos-on-wifi-using-commview-windows-745bad254de3
- https://hicc.cs.kumamoto-u.ac.jp/~fajar/pentest/dos-using-commview-windows.html
- https://0fajarpurnama0.tumblr.com/post/614925923008069632/denial-of-service-dos-on-wifi-using-commview
- https://0darkking0.blogspot.com/2020/04/denial-of-service-wifi-commview-windows.html
- https://0fajarpurnama0.cloudaccess.host/index.php/uncategorised/30-denial-of-service-dos-on-wifi-using-commview-windows
- http://0fajarpurnama0.weebly.com/blog/denial-of-service-dos-on-wifi-using-commview-windows
- https://0fajarpurnama0.wixsite.com/0fajarpurnama0/post/denial-of-service-dos-on-wifi-using-commview-windows
- http://www.teiii.cn/denial-of-service-dos-on-wifi-using-commview-windows