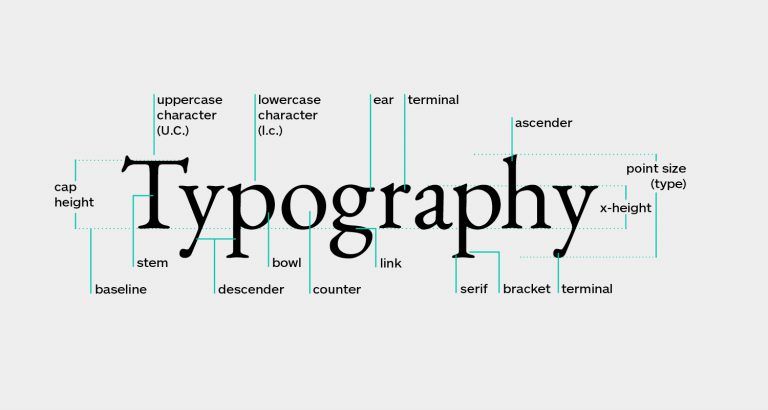
Making the content visible to users in a readable format is the goal of typography. To create a strong typographic design that emphasizes choosing the right font size, form, and structure, one needs to master advanced Photoshop typography techniques. Furthermore, only when color is carefully selected and utilized into typography does it improve the entire design. Put simply, while designing unique fonts, a complementary color must be chosen. The steps to make a color font in Photoshop are as follows:
1 . START BY SELECTING THE BASIC.
Start generating unique and personalized fonts with the Fontself program. A window appears when you open it. Drag and drop the fonts into the window, then edit their alignment and color. If you keep doing this, coloring all of your typefaces will be simple. This program can also be used to create standard fonts for you. It's a quick and simple method to get started with Photoshop's color font creation feature.
2 . TWO INSPIRATIONS FOR POWER.
Verify the colors' proper placement after you're done working with them. You can accomplish this by carefully adjusting the letter spacing and placement. Quickly aligning letters in a single row is the first power tip. Use the A-Z buttons to select all of the letters in a row that you have dropped into the drop area. Appropriate letter alignment is the subject of the second power tip. For guidance when constructing the new letters, use the horizontal ruler. This manual serves as Fontself's basic reference. To position the letter just right, adjust its height and position by dragging it up and down. Learning this is a crucial advanced skill.
3 . COMPLETE THE KERNING .
Kerning is necessary to guarantee that the letters are spaced correctly. There will inevitably be some spacing mistakes after you've finished coloring and arranging your letters. This can be attributed to their inherent geometry and form. Make use of the kerning pair notion. A kerneling pair is essentially a collection of spacing directives. They accommodate any set of letters with a unique spacing. The freely available type font has them encoded into it. It is a fast and simple method to finish the kerning process for developing creative fonts.
4 . IMPROVE LIGATURES.
The merging of letters into a single glyph is the focus of ligatures. You can use them to create unique letters. The font may easily have ligatures added to it. To complete the process, all you need to do is enter the letters in the "type any character" box and click "create ligature." You can test the ligatures by pressing the export button. In order to make a color font in Photoshop, ligatures must be created.
To generate a color font in Photoshop, follow the instructions listed above. You're set to go if you follow these procedures in a tactical manner. Make sure all the procedures involved in making creative fonts are followed correctly, and you will witness their amazing influence on your work.
Upvoted. Thank You for sending some of your rewards to @null. Get more BLURT:
@ mariuszkarowski/how-to-get-automatic-upvote-from-my-accounts@ blurtbooster/blurt-booster-introduction-rules-and-guidelines-1699999662965@ nalexadre/blurt-nexus-creating-an-affiliate-account-1700008765859@ kryptodenno - win BLURT POWER delegationNote: This bot will not vote on AI-generated content