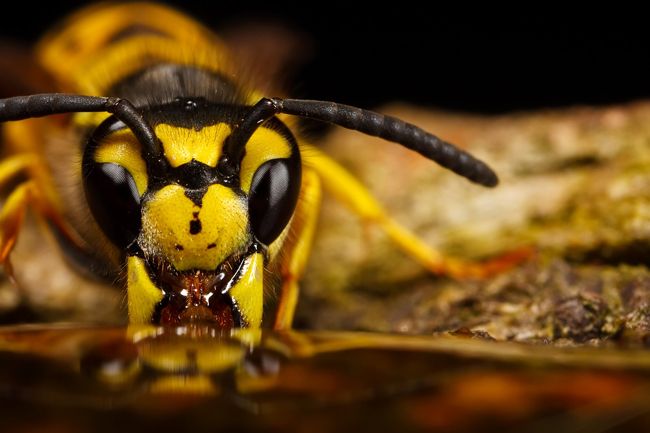
Macro Photography (or Photomacrography or Macrography) is a genre of photography that focuses on small subjects such as insects or other small animals. That's why this genre is also known as extreme close-up photography. Even a macro photographer can shoot the eye of an insect as small as a fly.
- Use the Best Lenses
The focal length of macro lenses ranges from 50mm - 200mm. While many zoom lenses boast of a macro setting, this is usually less than half the life-size for true macro magnification, but you can choose from 1:1 and no less.
A 50-60mm lens is suitable for general class macro shots but if you want a larger subject distance use a 100mm lens but this will put a bit of a burden on the lens price.
For subjects such as butterflies and dragonflies, the lens-to-subject distance becomes more important for the length of your lens so the focus should be greater.
While the 150-200mm range lens is the most expensive, but you will get results that are much more superior than the results of ordinary macro lenses.
- Adding Tube Extensions to Standard Focal Zoom
Extension Tube is an additional tool that is attached to the lens to shorten the focal length of your lens. With this tool you can produce much larger images of small subjects.
A thick-legged flower beetle shot with an 18-200mm zoom lens + 20mm tube, this could be an example of a much cheaper alternative to buying an expensive macro lens. In addition, you can also add more than 1 extension tube to your lens.
- Adding Dioptres To Make The Lens Focus Closer
A close-up filter is a single element for a lens that looks like a magnifying glass. This filter has a screw screw that attaches to the front element of the lens and can provide an inexpensive alternative to creating a great macro lens.
These filters are available in various strengths which are measured in diopters. Close-up filters that are often available are +1, +2 or +4 diopters of magnification.
Dioptres are also available on square filters such as the Cokin Filter style. And another advantage of using dioptres can also be used to make close-up photos.
- Apply the appropriate depth of field technique
To get maximum results with the Depth of Field (DOF) concept, choose the smallest aperture such as f/16 or even f/22. You'll find that applying DOF at an aperture of f/22 at a distance of about 15mm is best.
On the other hand you may want to use an extreme DOF and show a bit of sharpness/focus like using a full aperture of around f/2.8 or f/4. And one of the advantages of this method is that any part out of focus (like the background) will show a shape like a circle of bubbles which looks very interesting.
To find out more about Depth of Field, please read here.
- Combine Flash With Ambient Light
Indeed, using a light from a flash to animate an image is a common method that is often done, especially for beginners.
Be careful using flash completely on macro photos. When you turn on the flash with the shutter speed up 1-stop, the result will be very dark in the background and only light on the subject.
You can lower the shutter speed below 1/200 (200sec) to let the ambient light remain in the background.
- Use Third Hand Assistance
The Third Hand is an essential accessory for macro photography. This is very useful for keeping the subject in a stable position and for avoiding the subject being moved by the wind.
- Background Selection
Choose a background or background with a different color from the subject you are shooting.
Macro photography is not as easy as you think. Apart from requiring tools and skills, there are some common problems that are often encountered when shooting mini subjects such as macros. And to solve these common problems, please read the article "Tips to overcome 3 common problems of macro photos with plastic cups" here.
Hi, @in-macro,
Thank you for your contribution to the Blurt ecosystem.
Your post was picked for curation by @onchain-curator.
Please consider voting for our Upkeep Proposal by Symbionts.
Thanks