The English translation is below
Vorwort
So, nachdem ich nun auf meiner VM einen tollen Ubuntu Server eingerichtet habe, den ich per SSH ansteuern kann, konnte ich heute auch die DIG Installation auf einen VPS durchführen. War gar nicht mal so viel anders, als auf ein RasPi.
Ich hoffe, ich kann damit einigen helfen, die bisher nicht durchblickten oder die unbewusst einen Fehler machten.
ACHTUNG:
Dieser Guide beinhaltet nur die ERSTEINRICHTUNG, für ein Recovery sind (noch) keine Infos enthalten, da ich dies noch nicht versucht habe!
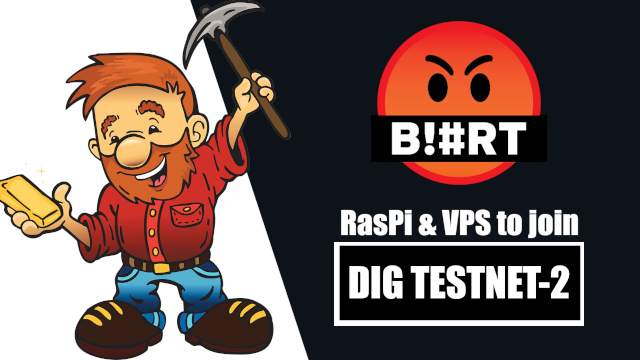
Installation auf einen VPS
Schritt 1:
Ihr loggt euch wie gewohnt auf eueren VPS über SSH ein. Für die Installation der DIG-Chain sind einige Programme nötig, die wir nun Installieren.
apt-get install screen
apt-get install git
wget -q -O - https://git.io/vQhTU | bash -s -- --version 1.16.4
Hiernach bitte einmal die SSH Verbindung schließen und neu öffnen.
Schritt 2:
Sobald die Installationen der Programme durch ist, können wir auch schon mit der DIG Installation beginnen.
Hierfür sind 3 Befehle nötig, die ihr schrittweise eingebt.
git clone https://github.com/faddat/dig
cd dig/cmd/digd
go install .
ACHTUNG:
Beim go install . Befehl kann es zu einem Fehler kommen, der dafür sorgt, dass der Command Prompt nicht mehr von selber erscheint. Wenn dies nach über 5 Minuten nicht passiert und ihr somit keine weiteren Befehle mehr eingeben könnt, dann nutzt die Tastenkombination STRG + C. Dies aber auch nur, wenn ihr wirklich schon lange gewartet habt und die Eingabemöglichkeit nicht von selber erscheint!
Schritt 3:
Nun geht es weiter mit dem anlegen der Konten:
digd init DEIN TOLLER NAME
(Wer jetzt hier wirklich "Dein Toller Name" hinschreibt anstatt seinen eigenen "Nick-Namen", der wird von mir eigenhändig geohrfeigt.😂)
digd keys add validator
ACHTUNG:
Die Keys sind zu notieren sowohl auch die mnemonic phrase (24 Worte)!
Schritt 4:
Nun folgen noch 7 Befehle die ihr ausführen müsst. Dies bitte Schritt für Schritt befolgen, auch wenn auf den Bildschirm nichts angezeigt wird.
cd ~/dig
cp networks/testnet-2/genesis.json ~/.dig/config
wget https://github.com/faddat/dig/releases/download/latest/dig_latest_linux_amd64.tar.gz
tar xvf dig_latest_linux_amd64.tar.gz
mv digd /usr/bin
digd unsafe-reset-all
wget -O ~/.dig/config/genesis.json https://raw.githubusercontent.com/faddat/dig/master/networks/testnet-2/genesis.json
INFO:
Bei der Eingabe von tar xvf dig_latest_linux_amd64.tar.gz kann die Meldung kommen, dass es nicht ausgeführt werden konnte, da die Datei schon vorhanden ist. Dies einfach ignorieren.
Schritt 5:
So, nun ist das Grobe erledigt, jetzt schauen wir ob auch alles gestartet werden kann. Da DIG nicht wie BLURT in einem Docker läuft nutzen wir nun die Software SCREEN um DIG in einen Container laufen zu lassen.
Einen Screen-Container anlegen:
screen -S dig
Die DIG Chain Starten:
digd start --p2p.persistent_peers 2d472c2fa9675ff9de92e95b00bc3169210da437@135.181.105.82:26656,140e9a1a85d33f295e7b55057ff328713d59c879@209.145.58.159:2090,be1a53d8abcf6efe22316ba2caf83a353777cfdc@109.235.70.204:26656,dc3508feaeae1feb649d6d50c24093d9992e82bb@95.115.26.180:26656,739350b0839f934b0b32a35bb0ba431c8df4b96e@116.118.48.245:26656,88eafddc59583f9bfdd6c3c0416cd9c57a9093e3@116.118.48.246:26656,cbd94e38b4d9bbb2758140c42bc839d56d71787a@13.229.181.25:26656,9cf4e1a049a6569ae8d86967727ee730a329bf8c@194.163.163.74:26656 --p2p.upnp true
Jetzt sollte die Chain auf dem Bildschirm runter rattern. Wenn dies passiert, ist die Einrichtung erfolgreich und du bist schon einmal eine DIG NODE!
Somit können wir die Anzeige schließen mit der Tastenkombination:
STRG +a +d
ACHTUNG:
Der nächste Schritt ist das Einrichten des eigentlichen Validator's / Witness (wie es auf Blurt heißen würde). Hierfür wird allerdings DIG auf euerem Konto benötigt. Daher ab hier erst weiter machen, sobald euer Konto nicht mehr Leer ist, dazu schickt ihr mir einfach euere DIG-Adresse, die ihr natürlich notiert habt in den Kommentaren oder per Discord! Ich sende euch dann 2 DIG wovon ihr dann einen für die Erstellung des Validator’s nutzen könnt.
Wenn ich euch die DIG gesendet habe UND die Blockchain auf eueren System vollständig Synchronisiert ist, geht es weiter mit dem Befehl:
digd tx staking create-validator --amount 1000000udig --from DEINE ADRESSE --pubkey 'DEIN PUB KEY' --commission-rate 0.1 --commission-max-change-rate 0.1 --commission-max-rate 1 --min-self-delegation 1 --keyring-backend test --chain-id dig-testnet-2
WICHTIGE INFO ZU DEM BEFEHL:
1DIG = 1000000udig.
Deinen zu benutzenden PUB KEY siehst du mit dem Befehl:
digd tendermint show-validator
BEISPIELE:
DEIN PUB KEY:
{"@type":"/cosmos.crypto.ed25519.PubKey","key":"foEwJVVSLdeYwdh8vT9ileUDDpn/XKTo1CUqaFt78tw="}
DEINE ADRESSE:
dig1uvwt062hfrmg893dr8n347rvt7w02n9gsgane0
Der Befehl würde mit den Beispiel Keys dann so aussehen:
digd tx staking create-validator --amount 1000000udig --from dig1uvwt062hfrmg893dr8n347rvt7w02n9gsgane0 --pubkey '{"@type":"/cosmos.crypto.ed25519.PubKey","key":"foEwJVVSLdeYwdh8vT9ileUDDpn/XKTo1CUqaFt78tw="}' --commission-rate 0.1 --commission-max-change-rate 0.1 --commission-max-rate 1 --min-self-delegation 1 --keyring-backend test --chain-id dig-testnet-2
ACHTUNG:
Bitte nicht die Beispiel Keys benutzen!
Hier ist verwirrend, dass man vorher beim Validator erstellen einen anderen Pub Key angezeigt bekommen hat, aber mit dem geht das nicht!
Wenn das nun ohne Fehler abgesendet werden konnte, kannst du auf der Webseite http://95.217.196.54:3069/validators hoffentlich deinen Namen lesen. Wenn nicht, gebt mir bitte Rückmeldung.
Fertig!
Now the English translation
Preface
So, now that I have a great Ubuntu server set up on my VM that I can control via SSH, I was able to do the DIG installation on a VPS today. Was not so much different than on a RasPi.
I hope I can help some of you who did not know what to do or who unknowingly made a mistake.
ATTENTION:
This guide contains only the FIRST SETUP, for a recovery are (yet) no info included, because I have not tried this yet!
Installation on a VPS
Step 1:
You log in to your VPS via SSH as usual. For the installation of the DIG-Chain some programs are necessary, which we install now.
apt-get install screen
apt-get install git
wget -q -O - https://git.io/vQhTU | bash -s -- --version 1.16.4
After this, please close the SSH connection once and reopen it.
Step 2:
As soon as the installation of the programs is done, we can start with the DIG installation.
For this, 3 commands are necessary, which you enter step by step.
git clone https://github.com/faddat/dig
cd dig/cmd/digd
go install .
ATTENTION:
When using the go install . command, an error may occur that causes the command prompt not to appear by itself. If this doesn't happen after more than 5 minutes and you can't enter any more commands, use the CTRL + C key combination. But only if you have been waiting for a long time and the command prompt does not appear by itself!
Step 3:
Now we continue with the creation of the accounts:
digd init YOUR GREAT NAME
(Who now really writes here "YOUR GREAT NAME" instead of his own "Nick-Name", he will be slapped by me with his own hands.😂)
digd keys add validator
ATTENTION:
The keys have to be written down as well as the mnemonic phrase (24 words)!
Step 4:
Now there are 7 commands that you have to execute. Please follow this step by step, even if nothing is displayed on the screen.
cd ~/dig
cp networks/testnet-2/genesis.json ~/.dig/config
wget https://github.com/faddat/dig/releases/download/latest/dig_latest_linux_amd64.tar.gz
tar xvf dig_latest_linux_amd64.tar.gz
mv digd /usr/bin
digd unsafe-reset-all
wget -O ~/.dig/config/genesis.json https://raw.githubusercontent.com/faddat/dig/master/networks/testnet-2/genesis.json
INFO:
When entering tar xvf dig_latest_linux_amd64.tar.gz you may get a message that it could not be executed because the file already exists. Just ignore this.
Step 5:
So, now the rough is done, let's see if everything can be started. Since DIG does not run in a Docker like BLURT, we now use the SCREEN software to run DIG in a container.
Create a screen container:
screen -S dig
Start the DIG Chain:
digd start --p2p.persistent_peers 2d472c2fa9675ff9de92e95b00bc3169210da437@135.181.105.82:26656,140e9a1a85d33f295e7b55057ff328713d59c879@209.145.58.159:2090,be1a53d8abcf6efe22316ba2caf83a353777cfdc@109.235.70.204:26656,dc3508feaeae1feb649d6d50c24093d9992e82bb@95.115.26.180:26656,739350b0839f934b0b32a35bb0ba431c8df4b96e@116.118.48.245:26656,88eafddc59583f9bfdd6c3c0416cd9c57a9093e3@116.118.48.246:26656,cbd94e38b4d9bbb2758140c42bc839d56d71787a@13.229.181.25:26656,9cf4e1a049a6569ae8d86967727ee730a329bf8c@194.163.163.74:26656 --p2p.upnp true
Now the chain should rattle down on the screen. If this happens, the setup is successful and you are already a DIG NODE!
So we can close the display with the key combination:
CTRL +a +d
ATTENTION:
The next step is to set up the actual Validator's / Witness (as it would be called on Blurt). For this, however, DIG is needed on your account. Therefore from here on only continue, as soon as your account is no longer empty, for this you simply send me your DIG address, which you have of course noted in the comments or via Discord! I will then send you 2 DIG of which you can then use one for the creation of the validator's.
When I have sent you the DIG AND the blockchain is fully synchronized on your system, you can continue with the command:
digd tx staking create-validator --amount 1000000udig --from YOUR ADDRESS --pubkey 'YOUR PUB KEY' --commission-rate 0.1 --commission-max-change-rate 0.1 --commission-max-rate 1 --min-self-delegation 1 --keyring-backend test --chain-id dig-testnet-2
IMPORTANT INFO ABOUT THE COMMAND:
1DIG = 1000000udig.
You can see your PUB KEY to use with the command:
digd tendermint show-validator
EXAMPLES:
YOUR PUB KEY:
{"@type":"/cosmos.crypto.ed25519.PubKey","key":"foEwJVVSLdeYwdh8vT9ileUDDpn/XKTo1CUqaFt78tw="}
YOUR ADDRESS:
dig1uvwt062hfrmg893dr8n347rvt7w02n9gsgane0
The command would then look like this with the example keys:
digd tx staking create-validator --amount 1000000udig --from dig1uvwt062hfrmg893dr8n347rvt7w02n9gsgane0 --pubkey '{"@type":"/cosmos.crypto.ed25519.PubKey","key":"foEwJVVSLdeYwdh8vT9ileUDDpn/XKTo1CUqaFt78tw="}' --commission-rate 0.1 --commission-max-change-rate 0.1 --commission-max-rate 1 --min-self-delegation 1 --keyring-backend test --chain-id dig-testnet-2
ATTENTION:
Please do not use the example keys!
Here is confusing that you have previously when creating validator another Pub Key displayed, but with this does not work!
If this could now be sent without errors, hopefully you can read your name on the website http://95.217.196.54:3069/validators. If not, please give me feedback.
Done!
Member of Opfergnome-Witness-Team on Blurt

Danke für deine Arbeit doti . GUt das du das in 3 Teile gemacht hast . Als 1 Post zu heftig
Gerne doch.
Jo, alle 3 zusammen hätte viele Mausräder gekillt :)
Herzlichen Dank für deine viele Arbeit!
Immer gerne.
Bin froh, dass die 3 Teile nun vorerst fertig sind. Die Tage kommt noch ein Bonus Kapitel mit allen mir bekannten Befehlen, wie Claimen, Token Senden, Delegieren usw.
Super!
Angeblich habe ich heute unterschrieben, von DHL-Express den RasPi empfangen zu haben.
Nun kann ich bei über 40 Grundstücks-Mitbewohnern nachfragen, ob sie meinen RasPi entgegen genommen haben.
Oft ist es echt nur zum Kotzen :(
Oh man.
Die DHL ist doch echt immer schlimmer. Hoffe findest den dann recht fix.
DHL ist eigentlich bei mir ok.
Das war leider DHL-Express.
Ich vermute, das war nicht der gewohnte Fahrer.
Wenn er wenigstens eine Nachricht hinterlassen hätte, wem er es gegeben hat.
In den Online-Daten ist zu sehen, dass er angegeben hat, dass ich persönlich unterschrieben hätte :(
Seit die DHL es bei mir witzig findet, meine nicht zustellbaren Pakete (obwohl immer einer zu Hause ist) an eine Abholstation am anderen Ende der Stadt (glaube ich sogar andere Postleitzahl) abzugeben, die ich dann ohne Auto / Bus abholen darf, bin ich auf dem Verein nicht mehr so gut zu sprechen. :)
Aber besser als der DPD, da wird bei mir von einem Oger oder einem Zyklopen geliefert, denn die Pakete schauen immer aus, als 3 mal durch den Wolf gedreht. :)
Bei uns dürfen die Zusteller sogar selber unterschreiben, das Paket vor der Tür lassen und das zählt als persönlich unterschrieben / übergeben. Also seit Corona. War da auch schon mal auf der Suche nach einem Angeblich zugestellten Paket, das dann nach beschwerde an der Hotline am nächsten Tag auf einmal ohne Laut vor der Tür lag. :)
Haha ... der RasPi war in meinem Briefkasten.
Auf die Idee wäre ich nicht gekommen, da ich nicht dachte, dass er dort mit Verpackung rein passt.
Da habe ich dem Zusteller ganz schön unrecht getan.
Jetzt muss nur am Montag noch die Karte ankommen. Dann werde ich fit sein ;-)
LOL.
Ok, darauf wäre ich auch nicht gekommen. Aber schon interessant, wie dein Briefkasten unterschreiben kann. :D
Congratulations, your post has been curated by @r2cornell-curate. Also, find us on Discord
Felicitaciones, su publication ha sido votado por @r2cornell-curate. También, encuéntranos en Discord
Thank you for using my upvote tool 🙂

Your post has been upvoted (34.83 %)
Delegate more BP for better support and daily BLURT reward 😉
@tomoyan
https://blurtblock.herokuapp.com/blurt/upvote