All Rights Reserved.
All the uses of the contents herein - and their derivatives - are strictly prohibited without the explicit consent of the author, except for dissemination without modification through media and social media channels.
The technical information you find in this article is the result of personal experiences or research. Always delve further with other sources and experiences to have a more complete view of possible techniques or scenarios.
Some of the information/images you find in this article may have a joking nature: don't consider them an instrument of offence because they weren't conceived or distributed with that purpose, but only to lighten a post that could prove too technical.

Hello!
Today I'm back with the third real episode of my space dedicated to building graphic design using Inkscape. Some weeks ago I launched the topic with an introductory post that you can find CLICKING HERE. Inside, you can get information about the two fondamental elements of this kind of initiative:
1. Creation of hypothetical logos as an example
2. Using the vector graphics program Inkscape
I won't repeat everything you can find there, but - basically - my article will try to show some of the basic actions of Inkscape during the creation of an imaginary logo; a logo that will often have playful features, and therefore I invite you not to take this characteristic as a desire to offend someone.
Let's start with the first part, the tutorial-shaped one.
Words VECTORIZATION in Inkscape
In this third appointment, I thought I would show the process necessary to transform one or more words into single vector elements. To better understand vector elements, you will find a dedicated space in the introductory article I previously linked. Inside, you will also find an explanation of how to write words within the Inkscape application and how to change fonts.
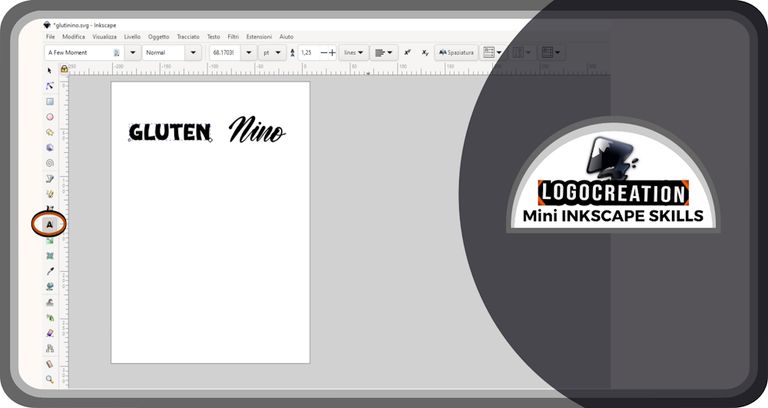
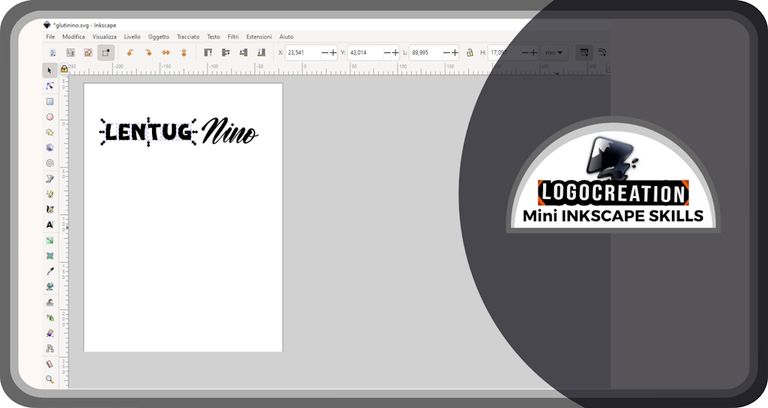
After opening the program on our computer, we look for the text box, the one with the representation of a capital A in bold style (which, as I usually do with the areas you have to pay attention, I highlighted with a red and black circular outline). We click with the left button, then move the cursor to the white page and click again with the left button: after typing the letters on our keyboard, the words appear on the page. I leave an example with two different words that you can see in the image below.
Then, let's click on the button representing an arrow, which you will find on the side in the column to your left: it's the SELECTION tool, a button that allows you to select the objects you want to act on. So, move the cursor to a word and click on it with the left mouse button. A dotted rectangle will appear around the word, delimited by arrows pointing in different directions. If we go to these arrows and click – CONTINUING TO HOLD CLICKED the left mouse button – and then move the cursor, we can resize, enlarge, reshape, etc., the word we have selected. This process doesn't alter the quality of the outlines of the letters, and from this point of view it can be considered an element similar to a vector. However, if we proceed in detail, it ISN'T a vector element in the strict sense, since the connection points between one line and another (the lines that constitute the outlines of the letters) cannot be modified.

The VECTOR elements properly so-called are instead those defined by a PATH, a sort of outline that delimits an element (which could be a word, a shape, etc., depending on the cases). These paths are no more than the union of several points through straight or curved lines.
To transform an object (such as a word) into a path, you must have selected it as mentioned a few lines ago; then, move the cursor to the top of the screen, where the Inkscape application displays a row full of names. We have to left-click on the word "PATH" (see the image above when you see it as "tracciato" in Italian).
At this point, a drop-down window will open. We have to move the cursor over the box marked "From object to path" and click with the left button.

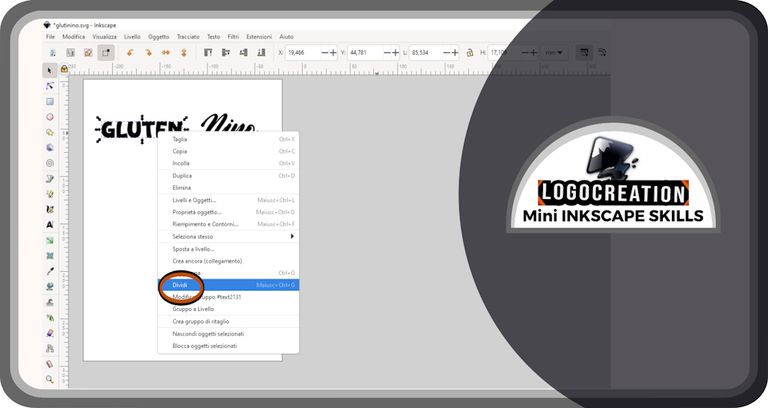
At this point, our text became a path. However, the difference isn't immediately apparent, because the text will be surrounded by the same dotted line seen previously. But something has changed: what?
To understand this, we must carry out a further action: we move the cursor over the selected object and click - be careful - with the RIGHT BUTTON of the mouse. In this way, a new drop-down window will appear in which we will have to locate the button with the wording "Split" ("Dividi" in Italian); by clicking with the left mouse button on it, we will have the first evidence of a change.
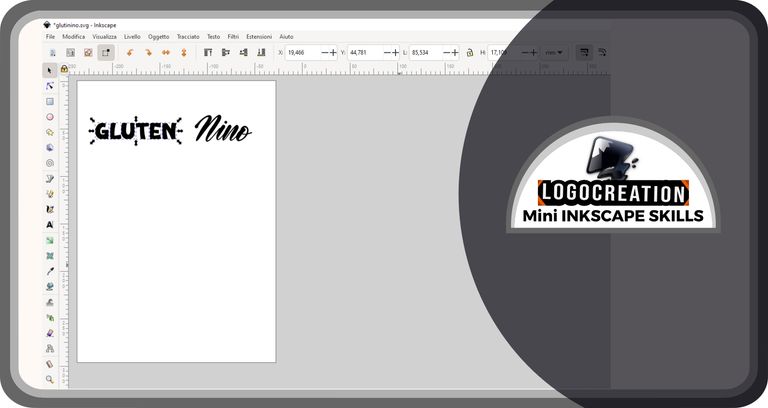
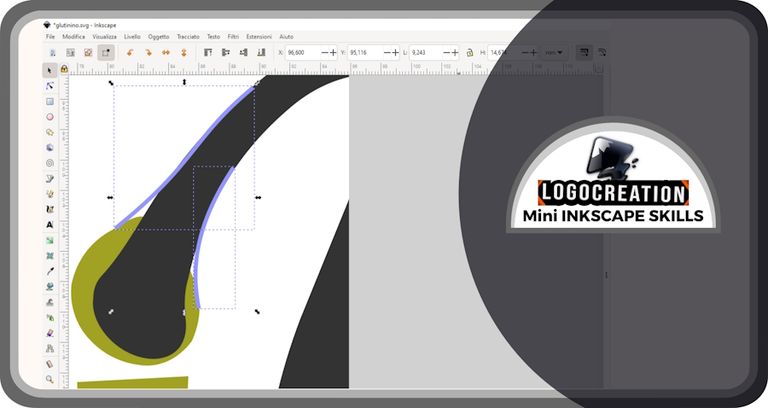
This evidence can be found in the image below. At this point, each letter that made up the text we initially typed will be surrounded by a dotted line. This has a single meaning: each element without continuity with the others - within what was our written word - becomes an element in itself. Thus: each letter becomes an element in itself, sometimes even more than one (the "i" - for example - will form two different elements, specifically a circular shape above a shape with the features of an auction).
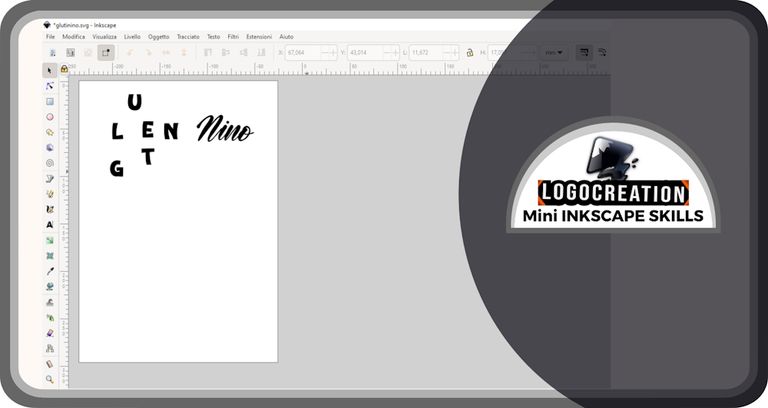
To give a simple example of what we can do at this point, I wanted to make a puzzle and recompose it differently. In the pair of images below you will find the first phase - in which I deselected by clicking with the cursor on the white page, then reselected and moved the letters one by one - and the second, in which I recomposed (with the same letters transformed into paths) a new word (without any sense in Italian, but useful only to explain what I can do with the letters of a word transformed into a path).
Then, if you want to recompose the word as a single element (which will allow you to act on it as if it were a whole) there are two procedures:
- the "GROUP" button, which you can activate by selecting an object with the right mouse button, then searching for the button in the drop-down window that opens, and clicking on it;
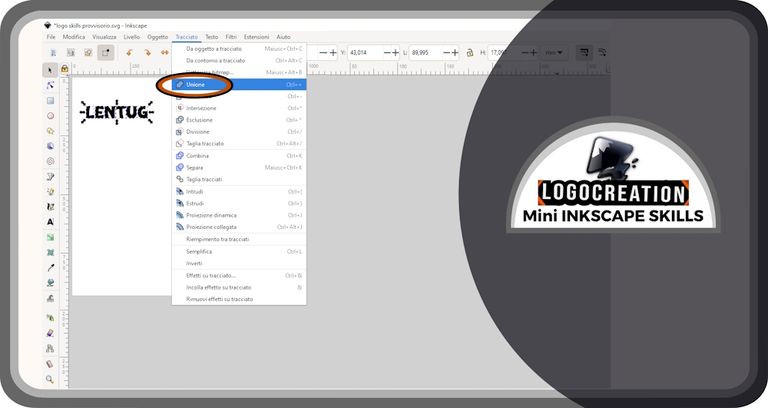
- the "UNION" button, which you can activate from the top bar by clicking on the "TRACE" section seen previously. Inside the drop-down window, you will find the button with the wording – precisely – "Union".
Using the procedure in the first case, the letters will continue to be single elements, and you can return to treating the letters as single elements later; you will have the advantage of being able to act on them as a whole, with some exceptions. This is the disadvantage: you cannot apply many actions, which can only be used on the single vector element.
The second - the Union - brings the united elements to be a single element, but it is no longer possible to return to the starting situation in many of the most common cases, except with cumbersome processes. We will see some examples in the future. It is recommended if the element reached is the final one or where you want to apply effects/actions that impact it entirely.
New Logo: "GLUTININO"
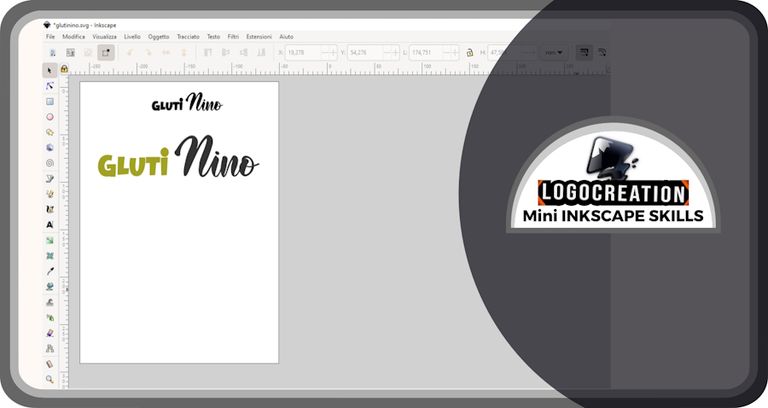
The second part of this article deals with the creation of a hypothetical logo. A logo in which I have largely used the procedures mentioned so far. In this case, my imagination went to a Gluten Free shop launched by Mr. Nino; a shop therefore named GLUTININO.
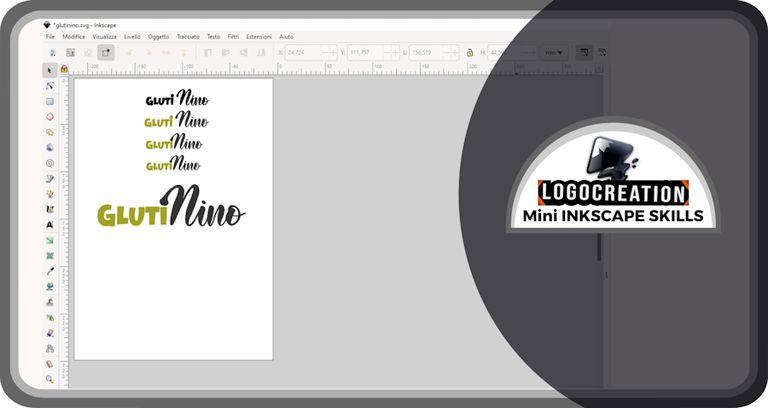
To churn out this logo, I used two different fonts together paired. I wrote two words: "Gluti" and "Nino".

I then looked for a color combination I liked, partly going with a light tone that could recall wheat or a green environment.
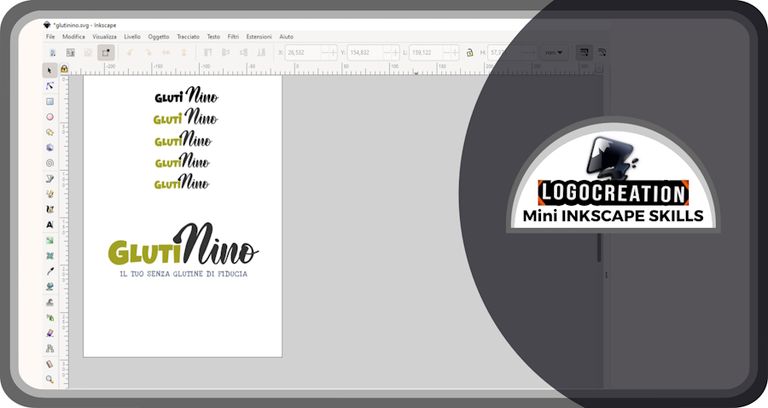
I then used the transformation into a path and the division of the individual letters, and resized the initial letters into something more imposing. On top of that, for the word "Gluti", I had an additional idea that needed this vector transformation to be realized.
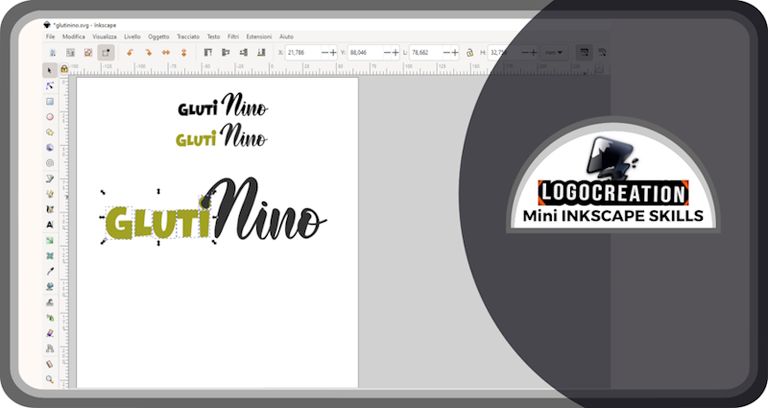
The idea I was mentioning is the union between the dot (above the sort of shaft of the "i") and the letter "N" of "Nino". I therefore used lines and shapes that could make this union more harmonious.
Finally, I added a small promotional slogan, which means "Your trusted gluten-free" in Italian. How does that sound to you?
And this time too we reached the end line. I hope the explanation on how to vectorize words was clear and that it can be useful if you want to start a career as a creator with Inkscape. Having said this, I greet you and leave you the links to my previous three posts:
Bye!
Congratulations, your post has been upvoted by @dsc-r2cornell, which is the curating account for @R2cornell's Discord Community.
Enhorabuena, su "post" ha sido "up-voted" por @dsc-r2cornell, que es la "cuenta curating" de la Comunidad de la Discordia de @R2cornell.