
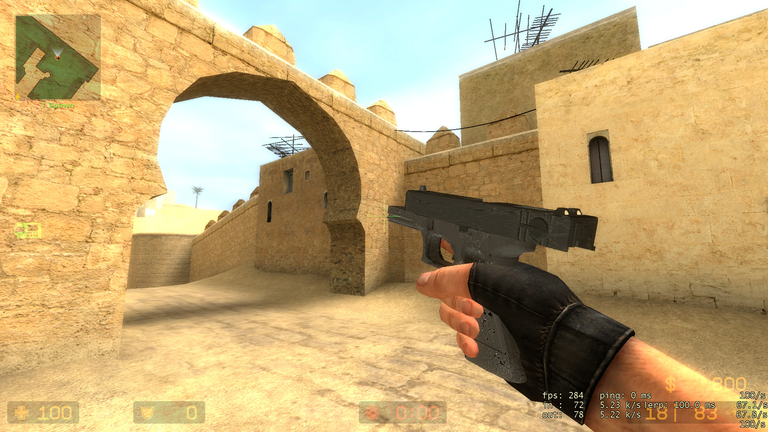
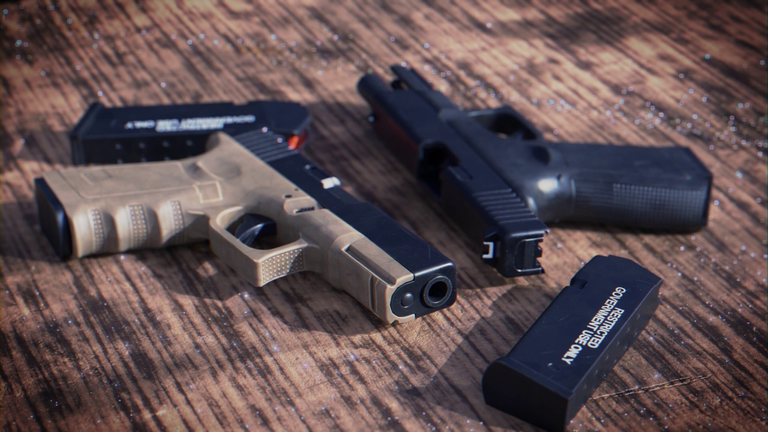
Si vamos a hacer un juego FPS es fundamental el detalle que debe tener el arma y la mano en el juego. Sabiendo que es el modelo visible es donde más se acentúa el detalle.
El programa fue inicialmente distribuido de forma gratuita pero sin el código fuente, con un manual disponible para la venta, aunque posteriormente pasó a ser software libre. Actualmente es compatible con todas las versiones de Windows, Mac OS X, Linux, Solaris, FreeBSD e IRIX.Tiene una muy peculiar interfaz gráfica de usuario, y se puede realizar la configuración personalizada de la distribución de los menús y vistas de cámara.
Parece una obviedad, pero el detalle tiene un límite, ya que no pueden usarse herramientas de subdivisión de malla, ni pueden superar una cantidad de polígonos, lo ideal sería que no supere los 4.000 sumando el arma y la mano.
Un ejemplo de detalle sería el Call of Duty donde el arma y la mano no superan los 5000 polígonos.
La magia detrás de esto, lo hacen los mapas normales para obtener mayor resolución sin tener que sobrecargar el modelo con mas detalles, sino fuera por esta técnica, serían muy pocas las maquinas que soportarían los juegos.
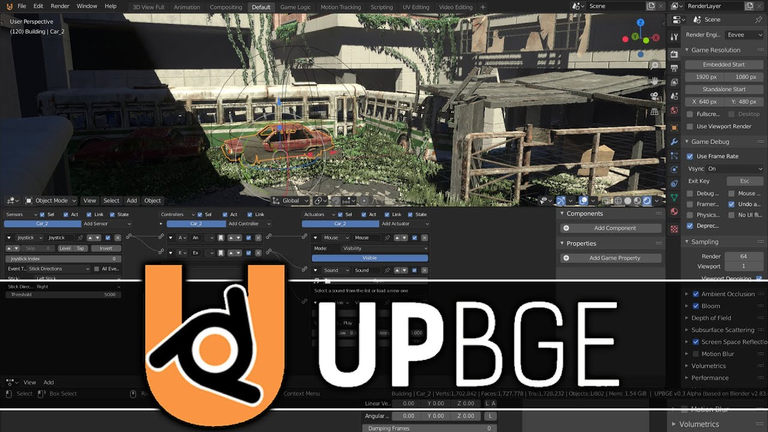
Blender ademas de modelar y animar, tiene un motor de juego excelente, Blender Game Engine, uno de los motores para el desarrollo de videojuegos y animación en 3d.
Blender como tal integra toda la animación y los modelos 3d en su entorno de juego pudiendo así interactuar directamente con lo que se realiza. Entre la muchas características de BGE, también integra una serie de bloques lógicos, de modo que aun quien no sepa nada de programación puede hacer un juego completamente profesional.
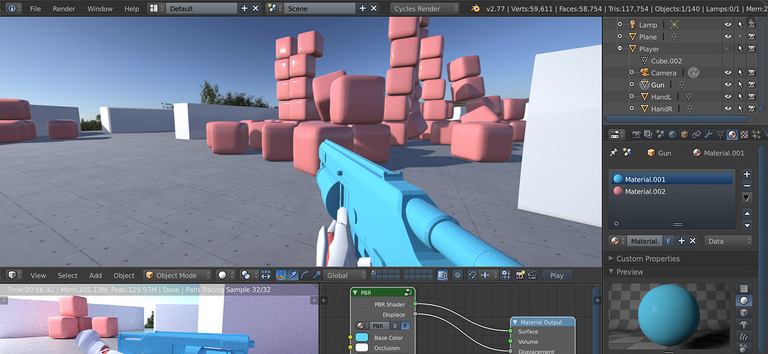
Se crea el modelo de un arma, en este caso una Glock 17 con sus respectivas texturas, desde la opción Normal dentro del campo de Texture le doy un relieve a la pistola.
Lo mismo con la mano, para poder ver las texturas en el BGE debemos activar la opción GLSL dentro las preferencias de Display presionando la tecla N.
Pasamos ahora a unir los dos modelos y se añade un sistema de huesos a la pistola para poder animarla.
La animación se compone de 9 frames, esto es importante ya que se debe tener una idea de cuanto tiempo dura cada disparo.
Se puede utilizar un video para tener noción del tiempo:
Luego la animación terminada, Hay que redimensionar los frames para que tengan un velocidad normal así que los dejé en 9.
Abriendo el Game Engine.
Veamos paso a paso todo el procedimiento a seguir en este tutorial.
1.- Pasamos del modo Default al BGE.
2.- Cambiamos la ventana de render a Blender Game.
3.- Apartado del editor, aqui crearemos los scripts que luego utilizaremos en nuestros juegos.
4.- Logic Bricks, la parte lógica del BGE.
5.- En la primer columna del Logic Bricks se encuentran los sensores, estos son los dispositivos de entrada, Mouse, teclado, joystick, como también los elementos de detección de impactos, radar, propiedades etc.
6.- Funciones lógicas del motor, And, OR, XOR,XNAN... Ademas de usar propiedades y los scripts de Python.
- Actuators, en está columna controlaremos las acciones de los personajes y sus movimientos.
De igual forma con todo lo que interactue dentro del escenario del juego.
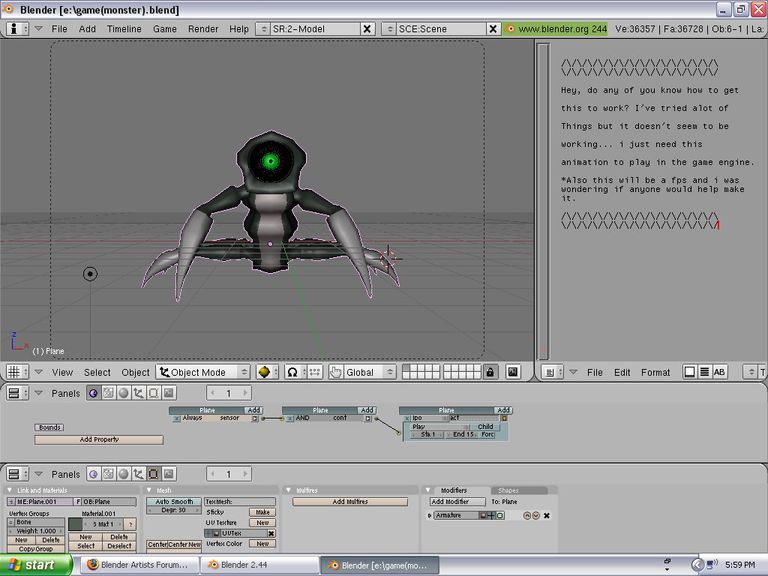
En la última imagen he seleccionado el Armature que controla a la mano, la pistola está emparentada a los Huesos de la mano, o sea que toda la acción dentro del motor de juegos estará sujeta a lo que acontezca al Armature "mano".
8.- A la izquierda estan las propiedades que podemos añadirle al juego, para dar un ejemplo práctico. si queremos que el arma solo tenga 20 tiros, vamos a añadirle una propiedad Integer con el valor 20 que luego utilizaremos.
Integer: propiedad que solo admite números enteros (Integer): 1 1000 -1 -369....
Float: admite números con decimal: 3,1416. 25,59...
String: "cadena" propiedad usada para los textos.
Boolean: Operador lógico que solo admite dos estados, True y False (verdadero o falso)
Botón presionado... True.... Botón no presionado.... False.
Timmer: contador de tiempo.
9.- Vamos a crear una propiedad tipo Integer para poder llevar el tiempo que dura la animación del disparo.
Esto es para que no se encimen las animaciones y para que no se entrecorte el sonido al apretar sucesivamente el mouse.
Se pone el nombre de "disparo" con un valor de 9 (tiempo que dura la animacion). Luego se activa la ventanita a la derecha del número para poder observar su acción dentro del motor de juegos. (Primero hay que agregar Show debug Poperty dentro de la opción Game arriba a la izquierda de la pantalla).
10.- Añadimos un sensor para el mouse, al ratón le daremos un evento Left botton, para que controlemos la acción pulsando el botón izquierdo del mouse.
11.- Ahora le toca el turno a que la computadora piense, se agrega un controlador expression y le pondremos los valores que se ven en la imagen.
Si al presionar el botón izquierdo del mouse: Mouse == True
Y si la propiedad de disparo es igual a 9, entonces se ejecuta la acción, de lo contrario hay que esperar que
el proceso termine.
12.- Se agrega un Actuator, Action con el nombre de la animación correspondiente, configurando el tiempo inicial y final, activando también la propiedad "disparo", esto hará que la propiedad sea controlada por los frames que tiene el Action.
Por último se selecciona primeramente la pistola, luego con el botón secundario y el Shift mantenido.
Seleccionamos el hueso Armature mano, ahora nos habilitará la opción de poder linckear la pistola, con la salida de la expresiónn que controla la acción.
Se finaliza con un sonido que se puede descargar de SoundBible, y dandole play end en las opciones, linkeandolo con la expression.
Contando las Balas que se utilizan.
Dijimos que las propiedades nos permiten controlar los valores que le podemos asignar a los objetos.
Vamos a crear un contador de balas, si las balas llegan a 0 la acción se corta.
Agregaremos una propiedad interger con el valor 20 que serán las balas disponibles
Le asignamos la expresión "balas >0" para que la secuencia continúe mientras "balas" sea mayor que "0".
En Actuators pondremos una propiedad colocando "balas" en el campo property, le daremos "add" y que vaya restando balas con -1.
Presionamos P, y vemos como el cargador de balas va bajando a medida que disparamos.
Botón de recarga.
Para terminar la secuencia de disparo.
Se agrega un Sensor Mouse con el evento del botón derecho, se crea otra expression. Donde le diremos a la maquina que se active si el botón derecho está presionado
Mouse1==True y las balas sean igual a cero, balas==0.
Pasando a la propiedad, con la opción Assign y un valor de 20.
Bueno hasta aquí son los controles simple de la mano y su arma, luego esto sigue... pero esto ya es otra historia....

If we are going to make a FPS game it is fundamental the detail that the weapon and the hand must have in the game. Knowing that it is the visible model is where the detail is more accentuated.
The program was initially distributed for free but without the source code, with a manual available for sale, but later became free software. It is currently compatible with all versions of Windows, Mac OS X, Linux, Solaris, FreeBSD and IRIX, has a very peculiar graphical user interface, and custom configuration of the layout of menus and camera views is possible.
It seems obvious, but the detail has a limit, as you can not use mesh subdivision tools, nor can exceed a number of polygons, ideally not exceeding 4,000 adding the weapon and the hand.
An example of detail would be Call of Duty where the weapon and hand do not exceed 5000 polygons.
The magic behind this is that normal maps do it to obtain higher resolution without having to overload the model with more details, if it were not for this technique, very few machines would support the games.
Blender besides modeling and animating, has an excellent game engine, Blender Game Engine, one of the engines for the development of video games and 3d animation.
Blender as such integrates all the animation and 3d models in its game environment being able to interact directly with what is being done. Among the many features of BGE, it also integrates a series of logic blocks, so that even those who know nothing about programming can make a completely professional game.
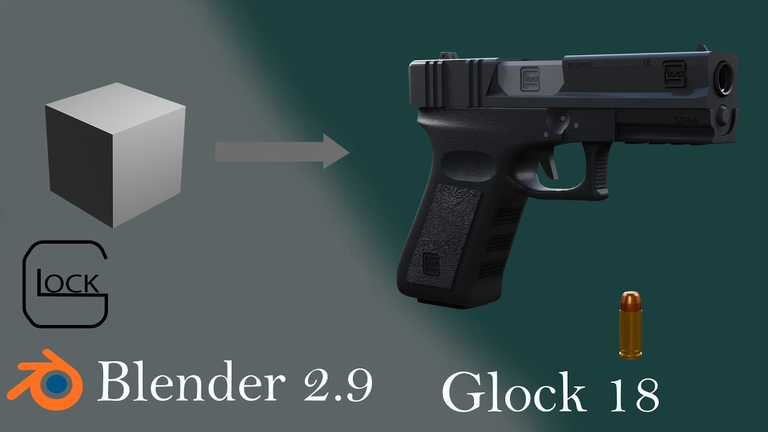
The model of a weapon is created, in this case a Glock 17 with its respective textures, from the Normal option in the Texture field I give a relief to the gun.
The same with the hand, to be able to see the textures in the BGE we must activate the option GLSL inside the Display preferences pressing the N key.
Now we join the two models and we add a bone system to the gun to animate it.
The animation is composed of 9 frames, this is important to have an idea of how long each shot lasts.
You can use a video to have an idea of the time:
After the finished animation, you have to resize the frames so that they have a normal speed so I left them in 9.
Opening the Game Engine.
Let's see step by step the whole procedure to follow in this tutorial.
1.- Switch from Default mode to BGE mode.
2.- We change the render window to Blender Game.
3.- Editor section, here we will create the scripts that later we will use in our games.
4.- Logic Bricks, the logical part of the BGE.
5.- In the first column of the Logic Bricks are the sensors, these are the input devices, mouse, keyboard, joystick, as well as the elements of detection of impacts, radar, properties etc.
6.- Logic functions of the engine, And, OR, XOR, XNAN.... In addition to using properties and Python scripts.
Python scripts.
7.- Actuators, in this column we will control the actions of the characters and their movements.
In the same way with everything that interacts inside the scenario of the game.
In the last image I have selected the Armature that controls the hand, the gun is related to the Bones of the hand, that is to say that all the action inside the game engine will be subject to what happens to the Armature "hand".
8.- To the left are the properties that we can add to the game, to give a practical example. If we want that the gun only has 20 shots, we are going to add an Integer property with the value 20 that later we will use.
Integer: property that only admits integers (Integer): 1 1000 -1 -369....
Float: supports numbers with decimal: 3,1416. 25,59....
String: "string" property used for texts.
Boolean: Logical operator that only admits two states, True and False.
Button pressed... True.... Button not pressed.... False.
Timmer: timer.
9.- We are going to create a property type Integer to be able to take the time that lasts the animation of the shot.
This is so that the animations are not overlapped and so that the sound is not chopped when successively pressing the mouse.
Set the name of "trigger" with a value of 9 (animation time). Then we activate the little window to the right of the number to be able to observe its action inside the game engine (first we have to add Show debug Poperty inside the Game option at the top left of the screen).
10.- We add a sensor for the mouse, to the mouse we will give a Left button event, so that we control the action pressing the left button of the mouse.
11.- Now it is the turn of the computer to think, we add an expression controller and we will put the values that you can see in the image.
If when pressing the left button of the mouse: Mouse == True
And if the trigger property is equal to 9, then the action is executed, otherwise we have to wait that
the process finishes.
12.- An Actuator, Action is added with the name of the corresponding animation, configuring the initial and final time, activating also the property "trigger", this will make that the property is controlled by the frames that the Action has.
Finally we select first the gun, then with the right button and Shift held.
We select the bone Armature hand, now it will enable us the option of being able to linckear the pistol, with the exit of the expressionn that controls the action.
It is finished with a sound that can be downloaded from SoundBible, and giving it play end in the options, linking it with the expression.
Counting the Bullets that are used.
We said that the properties allow us to control the values that we can assign to the objects.
We are going to create a bullet counter, if the bullets reach 0 the action is cut.
We will add a property interger with the value 20 that will be the available bullets.
We assign the expression "bullets >0" so that the sequence continues as long as "bullets" is greater than "0".
In Actuators we will put a property placing "bullets" in the property field, we will give it "add" and it will subtract bullets with -1.
We press P, and we see how the magazine of bullets goes down as we shoot.
Reload button.
To finish the firing sequence.
We add a Sensor Mouse with the event of the right button, we create another expression. Where we will tell the machine to be activated if the right button is pressed
Mouse1==True and the bullets are equal to zero, bullets==0.
Passing to the property, with the option Assign and a value of 20.
Well until here they are the simple controls of the hand and its weapon, then this follows... but this already is another story....
Fuentes/Sources:
Translated with www.DeepL.com/Translator (free version)
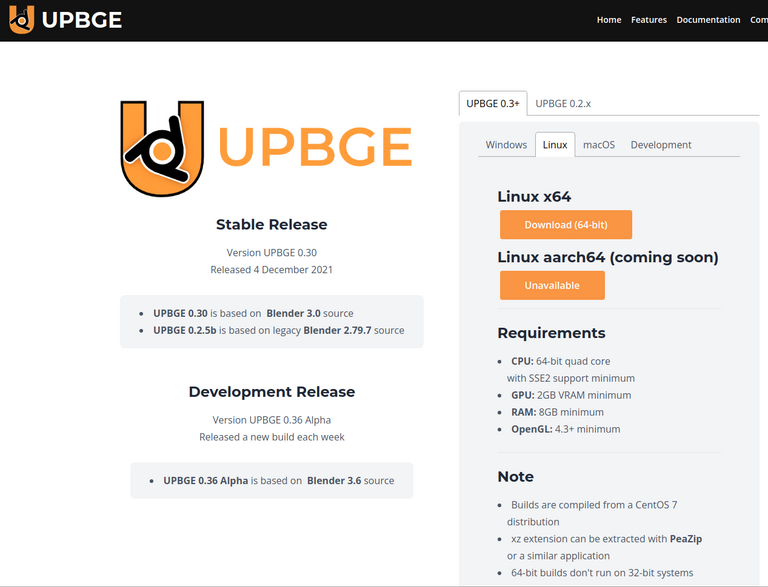
Home Page oficial del proyecto: /Official home page of the project: UPBGE
Descargas / Downloads:
Screenshots / Capturas de pantallas:
| Blogs, Sitios Web y Redes Sociales / Blogs, Webs & Social Networks | Plataformas de Contenidos/ Contents Platforms | |
|---|---|---|
| Mi Blog / My Blog | Los Apuntes de Tux | |
| Red Social Twitter / Twitter Social Network | @hugorep |