A cheese board is the perfect centerpiece for any gathering, offering a mix of flavors, textures, and colors. Whether you're hosting a party or enjoying a cozy night in, creating a beautiful and delicious cheese board is easier than you think. Here’s how to do it!
🧀 Step 1: Choose Your Cheeses
Aim for variety in flavor, texture, and milk type (cow, goat, sheep). A good selection includes:
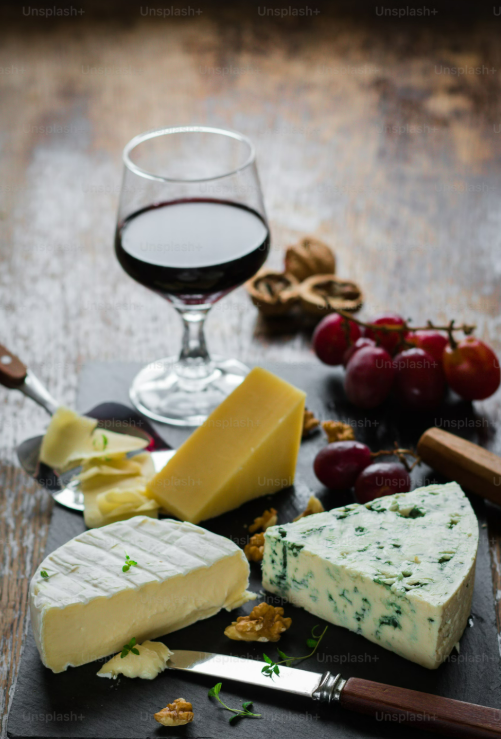
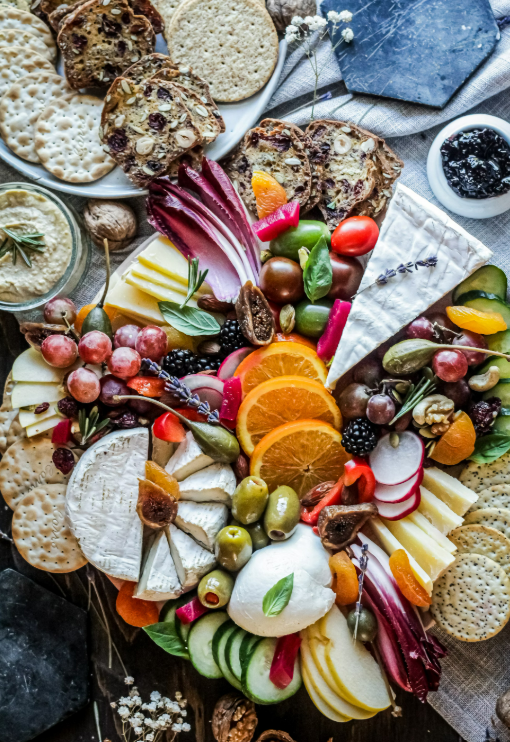
- Soft cheese: Brie, Camembert, Goat Cheese
- Semi-soft cheese: Havarti, Fontina, Gouda
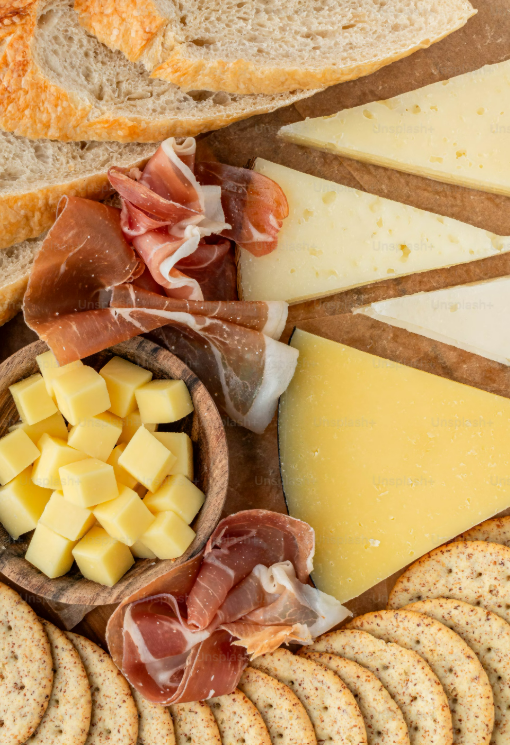
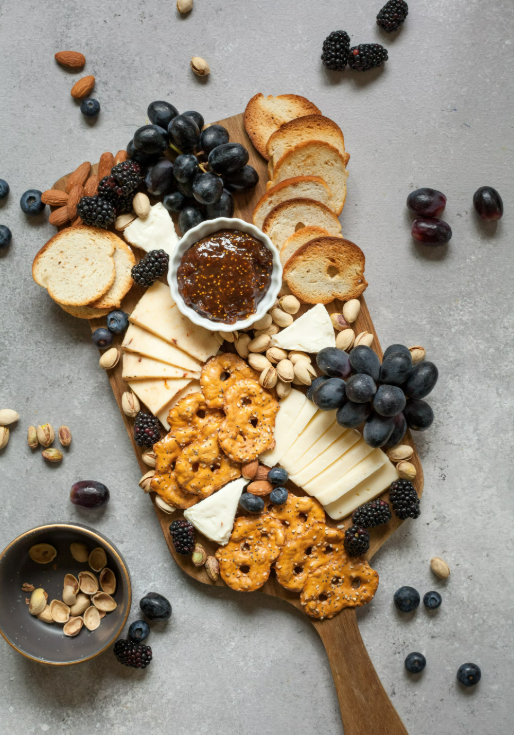
- Hard cheese: Cheddar, Manchego, Gruyère
- Blue cheese: Gorgonzola, Roquefort, Stilton
Tip: Include 3-5 types of cheese for balance and variety.
🍇 Step 2: Add Accompaniments
Enhance the cheese flavors with a mix of sweet and savory pairings:
🫒 Savory Options:
- Cured meats (salami, prosciutto)
- Olives, pickles, marinated artichokes
- Nuts (almonds, walnuts, cashews)
- Crackers, toasted baguette slices, breadsticks
🍯 Sweet Additions:
- Fresh fruits (grapes, berries, figs, apple slices)
- Dried fruits (apricots, dates, cranberries)
- Honey, fruit preserves, fig jam
🍽 Step 3: Assemble Your Cheese Board
- Start with the cheese: Place whole wedges or small slices evenly across the board.
- Add meats: Fold or roll slices for visual appeal.
- Place accompaniments: Scatter fruits, nuts, and extras around the cheese.
- Fill gaps: Use small bowls for spreads, olives, or nuts.
- Garnish: Add fresh herbs like rosemary or edible flowers for elegance.
Tip: Let cheese sit at room temperature for 30 minutes before serving for the best flavor.
🥂 Step 4: Pair with Drinks
- Wine: Red (Cabernet Sauvignon, Pinot Noir), White (Chardonnay, Sauvignon Blanc)
- Beer: Pale ales, stouts, or wheat beers
- Non-Alcoholic: Sparkling water, fruit juices, herbal tea
💡 Bonus Tips for the Perfect Cheese Board
✅ Use a wooden or marble board for a stylish presentation.
✅ Label cheeses so guests know what they're tasting.
✅ Arrange colors and textures for a balanced, eye-catching look.
✅ Keep a cheese knife for each type to prevent flavor mixing.