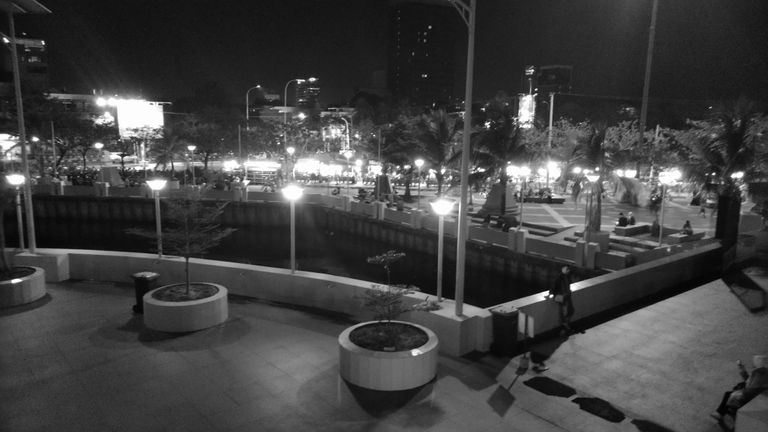
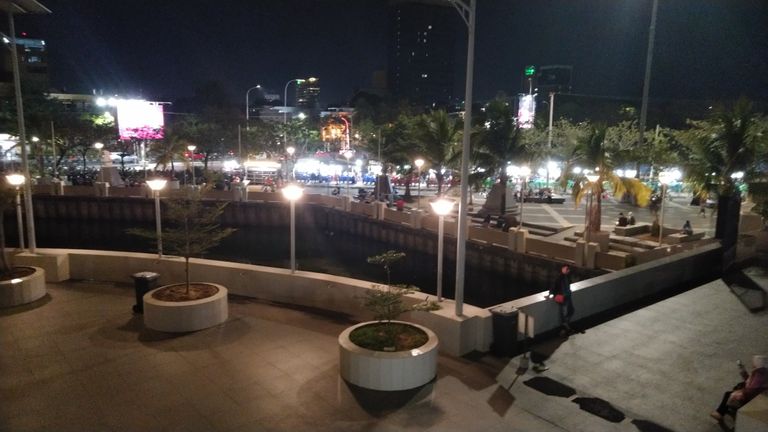
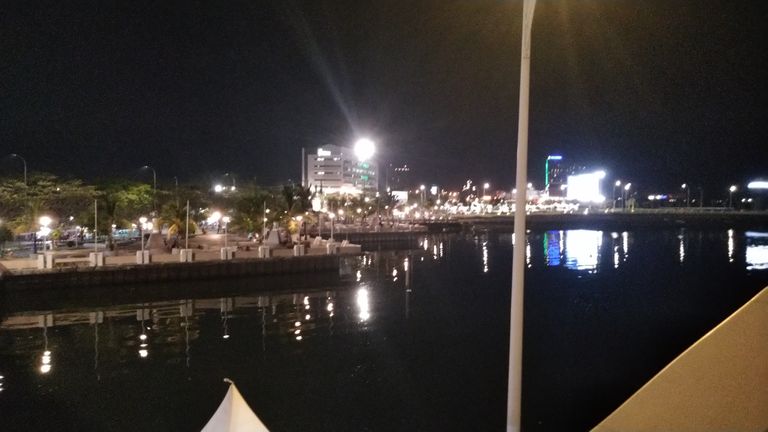
 Kamera Yang Saya Gunakan Asus Zenfone
Aturan Sederhana untuk diikuti dalam tantangan fotografi Hitam Putih ini:
- Foto Anda sendiri / diambil oleh Anda
- Gambar hitam putih yang mewakili makna positif dalam hidup
- Tampilkan satu atau dua gambar setiap hari
- Anda dapat menambahkan orang, jika Anda suka
- Tidak diperlukan penjelasan dari foto
- Gunakan tag #bnwphotograph tagar #hitamputih
bangsam

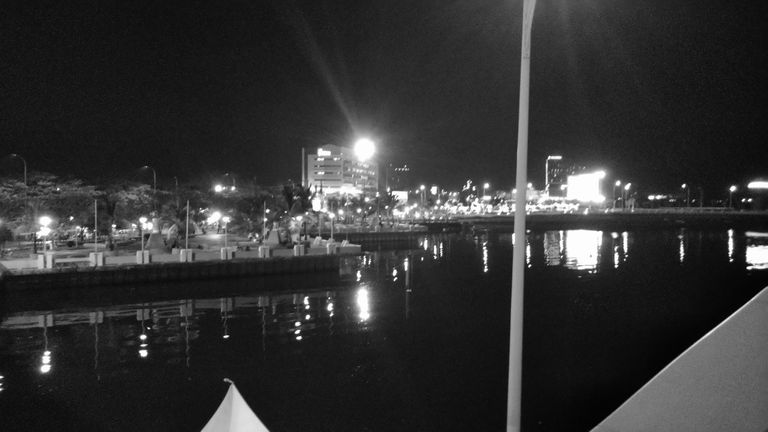 Device I used Was Asus Zenfone
Simple Rules to follow in this Black & White photography challenge:
• Your own photo
• Black and white images that represent any positive meaning in life
• Present one or two image every day
• You may add people, if you want
• No explanation
• Use tag #bnwphotograph
bangsam

5 Tips Dasar Memotret Foto Hitam Putih ini akan membantu untuk dapat memotret foto hitam putih dengan baik
1. Menentukan objek
Dalam menentukan objek yang akan difoto, kita harus dapat memilihnya terlebih dahulu. Hal yang harus diperhatikan dalam memilih objek untuk difoto ini adalah dengan melakukan identifikasi. Kita perlu tahu objek apa saja yang akan indah ketika dijadikan foto hitam putih, karena tidak semua objek akan bagus untuk dijadikan foto hitam putih. Seperti contoh, kita memilih pelangi sebagai objek untuk foto hitam putih, tentu tidak bagus karena pada dasarnya yang menarik dari pelangi itu adalah dari warnanya yang beraneka ragam yang membentuk suatu hal yang indah dipandang. Atau landscape matahari terbit dan terbenam, tentu akan kurang menarik jika dijadikan foto hitam putih karena yang menjadikannya indah itu karena terdapat perbedaan warna dari langit yang memberikan nuansa khas. Selain itu, objek yang ingin menonjolkan kesan warna pun tidak cocok dijadikan foto hitam putih, seperti halnya bunga yang berwarna-warni serta unsur fashion yang indah jika menggunakan warna sebagai daya pikat. Walaupun tidak menutup kemungkinan pula untuk dapat dijadikan foto hitam putih dengan konsekuensi ada sedikit nilai yang hilang jika memang kekuatannya ada pada warna yang beraneka ragam. Lantas objek seperti apa yang baik dijadikan foto hitam putih? Yaitu objek yang memiliki kesan sejarah, portrait yang ingin menunjukkan kesan dramatis dan detail (misalnya objek orang yang sudah tua), ataupun objek yang ingin menunjukkan kesan kontras yang kuat. Selain itu, objek lainnya pun bisa dijadikan foto hitam putih tergantung imajinasi pengambil foto.
2. Mengatur pencahayaan
Dengan mengatur pencahayaan sedemikian rupa kita dapat memandang objek lebih dalam lagi. Karena dengan adanya pencahayaan yang kuat tentu akan menghasilkan bayangan yang kuat pula. Mengatur pencahayaan memang tidak mudah. Oleh karena itu, dibutuhkna imajinasi yang baik pula dalam poin kedua ini. Ketika pencahayaan tepat maka foto yang dihasilkan tentu akan semakin baik, dan sebaliknya ketika pencahayaan kurang tepat maka hasil foto malah akan hancur. Dalam membuat foto hitam putih, kita dapat mengambil foto ketika matahari tepat berada diatas (pada siang hari). Hal ini tentu boleh dalam pengambilan foto hitam putih, karena akan lebih memperlihatkan bayangan yang kuat untuk menekankan garis dan bentuk pada komposisi. Atau bahkan kita bisa langsung mengambil foto ke arah matahari agar menghasilkan siluet yang indah tentu dengan imajinasi yang baik pula.
3. Gunakan RAW
Jika Anda memiliki jenis kamera yang bisa dengan format RAW maka maksimalkan dan sediakan memori yang besar untuk menyimpannya. Dengan menggunakan format RAW dalam tips foto hitam putih ini Anda akan lebih mudah mengotak atik file mentah sesuai yang diharapkan, selain itu Anda bisa lebih kreatif karena opsi pengolahan foto lebih banyak, dan diharapkan jika Anda memakai format RAW maka informasi yang tersimpan lebih banyak. pastikan Anda memilih setelan Monochrome Picture Control sehingga tampilan di LCD kamera terlihat hitam-putih. Namun pastikan saat file foto RAW dilihat di komputer maka Anda tetap memperoleh informasi warna. Inilah yang membedakannya dengan file JPG.
4. Gunakan ISO Rendah
Hal ini dilakukan untuk mengurangi efek noise pada foto ketika di konversi ke hitam putih. Noise adalah bintik-bintik kecil putih pada foto yang akan terlihat lebih jelas dalam foto hitam putih dibanding dengan pada foto berwarna. Dengan menggunakan ISO rendah maka noise ini akan diminimalisir sehingga kualitas foto menjadi maksimal. ISO rendah pun baik digunakan ketika pengambilan gambar di lokasi dengan cahaya yang cukup. ISO rendah mampu menangkap kekontrasan dengan baik yang akan membuat efek hitam putih lebih efektif. Namun jika diinginkan adanya noise, maka tetap gunakan ISO rendah dan kita bisa menambahkan noise dalam proses pascaproduksi. ISO tinggi bisa digunakan jika mendapatkan shutter speed yang tinggi ataupun efek grain yang dramatis dengan sengaja.
5.Potretlah dalam mode warna
Dalam tips memotret hitam putih ini anda harus memperhatikan tips pertama ini. Hal ini dikarenakan kamera digital menghasilkan rentang tone yang lebih lebar dalam mode warna karena dalam mode ini sensor mengambil data dari 3 channel – Red, Green dan Blue atau RGB. Untuk itulah, foto hitam yang dihasilkan dari pengolahan foto warna menggunakan photo editor di komputer akan cenderung lebih baik kualitasnya.
These 5 Basic Tips for Shooting Black and White Photos will help you to shoot black and white photos well
- Determine the object
In determining the object to be photographed, we must be able to choose it first. The thing that must be considered in choosing an object to photograph is to identify it. We need to know what objects will be beautiful when made into black and white photos, because not all objects will be good for black and white photos. For example, we choose a rainbow as an object for a black and white photo, of course it is not good because basically what is interesting about the rainbow is its diverse colors that form a beautiful thing to look at. Or the landscape of sunrise and sunset, of course it will be less interesting if it is made into a black and white photo because what makes it beautiful is because there are different colors from the sky that give a distinctive feel. In addition, objects that want to accentuate the impression of color are not suitable for black and white photos, such as colorful flowers and fashion elements that are beautiful when using color as an allure. Although it does not rule out the possibility of being able to be made into black and white photos with the consequence that there is little value lost if indeed the strength is in diverse colors. So what kind of objects are good for black and white photos? Those are objects that have a sense of history, portraits that want to show a dramatic and detailed impression (such as objects of old people), or objects that want to show a strong sense of contrast. In addition, other objects can also be made into black and white photos depending on the imagination of the photo taker.
- Adjusting the lighting
By adjusting the lighting in such a way, we can see the object more deeply. Because with strong lighting it will certainly produce strong shadows as well. Setting the lighting is not easy. Therefore, a good imagination is also needed in this second point. When the lighting is right, the resulting photo will certainly be better, and vice versa when the lighting is not right, the photo results will actually be destroyed. In making black and white photos, we can take photos when the sun is directly above (during the day). This is certainly allowed in taking black and white photos, because it will show more strong shadows to emphasize the lines and shapes in the composition. Or we can even take photos directly towards the sun to produce beautiful silhouettes with good imagination.
- Use RAW
If you have a type of camera that can use the RAW format then maximize it and provide a large memory to store it. By using the RAW format in these black and white photo tips, you will find it easier to tinker with the raw files as expected, besides that you can be more creative because there are more photo processing options, and it is hoped that if you use the RAW format, the information stored is more. make sure you select the Monochrome Picture Control setting so that the display on the camera LCD looks black and white. But make sure that when the RAW photo file is viewed on a computer, you still get color information. This is what distinguishes it from a JPG file.
- Use Low ISO
This is done to reduce the effect of noise on photos when converted to black and white. Noise is small white spots in photos that will be more obvious in black and white photos than in color photos. By using a low ISO, this noise will be minimized so that the photo quality is maximized. Low ISO is also good to use when shooting in locations with sufficient light. A low ISO is able to capture contrast well, which will make the black and white effect more effective. However, if noise is desired, then keep the ISO low and we can add noise in post-production. High ISO can be used if you want a high shutter speed or a dramatic grain effect on purpose.And how to set the camera or ISO you can see here
5.Shoot in color mode
In these black and white shooting tips you should pay attention to this first tip. This is because digital cameras produce a wider range of tones in color mode because in this mode the sensor takes data from 3 channels - Red, Green and Blue or RGB. For this reason, black photos resulting from processing color photos using a photo editor on a computer will tend to be of better quality.
** Your post has been upvoted (6.00 %) **
Curation Trail is Open!
Join Trail Here
Delegate more BP for bigger Upvote + Daily BLURT 😉
Delegate BP Here
Upvote
https://blurtblock.herokuapp.com/blurt/upvote
Thank you 🙂 @tomoyan