
Hola a toda la comunidad Blurt, el día de hoy les traigo un tutorial que en lo personal me ayudo mucho.
Hello to the entire Blurt community, today I bring you a tutorial that personally helped me a lot.
Soy una chica que le encanta el color y ser creativa, me gusta redactar post con orden y con armonía, por ende necesitaba un separador de párrafo personalizado, así que investigue y con mi cuenta en Canva pude crearlo. De esta manera les explico los pasos para que lleven a cabo el suyo.
I am a girl who loves color and being creative, I like to write posts with order and harmony, therefore I needed a custom paragraph separator, so I did some research and with my Canva account I was able to create it. In this way I explain the steps to carry out yours.
- En primer lugar ingresen a Canva sino tienen una cuenta pueden crearla con su correo y una contraseña. Al estar en el inicio configura el tamaño personalizado para tu separador, lsa medidas estándares son 800px de ancho y 40px de alto.
First of all, enter Canva if you don't have an account you can create it with your email and a password. When you are at the beginning, configure the custom size for your separator, the standard measurements are 800px wide and 40px high.

- Luego de configurar tu tamaño te redirecciona a una ventana con tu página de trabajo, allí podrás comenzar a diseñar tus separador a partir de tus gustos.
After configuring your size, you are redirected to a window with your work page, there you can start designing your separators according to your tastes.
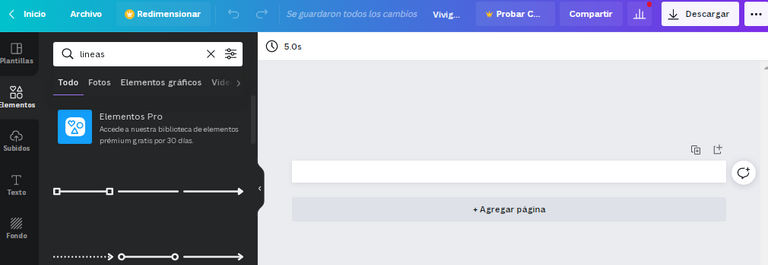
- Podrás colocar cualquier elemento, figura, todo de acuerdo a como quieras diseñar. En mi caso me gustan las lineas y puntos.
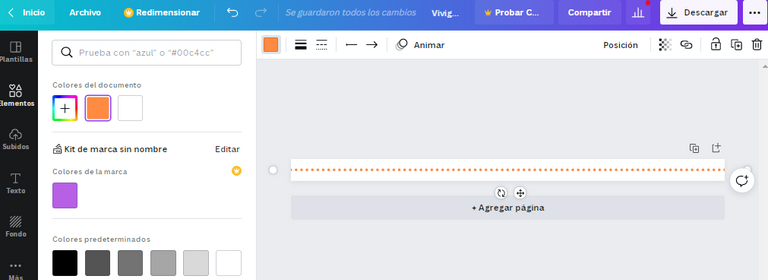
- Luego de tener listo tu diseño puedes descargarlo como una simple imagen.
After you have your design ready you can download it as a simple image.
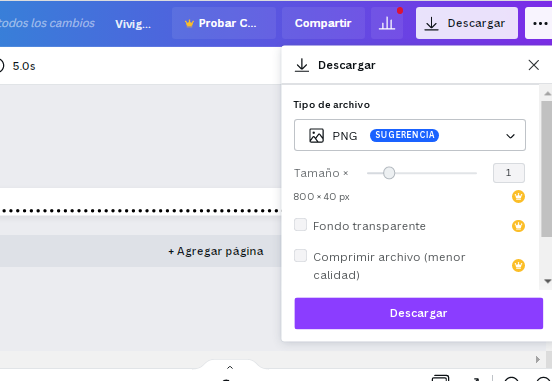

Ahora nos fijamos que al descargar la imagen tenemos un fondo blanco, el cual entorpece la armonía de nuestro separador, cabe destacar que la versión gratuita de Canva no permite descargar imágenes con fondos transparentes, de tal forma que se hace uso de otro programa para darle el correcto uso. El mismo se llama Piskel.
Now we notice that when downloading the image we have a white background, which hinders the harmony of our separator, it should be noted that the free version of Canva does not allow downloading images with transparent backgrounds, in such a way that another program is used to give it the correct use. He himself is called Piskel.
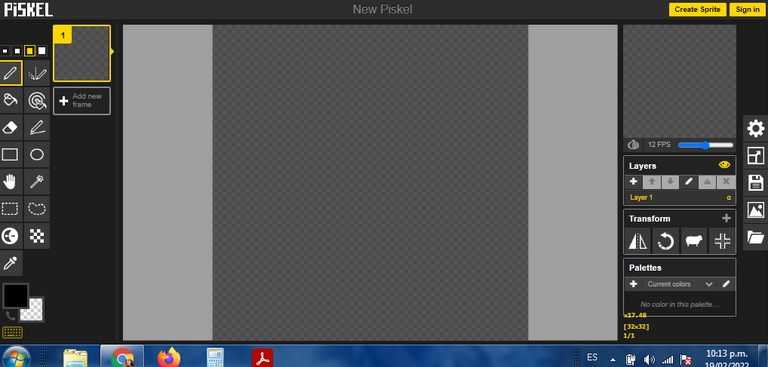
- Aparecen dos opciones así que presionamos Create sprite para luego importar la imagen que anteriormente descargamos, presionamos la opción Browse Images y nos lleva a nuestros documentos.
Two options appear so we press Create sprite to then import the image that we previously downloaded, we press the Browse Images option and it takes us to our documents.
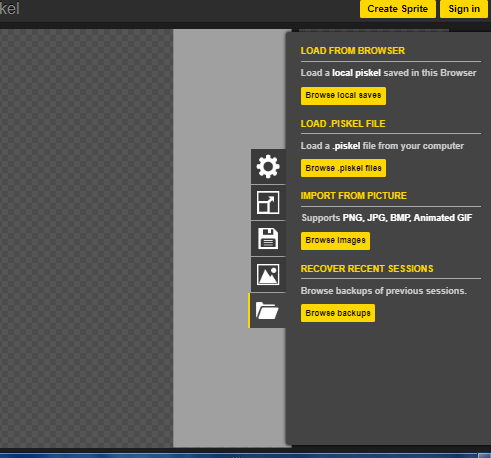
- Nos aparece la imagen y presionamos import
The image appears and we press import
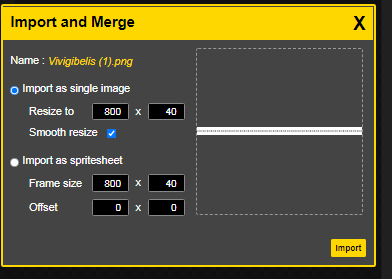
- Al tener nuestra imagen nos vamos al panel de lado izquierdo y presionamos el recuadro donde aparece un espiral con un bote de pintura la finalidad es que con este comando seleccionar la escala de grises que se muestra. De allí nos vamos a la imagen, en el espacio en blanco y presionamos clic derecho automáticamente cambiara a un formato con fondo trasnparente.
Once we have our image, we go to the panel on the left side and press the box where a spiral with a pot of paint appears. The purpose is that with this command we can select the gray scale that is shown. From there we go to the image, in the blank space and press right click it will automatically change to a format with a transparent background.
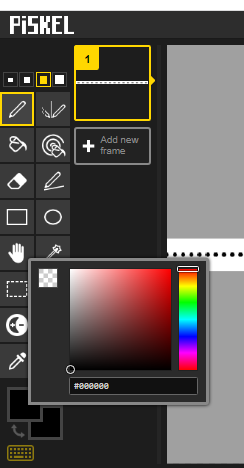
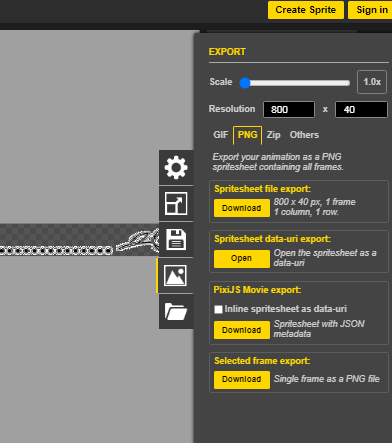
- Al tener la imagen lista, nos vamos al panel de lado derecho para guardar nuestro diseño, en la casilla de imagen buscamos la opción png seguido de spritesheet file export automáticamente se descargara.
Having the image ready, we go to the panel on the right side to save our design, in the image box we look for the option png followed by spritesheet file export it will automatically download.
De esta forma tendremos un lindo separador acorde a tus gustos, pueden ver el que diseñe, con un tulipán, muy sencillo pero es mi manera de ser.
In this way we will have a nice separator according to your tastes, you can see the one that design, with a tulip, very simple but it is my way of being.


Excelente tutorial amiga
Gracias Noe, lo hice con mucho cariño.
Te invitamos a usar el tag #blurthispano. Nos puedes encontrar en Discord.
Curado manualmente por Geeklania.
Te invitamos a votar por @blurthispano como Witness.
Muchas gracias.
Amiga gracias por compartir lo pondré en practica ..
Te será muy útil Edi
Gracias por compartir tu publicación en #Blurt. Tu esfuerzo significa mucho para nosotros; por eso has recibido un voto positivo.
Te invito a votar por @blurtlatam como Testigo / Witness
---
Muchas gracias por su apoyo.