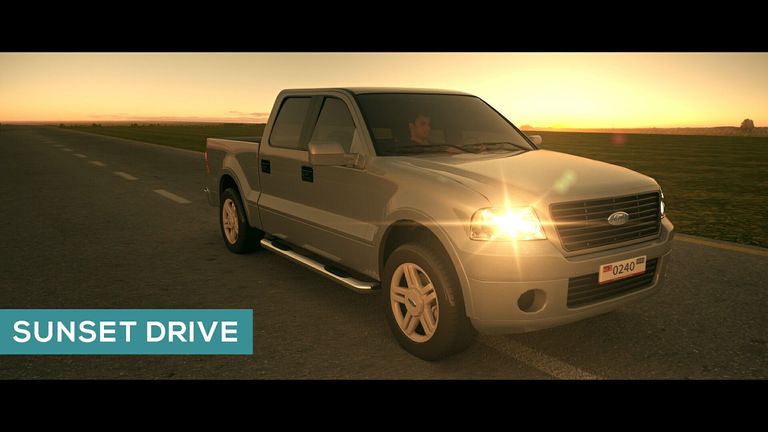
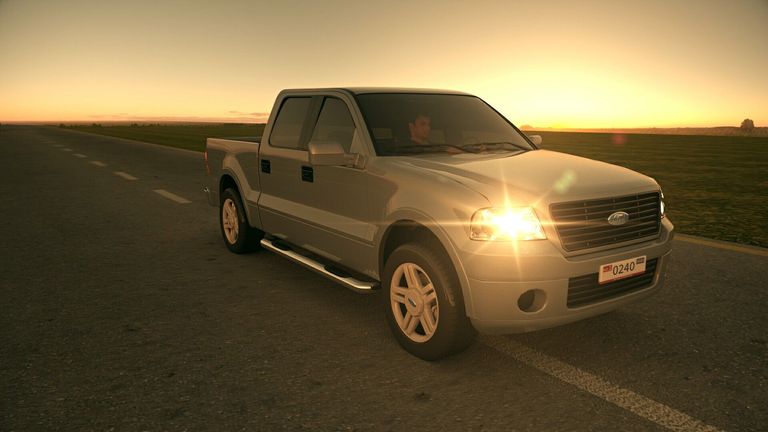
Hello wonderful Blurtians, hope we are having a wonderful week... I'm here again to do a quick walkthrough on how I created the sunset drive shot.
I actually created this as a follow-up of my previous post which was well received by the awesome community and I've decided to share my knowledge and skills to everyone in the community that are interested in this type of art.
As usual, It was a fun shot to create and everything was do entirely digital... Like i usually say, That's the beauty of creating stuffs in computers.
I usually tell a lot of beginners in 3d/CG that Creating believable shots requires a certain skill level... and It all takes a lot of practice and learning to develop the skills to create amazing 3d art and designs...
The best thing for any creative artist is to keep learning and improving. I try as much as possible to learn and study the works of other creatives and also learn from them. Continuous learning is very necessary and can never be over emphasised.
I originally created this as a different project some months ago, also with a different title. I decided to name it Sunset Drive cos I thought it represents the scene and also I wanted something different just for this walkthrough.
The concept here was to create a sunset scene cos in my opinion, sunset looks cooler and adds more character to the scene than a regular daytime shot.
Permit me to digress a little bit... A lot of people usually get confused between a sunset shot and a sunrise shot. I'll quickly differentiate between the two.
SUNSET VS SUNRISE
Sunrise and sunset are daily events but very beautiful to observe. When you see the sunrise and sunset scene in photographs, it is often difficult to tell the difference between the two due to the similarities in the colors of the sky at these times. However, there are subtle differences between sunrise and sunset that are based upon the lights observed in the skies during these times. For one, sunsets appear to have much redder skies than sunrise. Below are a few differences between the two...
Sunrise takes place during early morning while sunset takes place during evening.
Sunrise has bright skies whereas sunset has dark skies.
The sky is has more colors during sunset than at sunrise.
Atmosphere is warmer at evening than during morning.
Red color in the skies is also due to the presence of dust particles and other environmental factors that rise in the atmosphere due to all the human activities during day time.
I hope I didn't waste too much of your time on that, let’s get into business.
In this walkthrough like I've done and will continue doing, I am going to show you the processes, tips and tricks I implemented to creating this sunset drive shot.
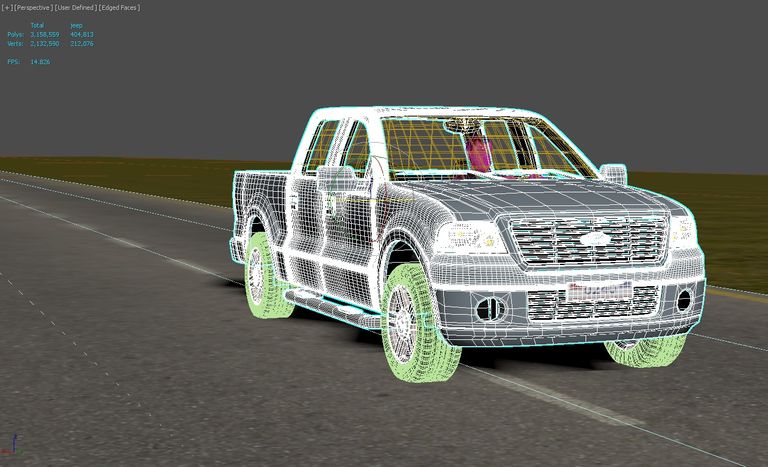
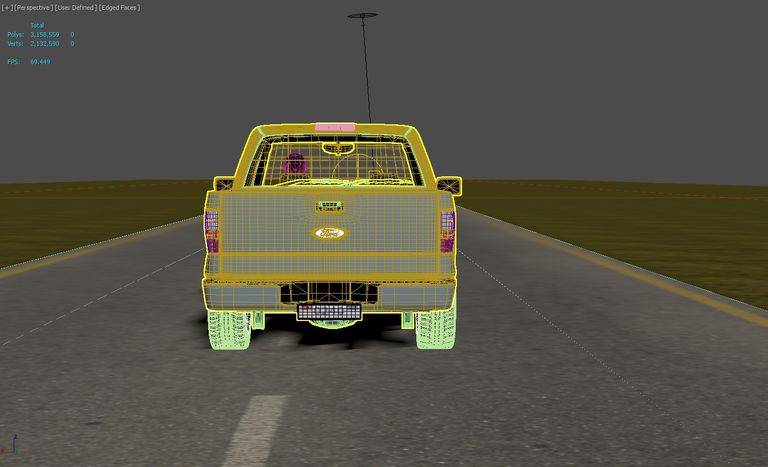
As usual, The vehicle was a free model gotten from the internet, there are many free vehicle models on the internet. If you do a seaech, I'm sure you will find good ones. Free models helps you save time and focus more on the creative side of things instead of spending most of the time modelling the vehicle from scratch, that time will be channelled towards creating a good looking shot.
The shot was entirely created in 3ds max and rendered with vray.
The whole material in the scene were vray materials. Except the road and grass which were actual photographs of a real road and grass. I just used the photographs to drive the colour channel in the vray material for those parts.
I made few changes to the vray car paint material. I went for a less saturated bluish colour for the body of the vehicle. The same for the flake colour. I reduced the flake density, scale and size to make coat have a subtle car flake effect.
NOTE: Understanding how various material look in real life and how they interact with light in real life will really be of great benefit when trying to replicate that in the computer. Knowing this is a step forward to creating believable materials and light setup for realistic rendering
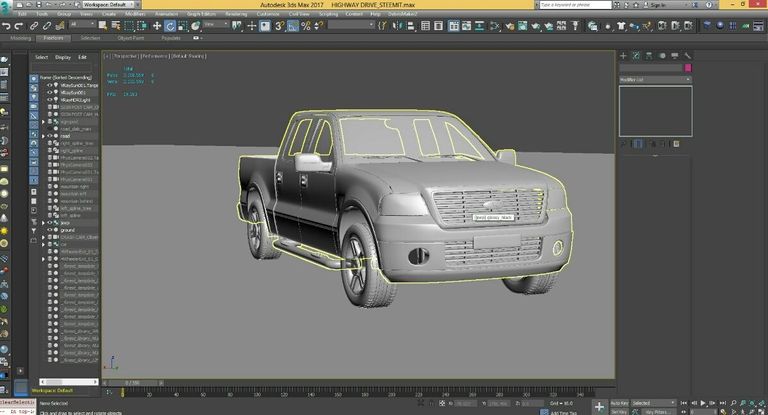
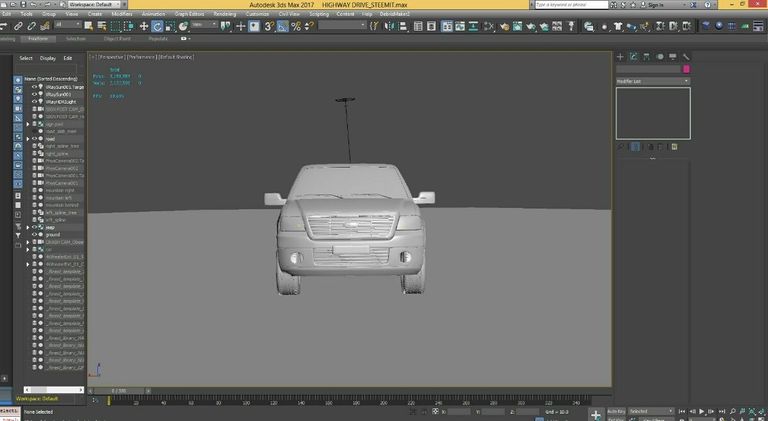
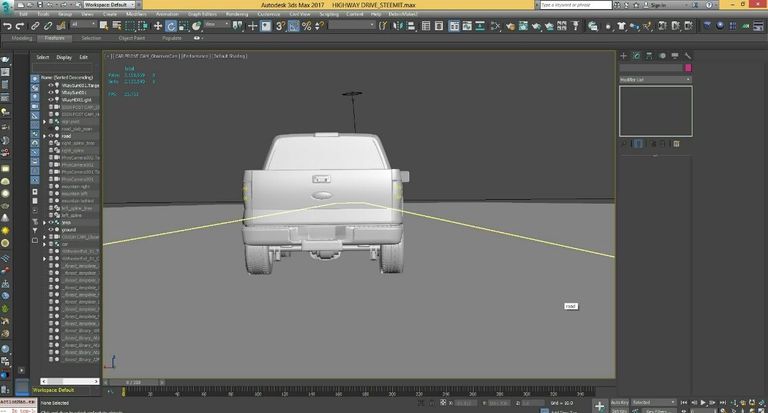
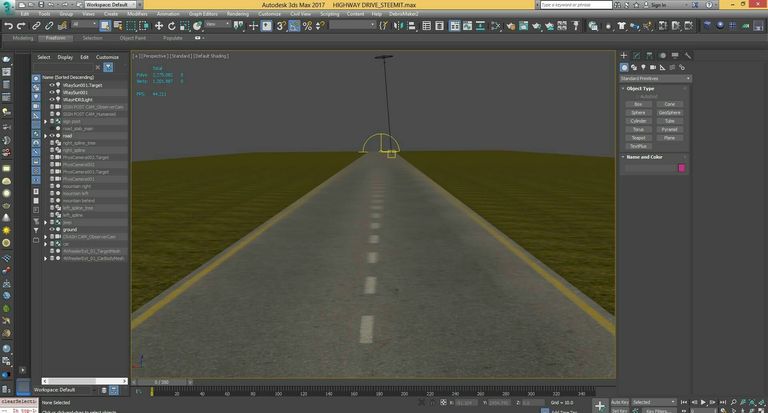
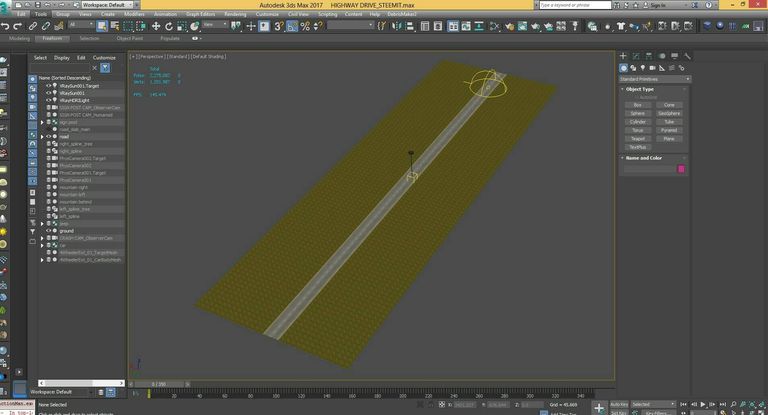
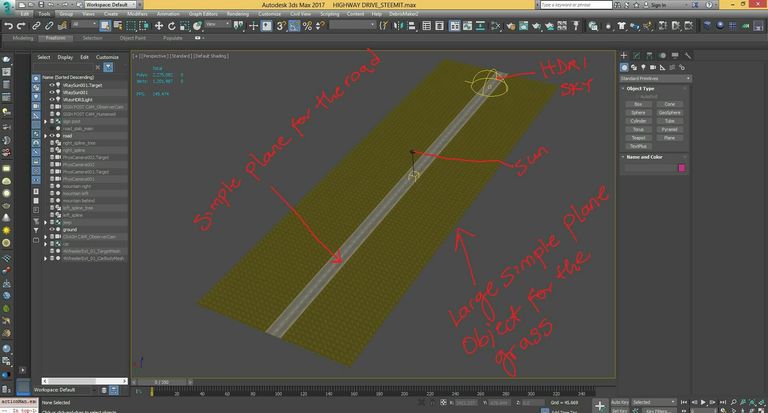
SCENE SETUP
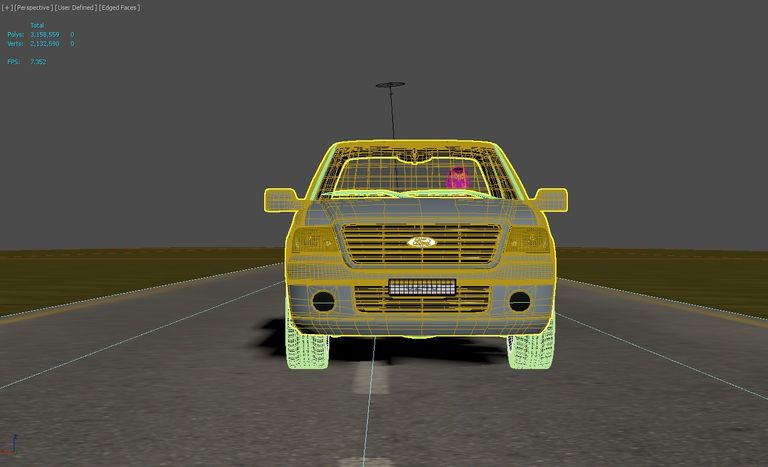
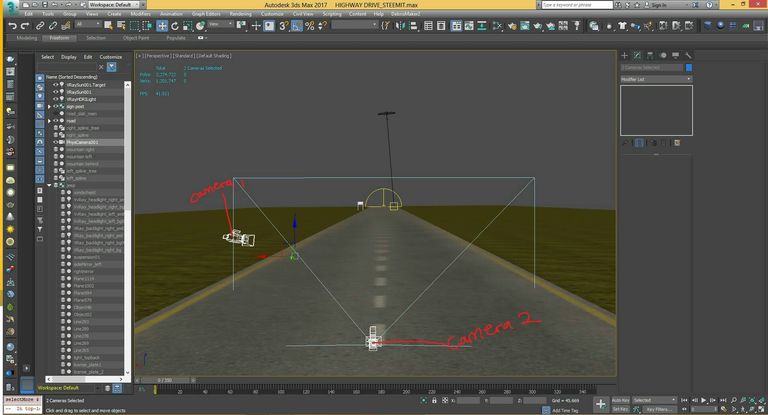
For the scene setup, it is just a simple scene with very simple geometries. A large plane object for the ground and a narrow plane object for the road. With 2 lights (a vray sun light and a vray HDRI light) to illuminate the scene. And also 2 cameras for the different angles and shots. I already knew the type of shot I was going for before setting up the scene and I knew the scene didn't require complex setups.
MATERIALS
The car body:
I used a less saturated dark bluish colour for the body of the car. I used a high reflection amount to give the car a clean and shiny look. No refraction was added.
The windshield and glass
For the glass material, I set the diffuse colour to black and Set the reflection and refraction color amount to 80% white since a car windscreen does not have 100 percent reflection and transparency. I added a little colour to the fog parameter to give it that tinted look. I also used a Fresnel reflection type to give it that natural reflection you would normally see on a car windshield.
The tyres:
For the car tyre material, I just used a vray material with the diffuse color channel set to a very dark grey, I didn't set it to black cos I don't like anything that is 100% black. A little bit of reflection was added too.
Shinny surfaces and mirror:
I set the diffuse colour to dark gray and set the reflection colour amount to 100% with no refraction.
Plastics:
For the dark plastic material, I used almost the same settings as the tyre material but with a little more reflection.
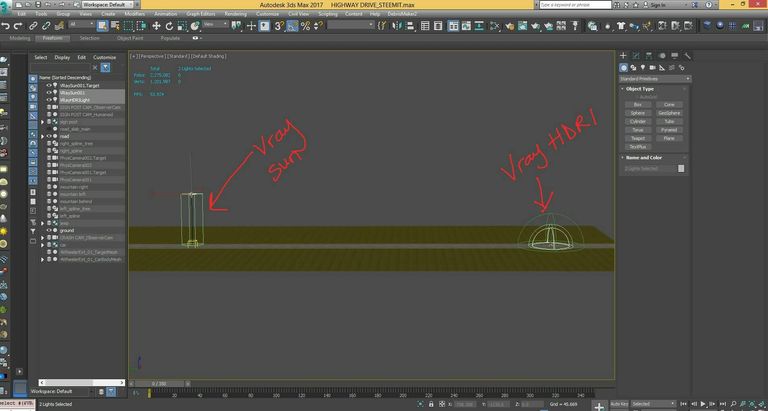
LIGHTING
This is one of my favourite part, it is at this stage that the mood and feel of the scene begins to take effect.
For the lighting, I used 2 vray lights..
A vray sun and a vray HDRI light.
The vray sun was used with very low light intensity just to cast a little bit of direct shadows
The vray HDRI light was used as an ambient sky light to illuminate the way overall scene. An HDRI image of a sunset sky was used to give it that realistic sunset lighting.
For the car lights, I used simple vray sphere lights and attached it the the car headlights and backlights with high light intensities.
RENDERING
The scene car was rendered using vray. I used the brute force as my primary GI engine and light cache as my secondary GI engine and a few other tweaks. The brute force has very little settings for tweaks...
I used Area filter as the antialiasing filter (personal preference).
In the global DMC tab, I set the noise threshold to 0.002
In the colour mapping tab, I changed the type to Reinhard (since it is a blend between exponential colour mapping and linear colour mapping), I felt this colour mapping type best suit my lighting setup. Pretty much from here, all the other settings were at their default values.
For the render elements, I rendered only two passes... The RGB pass and the Ambient occlusion pass. The ambient occlusion pass just add that extra contact shadow to the scene...
COMPOSITING
I composited the final render in Adobe After effects, it was a pretty simple composite, nothing special. In fact I just placed the ambient occlusion pass on top of the RGB pass and set the blending mode to multiply then I reduced the opacity to 70%. That's all... Simple right?. I told you... It was a very simple composite. I also did the colour grading in After effects too...
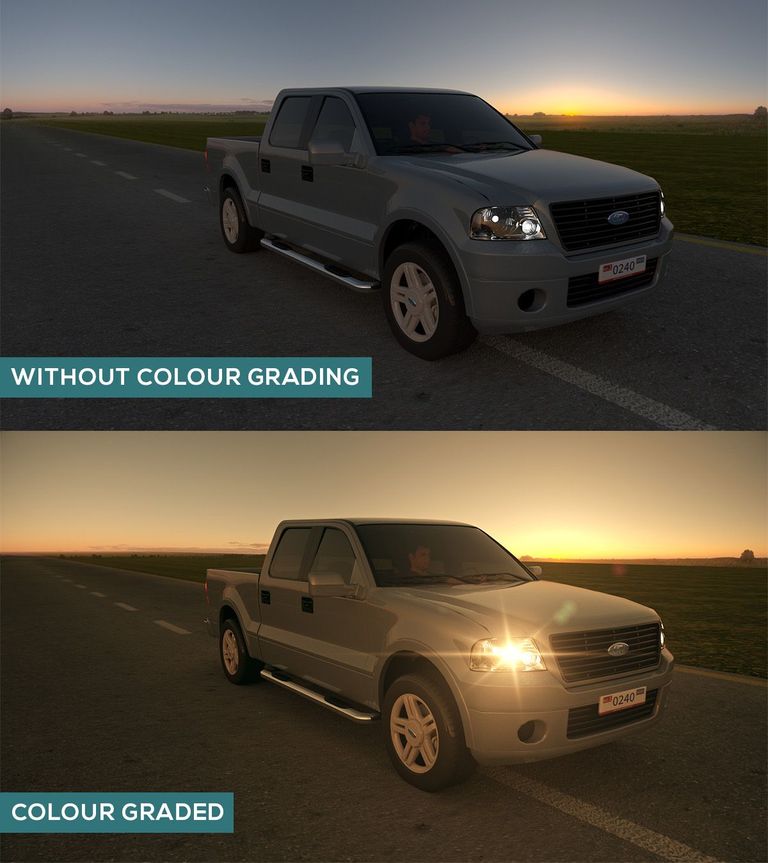
COLOR GRADING
I love this part. Color grading a shot is like the icing on the cake. After all the hard work spent on creating a shot, colour grading gives it that final look and feel. Some artist prefer getting their look when creating the shot. But I like to give my shot a specific look during the colour grading stage.
But I plan out my shots first and I try to know the look I am going for before I even start the project.
For example, if I'm going for a night time look with a bluish tone, I will use the appropriate lighting setup for the scene. So I'll try to keep my lights within the colour spectrum and range that will allow me colour grade the scene more to a bluish tone during the compositing stage.
For this sunset scene, I made sure that my light were within the red and orange spectrum and also the intensity was within the correct range so as to be able to grade it to look more like a sunset scene.
try to keep your content little bit small , rest good work and keep it up.
congratulation you have been upvoted by @blurtutorials. Follow blurtutorials for more rewards.