Each action described below is valid at the moment of the publication of the post only. Don't perform them, if you don't know and/or trust the described platforms or processes.

Hello!
Today I created a new TUTORIAL themed post for the Blurt ecosystem. This time I try to answer the question:
and I did it using the BEESWAP interface. I will create in a later episode a variant containing the essential steps to complete the process using the Tribaldex interface.
Liquidity pools are large token recipients in which anyone can participate, adding liquidity. With "liquidity" we mean a ready-to-use amount of tokens (an amount that, in this specific case, we will add to the pool).
As in the previous tutorial, also in this case I used my accounts and other specific platforms. However, I invite you to be careful: over time, this procedure may undergo changes or may no longer be valid. Don't risk your tokens if you are unsure, because interacting with blockchains without certainty could result in the total loss of your tokens. Furthermore, the protocols that give rise to the liquidity pools are in an experimental phase: in the event of a malfunction (and in the worst possible case), you could end up losing all the amount you invested. With this, I don't want to scare you, but to invite you to act with the utmost caution.
Reaching the focal point, to add liquidity to the BLURT pool you need:
- have an account on the Hive blockchain;
- have a Hive Keychain extension installed on your browser;
- have an account on the Blurt blockchain;
- interact with the Beeswap.dcity.io platform.
Let's look specifically at the process.

STEP by STEP
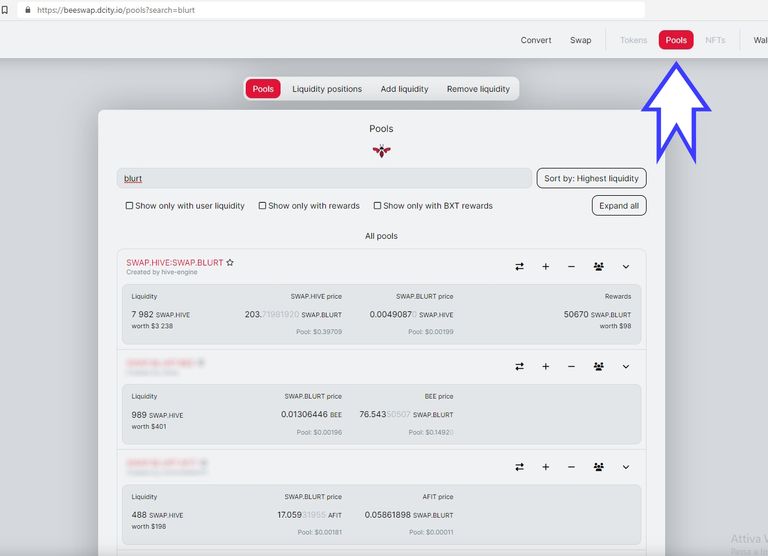
Let's go to the BEESWAP.DCITY.IO website.
Above the URL (moved to your right), you can view a list of buttons (Convert, Swap, etc). Click on the “POOLS” button indicated by the arrow in the figure below. This will open a page with a series of liquidity pools present on Beeswap. These pools are the same as those found when connecting through Tribaldex or other similar interfaces.
In order to interact, we must connect to the site. Under the list of buttons seen earlier, you will find another list of buttons (this time more to the center of the page), including the item “Add Liquidity”.

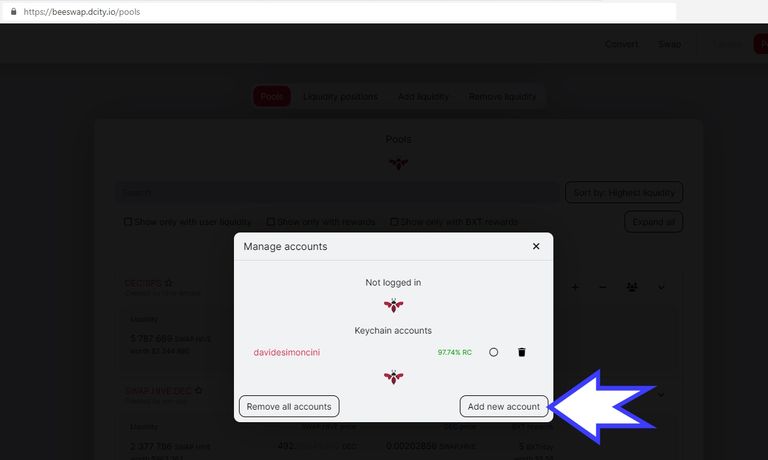
By clicking on it, a window will open in the middle of the screen. If you have already interacted with Beeswap, you will simply have to log in. If, on the other hand, you have never interacted with this site, click on the item "Add new account", a little to your right.
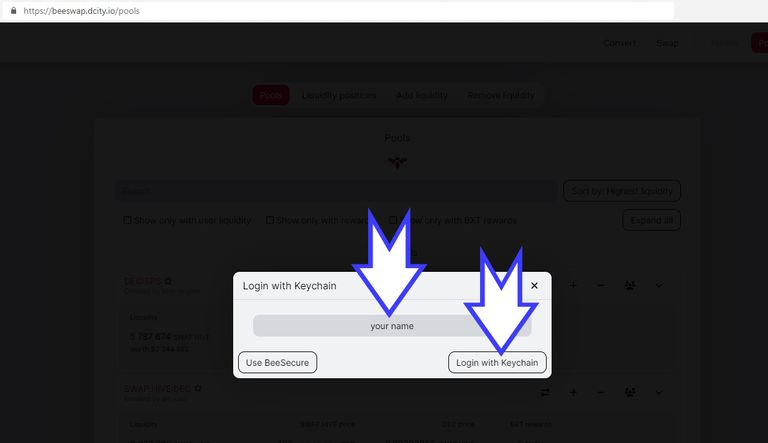
Type your username in the central gray box and click on “Login with Keychain”.
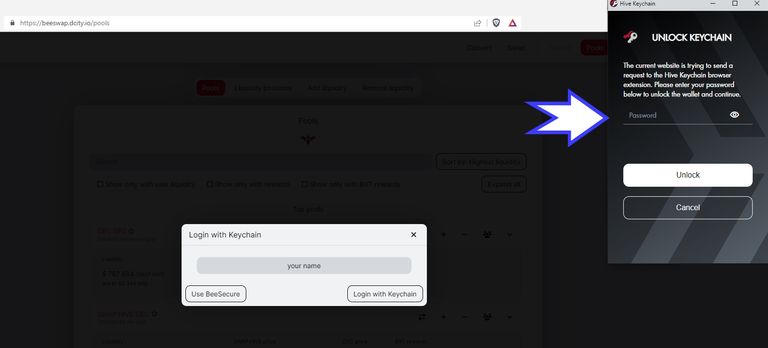
Within the browser, it will open a dialog (a dialogue window) (again on your right) where you will need to confirm your identity through the Hive Keychain extension. Hive Keychain will ask you to enter the credentials you set it up with.
After confirming, the Pools page on the Beeswap website will be reopened. If it doesn't do it automatically, go back to the "Pools" page (action described as the second step of this list) by clicking on the "Pools" item indicated in the figure.
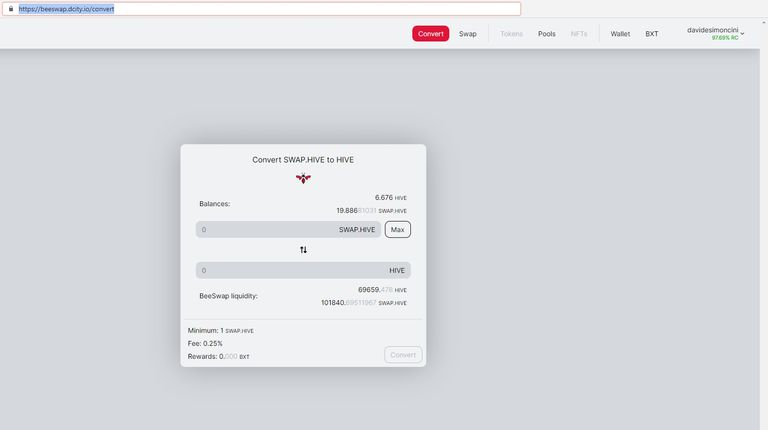
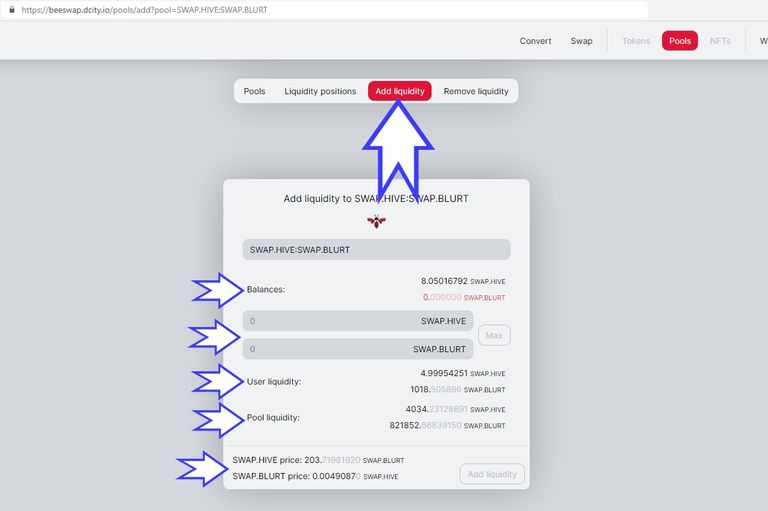
Click again on “Add Liquidity” to reach the homonymous page. On this page, you will find a box in the center of the screen. Inside, the box will contain:
- Balances, i.e. the amounts in SWAP.HIVE and SWAP.BLURT available to you in the Hive Engine wallet;
- SWAP.HIVE and SWAP.BLURT, i.e. the boxes where you will have to write the number of tokens you want to add to the pool;
- User liquidity, i.e. the amounts you have previously added to that specific pool and which are blocked in it;
- Pool liquidity, i.e. the total of the value locked within the pool, for both tokens that make it up;
- SWAP.HIVE and SWAP.BLURT Price, i.e. the value of each of the tokens compared to each other.
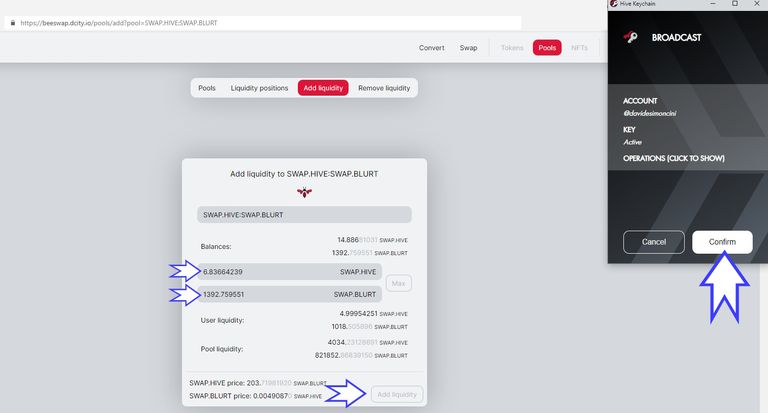
Inside the gray boxes, we type the amounts we want to add to the pool. Let's be careful: when we add the tokens, there is a proportion to be respected. For example, for each SWAP.HIVE we add, we also need to add a certain number of SWAP.BLURTS: in my case, the ratio was about 1:205 (205 SWAP.BLURTS for each SWAP.HIVE).
Once ready, click on the button in the window you find in the center of the screen (the button at the bottom and a little to your right), the one with the writing “Add liquidity”. The Hive Keychain dialog will re-open. If we want to proceed, we will have to confirm the transaction.
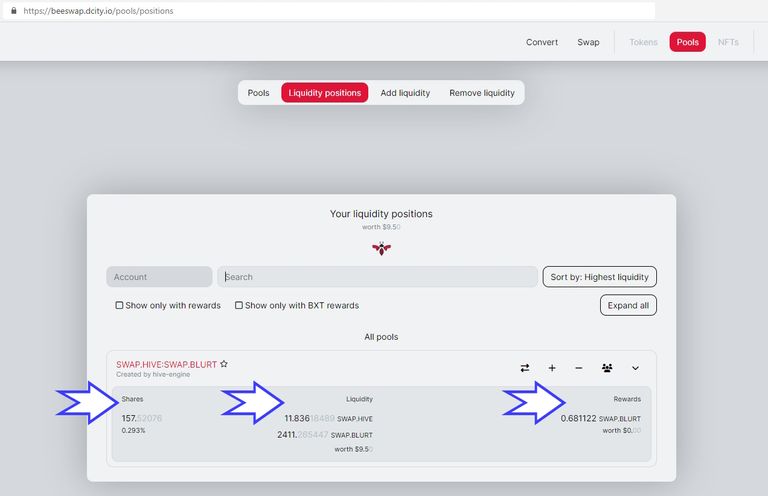
After confirming, the web page will reload. At first, the added amount may not appear. We wait a few seconds or a few minutes. Then we go back to the list of 4 buttons above the central window and click on “Liquidity Positions”. The address you need to reach is https://beeswap.dcity.io/pools/positions.

In the window that will open, we will find the list of pools to which we have added liquidity, with:
Shares (dividends), i.e. the proportion of earnings that we will obtain on the total earnings generated by the pool;
Liquidity, i.e. the amounts of tokens that we have added to the pool;
Rewards, i.e. the rewards generated by our participation in the pool. I noticed that this last box often doesn't report data or reports them sometimes incorrectly. You can check the arrival of the rewards through the Hive Engine website or through other interfaces: the rewards should arrive starting from the second day after adding the liquidity.
DOUBTS?
And nothing, we're done. I hope the tutorial is simple enough. Feel free to comment if you have any doubts or if you can't figure out how to proceed between the various steps. As much as I can, I will try to provide you with my help. I plan to publish an integration soon where I explain what pools are in a slightly more in-depth and valid way for most of the cryptocurrency world. Check my blog or the #blurtutorial tag from time to time to stay updated. With this, I say goodbye, and...
Bye to the next!

Dear @davidesimoncini, your content was selected manually by curators @nalexadre, @ten-years-before to receive a curation from BeBlurt 🎉