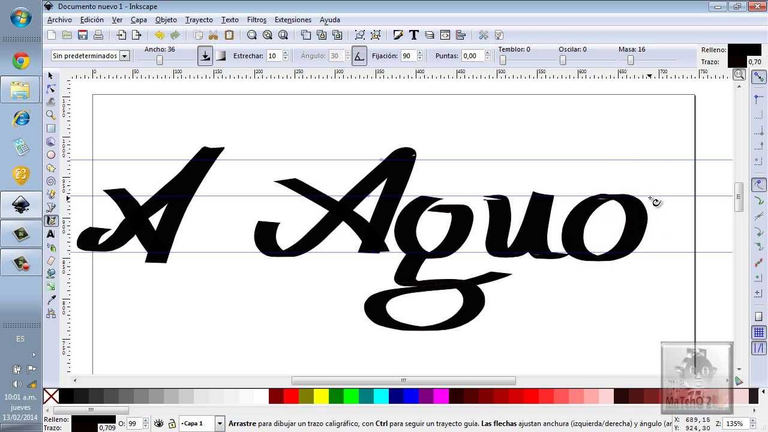
Una de las grandes herramientas disponibles en Inkscape es la herramienta de Caligrafía. Este tutorial le ayudará a conocer como trabaja la herramienta, o mejor aú demostrar alguna técnicas básicas del arte de la Caligrafía.
One of the great tools available in Inkscape is the Calligraphy tool. This tutorial will help you to know how the tool works, or better yet demonstrate some basic techniques of the art of Calligraphy.
Historia y estilos.
Dirigiéndonos a la definición del diccionario, caligrafía significa "escritura hermosa" o "escritura elegante o vistoza". Escencialmente, la caligrafí es el arte de hacer escritura a mano de manera hermosa o elegante. Esto puede sonar intimidante, pero con un poco de práctica, cualquiera puede ser un maestro en las bases de este arte.
Las primeras formas de caligrafía se remontan a los gráficos rupestres. Después del año 1440 D.C. y antes de la creación de la prensa de impresión, la caligrafía se encontraba en los libros y otras publicaciones que eran realizadas. Un escriba tenía que realizar a mano cada copia de cada libro o publiciación. La escritura a mano era realizada con una pluma y tinta hechas sobre vitelas o pergaminos. Los éstilos de letra usados a traés de esos años incluían: Rústico, Carolingio, Letraoscura, etc. Hoy en día el uso más común de la caligrafía son las invitaciones a bodas.
Existen tres tipos principales de caligrafía:
- Occidental o Roman
- Arabiga
- China u Oriental
Este tutorial se enfoca fundamentalmente en la caligrafía Occidental, como los otros dos éstilos tienden al uso de la brocha (En vez de un esfero con mina), lo cual no se relaciona al funcionamiento actual de nuestra herramienta de Caligrafía.
Una de las grandes ventajas que tenemos sobre los escribas del pasado, es el comando Deshacer: Si usted comete un error, no se daña toda la página . La herramienta Caligrafía de Inkscape permite algunas otras técnicas que no serían posibles con una pluma y tinta tradicional.
History and styles.
Going to the dictionary definition, calligraphy means "beautiful writing" or "elegant or showy writing." Essentially, calligraphy is the art of doing beautiful or elegant handwriting. This may sound intimidating, but with a little practice, anyone can master the basics of this art.
The earliest forms of calligraphy can be traced back to cave charts. After the year 1440 A.D. and before the creation of the printing press, calligraphy was found in the books and other publications that were produced. A scribe had to make each copy of each book or publication by hand. Handwriting was done with a pen and ink made on vellum or parchment. Type styles used through those years included: Rustic, Carolingian, DarkLetter, etc. Today the most common use of calligraphy is wedding invitations.
There are three main types of calligraphy:
- Western or Roman
- Arabic
- Chinese or Oriental
This tutorial focuses primarily on Western calligraphy, as the other two styles tend to use a brush (Rather than a pen with a lead), which is unrelated to how our Calligraphy tool actually works.
One of the great advantages we have over scribes of the past is the Undo command: If you make a mistake, the whole page is not damaged. Inkscape's Calligraphy tool allows for a few other techniques that would not be possible with a traditional pen and ink.
Hardware.
Obtendrá unos mejores resultados si usa una tableta y lápiz (eje. Wacom). Sin embargo, por medio del ratón usted puede hacer algunos trazos caligráficos iniciales, piense que tendrá dificultad para producir trazos rápidos.
Inkscape no usa aún sensibilidad de presión de un lápiz de tabla, pero esto no es un problema, por que una pluma de caligrafía tradicional (diferente a una brocha) también no es muy sensible a la presión. La pluma caligráfica de Inkscape puede ser sensible a la velocidad del trazo (Observe "Adelgazar" más adelante), entonces si usa el ratón, probablemente deseará en ver este parámetro.
You will get better results if you use a tablet and pen (eg Wacom). However, by means of the mouse you can make some initial calligraphic strokes, think that you will have difficulty producing quick strokes.
Inkscape does not yet use the pressure sensitivity of a tablet pen, but this is not a problem, because a traditional calligraphy pen (unlike a brush) is also not very sensitive to pressure. Inkscape's calligraphic pen can be sensitive to stroke speed (see "Thin" below), so if you use the mouse, you'll probably want to watch this parameter.
Ancho & Adelgazar. / Width & Slimming.
Desde que el ancho de la pluma sea cambiado a menudo, usted puede ajustarlo sin ir a la barra de herramientas, usando las teclas de flechas izquierda y derecha. Lo mejor de estas teclas es que trabajan de esta forma sólo mientras dibuja, así que puede cambiar el ancho de su pluma gradualmente en medio del trazo.
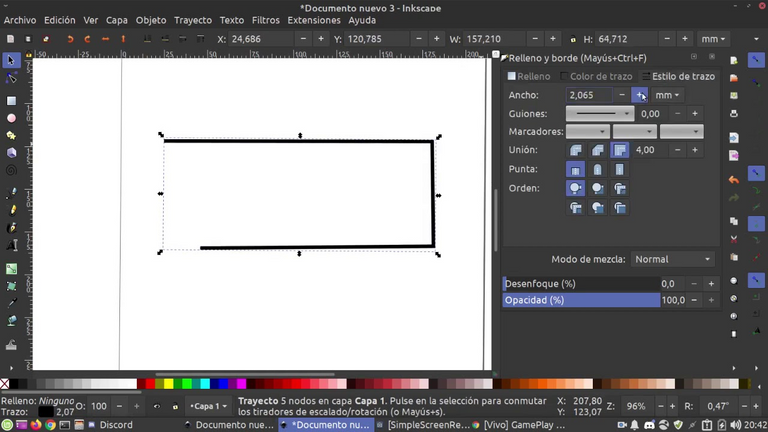
Since the pen width is changed often, you can adjust it without going to the toolbar, using the left and right arrow keys. The best thing about these keys is that they work this way only while you're drawing, so you can change the width of your pen gradually in the middle of your stroke:
Angulo & Fijación. / Angle & Fixation.
Después del Ancho, el ángulo es el parámetro caligráfico más importante. Este se refiere al ángulo de su pluma en grados, cambiando desde 0 (horizontal) hasta 90 (vértical en sentido anti-horario) o hasta -90 (vértical en sentido horario).
Como podemos observar, el trazo es más delgado cuando es dibujado paralelo a su ángulo y es más amplio cuando se dibuja perpendicular a este. ángulos posítivos son más naturales y tradicionales para caligrafía con dibujo hecho con mano derecha .effect anymore.
Hablando tipográficamente, la fijación máxima y por consiguiente el contraste del ancho máximo del trazo son las características (más adelante) de las fuentes antique serif, como las Times o Bodoni (por que estas fuentes son históricamente una imitación de la caligrafí de la pluma-arreglada). La fijación Cero y el ancho de contraste Cero (Arriba a la derecha), sobre la otra mano, sugiere la fuente actual Sans Serif, así como la Helvetica.
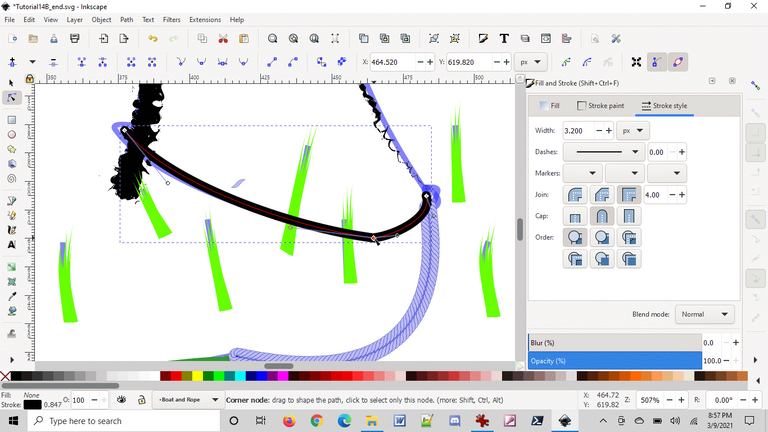
After the Width, the angle is the most important calligraphic parameter. This refers to the angle of your boom in degrees, changing from 0 (horizontal) to 90 (counterclockwise vertical) or to -90 (clockwise vertical).
As we can see, the line is thinner when it is drawn parallel to its angle and it is wider when it is drawn perpendicular to it. positive angles are more natural and traditional for calligraphy with right hand drawing .effect anymore.
Typographically speaking, maximum fixation and therefore maximum stroke width contrast are the characteristics (later) of antique serif fonts, such as the Times or Bodoni (because these fonts are historically an imitation of pen calligraphy). fixed). The Zero setting and Zero contrast width (Top Right), on the other hand, suggests the current Sans Serif font, as well as Helvetica.
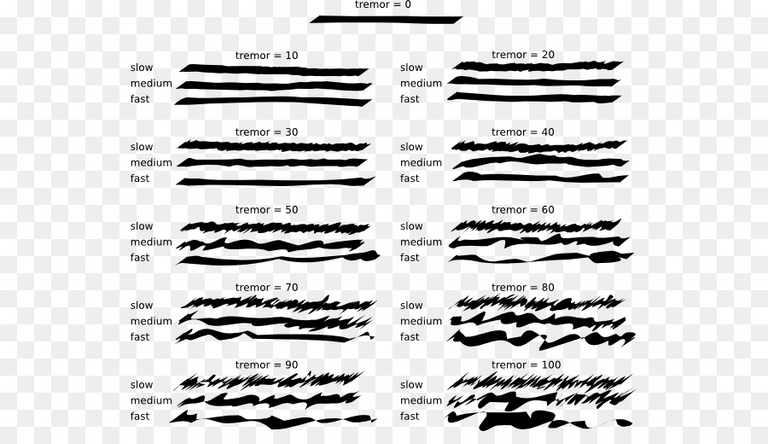
Tremor.
Wiggle & Mass.
Diferente al ancho y al ángulo, estos dos últimos parámetros definen como "siente" la herramienta, más allá de como afectan su salida visual. A razón de esto en esta sección no habrán ilustraciones; en vez de esto intente usted mismo para poder tener una mejor idea de lo que hacen estos parámetros.
Unlike width and angle, these last two parameters define how the tool "feels", as well as how they affect its visual output. Because of this, there will be no illustrations in this section; try it yourself instead so you can get a better idea of what these parameters do.
Ejemplos de caligrafía.
Ahora que ya posee las capacidades básicas de la herramienta, puede intentar producir algunas caligrafís reales. Si es usted nuevo en este arte, adquiera un buen libro de caligrafía y estudielo junto con el Inkscape. Esta sección le mostrará unos pocos ejemplos.
Primero que todo, para hacer letras, requiere crear un par de reglas para guiarse. Si usted va a escribir con éstilo inclinado o cursiva, agregue algunas guías inclinadas a través de las dos reglas.
Entonces haga zoom de tal manera que la longitud entre las reglas corresponda al rango natural de su escritura, ajuste el ancho y el ángulo, y ¡aquí vamos!
Probably the first thing you would do as a beginner calligrapher is practice the basic elements of letters — vertical and horizontal stems, round strokes, slanted stems. Here are some letter elements for the Uncial hand:
Algunos trucos interesantes:
Si siente comodidad sobre la tabla, no la mueva. En vez de eso, acomode la pizarra (Ctrl+tecla de flecha) con su mano izquierda después de finalizar cada letra.
Si su último contorno no está bien, tan sólo deshágalo (Ctrl+Z). Sin embargo, si una forma es buena pero la posición o el tamaóo no son correctos, es mejor utilizar temporalmente el Selector (Barra Espaceadora) y perfile/escale/rote de ser necesario (usando el ratón o las teclas), luego presione Barra Espaceadora de nuevo para retornar a la herramienta Caligrafía.
Habiendo realizado una palabra, cambie al selector de nuevo para ajustar las barras y espaceado entre letras uniformemente. No exagere con esto, sin embargo; la buena caligrafía debe conservar un éstilo similar. Resista la tentación de copiar letras y sus elementos; cada contorno debe ser original.
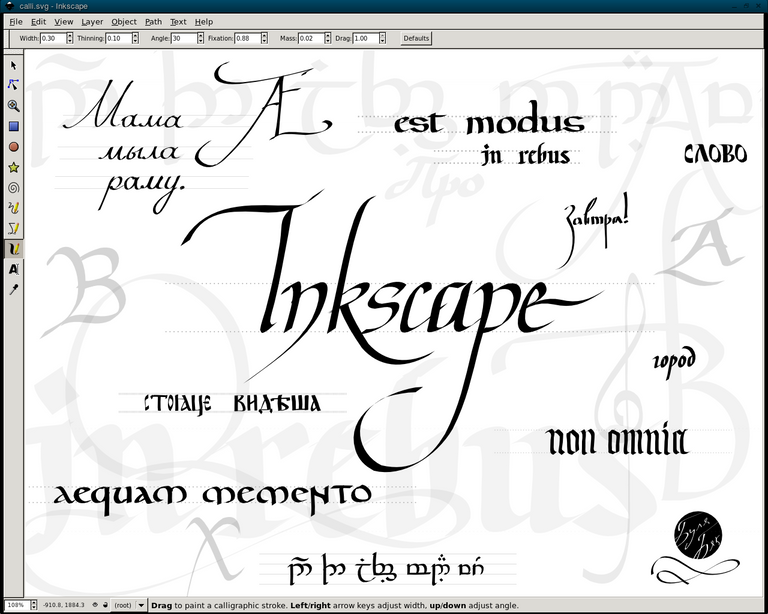
Y aquí podemos observar alguno ejemplos completos:

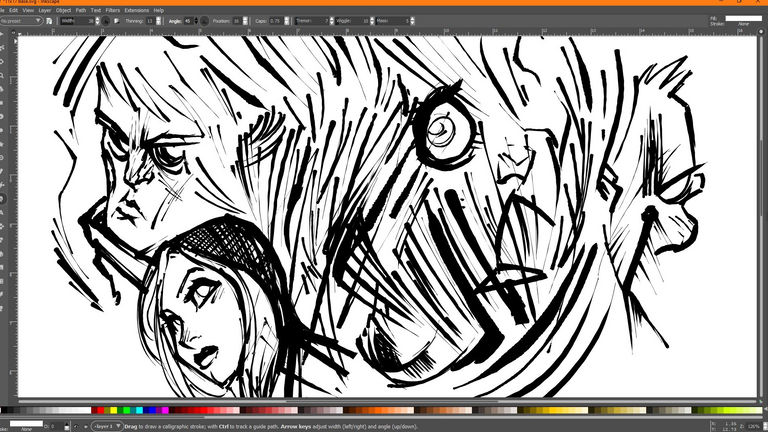
Examples of calligraphy.
Now that you have the basic capabilities of the tool, you can try producing some real handwriting. If you are new to this art, get a good calligraphy book and study it along with Inkscape. This section will show you a few examples.
First of all, to make letters, you need to create a couple of rules to guide you. If you are going to write in a slant or italic style, add some slant guides through the two rulers.
So zoom in so that the length between the rulers corresponds to the natural range of your writing, adjust the width and angle, and here we go!
Probably the first thing you would do as a beginner calligrapher is practice the basic elements of letters — vertical and horizontal stems, round strokes, slanted stems. Here are some letter elements for the Uncial hand:
Some interesting tricks:
If you feel comfortable on the board, don't move it. Instead, square the board (Ctrl+arrow key) with your left hand after finishing each letter.
If your last outline isn't right, just undo it (Ctrl+Z). However, if a shape is good but the position or size is not correct, it is better to temporarily use the Selector (Spacebar) and outline/scale/rotate if necessary (using the mouse or keys), then press Spacebar again to return to the Calligraphy tool.
Having made a word, switch to the selector again to adjust the bars and letter spacing evenly. Don't go overboard with this, however; good calligraphy should retain a similar style. Resist the temptation to copy letters and their elements; each outline must be original.
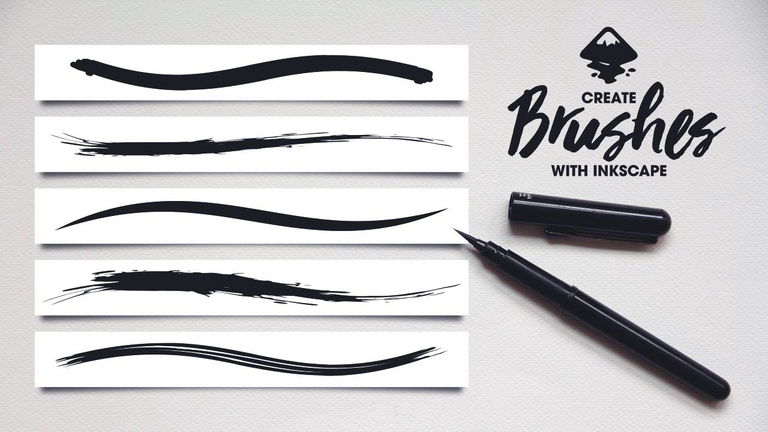
And here we can see some complete examples:
Conclusión. / Conslusion.
La caligrafía no es sólo divertida; es además un arte espiritual que puede transformar su visión sobre todo lo que hace y puede ver. La herramienta de caligrafía de Inkscape puede servirle como una modesta introducción para este arte. Y aún es muy divertido jugar jugar con ella y puede ser muy útil en el diseño real.

Calligraphy isn't just fun; it is also a spiritual art that can transform your vision of everything you do and see. Inkscape's calligraphy tool can serve as a modest introduction to this art. And it's still a lot of fun to play with and can be very useful in actual design.
Fuente/Source: Inkscape.
