ArchLinux no posee herramientas de configuración automática, compartiendo así la misma filosofía que otras distribuciones, como por ejemplo Slackware, por lo que para poder llegar a instalar y configurar el sistema se necesita un grado de conocimiento más que básico. Pero, al mismo tiempo, ArchLinux posee diversas aplicaciones que permiten que el mantenimiento a diario del sistema sea bastante sencillo.
Una alternativa al uso de imágenes de CD o USB para la instalación es utilizar la versión estática del gestor de paquetes Pacman, desde dentro de otro sistema operativo basado en Linux.
El usuario puede montar su partición formateando la unidad, y haciendo uso de Pacman mediante la línea de comandos para que se utilice el punto de montaje del dispositivo como root para sus operaciones. De esta manera el grupo de paquetes base y los paquetes adicionales se pueden instalar en la partición recién formateada. Sin embargo, hay otras medidas que deben de hacerse para que el sistema este listo para su uso, en particular la instalación de un cargador de arranque y configurar el nuevo sistema.
Así su filosofía se basa en tres puntos:
Mantener el sistema lo más simple y ligero posible, seguir el principio KISS.
Confiar en los GUIs para construir y configurar un sistema termina por dañar al usuario. Es por esto que el usuario necesitara conocer todo lo que los GUIs ocultan y llevar a cabo las configuraciones de forma manual.
Arch Linux permite al usuario hacer todas las contribuciones que desee mientras que no vayan en contra de la filosofía.
Continuamos con la segunda parte de la instalaciòn de ArchLinux, desarrollada esplèndidamente por Novatovich. La primera parte la encuentran aquì:
El paso siguiente es crear nuestro usuario y para eso nos logeamos:
y pasamos a crear nuestro usuario con useradd y agregaremos a grupos
useradd -m -g users -G audio,lp,optical,storage,video,wheel,games,power,scanner -s /bin/bash novatovich
y establecemos el pass para la cuenta de usuario
passwd novatovich
claro!!! cambien novatovich por su usuario
ahora instalaremos sudo
pacman -S sudo
y pasamos a editar sudoers
nano /etc/sudoers
solo quitar "#" a #wheel ALL=(ALL) ALL
ahora pasamos a logearnos como usuario
cambien novatovich por el usuario que le asignaron
su - novatovich
y para probar que funciona
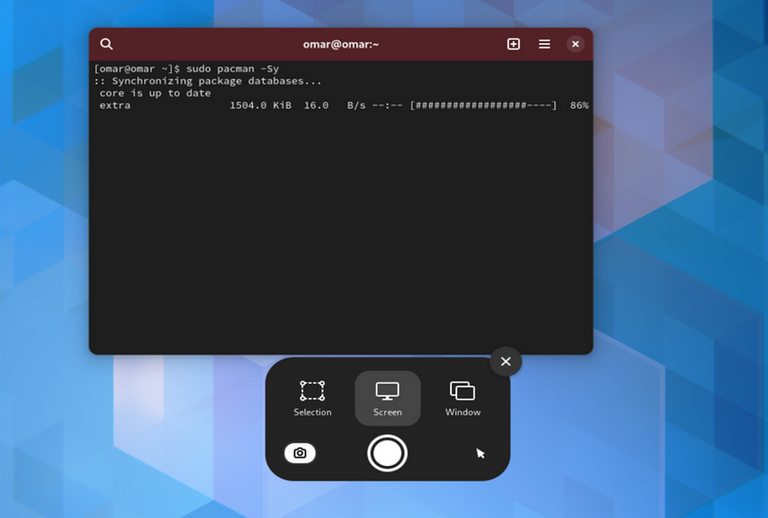
sudo pacman -Syu
Ahora pasaremos a instalar el entorno grafico basico
sudo pacman -S xorg-server xorg-xinit xorg-utils xorg-server-utils
para agregar soporte 3d
sudo pacman -S mesa mesa-demos
Ahora instalaremos nuestro driver de video
antes que nada ,tenemos que saber que marca y modelo es nuestra tarjeta de video para ello usaremos:
lspci
Si tu tarjeta de video es nVidia
Por lo general, el controlador libre Nouveau es suficiente para la mayoría de los usuarios, y es el recomendado:
sudo pacman -S xf86-video-nouveau
Si por algún motivo, Nouveau no es de tu agrado o no funciona adecuadamente en tu sistema, la recomendación es usar drivers propietarios.
Para instalar el driver propietario para las tarjetas de video más recientes (GeForce 6 en adelante):
sudo pacman -S nvidia nvidia-utils
Si tu tarjeta de video no es tan reciente (GeForce 5 FX series):
sudo pacman -S nvidia-173xx nvidia-173xx-utils
Debes reiniciar el sistema para que los cambios surtan efecto. Luego, debemos configurar el recién instalado driver de nVidia:
sudo nvidia-xconfig
Si tu tarjeta de video es ATI
Para este tipo de tarjetas de video, debemos instalar el controlador xf86-video-ati (radeon), el cual funcionará con los chipsets hasta HD 4xxx (últimos R700 chipsets), así como para HD 5xxx (últimos R800 chipsets).
sudo pacman -S xf86-video-ati
Un detalle: El controlador xf86-video-ati es reconocido como “radeon”
Si tu tarjeta de video es Intel
Para las tarjetas madre (motherboards) marca Intel, que tienen integrada la tarjeta de video (GPU), basta con instalar el siguiente controlador:
sudo pacman -S xf86-video-intel
Funcionará en los GPUs más comunes, tales como Intel GMA 900 (chipsets 910, 915) e Intel GMA 950 (chipset 945).
Si estás instalando ArchLinux bajo VirtualBox
sudo pacman -S virtualbox-guest-utils
Y luego cargar los módulos del kernel de VirtualBox:
sudo modprobe -a vboxguest vboxsf vboxvideo
Si tu tarjeta de video es una diferente a las anteriores
sudo pacman -Ss xf86-video
Si no encuentras ninguno apropiado a tu tarjeta de video, el controlador vesa es el más genérico, aunque no ofrece soporte 3D ni aceleración por hardware:
sudo pacman -S xf86-video-vesa
How to install step by step the new version of ArchLinux (part 2).
ArchLinux has no automatic configuration tools, thus sharing the same philosophy as other distributions, such as Slackware, so that in order to be able to install and configure the system a more than basic level of knowledge is required. But, at the same time, ArchLinux has several applications that make daily maintenance of the system quite easy.
An alternative to using CD or USB images for installation is to use the static version of the Pacman package manager from within another Linux-based operating system.
The user can mount his partition by formatting the drive, and using Pacman via the command line to use the device's mount point as root for his operations. This way the base package group and additional packages can be installed on the newly formatted partition. However, there are other steps that must be taken to make the system ready for use, in particular installing a bootloader and configuring the new system.
Thus their philosophy is based on three points:
Keep the system as simple and lightweight as possible, following the KISS principle.
Relying on GUIs to build and configure a system ends up hurting the user. This is why the user will need to know everything that the GUIs hide and carry out the configurations manually.
Arch Linux allows the user to make all the contributions he wants as long as they do not go against the philosophy.
We continue with the second part of the ArchLinux installation, splendidly developed by NovatoviArch Linux allowsch. The first part can be found here:
The next step is to create our user and for that we log in:
and then we create our user with useradd and add to groups
useradd -m -g users -G audio,lp,optical,storage,video,wheel,games,power,scanner -s /bin/bash novatovich
and set the pass for the user account
passwd novatovich
sure!!! change novatovich to your username
now we will install sudo
pacman -S sudo
and move on to edit sudoers
nano /etc/sudoers
just remove "#" from #wheel ALL=(ALL) ALL
now let's log in as a user
change novatovich to the user you assigned to him
su - novatovich
and to test that it works
sudo pacman -Syu
Now we will install the basic graphical environment
sudo pacman -S xorg-server xorg-xinit xorg-utils xorg-server-utils
to add 3d support
sudo pacman -S mesa mesa-demos
Now we will install our video driver
first of all, we have to know what brand and model is our video card for that we will use:
lspci
If your video card is nVidia
Generally, the free Nouveau driver is sufficient for most users, and is the recommended driver:
sudo pacman -S xf86-video-nouveau
If for some reason, Nouveau is not to your liking or does not work properly on your system, the recommendation is to use proprietary drivers.
To install the proprietary driver for the latest video cards (GeForce 6 and up):
sudo pacman -S nvidia nvidia-utils
If your video card is not so recent (GeForce 5 FX series):
sudo pacman -S nvidia-173xx nvidia-173xx-utils
You must reboot the system for the changes to take effect. Next, we need to configure the newly installed nVidia driver:
sudo nvidia-xconfig
If your video card is ATI
For this type of video cards, we must install the xf86-video-ati (radeon) driver, which will work with chipsets up to HD 4xxx (latest R700 chipsets), as well as for HD 5xxx (latest R800 chipsets).
sudo pacman -S xf86-video-ati
One detail: The xf86-video-ati driver is recognised as "radeon".
If your video card is Intel
For Intel motherboards, which have an integrated video card (GPU), just install the following driver:
sudo pacman -S xf86-video-intel
It will work on the most common GPUs, such as Intel GMA 900 (chipsets 910, 915) and Intel GMA 950 (chipset 945).
If you are installing ArchLinux under VirtualBox
sudo pacman -S virtualbox-guest-utils
And then load the VirtualBox kernel modules:
sudo modprobe -a vboxguest vboxsf vboxvideo
If your video card is a different one from the ones above
sudo pacman -Ss xf86-video
If you can't find one suitable for your video card, the vesa driver is the most generic, although it doesn't offer 3D support or hardware acceleration:
sudo pacman -S xf86-video-vesa


Home Page oficial del proyecto: /Official home page of the project: ArchLinux
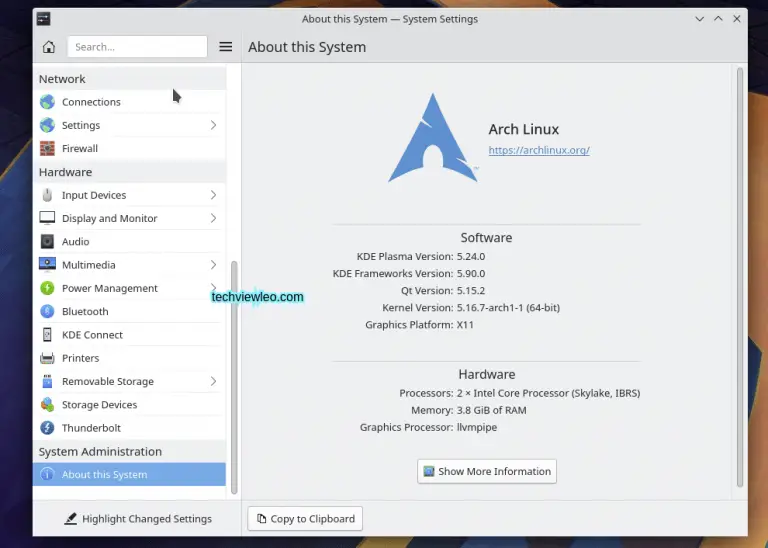
Screenshots / Capturas de pantallas:
| Blogs, Sitios Web y Redes Sociales / Blogs, Webs & Social Networks | Plataformas de Contenidos/ Contents Platforms |
|---|---|
| Mi Blog / My Blog | Los Apuntes de Tux |
| Red Social Twitter / Twitter Social Network | @hugorep |
