ArchLinux no posee herramientas de configuración automática, compartiendo así la misma filosofía que otras distribuciones, como por ejemplo Slackware, por lo que para poder llegar a instalar y configurar el sistema se necesita un grado de conocimiento más que básico. Pero, al mismo tiempo, ArchLinux posee diversas aplicaciones que permiten que el mantenimiento a diario del sistema sea bastante sencillo.
Una alternativa al uso de imágenes de CD o USB para la instalación es utilizar la versión estática del gestor de paquetes Pacman, desde dentro de otro sistema operativo basado en Linux.
El usuario puede montar su partición formateando la unidad, y haciendo uso de Pacman mediante la línea de comandos para que se utilice el punto de montaje del dispositivo como root para sus operaciones. De esta manera el grupo de paquetes base y los paquetes adicionales se pueden instalar en la partición recién formateada. Sin embargo, hay otras medidas que deben de hacerse para que el sistema este listo para su uso, en particular la instalación de un cargador de arranque y configurar el nuevo sistema.
Así su filosofía se basa en tres puntos:
Mantener el sistema lo más simple y ligero posible, seguir el principio KISS.
Confiar en los GUIs para construir y configurar un sistema termina por dañar al usuario. Es por esto que el usuario necesitara conocer todo lo que los GUIs ocultan y llevar a cabo las configuraciones de forma manual.
Arch Linux permite al usuario hacer todas las contribuciones que desee mientras que no vayan en contra de la filosofía.

El primer paso sera descargar la ISO desde: https://www.archlinux.org/download/
loadkeys es
para poder usar el teclado en Español
cfdisk
pasamos a particionar nuestro disco
yo particione:
sda1:boot
sda2:swap
sda3:/
sda4:home
una vez particionado el disco pasamos a formatear particiones
mkfs -t ext2 /dev/sda1
mkfs -t ext4 /dev/sda3
mkfs -t ext4 /dev/sda4
mkswap /dev/sda2
y activamos la swap
swapon /dev/sda2
Ahora montamos las particiones
primero la particion root
mount /dev/sda3 /mnt
creamos los directorios para otras particiones dentro de /mnt
mkdir /mnt/boot
mkdir /mnt/home
y montamos las respectivas particiones
mount /dev/sda1 /mnt/boot
mount /dev/sda4 /mnt/home
Ahora nos conectamos a internet ["ip link set eth0 up y dhclient eth0"]ya no hacen falta ya que se conecta solo
Ahora instalamos el sistema base
pacstrap /mnt base base-devel
Ahora instalamos el gestor de arranque osea el grub
pacstrap /mnt grub-bios
Ahora configuramos el sistema
generamos el archivo fstab
genfstab -p /mnt >> /mnt/etc/fstab
y haremos un chroot
arch-chroot /mnt
estableceremos el nombre de nuestro hostname en el archivo /etc/hostname
solo tienes que escribir el nombre que quieras ponerle
nano /etc/hostname
ahora crearemos un enlace simbolico de /etc/localtime a /usr/share/zoneinfo/"zona"/"subzona"
"cada uno que ponga su ubicacion solo cambiar Europe/Madrid por la que corresponda"
ln - s /usr/share/zoneinfo/Europe/Madrid /etc/localtime
establecemos las preferencias de localizacion editando el archivo /etc/locale.conf
ejemplo:para España
LANG=es_ES.UTF-8
para Argentina
LANG=es_AR.UTF-8
nano /etc/locale.conf
asi mismo en el archivo /etc/locale.gen debemos descomentar (eliminar el "#"al iniciode la linea)de tu localizacion
nano /etc/locale.gen
ya podemos generar la localizacion
locale-gen
ahora crearemos el archivo /etc/vconsole.conf que es el que establecera el keymap

ArchLinux has no automatic configuration tools, thus sharing the same philosophy as other distributions, such as Slackware, so that in order to be able to install and configure the system a more than basic level of knowledge is required. But, at the same time, ArchLinux has several applications that make daily maintenance of the system quite easy.
An alternative to using CD or USB images for installation is to use the static version of the Pacman package manager from within another Linux-based operating system.
The user can mount his partition by formatting the drive, and using Pacman via the command line to use the device's mount point as root for his operations. This way the base package group and additional packages can be installed on the newly formatted partition. However, there are other steps that must be taken to make the system ready for use, in particular installing a bootloader and configuring the new system.
Thus their philosophy is based on three points:
Keep the system as simple and lightweight as possible, following the KISS principle.
Relying on GUIs to build and configure a system ends up hurting the user. This is why the user will need to know everything that the GUIs hide and carry out the configurations manually.
Arch Linux allows the user to make all the contributions he wants as long as they do not go against the philosophy.
The first step is to download the ISO from: https://www.archlinux.org/download/
loadkeys is
to be able to use the English keyboard
cfdisk
we move on to partition our disk
I partition:
sda1:boot
sda2:swap
sda3:/
sda4:home
once the disk has been partitioned, format the partitions
mkfs -t ext2 /dev/sda1
mkfs -t ext4 /dev/sda3
mkfs -t ext4 /dev/sda4
mkswap /dev/sda2
and activate the swap
swapon /dev/sda2
Now we mount the partitions
first the root partition
mount /dev/sda3 /mnt
create the directories for other partitions inside /mnt
mkdir /mnt/boot
mkdir /mnt/home
and mount the respective partitions
mount /dev/sda1 /mnt/boot
mount /dev/sda4 /mnt/home
Now we connect to the internet ["ip link set eth0 up and dhclient eth0"] are no longer needed as it connects by itself.
Now we install the base system
pacstrap /mnt base base-devel
Now we install the boot loader, i.e. grub
pacstrap /mnt grub-bios
Now we configure the system
generate the fstab file
genfstab -p /mnt >> /mnt/etc/fstab
and do a chroot
arch-chroot /mnt
we set our hostname in the /etc/hostname file
just type in the name you want to give it
nano /etc/hostname
now we will create a symbolic link from /etc/localtime to /usr/share/zoneinfo/"zone"/"subzone".
"everyone put their own location, just change Europe/Madri
nano /etc/vconsole.conf
KEYMAP=es
Now we configure the bootloader, that is, grub
grub-install /dev/sda
and create the file grub.cfg
grub-mkconfig -or /boot/grub/grub.cfg
and create the initial ram disk with :
mkinitcpio -p linux
set our root password with :
passwd
and exit the chroot environment with:
exit
unmount the partitions previously mounted on /mnt with.
umount /mnt/{boot,home,}
and finally reboot the system with:
reboot
After reboot we will see our grub
and log in to our newly installed system
we will enable the "new" network
and now we only have to enable the network with system
systemctl enable dhcpcd.service
systemctl start dhcpcd.service
Now everything should look like in the following screenshot. If so, click Apply and OK.
Now we have everything ready, everything configured. Now we can start using and enjoying this programme. A very good alternative to Ares.


Home Page oficial del proyecto: /Official home page of the project: ArchLinux
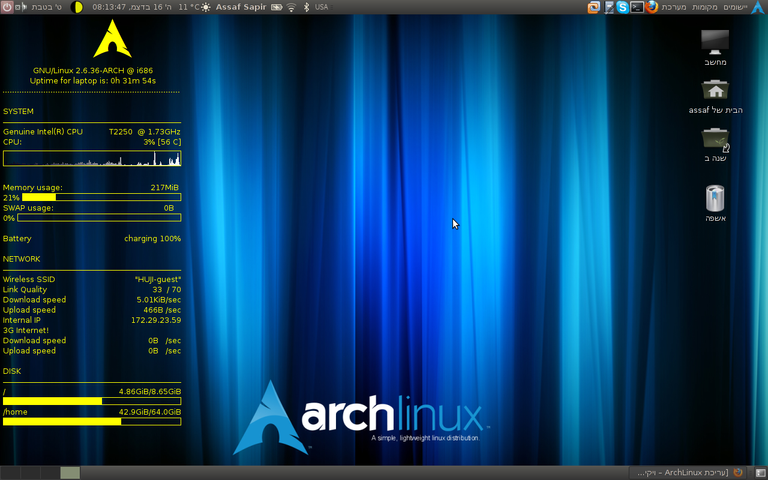
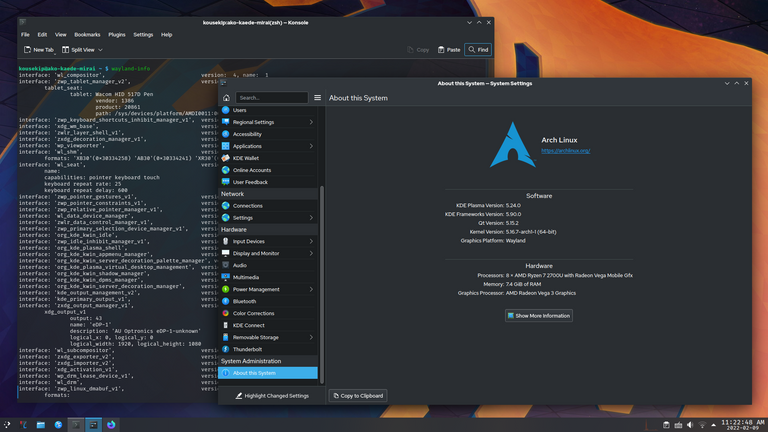
Screenshots / Capturas de pantallas:
| Blogs, Sitios Web y Redes Sociales / Blogs, Webs & Social Networks | Plataformas de Contenidos/ Contents Platforms |
|---|---|
| Mi Blog / My Blog | Los Apuntes de Tux |
| Red Social Twitter / Twitter Social Network | @hugorep |

Only people looking for a challenge install Arch the classic way, and its much easier than what other people brag about. If you never tried it, have a look at ArchLabs, I'm using it for more than 2 years, great community as well on the forums.