Español
Nuevamente me complace traerles una actividad manual fácil de realizar, no necesitaremos mayor cantidad de materiales dado que la creatividad será nuestra principal aliada. Mayormente, en nuestras casas tenemos objetos que no usamos y al transcurrir el tiempo dejamos en el olvido hasta tirar a la basura, sin pensar que podríamos convertirlos en piezas valiosas.
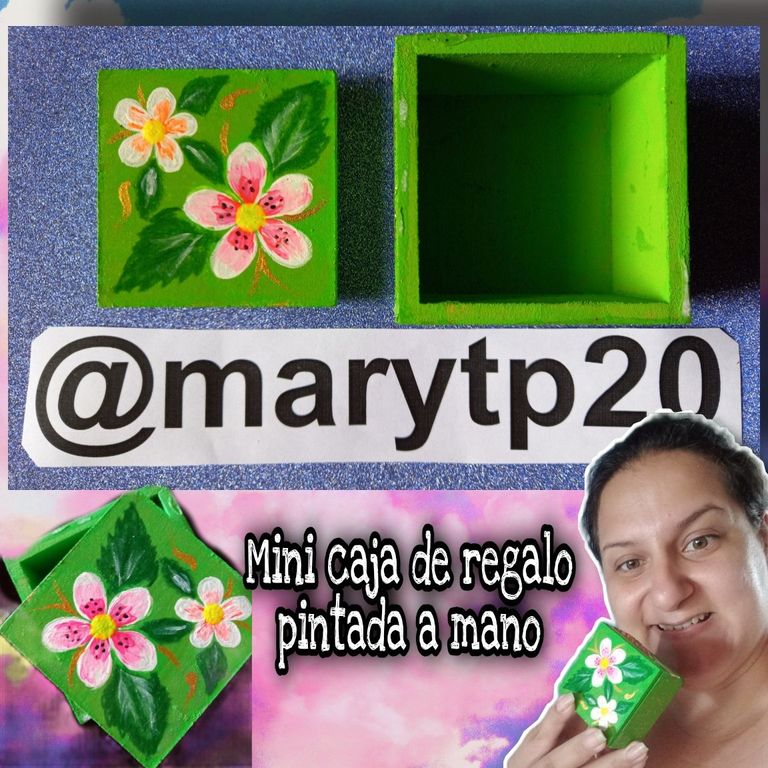
Hoy estaré convirtiendo una pieza de MDF (mini) en una hermosa caja decorada con motivo floral, ideal para obsequiar algún presente a alguien especial ya sea por su cumpleaños o día especial.
Utilizaremos:
• Pinturas al frío
• Pincel fino
• Pega escolar
• Escarcha
• Cinta decorativa (opcional)
• Creatividad
Inglés
Once again I am pleased to bring you an easy to make manual activity, we will not need a lot of materials since creativity will be our main ally. Mostly, in our homes we have objects that we don't use and as time goes by we forget to throw them away, without thinking that we could turn them into valuable pieces.
Today I will be turning a piece of MDF (mini) into a beautiful box decorated with floral motif, ideal to give a present to someone special either for their birthday or special day.
We will use:
- Cold paints
- Fine brush
- School glue
- Frosting
- Decorative tape (optional)
- Creativity

PASO 1:
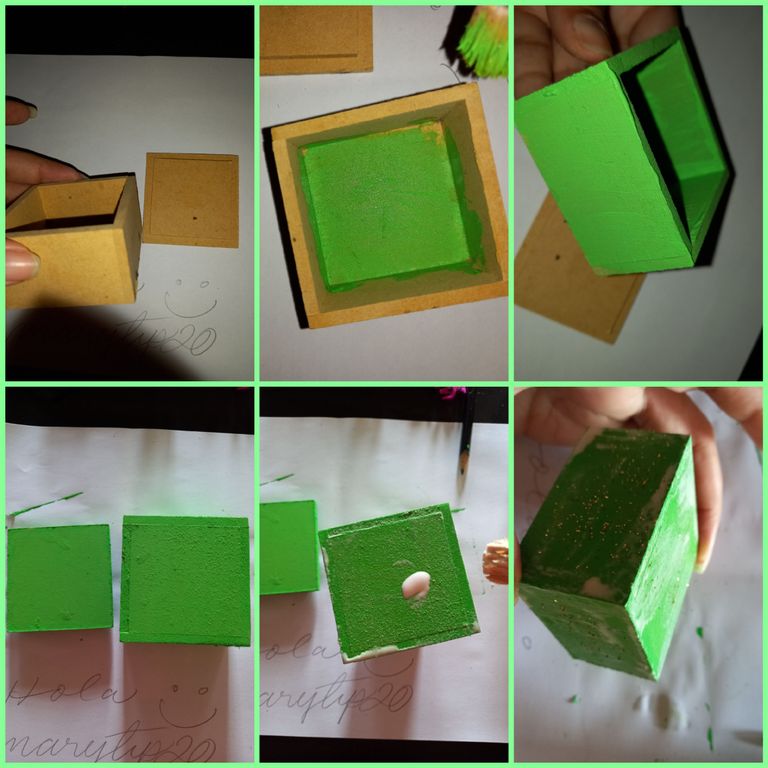
We start by removing the dust from the box, with a brush (medium) we paint with the color of our preference, I used apple green, we cover each corner and all sides, let dry and repeat the procedure 2 more times if necessary. Once all the green paint is dry, apply a small layer of school glue and put frosting on top, this will help to give a better finish (shine). Let it dry as long as necessary.

PASO 2:
Con nuestra caja totalmente seca, procedemos a decorar la tapa, haremos una motivo floral bastante fácil y sin técnica. Comenzamos fijando el sitio donde dibujaremos, puede ser cualquiera pero, mientras más organizado quedé se verá más lindo el detalle, utilizaremos pinturas de uso escolar en color verde, fucsia, , blanca, amarilla, negra. Con la ayuda de un pincel fino trazamos pequeños pétalos en color blanco, no importa que queden desiguales, luego podemos corregir. Seguidamente, le hacemos detalles con fuscia, naranja, negro y amarillo. Para las obras utilicé colores tradicionales (verde) haciendo el diseño de la misma y aportándole luz en el centro con pintura blanca. Por último, aplicamos pega para dar brillo y proteger el dibujo. Como decoración opcional podemos colocar algún detalle en los lados de la caja, en este caso usé una cinta estampada. Dejamos secar el tiempo necesario.


With our box completely dry, we proceed to decorate the lid, we will make a floral motif quite easy and without technique. We start by fixing the place where we will draw, it can be any place, but the more organized it is, the nicer the detail will look, we will use school paints in green, fuchsia, white, yellow, black. With the help of a fine brush we trace small petals in white, it doesn't matter if they are uneven, we can correct them later. Next, we make details with fuscia, orange, black and yellow. For the works I used traditional colors (green) making the design of the same and giving it light in the center with white paint. Finally, we apply glue to brighten and protect the drawing. As an optional decoration we can place some detail on the sides of the box, in this case I used a printed ribbon. Let it dry for the necessary time.


Todas las imágenes son de mi propiedad.
Utilice traductor DeepL versión gratuita
Imágenes, separadores, banner hechos en Canva
Contenido original de @marytp20

Congratulations, your post has been upvoted by @dsc-r2cornell, which is the curating account for @R2cornell's Discord Community.
Enhorabuena, su "post" ha sido "up-voted" por @dsc-r2cornell, que es la "cuenta curating" de la Comunidad de la Discordia de @R2cornell.
Te invitamos a votar por @blurthispano como Witness