
Hola amigos de #Blurt. Yo soy Lelys, me da gusto pasar a saludarles y mostrarles mi más reciente creación. Siempre es un placer compartir con ustedes mis proyectos.
Hoy les traigo el paso a paso para elaborar un lindo llavero, podemos realizarlo de diferentes tamaños, según el gusto y la necesidad. Ahora te muestro cómo los hice.
Hello #Blurt friends. I'm Lelys, I'm happy to stop by to say hello and show you my latest creation. It's always a pleasure to share with you my projects.
Today I bring you the step by step to make a cute keychain, we can make it in different sizes, according to taste and need. Now I show you how I made them.

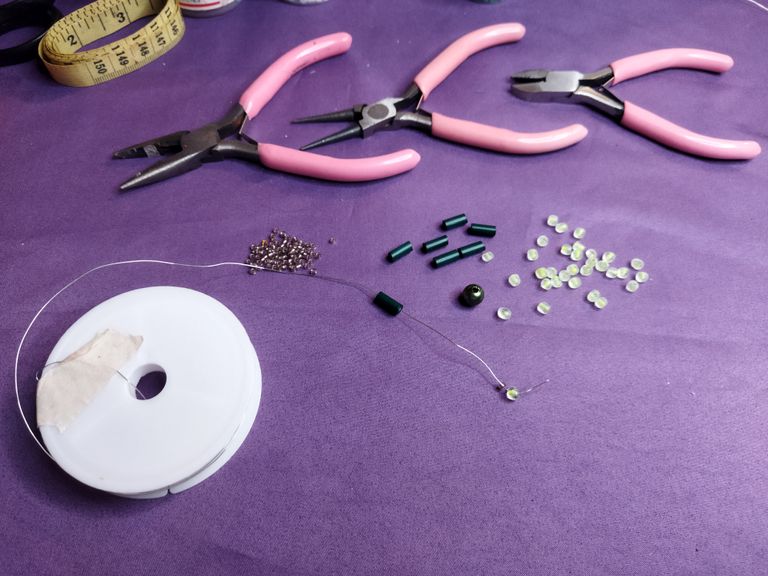
🤵 Los materiales que utilicé para hacer este lindo hombrecito son: mostacillas pequeñas y medianas. Canutillos. Alambre de bisutería del número 4. Perla de color verde. Pinzas de bisutería. Cadena y aro para llaveros.
🤵 The materials I used to make this cute little man are: small and medium beads. Beads. Number 4 costume jewelry wire. Green pearl. Costume jewelry clips. Chain and ring for key chains.
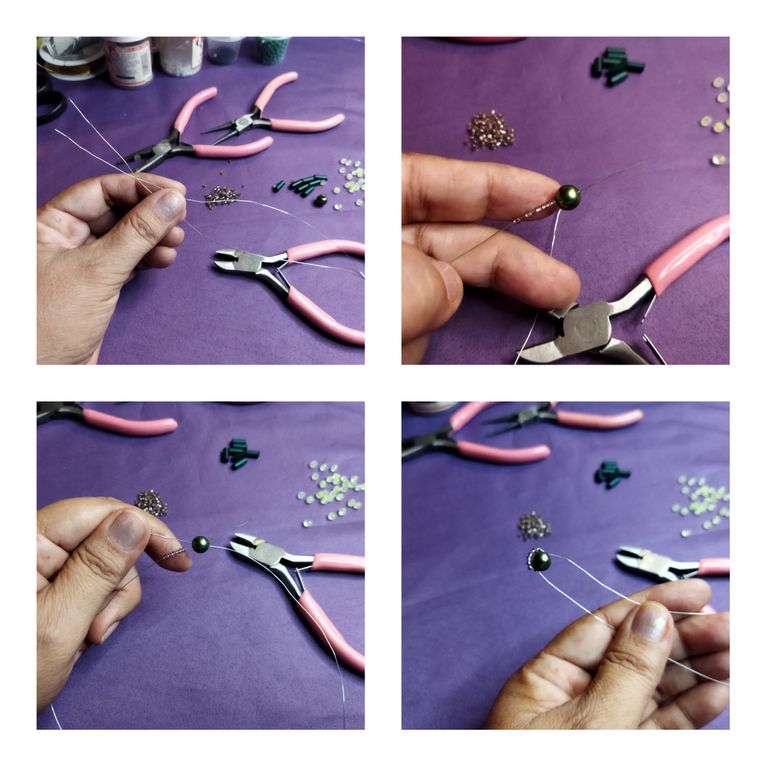
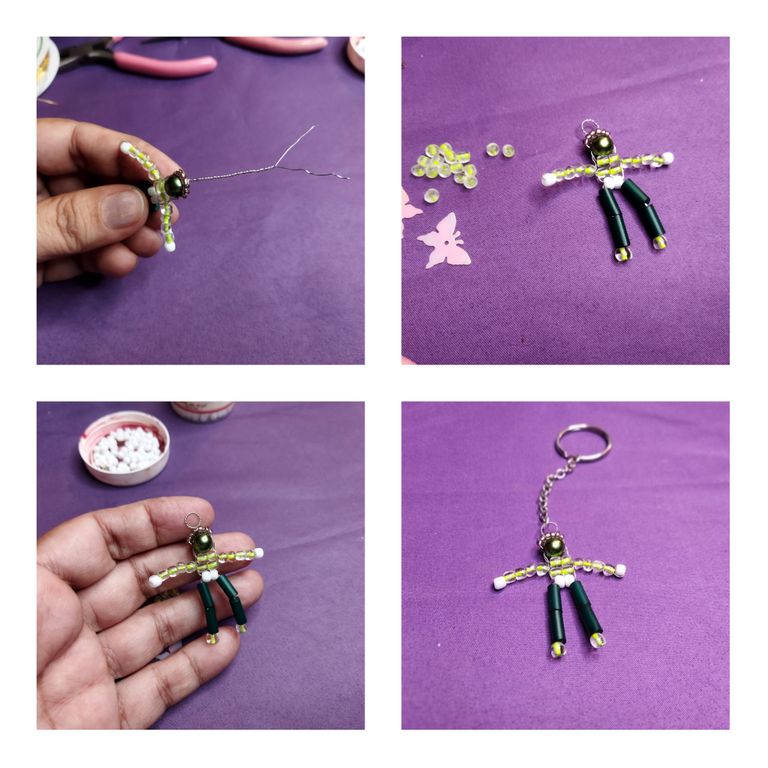
🤵 Para realizarlos necesitamos cortar 50 cm de alambre y doblarlo a la mitad. Pasamos por el alambre 6 mostacillas pequeñas y la perla. Seguidamente las llevamos hasta abajo y al centro del alambre, el otro extremo del alambre lo metemos por donde sale el de las MOSTACILLAS. Cruzamos y colocamos bien ajustado en el centro del alambre. Debe verse así.
🤵 To make them we need to cut 50 cm of wire and bend it in half. We pass through the wire 6 small beads and the pearl. Then we bring them down to the center of the wire, the other end of the wire we put it through the end of the MOSTACILLAS. Cross and place it tightly in the center of the wire. It should look like this.
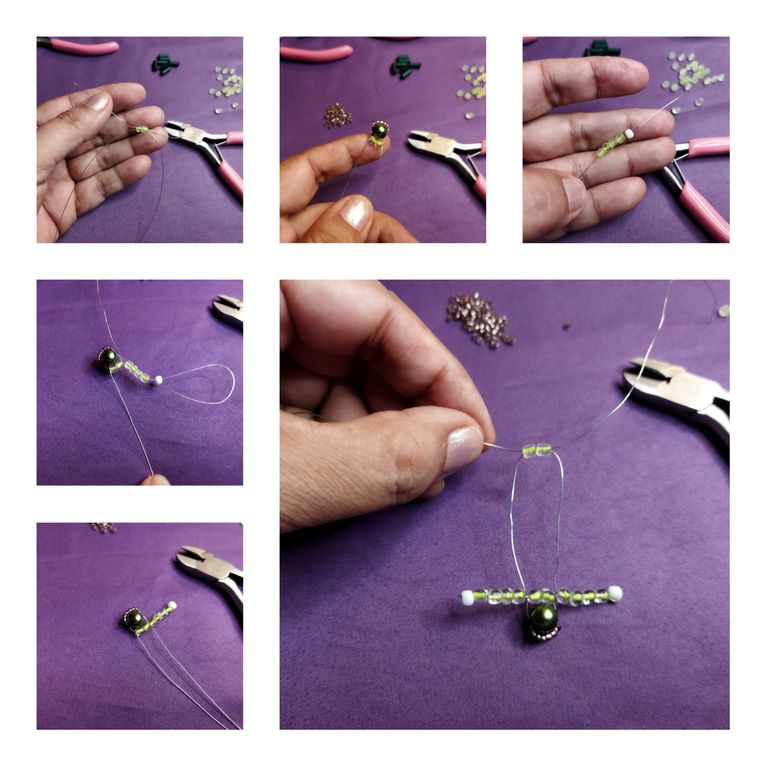
🤵 Seguidamente metemos 2 MOSTACILLAS verdes y nuevamente cruzamos los alambres llevando las mostacillas hasta abajo. Metemos en uno de los extremos del alambre 4 mostacillas verdes y 1 blanca. Con la punta de ese alambre atravesamos las 4 MOSTACILLAS verdes. Así se forma un brazo. Repite lo mismo con el otro extremo. En la otra vuelta mete 2 MOSTACILLAS verdes y cruza los alambres. Ahora repite otra vuelta metiendo 2 mostacillas blancas.
🤵 Then we insert 2 green MOSTACILLAS and again we cross the wires bringing the beads to the bottom. We put in one of the ends of the wire 4 green beads and 1 white bead. With the end of that wire we cross the 4 green MOSTACILLAS. This forms an arm. Repeat the same with the other end. In the other round put 2 green MOSTACILLAS and cross the wires. Now repeat another loop by inserting 2 white beads.
🤵 Mete en uno de los extremos 2 canutillos de color verde y 1 mostacilla verde claro. Con la punta de alambre de ese extremos atraviesa los 2 canutillos. Haz lo mismo con el otro extremo de alambre. Así se formarán sus piernas. Los dos extremos irán de vuelta por cada 2 de las MOSTACILLAS de las vueltas anteriores. Llegando hasta la perla. Allí también haremos el cruce para después entorchar ambos extremos y hacer el aro para colgar.
🤵 Tuck 2 green beads and 1 light green bead into one of the ends. With the wire end of that end go through the 2 beads. Do the same with the other end of the wire. This will form your legs. The two ends will go back through each 2 of the MOSTACILLAS of the previous turns. Reaching the pearl. There we will also make the crossing to then twist both ends and make the ring to hang.
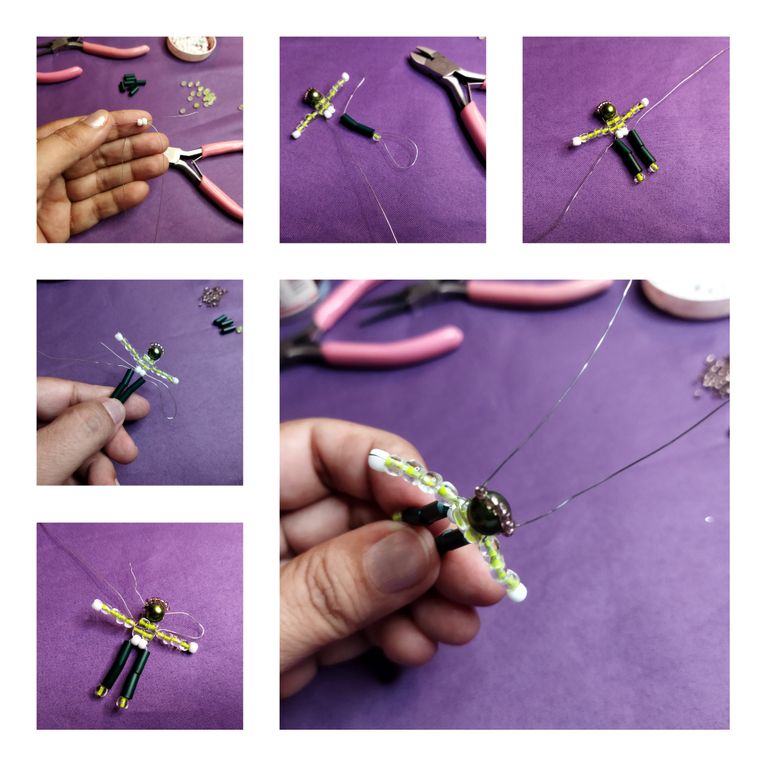
🤵 Entorchamos los dos alambres y formamos un aro ayudándonos con la pinza mandril. Luego enrollamos el sobrante de alambre para sujetar el aro. Así debe verse.
🤵 We twist the two wires together and form a ring using the mandrel pliers. Then we roll up the excess wire to hold the hoop. This is how it should look.
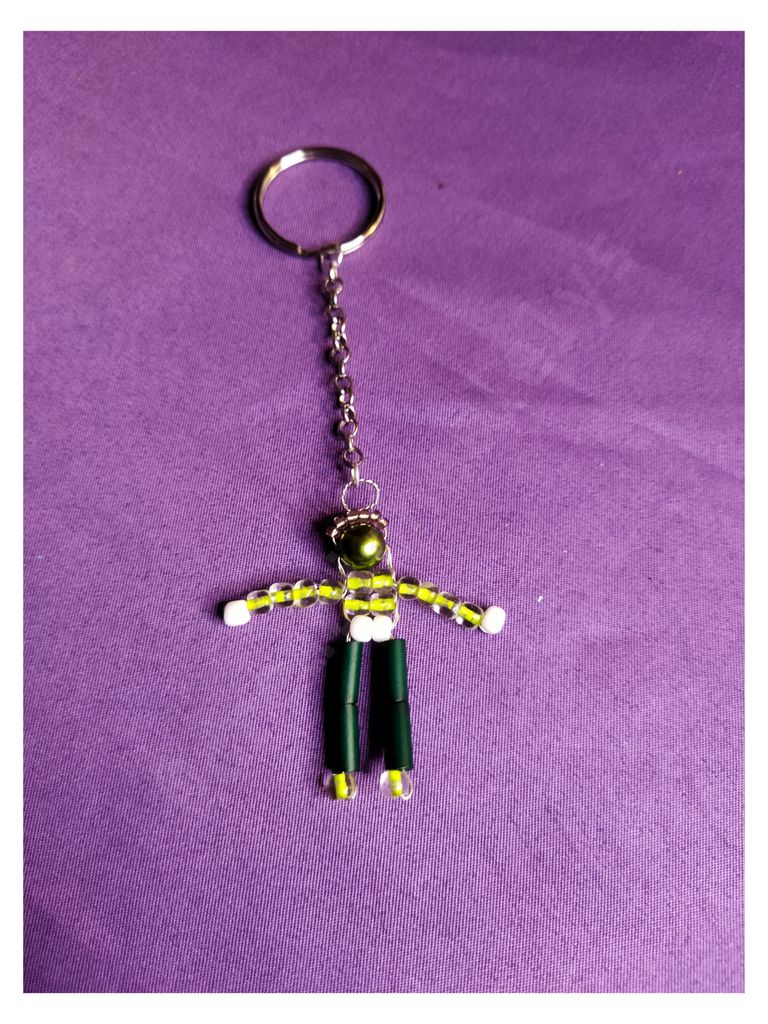
Espero que les guste mi nuevo proyecto. Solo basta colocar en el llavero y ya habremos terminado.
Todas las fotos son de mi autoría. Editadas con Polish. Usé el traductor de Deelp. El logo usado en la portada fue diseñado por @Geeklania. Mil gracias por leer mis publicaciones. Saludos.
I hope you like my new project. Just place it on the keychain and you are done.
All photos are my own. Edited with Polish. I used Deelp translator. The logo used on the cover was designed by @Geeklania. Thank you very much for reading my posts. Regards.
Te invitamos a usar el tag #blurthispano. Nos puedes encontrar en Discord.
Curado manualmente por Geeklania.
Te invitamos a votar por @blurthispano como Witness.
Gracias por el apoyo recibido. 🙋🤗😉🎉🙏
Congratulations, your post has been curated by @r2cornell-curate. Also, find us on Discord
Felicitaciones, su publication ha sido votado por @r2cornell-curate. También, encuéntranos en Discord
Thanks you ☺️ Muchas gracias por su apoyo constante 🙏🙋❤️
Gracias por compartir tu publicación en #Blurt. Tu esfuerzo significa mucho para nosotros; por eso has recibido un voto positivo.
Te invito a votar por @blurtlatam como Testigo / Witness
Gracias a ustedes por su apoyo a mis publicaciones. Éxitos!!! 😁🙏🙋🎉🥳🤗