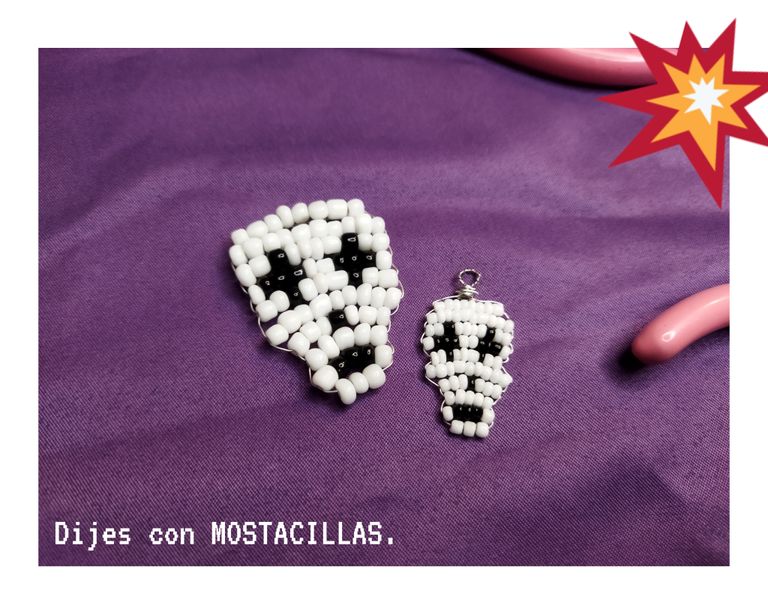
Hola amigos de #Blurt me da gusto saludarlos. Estuve un poco ocupada últimamente aprendiendo a realizar nuevos proyectos con mostacillas. Una de mis amigas me pidió que le haga algunos dijes de calavera como uno que le realicé hace algún tiempo. Me trajo la muestra y a partir de allí comencé a trabajar. Espero que les guste y si se animan a realizarlos me encantaría ver el resultado. Se hacen rápido y no es difícil. Les cuento cómo los hice.
Hello #Blurt friends, I'm happy to say hello. I've been a little busy lately learning how to make new projects with beads. One of my friends asked me to make her some skull charms like the one I made for her some time ago. She brought me the sample and from there I started working. I hope you like them and if you dare to make them I would love to see the result. They are quick to make and not difficult. I'll tell you how I made them.

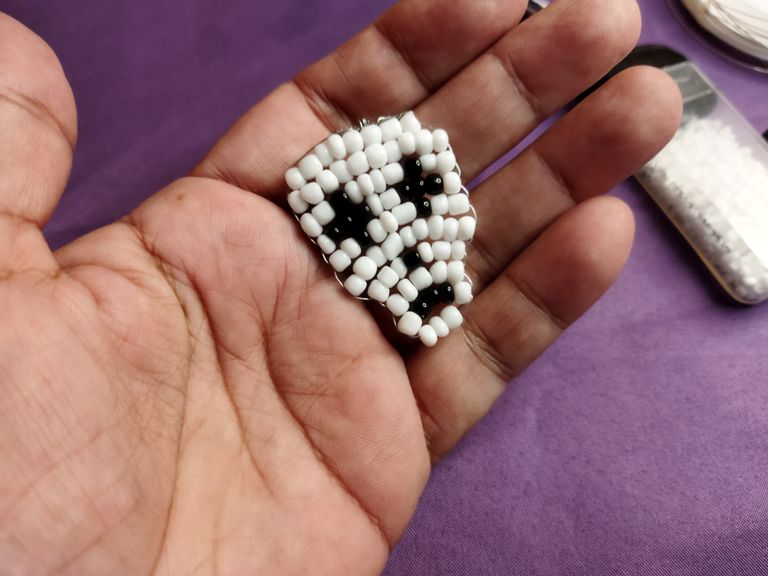
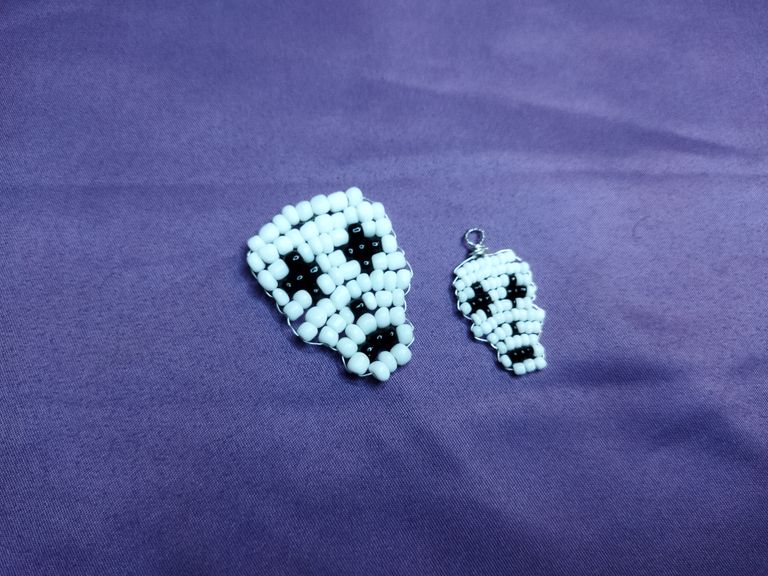
Esta es la muestra que mi amiga trajo. Me pidió unos similares, pero más pequeños. Los quiere para regalar como recuerdo en un compartir entre amigos. Me gusta hacer este proyecto porque es bastante fácil. Lo recomiendo mucho si estás recién aprendiendo a usar las MOSTACILLAS.
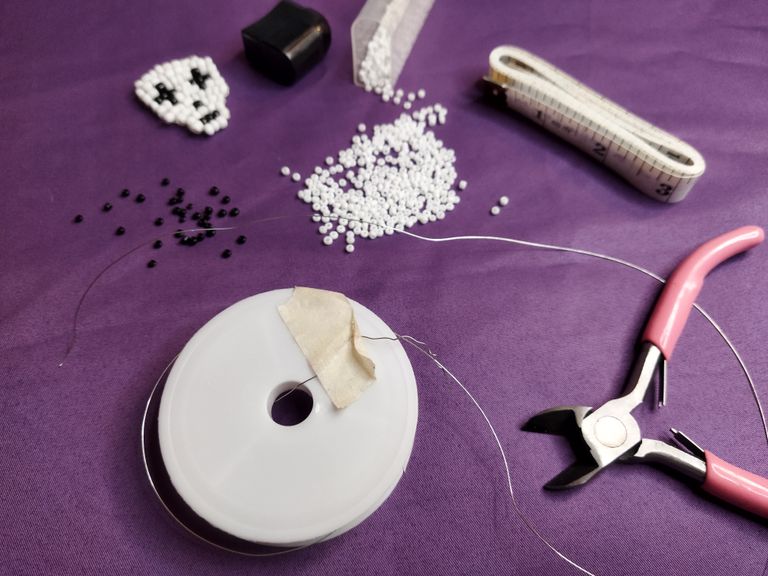
Los materiales que necesitas son:
- Mostacillas pequeñas. Blancas y negras.
- Alambre de bisutería del más delgado.
- Pinzas de bisutería.
- Cinta métrica.
This is the sample that my friend brought. She asked me for similar ones, but smaller. She wants to give them as a souvenir to share with friends. I like making this project because it is quite easy. I highly recommend it if you are just learning how to use the MOSTACILLS.
The materials you need are:
- Small beads. White and black.
- Jewelry wire of the thinnest size.
- Costume jewelry tweezers.
- Tape measure.
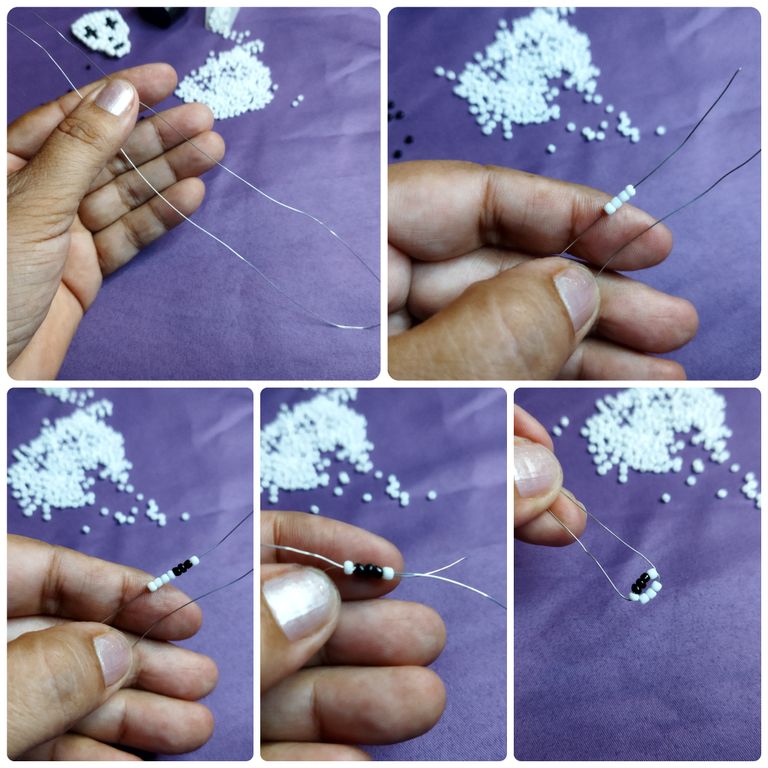
El procedimiento es el siguiente:
- Corta 40 cm de alambre si vas a usar la mostacilla pequeña. Corta 50 cm de alambre si vas a usar la mostacilla mediana.
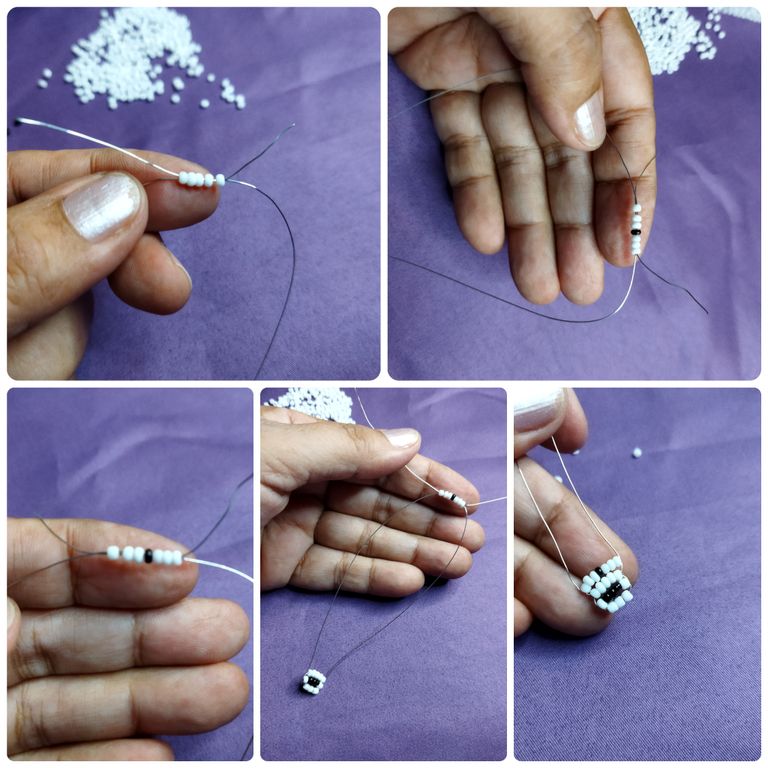
- Dobla el alambre a la mitad e introduce 4 MOSTACILLAS blancas, 3 negras y 1 blanca.
- Con el otro extremo del alambre tomamos las últimas 5 mostacillas que metimos.
- Con sumo cuidado vamos templando ambos extremos del alambre hasta que queden todas las MOSTACILLAS ubicadas en el centro y las puntas del alambre a la misma altura. Ver imagen 👇
The procedure is as follows:
- Cut 40 cm of wire if you are going to use the small bead. Cut 50 cm of wire if you are going to use the medium sized beads.
- Fold the wire in half and insert 4 white, 3 black and 1 white MOSTACILLAS.
- With the other end of the wire we take the last 5 beads that we put in.
- With great care we temper both ends of the wire until all the MOSTACILLAS are located in the center and the tips of the wire at the same height. See image 👇
- A partir de esta segunda vuelta lo que haremos es meter más MOSTACILLAS según el orden que vemos en la muestra ordenadas de izquierda a derecha. Luego hacemos el cruce con el otro extremos y llevamos hasta abajo.
- En la segunda vuelta metemos 5 MOSTACILLAS blancas, hacemos el cruce y llevamos hasta abajo.
- Tercera vuelta metemos 3 mostacillas blancas, 1 negra y 3 blancas. Hacemos el cruce y llevamos hasta abajo.
- From this second round what we will do is to put more MOSTACILLAS according to the order that we see in the sample ordered from left to right. Then we make the crossing with the other end and we take it to the bottom.
- In the second round we put 5 white MOSTACILLAS, we make the crossing and we take to the bottom.
- In the third round we insert 3 white beads, 1 black bead and 3 white beads. We make the crossing and we take it to the bottom.
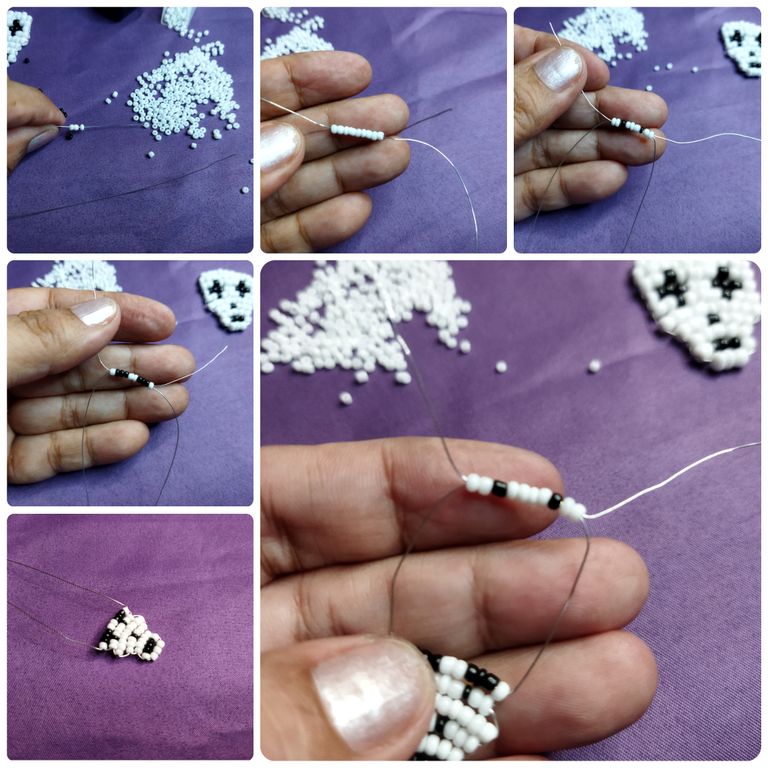
- Cuarta vuelta metemos 9 mostacillas. Cruzamos y llevamos hasta abajo.
- Es importante ir acomodando y dando forma al final de cada vuelta.
- Quinta vuelta metemos 2 mostacillas blancas, 1 negra, 3 blancas, 1 negra, 2 blancas. Cruzamos y llevamos hasta abajo.
- Sexta vuelta metemos 1 mostacilla blanca, 3 negras, 2 blancas, 3 negras y 1 blanca. Cruzamos ambas puntas del alambre por dentro de las MOSTACILLAS y llevamos hasta abajo.
- Séptima vuelta metemos 2 mostacillas blancas, 1 negra, 4 blancas, 1 negra y 2 blancas. Cruzamos las puntas y llevamos hasta abajo.
- Fourth turn we insert 9 beads. Cross and bring to the bottom.
- It is important to accommodate and give shape at the end of each turn.
- Fifth row we insert 2 white beads, 1 black, 3 white, 1 black, 2 white. Cross and bring to the bottom.
- Sixth turn we insert 1 white, 3 black, 2 white, 3 black and 1 white beads. Cross both ends of the wire inside the MOSTACILLAS and bring to the bottom.
- Seventh turn we insert 2 white, 1 black, 4 white, 1 black and 2 white beads. Cross the ends of the wire and go all the way to the bottom.
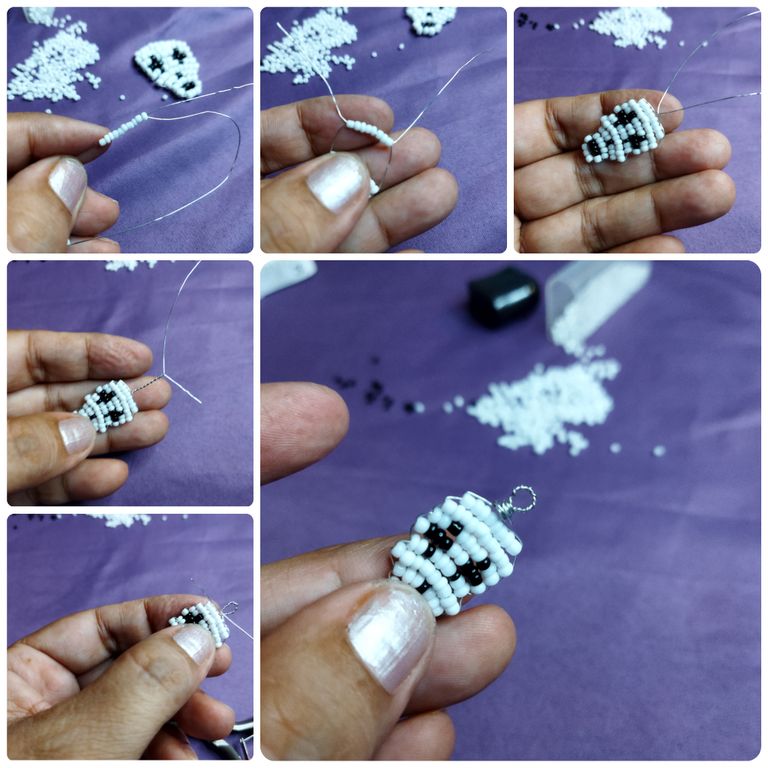
- Octava vuelta metemos 10 mostacillas blancas hacemos el cruce y llevamos hasta abajo.
- Novena vuelta metemos 8 mostacillas, hacemos el cruce y llevamos hasta abajo.
- Décima vuelta torcemos ambos extremos del alambre procurando que quede centrado. Luego formamos un aro y aseguramos dando vueltas con los alambres sobrantes.
- Eighth turn we insert 10 white beads, we make the crossing and we take it to the bottom.
- Ninth turn we put in 8 beads, we make the cross and we take it to the bottom.
- Tenth turn we twist both ends of the wire making sure it is centered. Then we form a ring and secure it by twisting the remaining wires.
De este modo ya tendremos listo nuestro dije. Lo podemos usar colgado en cadenas, pulseras, llaveros y zarcillos. Lucen bastante bien y son bonitos.
This way we will have our pendant ready. We can use it hanging on chains, bracelets, key chains and earrings. They look quite nice and pretty.
Muchas gracias por el apoyo recibido en mis publicaciones. Usé el traductor de Deelp. Edité con Polish. Hasta pronto.
Thank you very much for the support received on my publications. I used Deelp translator. I edited with Polish. See you soon.

Lelysssss estan super cool esas calacas, y el tutorial y el post están superrrr.
Hola amigo! Gusto en saludarte.
Muchas gracias por visitar mi blog 😁 sigo aprendiendo. Me encantan las calaveras. Saludos.
Te invitamos a usar el tag #blurthispano. Nos puedes encontrar en Discord.
Curado manualmente por Geeklania.
Te invitamos a votar por @blurthispano como Witness.
Muchas gracias por su apoyo 🤗 éxitos.
Gracias por compartir tu publicación en #Blurt. Tu esfuerzo significa mucho para nosotros; por eso has recibido un voto positivo.
Te invito a votar por @blurtlatam como Testigo / Witness
Hola. Muchísimas gracias 🤗 por apoyar y valorar mi publicación. ¡Éxitos!
Congratulations, your post has been curated by @r2cornell-curate. Also, find us on Discord
Felicitaciones, su publication ha sido votado por @r2cornell-curate. También, encuéntranos en Discord
Thanks you ☺️