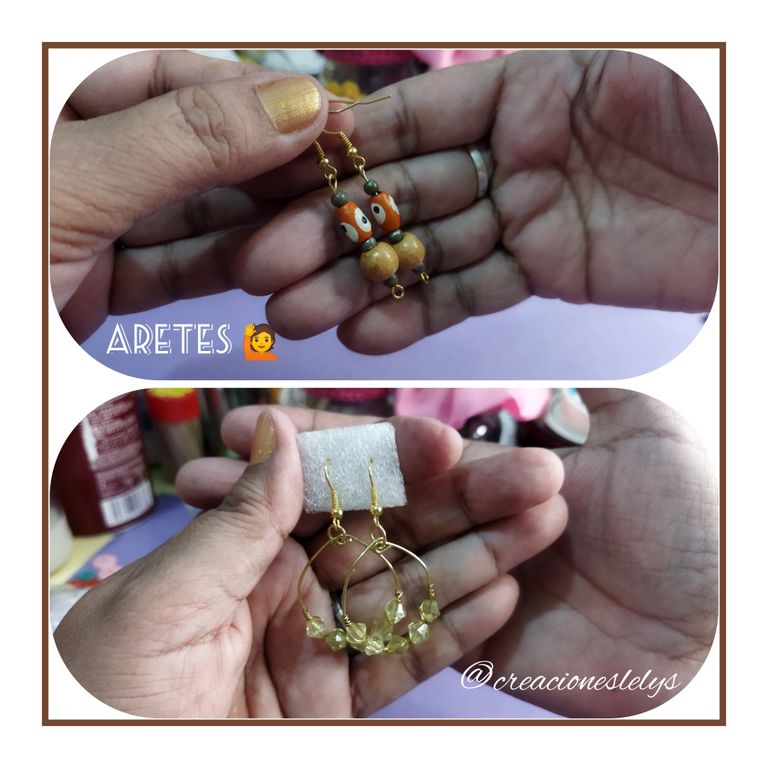
Hola amigos de mi querida plataforma #Blurt 🤗 el día de hoy traigo para ustedes el tutorial para realizar dos modelos de aretes sensacionales que podemos hacer súper fácil y rápido.
Hello friends of my dear #Blurt platform 🤗 today I bring for you the tutorial to make two models of sensational earrings that we can make super easy and fast.

¿En cuántas ocasiones hemos tenido que salir con las orejas desnudas porque no encontramos los aretes adecuados para la ocasión o que combinen con nuestros vestidos? ¿Te ha pasado? ¿Te acaban de invitar para un cumpleaños y no tienes nada a mano para regalar?
Estos aretes serán tu salvación. Procura tener en casa los siguientes materiales y verás cómo en un santiamén harás pares de zarcillos de diferentes colores. Ideales para lo que se te presente.
How many times have we had to go out with bare ears because we couldn't find the right earrings for the occasion or to match our dresses? Has it happened to you? Have you just been invited to a birthday party and you don't have anything to give?
These earrings will be your salvation. Try to have the following materials at home and you will see how in a jiffy you will make pairs of earrings in different colors. Ideal for whatever comes your way.

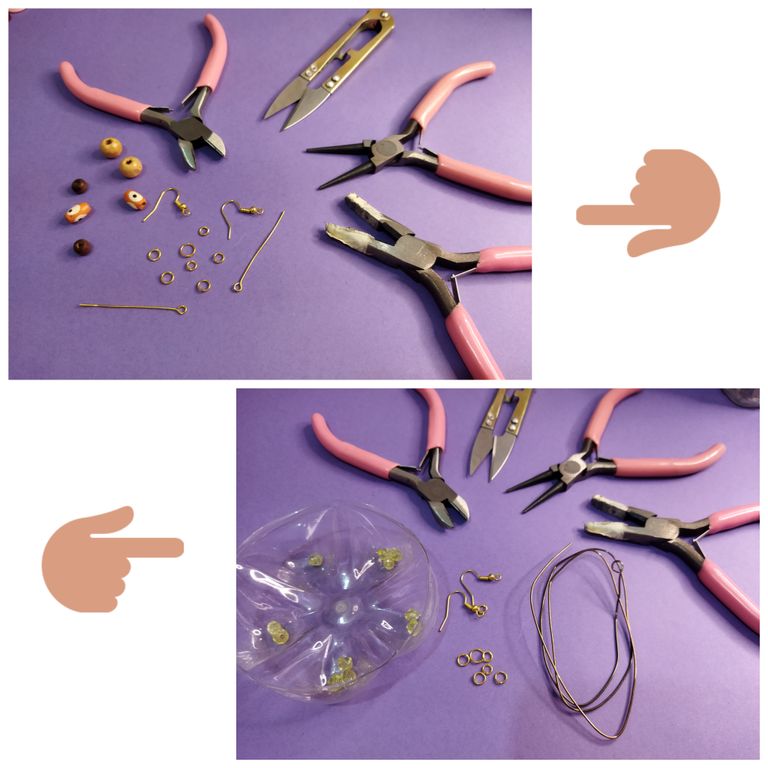
- Alambre de bisutería n°20 o 18.
- Alfileres de bisutería.
- Pinzas de bisutería.
- Swarovski.
- Abalorios.
- Alambre de bisutería del más delgado para engarzar.
- Aros o argollas.
- Anzuelo pescador.
- Jewelry wire n°20 or 18.
- Jewelry pins.
- Jewelry clips.
- Swarovski.
- Beads.
- Jewelry wire of the thinnest for crimping.
- Hoops or rings.
- Fish hook.

- Empezaremos haciendo los aretes de firma básica o tradicional. Para ello usaremos los abalorios que más te gusten.
- En los alfileres para bisutería iremos colocando los abalorios según el diseño que hayamos elegido. Siempre colocando la piedra o perla más pesada entre las primeras que meteremos.
- We will start by making the basic or traditional signature earrings. To do this we will use the beads that you like the most.
- In the pins for costume jewelry we will place the beads according to the design we have chosen. Always placing the heaviest stone or pearl among the first ones we will put in.
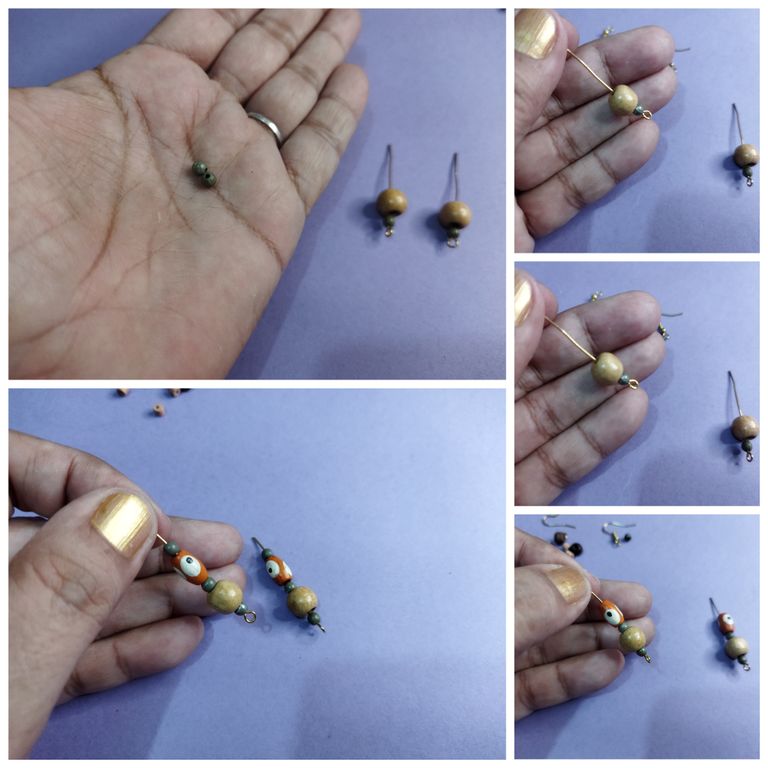
- Haremos este proceso dos veces iguales para crear el par de aretes.
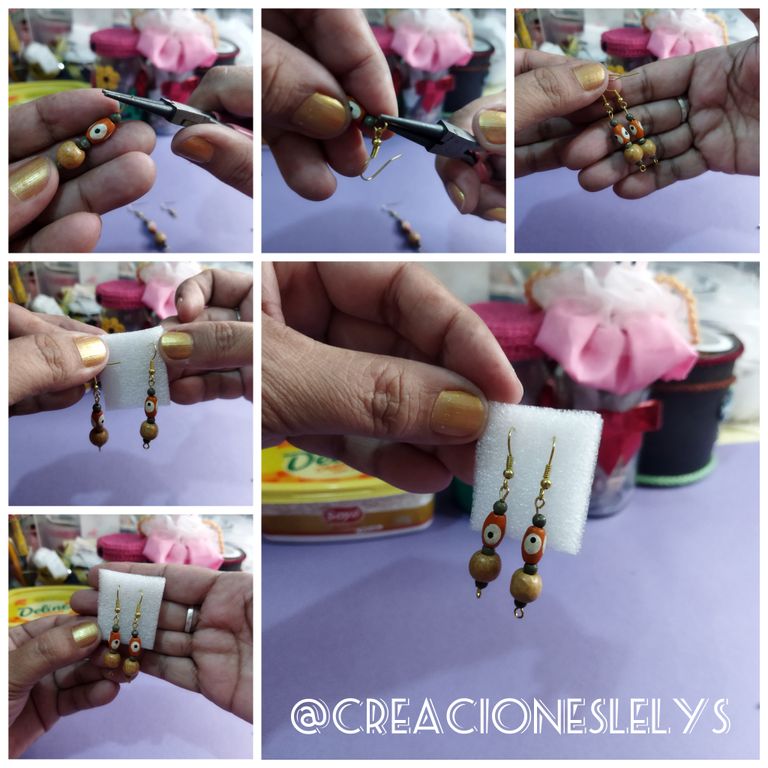
- Luego con la pinza mandril formaremos la argolla al final de cada alfiler.
- Antes de cerrarla completamente introduciremos el gancho o anzuelo pescador.
- Medimos ambos aretes para que queden del del mismo tamaño y habremos terminado.
- We will do this process two equal times to create the pair of earrings.
- Then with the mandrel pliers we will form the ring at the end of each pin.
- Before closing it completely we will introduce the hook or fishhook.
- We measure both earrings so that they are the same size and we are finished.
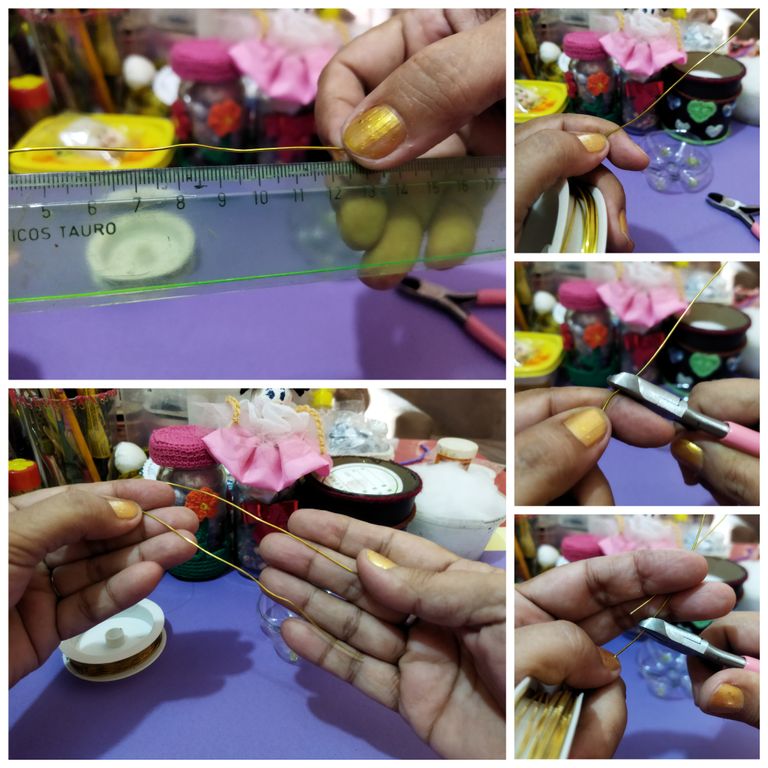
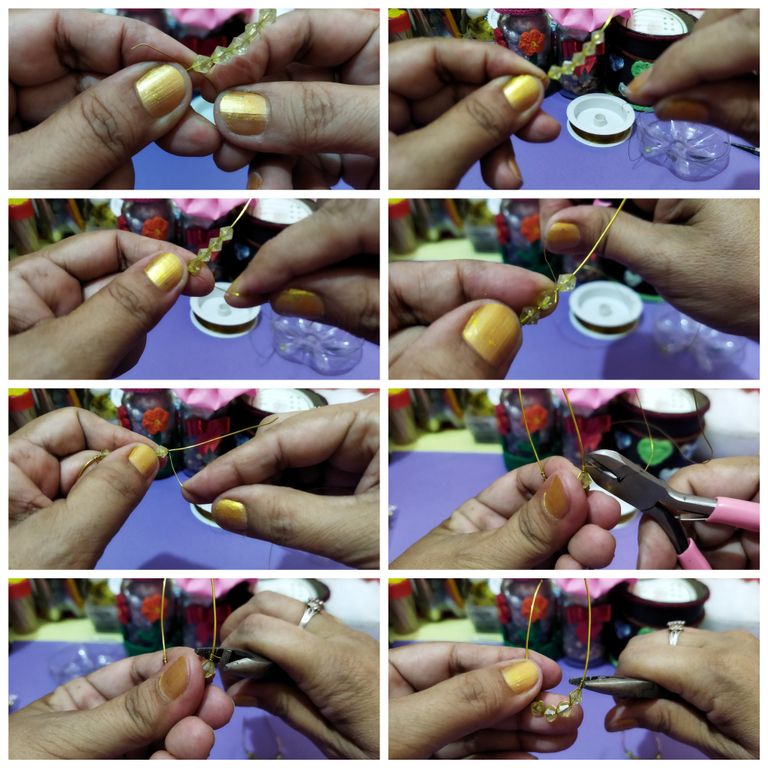
- El segundo modelo requiere de un poco más de dedicación. Empezaremos eligiendo 10 piedras de Swarovski del color de tu preferencia.
- Medimos y cortamos 12 cm de alambre para hacer cada arete.
- The second model requires a little more dedication. We will start by choosing 10 Swarovski stones of the color of your choice.
- We measure and cut 12 cm of wire to make each earring.
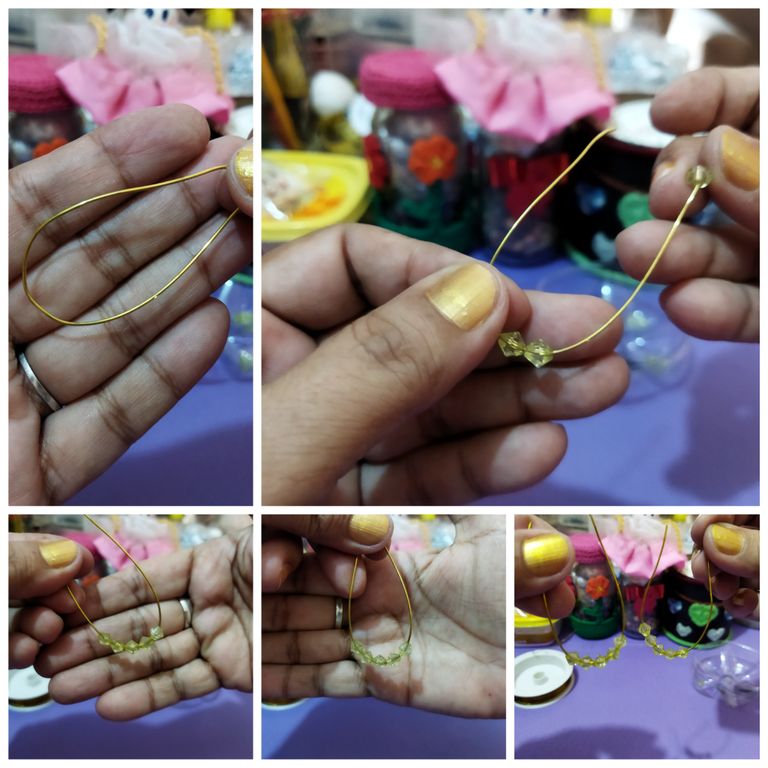
- Daremos a cada alambre una forma oblícua y luego meteremos cinco Swarovski en cada uno, posicionándolos en la curva de abajo del alambre.
- We will give each wire an oblique shape and then we will put five Swarovski in each one, positioning them in the bottom curve of the wire.
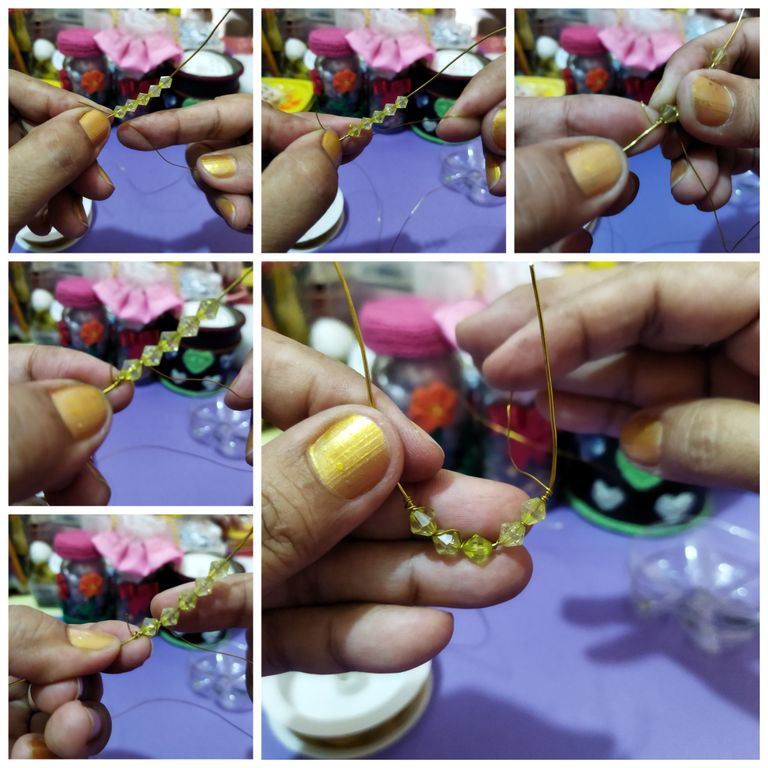
- Haremos el engarce de cada Swarovski con el alambre delgado. Consiste en sujetar muy bien con la punta del alambre, enrollando varias veces desde el primer Swarovski. Atravesamos y entre cada Swarovski haremos dos vueltas.
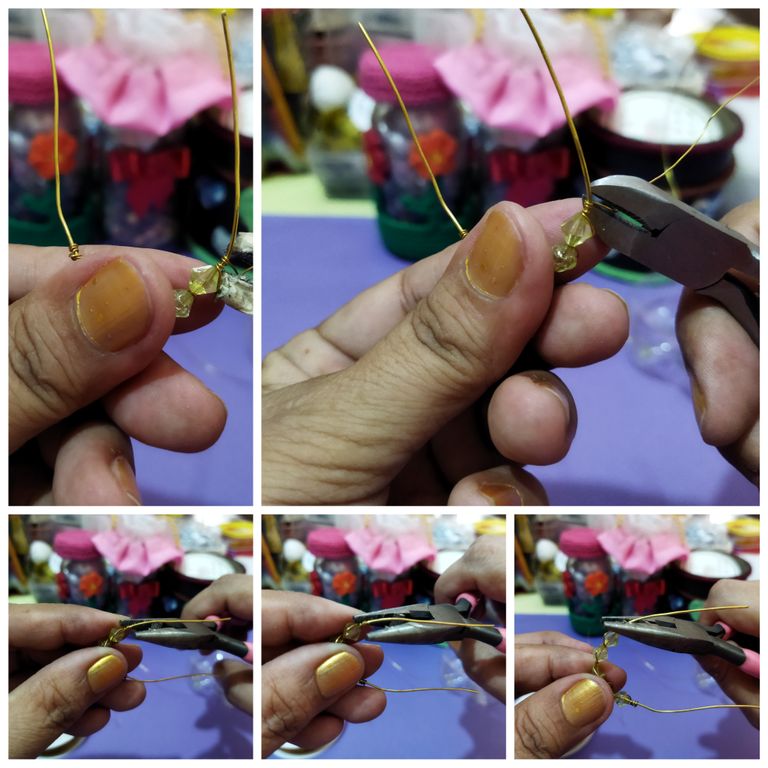
- Al final enrollamos nuevamente y apretamos ambas puntas con la pinza plana.
- We will crimp each Swarovski with the thin wire. It consists of holding very well with the tip of the wire, winding several times from the first Swarovski. We go through and between each Swarovski we make two turns.
- At the end we wind again and tighten both ends with the flat pliers.
- Haremos lo mismo para el segundo arete.
- We will do the same for the second earring.
- Luego mediremos ambos aretes para cortar el excedente de alambre. Deben quedan del mismo largo y ancho.
- Then we will measure both earrings to cut the excess wire. They should be the same length and width.
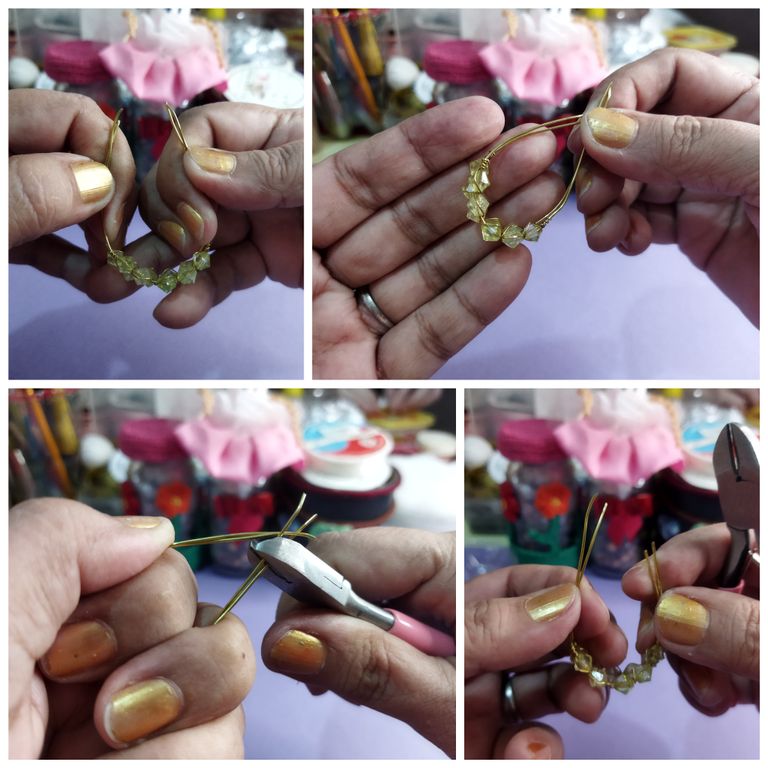
- Seguidamente haremos una argolla pequeña, usando la pinza mandril en cada punta del alambre de ambos aretes.
- Con un trocito de alambre de los que cortamos del excedente haremos dos argollas medianas.
- En esta argolla metemos las dos argollas pequeñas que hicimos en las puntas de cada arete.
- Next we will make a small ring, using the mandrel pliers on each end of the wire of both earrings.
- With a small piece of wire that we cut from the excess we will make two medium rings.
- In this ring we put the two small rings that we made at the ends of each earring.
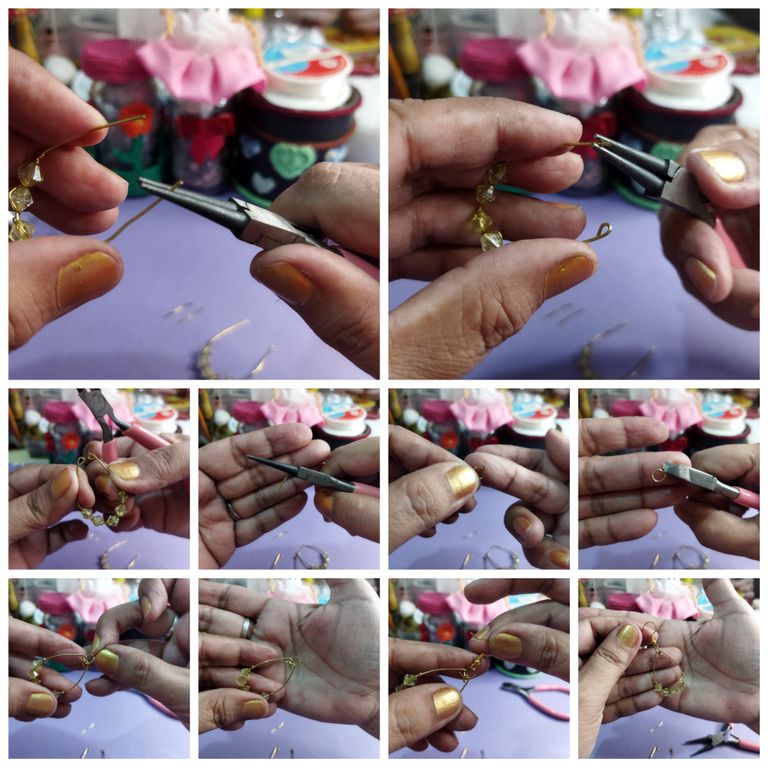
- Por último colocamos el anzuelo pescador y cerramos la argolla.
- Para mejorar la forma oblícua o circular nos ayudamos con un tubo, mandril o marcador grueso.
- Corregimos y ya habremos terminado.
- Finally we place the fishhook and close the ring.
- To improve the oblique or circular form we help ourselves with a tube, mandrel or thick marker.
- We correct and we will have finished.
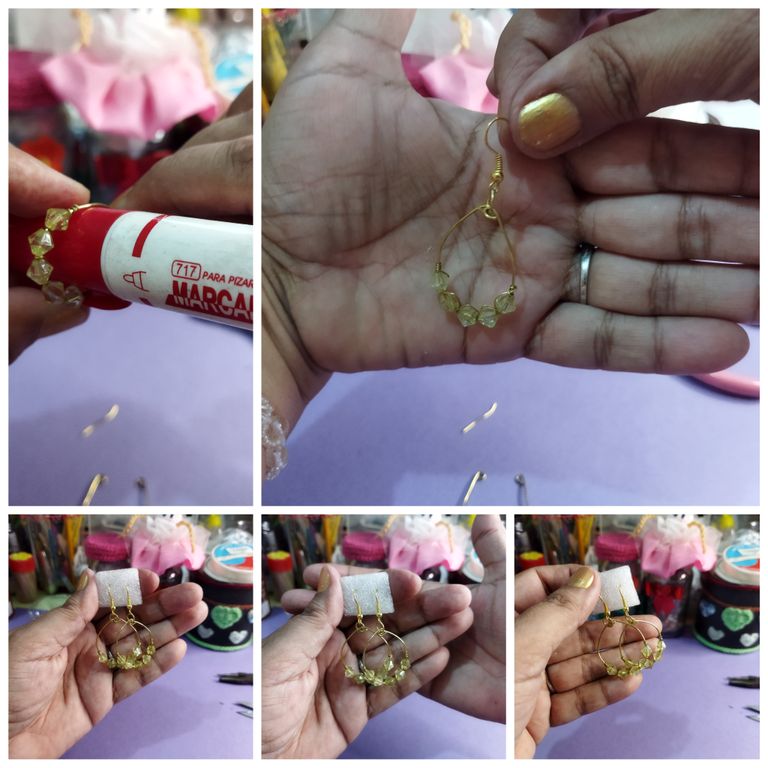
Espero que te gusten estos modelos y puedas hacerlos. Es todo por ahora. Nos veremos pronto con otros modelos y más accesorios.
I hope you like these models and you can make them. That's all for now. See you soon with other models and more accessories.

Gracias por compartir tu publicación en #Blurt. Tu esfuerzo significa mucho para nosotros; por eso has recibido un voto positivo.
Te invito a votar por @blurtlatam como Testigo / Witness
Gracias por su apoyo 🤗
Te invitamos a usar el tag #blurthispano. Nos puedes encontrar en Discord.
Curado manualmente por Geeklania.
Te invitamos a votar por @blurthispano como Witness.
Posted from https://blurtlatam.com
Muchas gracias por el apoyo a mis publicaciones😀