In our previous lesson, we virtualized a physical server using VMware technology and created a VDS unit.
In this course, we will publish how to install the CentOS operating system in VDS and define and update ip addresses.

First, we open it by giving the Start command to our VDS.
After opening, the Start key will turn gray, and then,

We press the console button and we are faced with the CentOS installation screen.
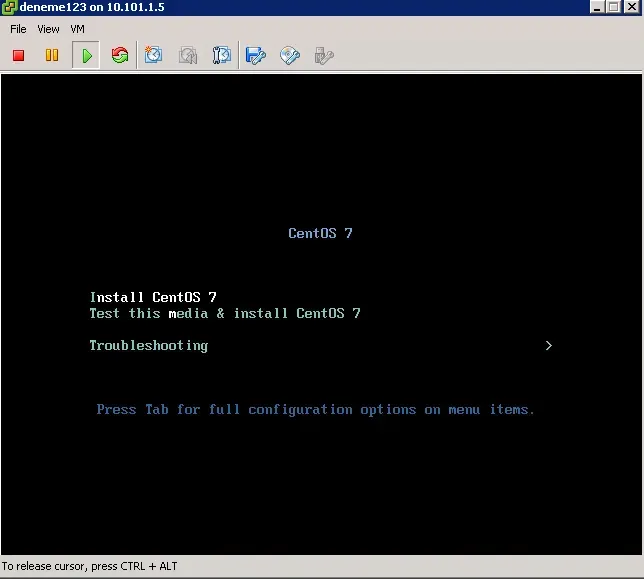
With the direction keys of the keyboard, we hover over the Install CentOS 7 in the first option and press Enter.
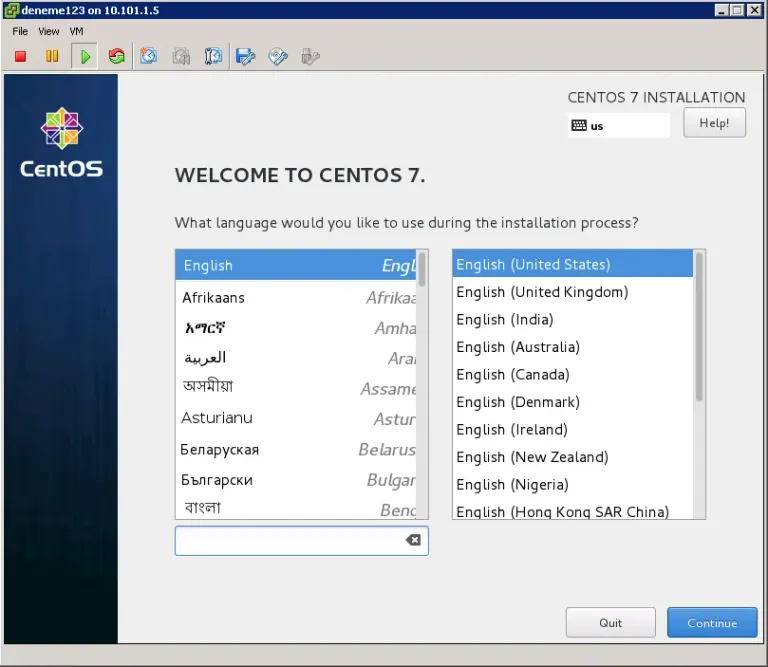
We have come to the screen where we will select the operating system language, I recommend that it remain in English so that you don't have problems with web services. We click on the Continue button without touching anything.
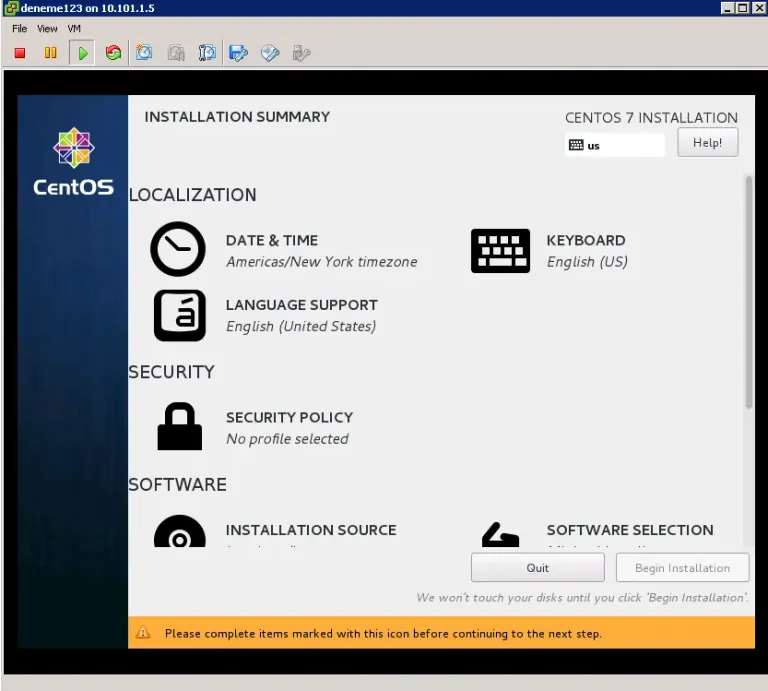
Then we switch to the CentOS7 installation screen.
In order of;
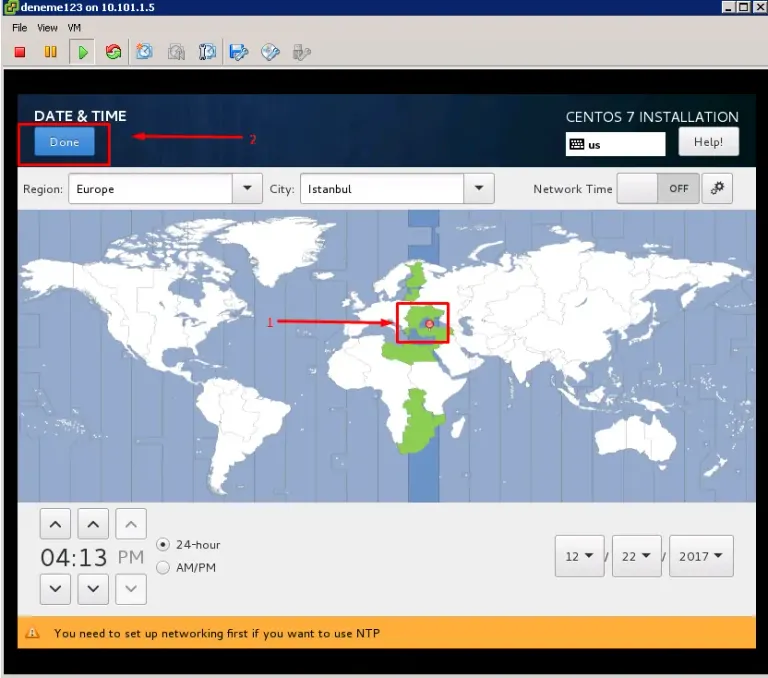
We click on the DATE & TIME section and select Turkey on the map that opens. Then we return to the main screen with the Done button at the top left.
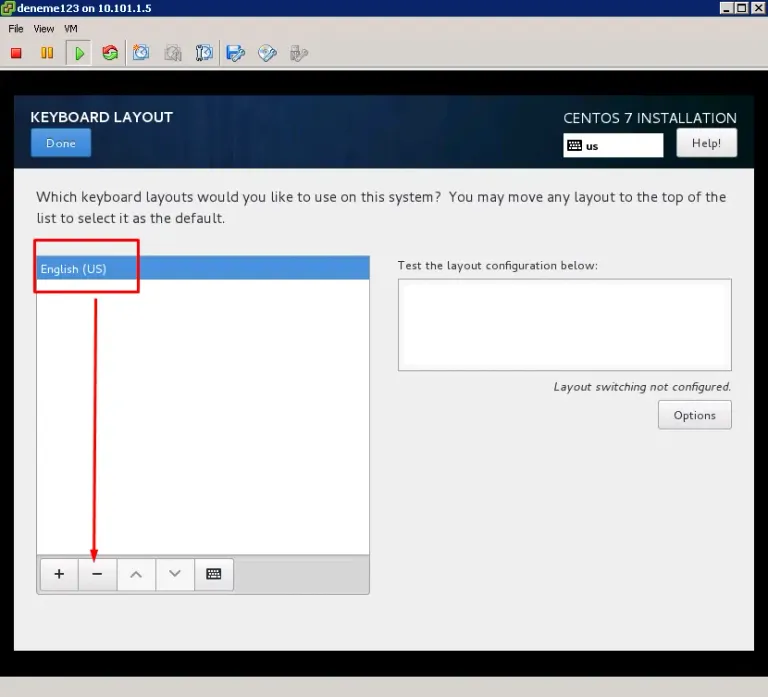
We delete this keyboard language by clicking on the KEYBOARD section, clicking on English (US) from the page that opens, and then clicking on the (-) sign at the bottom.
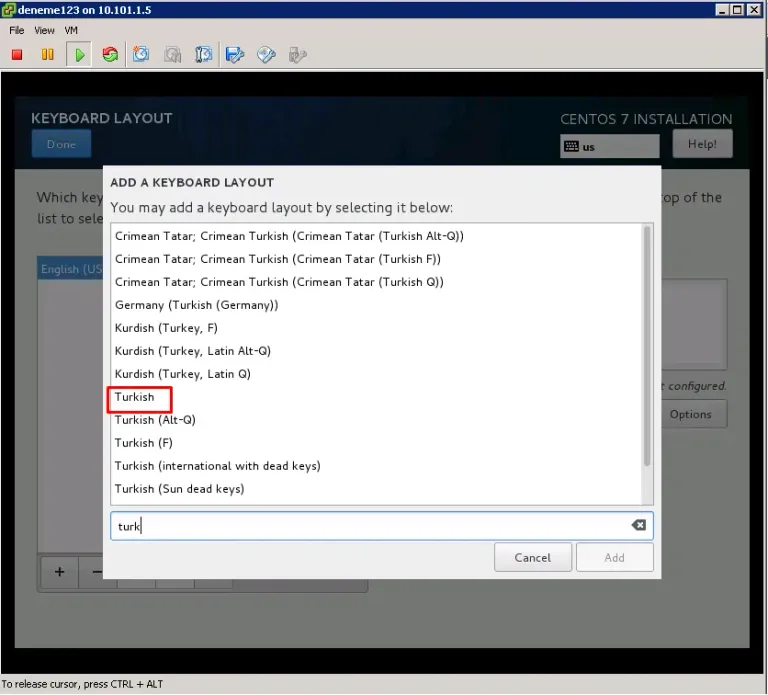
Then a window opens automatically, from this window we select Turkish as the keyboard language and press the Add button at the bottom right.
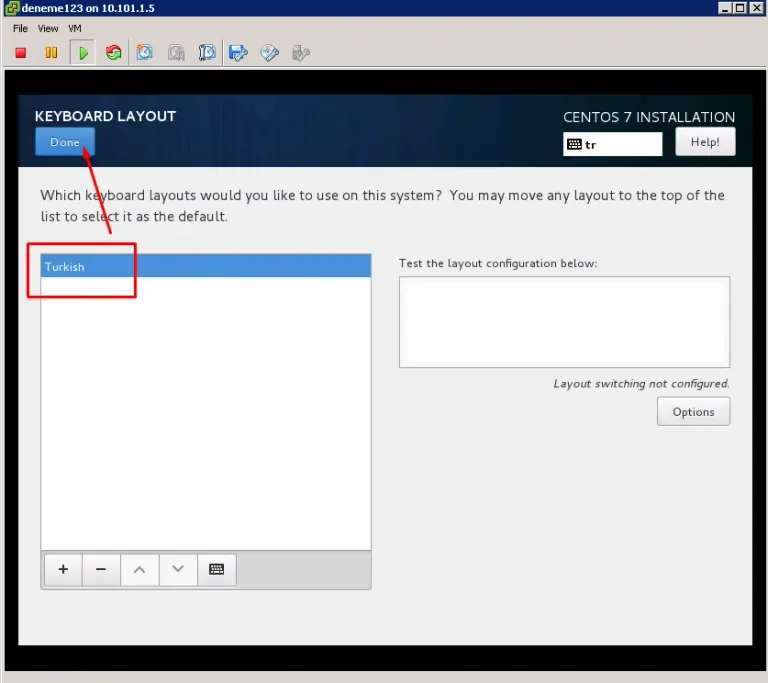
The English we deleted is replaced by Turkish, and we return to the main screen again by pressing Done.
We don't press the LANGUAGE SUPPORT section from the main screen (our operating system will already be English),
We also don't touch the SECURITY POLICY section just below it,
We also don't touch the INSTALLATION SOURCE section, it should remain as Local media by default,
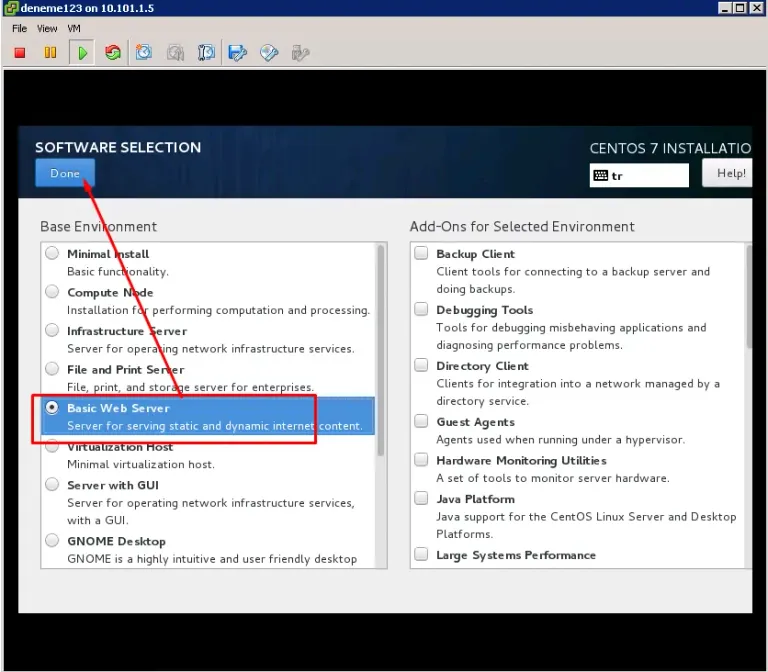
From the main screen, we click on the SOFTWARE SELECTION section and from the window that opens, we press the Basic Web Server button on the left side and say Done without pressing anything from the list on the right side
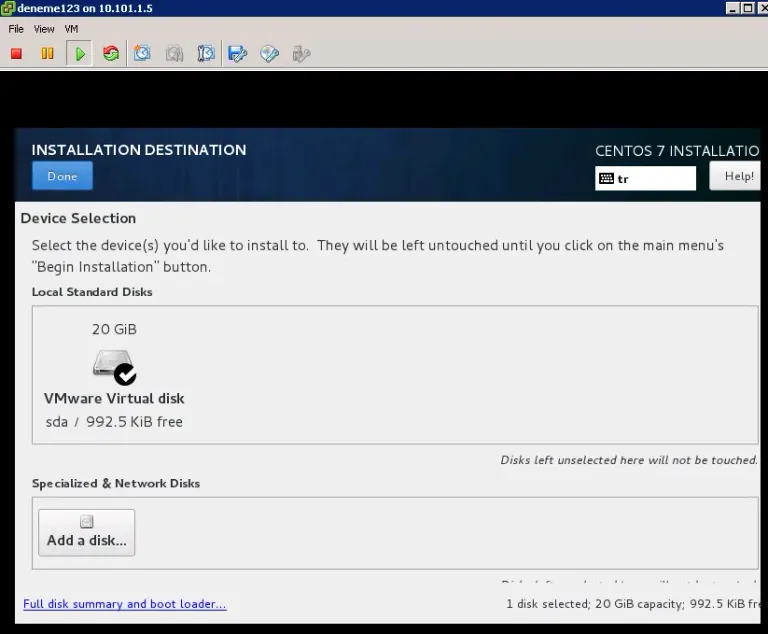
Again, we click on the INSTALLATION SUPPORT section from the main screen and here we will make our disk settings.
The disk that we have already defined in VDS is already selected, but if we say Done in this way, it will determine the partitions itself, we don't want it because it can give disproportionate sizes to directories.
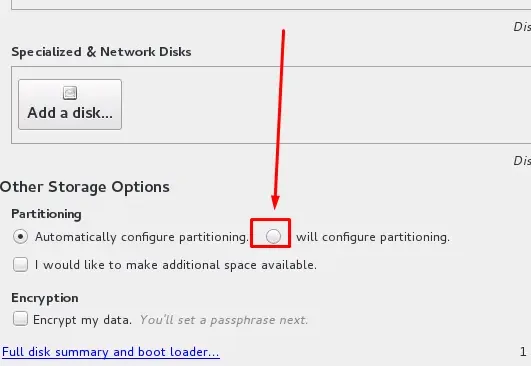
So we go down a little with the mouse and mark the "I will configure patience" option and press the Done button again from the top.
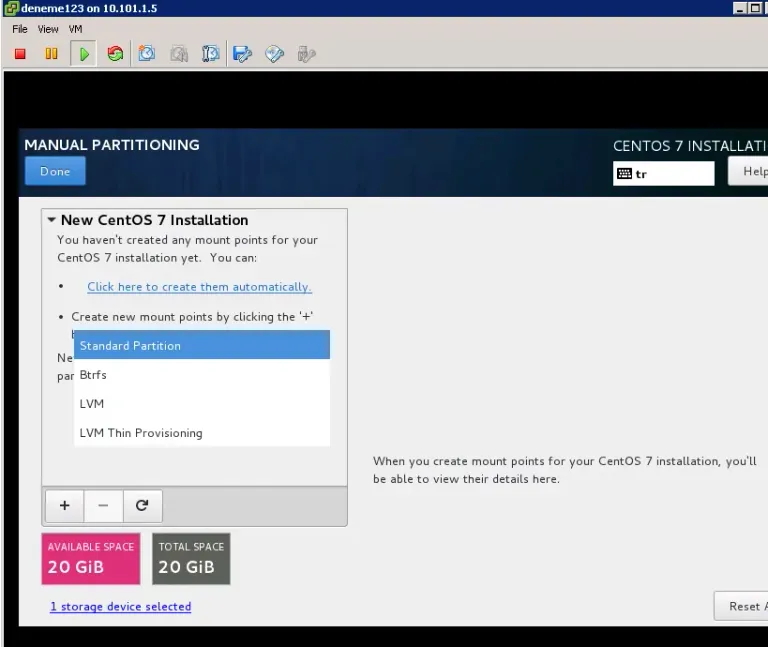
After I say Done, we are faced with a window where we will partition the disk. LVM is selected as the default here, but we will use the Standard Partition.
After selecting the Standard, we press the (+) button at the bottom and another small window opens, from here we will enter the following data.
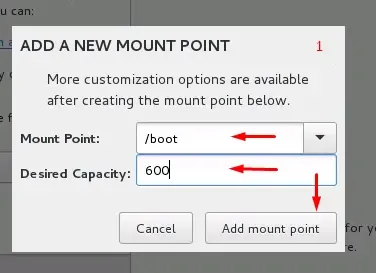
/boot - 600
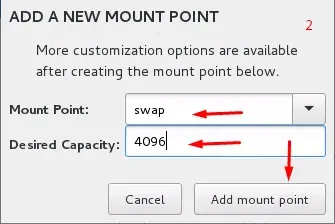
swap - 4096
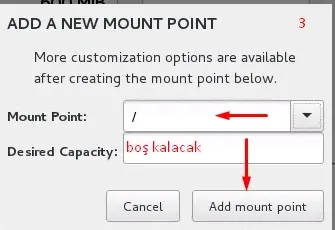
/ - empty
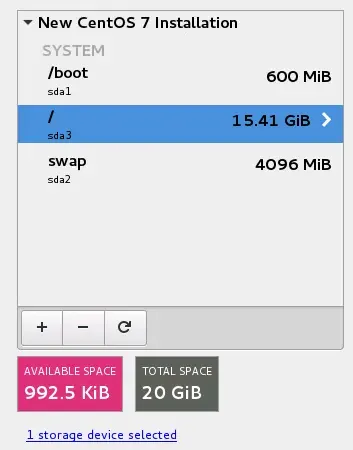
After completing all of them, the dec list on the left side will also look like the one in the picture, then we click on the Done button at the top.
After clicking, the confirmation window will appear and we continue by saying Accept Changes.
Finally, after returning to the main screen, we click on the NETWORK & HOST NAME section.
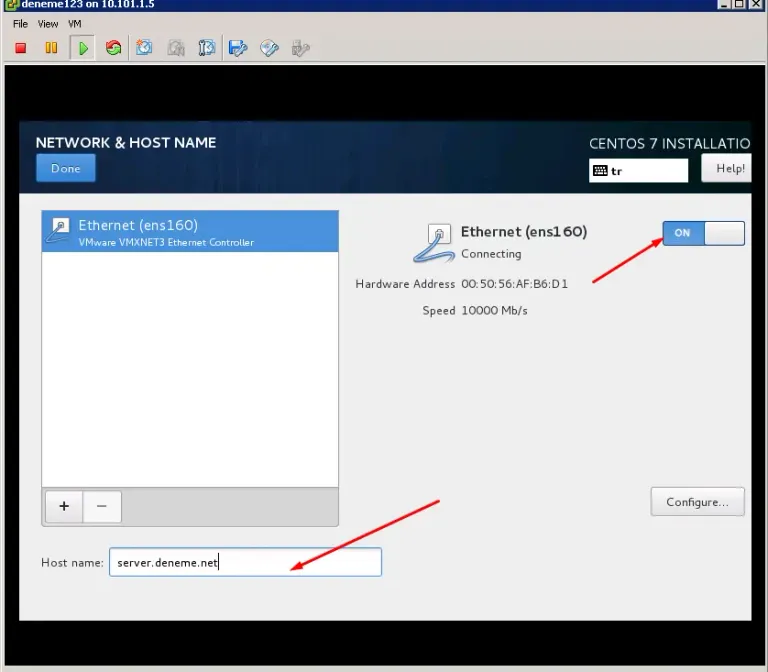
As you can see on the left side, our Ethernet line is selected, you can specify an address according to your domain extension in the "Host name" section at the bottom.
Example: server.domain.com
After that, you click on the OFF button at the top right and turn it ON, and under it "Configure... you are clicking on the "" button.
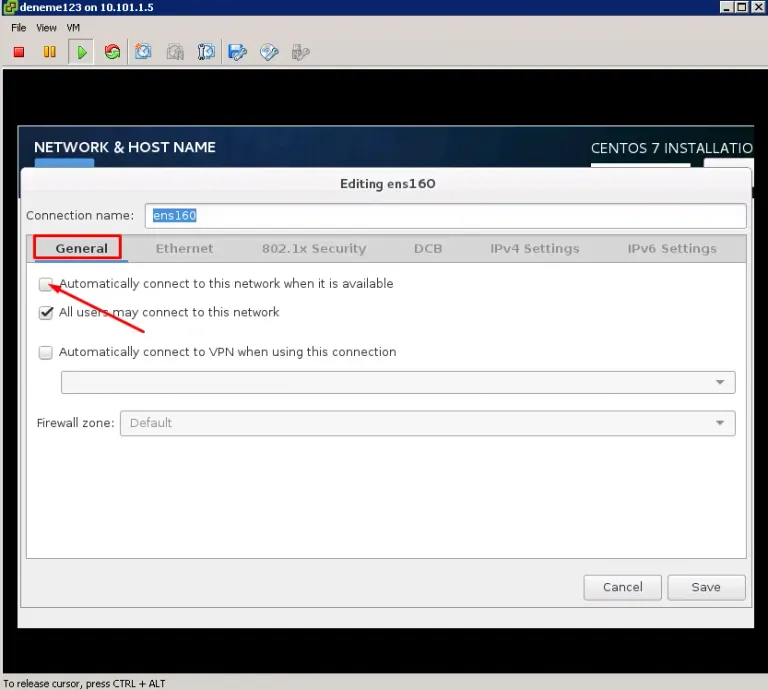
In the window that opens, press the General tab and press 1. you are checking the Automatically connect option, which is an option.
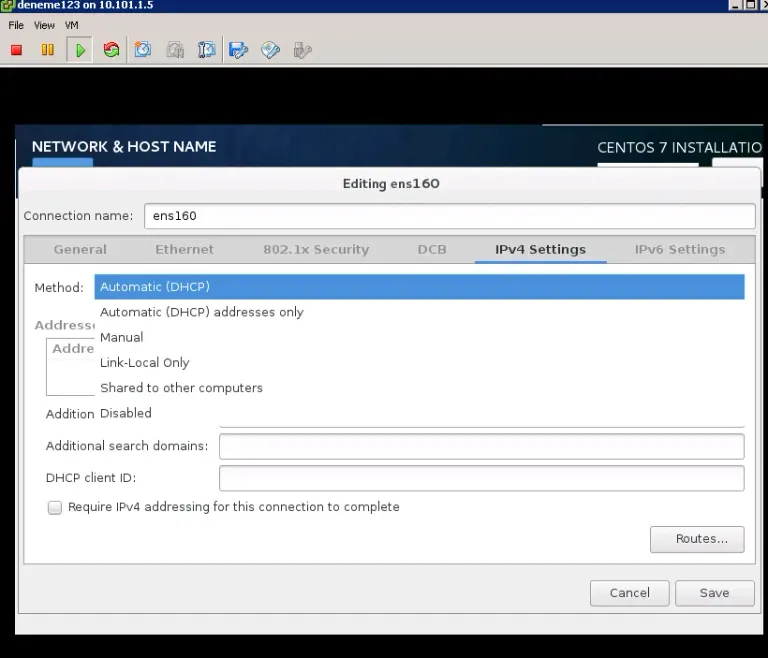
Then we click on the IPv4 Settings tab again from the top menu and select "Manual" as the Method from the page that opens.
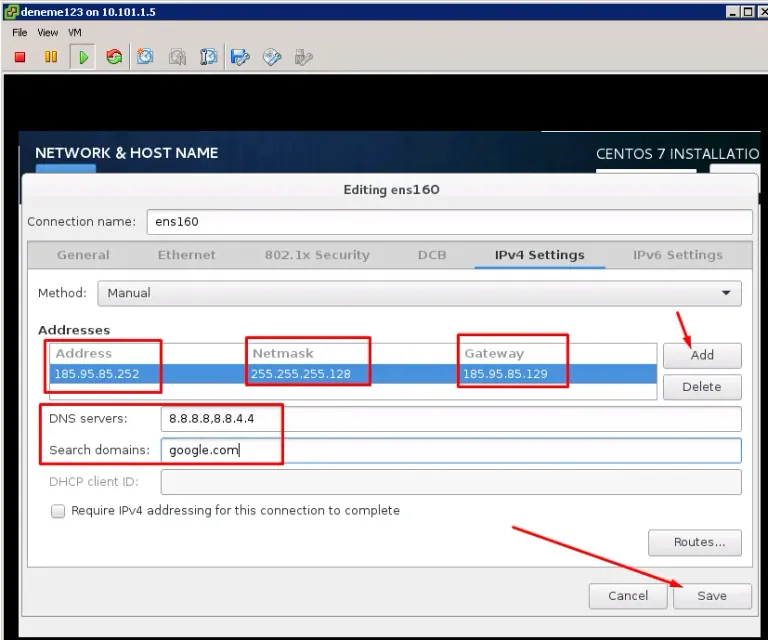
Then we fill in the corresponding fields as shown in the picture. This ip address, information such as netmask and gateway will be sent to you by the company where you rented the server. Then we say Save and go back to the previous page, and then we go back to the main screen by pressing the Done button at the top left.
The ip address that you see connected under the NETWORK & HOSTNAME section means that it has been successfully defined. You can still send a ping by opening the CMD terminal on your computer for confirmation.

As you can see, our ip address has started to get pinged.
Then we click on the "Start Installation" button from the main screen and our operating system starts to install...
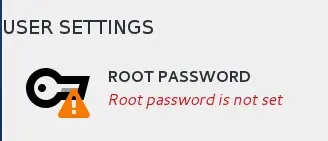
In the meantime, we can click on the ROOT PASSWORD button dec the page that opens and set the root password for VDS.
We are waiting for the loading bar to fill up... After it is full, we press the Finish button that appears.
Then we do another short load and hit Reboot.. Our operating system starts up again.
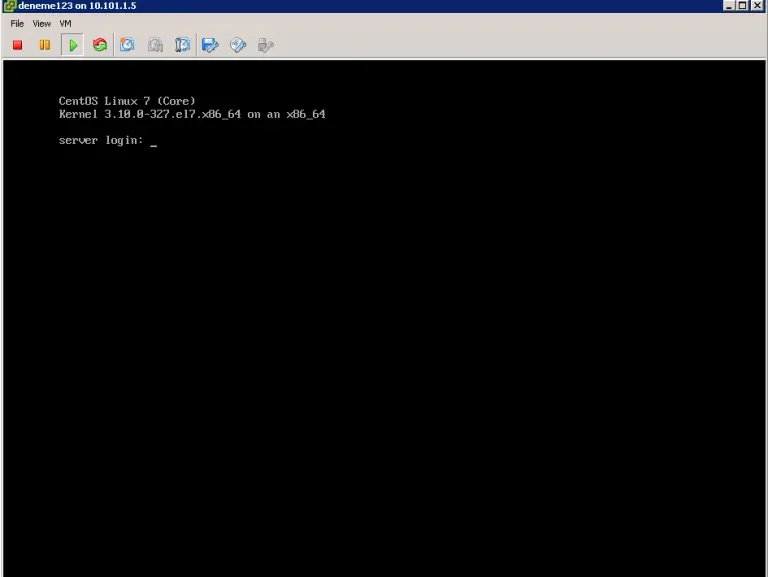
If we are greeted with an image such as the one on the screen, the installation has been completed successfully and our VDS is in the active position.
We can provide management directly from the console or connect to an SSH program such as Putty.
In our next lesson, I will demonstrate cPanel installation and optimizations on our CentOS VDS. See you...
Hi, @sedatyildiz,
Thank you for your contribution to the Blurt ecosystem.
Please consider voting for the witness @symbionts.
Or delegate to @ecosynthesizer to earn a portion of the curation rewards!