Saludos amigos de @Blurtchallenge hoy les traigo como hacer un porta lápiz de cartón fácil.. aunque todo tiene una historia mi hijo me había dicho que necesitaba uno para sus colores y bueno mama lista para cumplir y aquí les muestro como lo realice:
Greetings friends from @Blurtchallenge today I bring you how to make an easy cardboard pencil holder... although everything has a story my son had told me that he needed one for his colors and well mom ready to comply and here I show you how to do it:
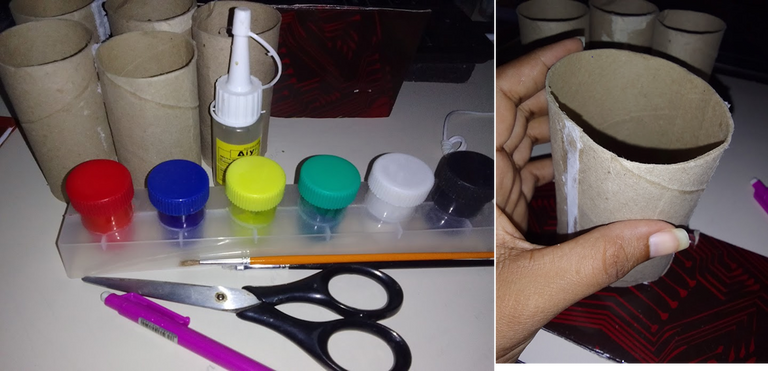
Los materiales que utilice:
🔵 Rollos de cartón
🔵 Un pedazo de cartón, para la base de la medida de su preferencia yo use 17cm
🔵 Tempera
🔵 tijera
🔵 Pega silicona fría
🔵 lápiz, pinceles, marcador
The materials you use:
🔵 Cardboard rolls
🔵 A piece of cardboard, for the base of the measure of your preference I used 17cm
🔵 Tempera
🔵 scissors
🔵 Cold silicone glue
🔵 pencil, brushes, marker
Manos a la obra:
Una foto con los materiales y lo siguiente que hice fue unir dos para hacer una un poco mas grande así que las corte y uní como lo muestro:
Let's do it:
A photo with the materials and the next thing I did was join two to make one a little bigger so I cut them and joined as shown:
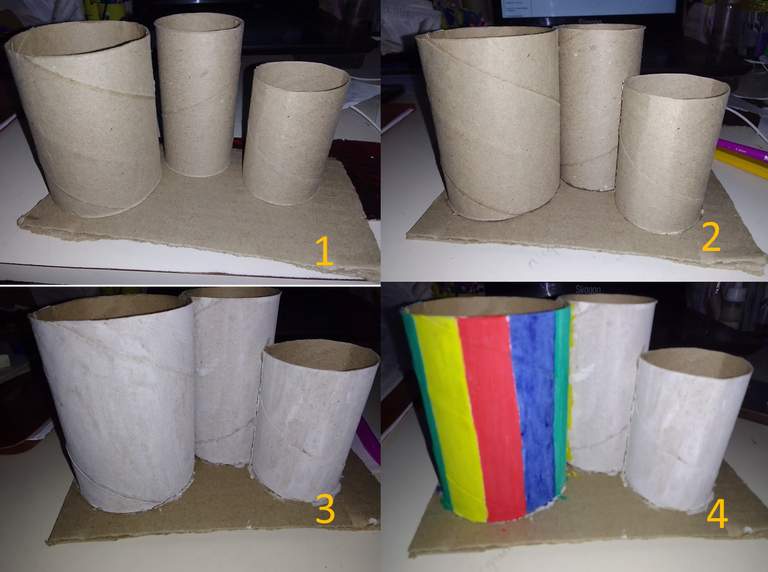
Una vez que uní para hacer uno mas ancho, recorte uno de los rollos un poco mas pequeño para tener tres de diferentes medidas, en la #1 se puede ver como los dispuse antes de pegarlos, en la figura #2 los fije con la pega silicona fría, la figura #3 una vez seco le aplique tempera blanca, si tienen pintura al frió o de cerámica mejor yo no tengo para este momento, y en #4 ya comienzo a aplicarle color a mi porta lápiz.
Once I joined to make a wider one, cut one of the rolls a little smaller to have three of different sizes, in #1 you can see how I arranged them before gluing them, in figure #2 I fixed them with the glue cold silicone, figure #3 once dry apply white tempera, if they have cold or ceramic paint better I don't have for this moment, and in #4 I already begin to apply color to my pencil holder.
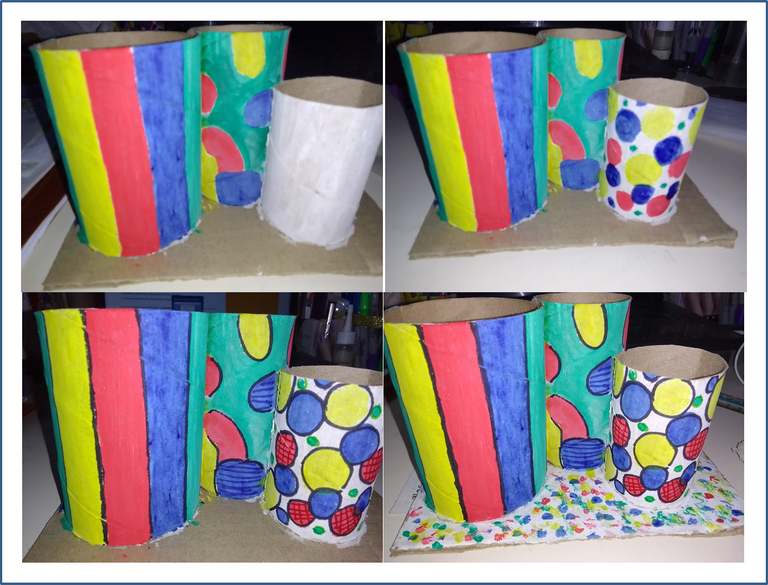
En la siguiente imagen les muestro es proceso creativo en cuanto a la decoración pero también pueden usar papel o goma eva, para decorar , yo los pinte con tempera escolar. y cuando seco le pase unas lineas con marcador negro, y aplique marcador azul a algunas de las formas azules de y rojo y pinte la base como muestro:
In the following image I show you the creative process in terms of decoration but you can also use paper or eva rubber, to decorate, I painted them with school tempera. and when dry I pass some lines with black marker, and apply blue marker to some of the blue and red shapes and paint the base as I show:
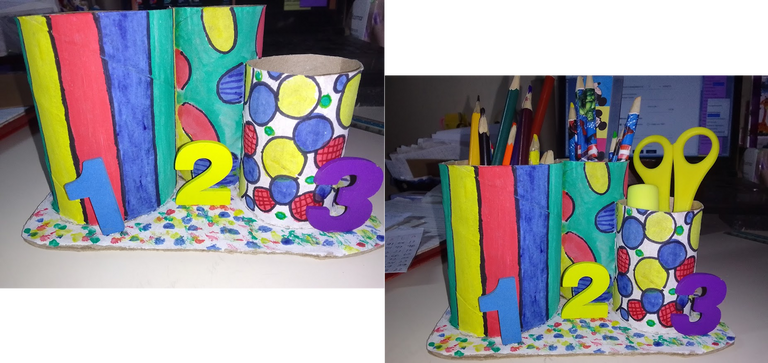
Le pegue esos numero que tenia mi hijo por allí y así quedo el porta lapices y se ve lindo con los artículos escolares de mi hijo.
I glued those numbers that my son had over there and that's how the pencil holder looks and it looks nice with my son's school supplies.
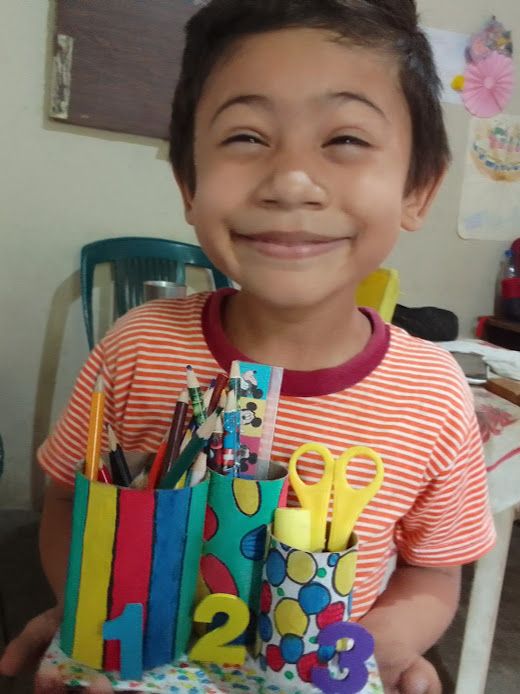
Mi hijo y su porta lapices
My son and his pencil holder
Espero les guste.. Saludos hasta la próxima.. I hope you like it.. Greetings until next time..
Que bonito te quedo amiga y ese modelo es precioso.
Gracias amiga bella, ese modelo estaba feliz.. un fuerte abrazo..
Your son looks so cute. I can see on his bright eyes and smile that he is happy of the outcome. This is a good idea as well on how we can recycle things and put more life unto it . What you made is one of it. Excellent job!
Hello friend Donna, thank you very much, he was happy with his porta pen ... that you have a nice day
Hi, @editta86,
Thank you for your contribution to the Blurt ecosystem.
Please consider voting for the witness @symbionts.
Or delegate to @ecosynthesizer to earn a portion of the curation rewards!
Gracias ..
lo que más me encanto ese modelo feliz con su porta lápiz, que bello amiga, éxitos, saludos!!
El estaba feliz amiga gracias..
Ay amiga ese príncipe tuyo hace lucir mas la belleza de tu trabajo. Muero de amor con su carita tan linda.
Bendiciones amiga.
Si amiga el estaba encantado porque ya me lo había pedido, siii jaja Amen amiga bella..