Hello, Dear members of the Blurt Community! how are you all? I have full faith that you guys will be fine and doing something good in your life. My name is Shivam and today I bring you the Digital WATERCOLOR Silhouette Paintings, I hope You guys will like it very much.
Tutorial link is below.......👇👇👇👇👇👇

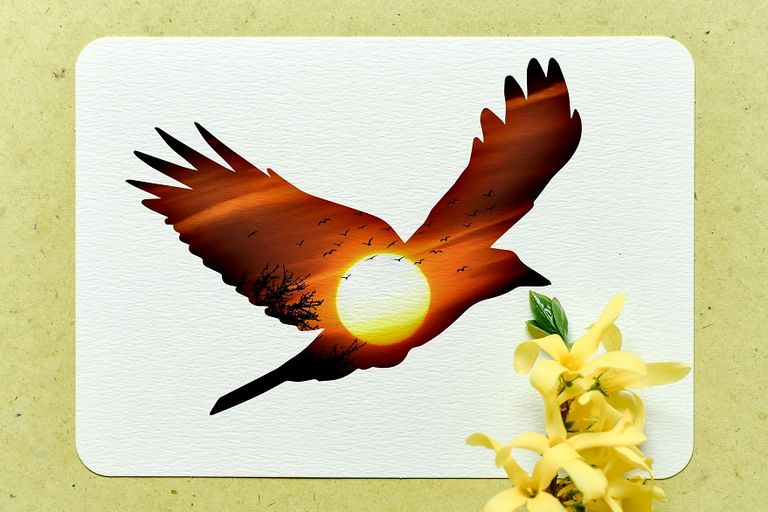
Digital watercolor silhouette paintings are a beautiful and artistic way to create visually striking and expressive artwork. They combine the soft and flowing characteristics of watercolor with the simplicity and elegance of silhouettes. While traditional watercolor paintings are created using physical materials like paint, brushes, and paper, digital watercolor silhouette paintings are made using digital painting software or applications.
Here are some steps you can follow to create digital watercolor silhouette paintings:

Choose your digital painting software: There are several digital painting programs available, such as Adobe Photoshop, Corel Painter, Procreate, or even free options like Krita or GIMP. Select a software that you feel comfortable working with and that offers the watercolor brush tools you need.
Gather your reference images: Find reference images or photographs that depict the subject or scene you want to paint. Silhouettes work best when there is a strong contrast between the subject and the background.
Set up your canvas: Create a new document in your chosen digital painting software and set the canvas size and resolution according to your preference or the intended output.
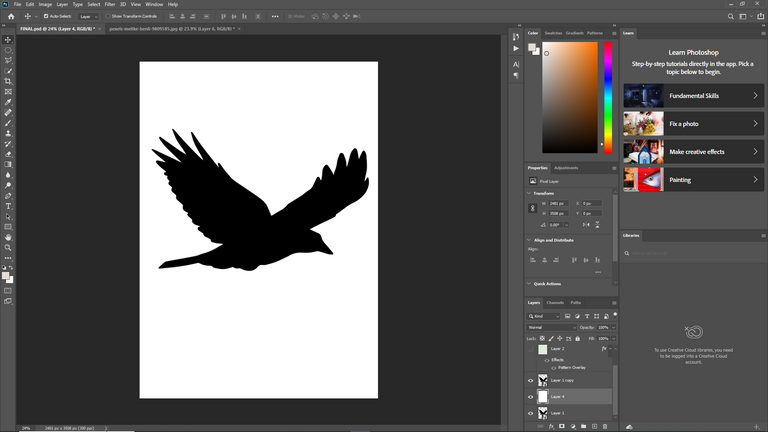
Sketch the silhouette: Using the sketching tools in your software, create a basic outline or silhouette of the subject. This will serve as a guide for the painting.
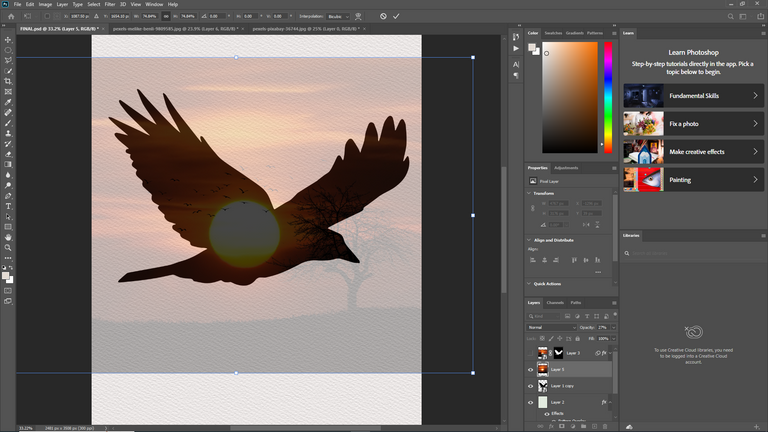
Create a new layer for the background: Add a new layer beneath the silhouette layer. This layer will be used to paint the background of your artwork. Choose a suitable color or create a gradient to set the mood or atmosphere of the painting.
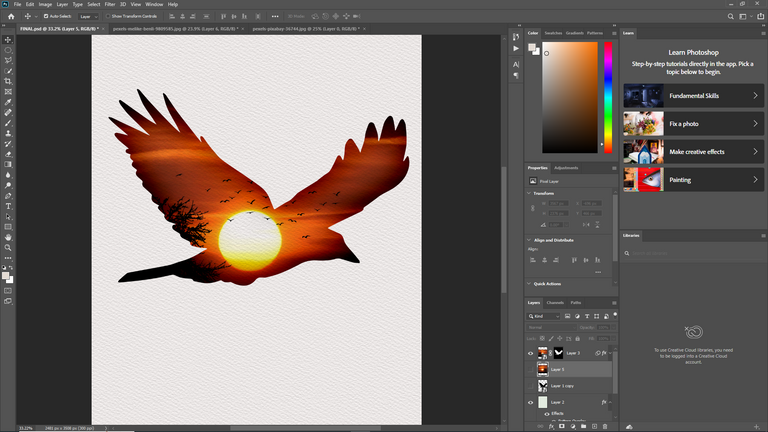
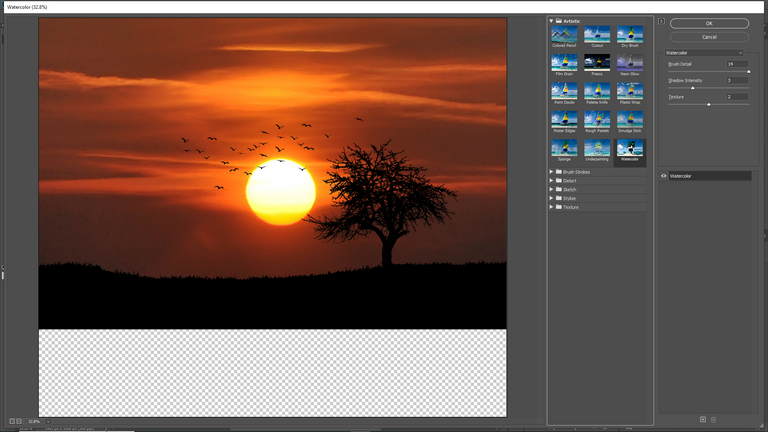
Start painting: Select a watercolor brush tool from your software's brush presets. Adjust the brush settings, such as opacity, flow, and brush size, to achieve the desired effect. Begin painting within the silhouette, using gentle brush strokes to create the watercolor effect. Experiment with different colors and blending techniques to add depth and texture to your artwork.
Refine details: Once you have painted the main shape of the subject, create additional layers to add details and textures. Pay attention to highlights, shadows, and small intricate features. Use different brush sizes and opacities to create variations in the watercolor washes.
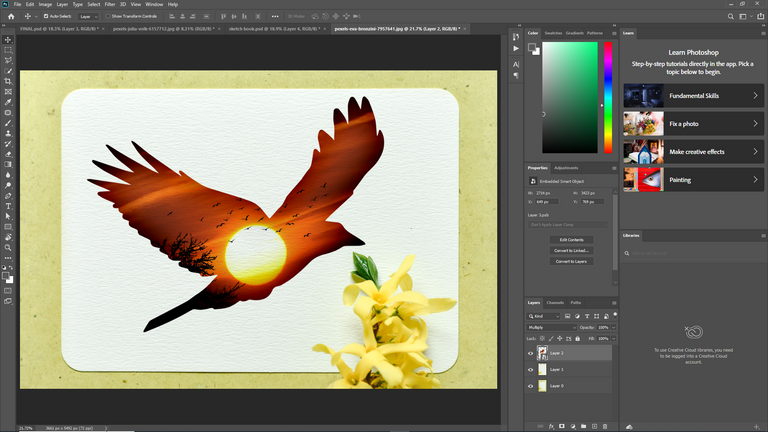
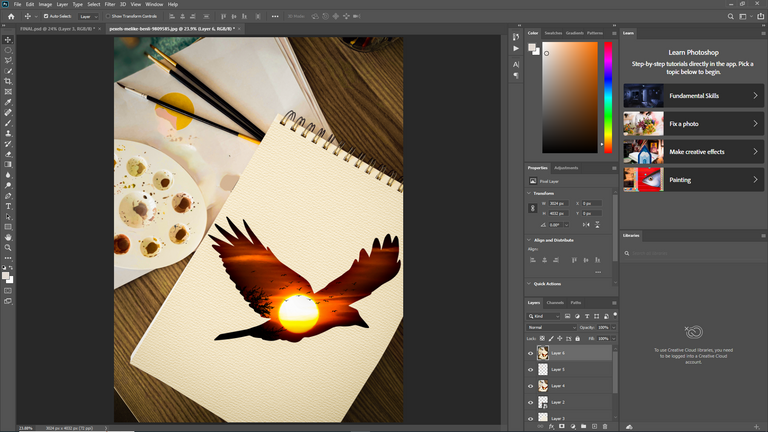
Final touches: Take time to refine and adjust your painting as needed. Add any additional elements or details that you feel would enhance the composition. Experiment with different blending modes and layer adjustments to achieve the desired look.
Save and export: Once you are satisfied with your painting, save the file in a suitable format, such as JPEG or PNG. You can also consider printing your artwork on high-quality paper or sharing it digitally.
