👉ENG VERSION👈

Segue versione Italiana.
Hello guys!!
Here I am my participation in the challenge organized by @qurator all the info for this competition is at this link:
Qurator's Art Walk! | Wire Art | Art Competition

When I read this post my eyes lit up, the thread !! the subject of this challenge is the wire, how can I not participate given my weird hobby made of nails and a lot of wire :)
and so here is the last work I created.
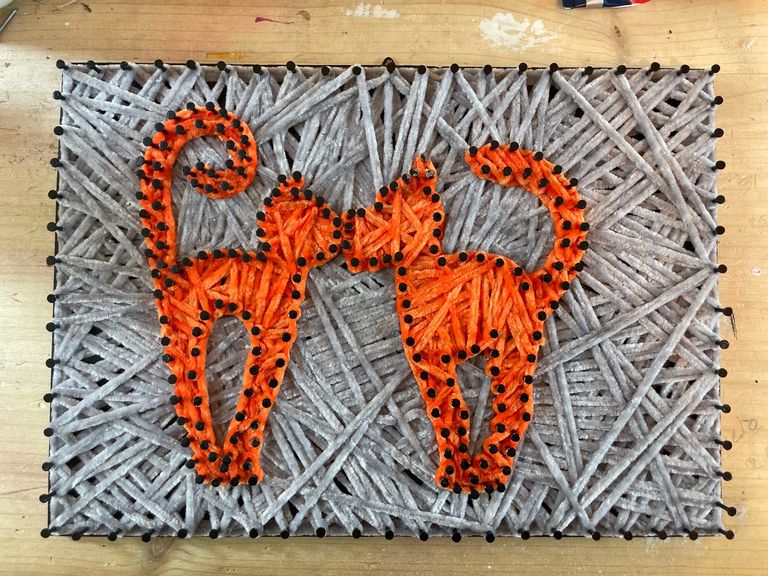
For this work, I created a full wire picture or completely covered with wires to create a background and an image, in this case, a cat and a dog, perennial enemies but in this picture, they exchange a sweet kiss.
Let's see the construction and the materials starting from the latter.
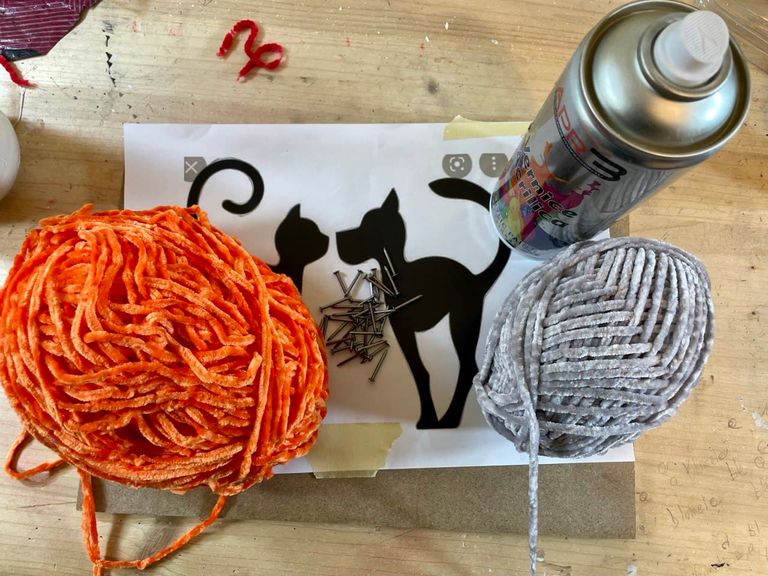
MATERIALS USED
- Wooden board dimensions 30 x 22 centimeters.
- Gray and orange chenille yarn.
- Black paint
- Nails
- Patience ... a lot of Patience :)

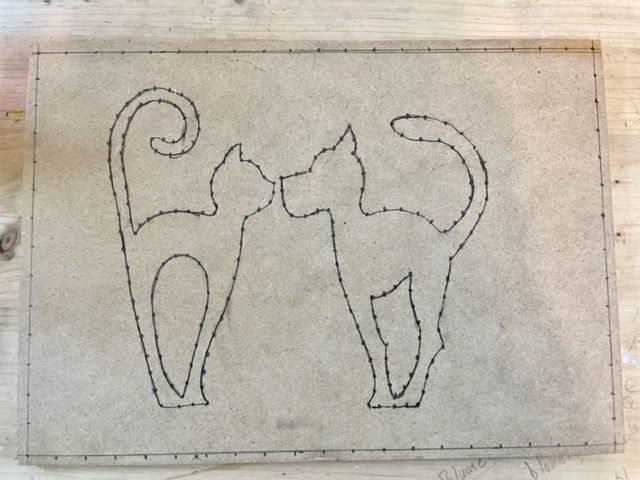
STEP 1
For this job I chose, indeed they gave me this beautiful image probably taken from the web and when I saw it I could not refuse and I immediately got to work.
The first step is to trace the design on the wooden board with the help of carbon paper.
Later I drew a frame standing half a centimetre from the edge of the table so that once the nails were driven in, the nails did not break the wood in the edge.
Once I made the drawing and the frame, I created many small points at a distance of about one centimetre from each other on the whole path to have the references for the nails and to have them equidistant from each other.

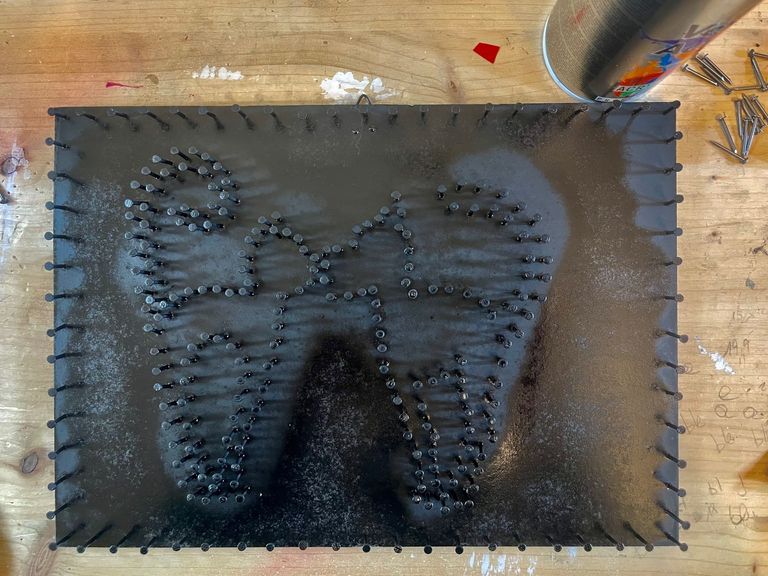
STEP 2
Done with the stitches and gone half-blind :) I started hammering and driving a nail for each stitch drawn earlier.
Pay attention to the fingers for this operation, my thumb is still crying! :)

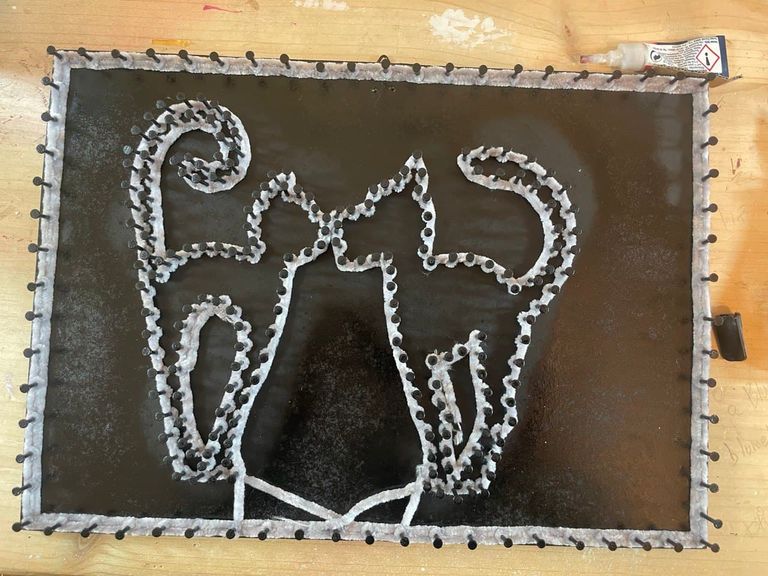
STEP 3
When I finished crying from the hammer blows on my fingers, I painted both the board and nails all black to create a different background from the wood colour.
Once this is done you have to wait at least half a day for the paint to dry well to avoid messing with the thread later.
Once the paint dried, I traced the outlines of both the image and the frame with the grey string, turning each nail twice, the first clockwise and the second counterclockwise!
The grey colour should be put first because it will be the background of our painting.
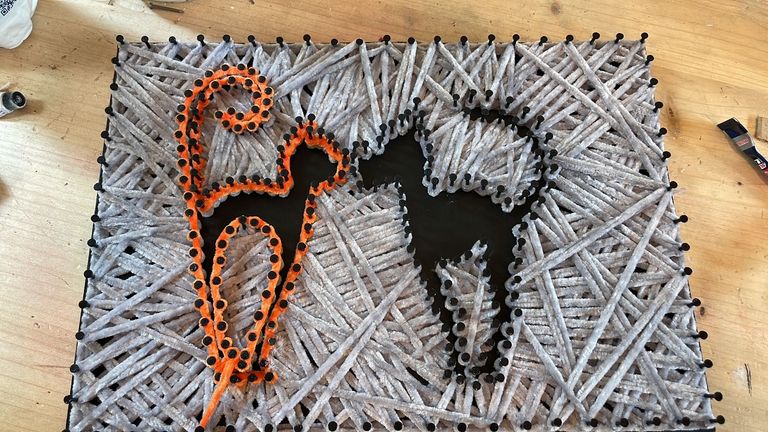
STEP 4
We are in the final stages, weaving the grey thread on the whole board in a casual way but trying to cover almost all of it.

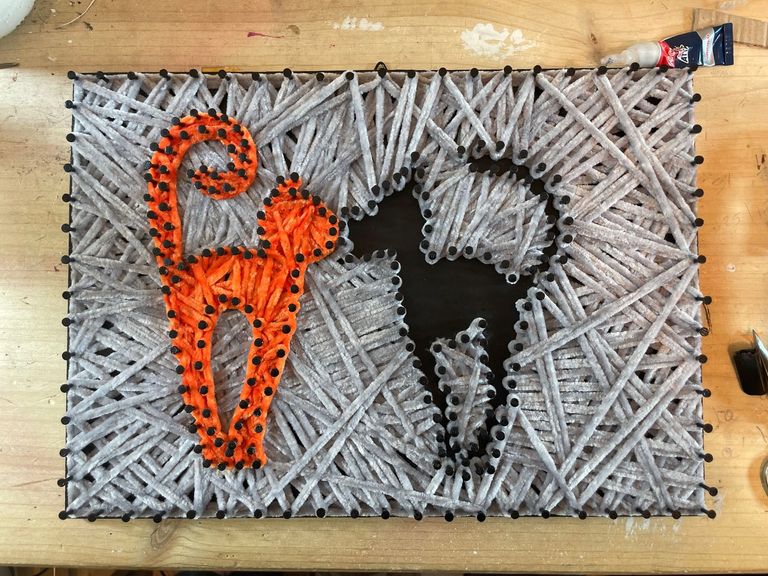
STEP 5
Once finished with the grey thread, let's move on to the orange one, filling the quadrupeds, pulling the orange thread from nail to nail here too randomly until we compose our images.
Here is the finished work!
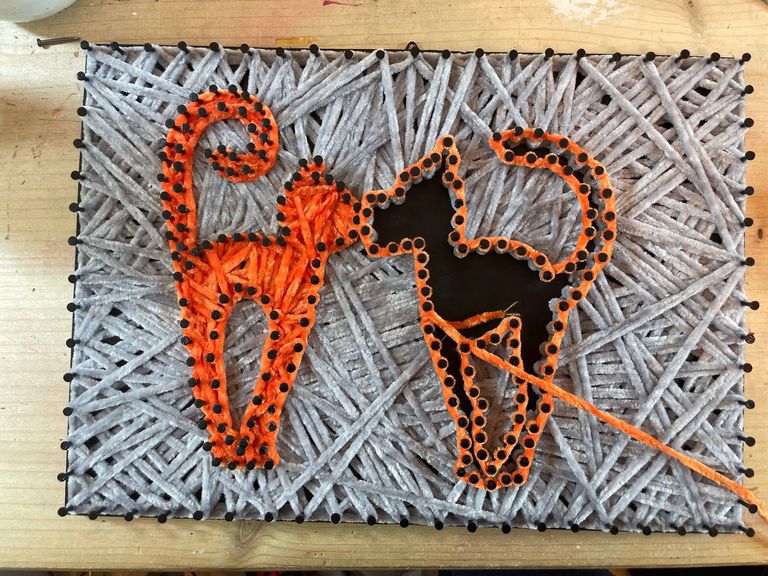

It took me nearly three hours, not including drying times, to finish the painting!
I hammered my thumb twice and to secure the final thread I made a small knot on a nail and fixed it with a drop of glue.
Here are the quadrupeds in love despite their nature is not among the most loving, not in all cases but almost :).
I hope you like it and to the next painting, thanking Qurator for this beautiful initiative, I greet you, friends.
Work completely done by me, except the image that was given to me.
The photos are the property of the author.

👉ITA VERSION👈

Ciao ragazzi!!
Eccomi la mia partecipazione alla sfida organizzata da @qurator tutte le info per questa competizone a questo link: Qurator's Art Walk! | Wire Art | Art Competition
Quando ho letto questo post mi si sono illuminati gli occhi, il filo!! il soggetto di questa sfida è il filo, come posso non partecipare visto il mio strambo hobby fatto di chiodi e tanto tanto filo :)
e quindi ecco l'ultimo lavoro da me creato.
Per questo lavoro ho creato un quadro full filo ovvero completamente ricoperti di fili in modo da creare uno sfondo e una immafine, in questo caso un gatto e un cane, nemici perenni ma in questo quadro si scambinao un dolce bacio.
Vediamo la realizzazione e i materiali partendo proprio da quest'ultimi.
MATERIALE UTILIZZATI
- Tavola in legno dimensioni 30 x 22 centimetri.
- Filo in ciniglia grigio e arancione.
- Vernice Nera
- Chiodi
- Pazienza... tanta Pazienza :)
STEP 1
Per questo lavoro ho scelto, anzi mi hanno dato questa bellissima immagine probabilmente presa dal web e quando l'ho vista non ho potuto rifiutarmi e mi sono messo subito al lavoro.
Il primo passo è quella di tracciare il disegno sulla tavola in legno con l'aiuto della carta carbone.
In seguito ho tracciato una cornice stando a mezzo centimetro dal borto della tavola in modo che una volta piantato i chiodi, i chiodi appunto non rompessero il legno nel bordo.
Una volta realizzato disegno e cornice ho creato tanti piccoli punti a distanza di un centimetro circa l'uno dall'altro su tutto il tracciato in modo da avere i riferimenti per i chiodi ed averli equidistanti fra loro.
STEP 2
Finito con i punti e diventato mezzo cieco :) ho iniziato a martellare e a piantare un chiodo per ogni punto disegnato in precedenza.
Per questa oprazione attenzione alle dita, il mio pollice ancora piange!:)
STEP 3
Finito di piangere per le martellate sulle dita, ho verniciato tutto di nero sia la tavola e chiodi per sare uno sfondo diverso dal colore legno.
Fatto ciò bisogna aspettare almeno mezza giornata che la vernice si assciughi bene per evitare pasticci con il filo successivamente.
Asciugata la vernice ho tracciato i contorni sia dell'immagine sia della cornice con lo spago grigio girando su ogni chiodo due volte la prima in senso orario la seconda in senso antiorario!
Il colore grigio va messo per primo perchè sarà lo sfondo del nostro quadro.
STEP 4
Siamo alle fasi finali, intrecciamo il filo grigio su tutta la tavola in modo casuale ma cercando di ricoprirla quasi tutta.
STEP 5
Una volta finito con il filo grigio passiamo a quello arancione riempiendo i quadrupedi, tirando il filo arancione da chiodo a chiodo anche qui in modo casuale fino a comporre le nostre immagini.
Ecco il lavoro finito!
Ho impiegato quasi tre ore, escluso i tempi di asciugatura, per finire il quadro!
Mi sono martellato due volte il pollice e per fissare il filo finale ho fatto un piccolo nodo su un chiodo e ho fissato con una goccia di colla.
Ecco i quadrupedi innamorati nonostante la loro natura non isa tra le più amorevoli, non in tutti i casi ma quasi :).
Spero vi piaccia e al prossimo quadro, ringraziando Qurator per questa bella iniziativa vi saluto amici.
Lavoro completamente realizzato da me, tranne l'immagine che mi è stata regalata.
Le foto sono di proprietà dell'autore.
Congratulations! This post has been upvoted by the @blurtcurator communal account,
You can request a vote every 12 hours from the #getupvote channel in the official Blurt Discord.Don't wait to join ,lots of good stuff happening there.