"Bismillahir Rahmanir Raheem"
This is @tammanna from #Bangladesh.
How are you all my dear friends? I hope everyone is well and I am also well, Alhamdulillah. we can present our creativity and see the creativity of my friends. I like it. Today I also made a wallmate with colored paper. Let's mention all the details of how I made it below.
✅ Present your paper craft to us in at least 4 steps.
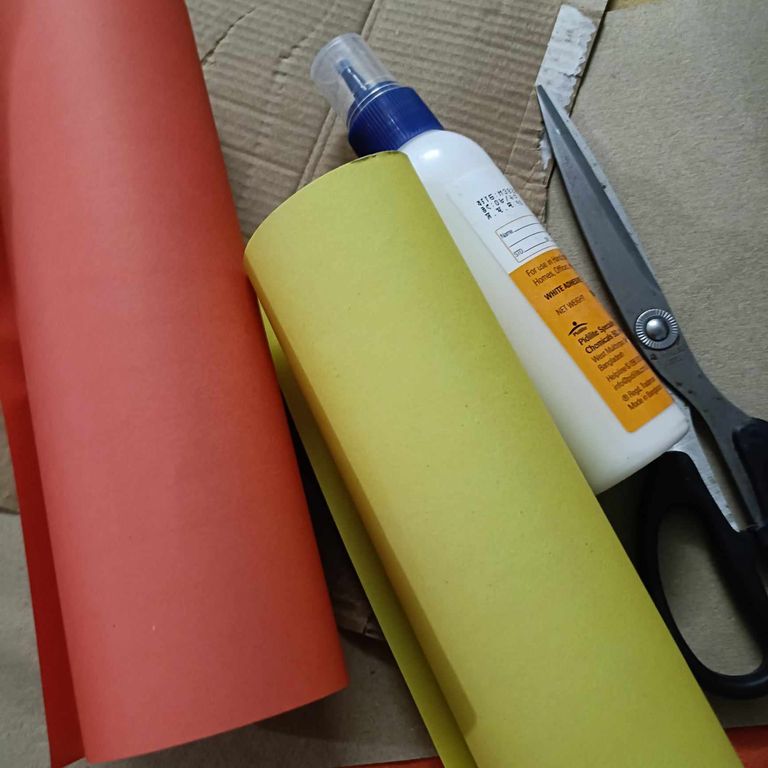
| Required materials👇🏾 |
|---|
| 🟤Cardboard paper |
| 🟤scissors |
| 🟤glue |
| 🟤colour paper |
 |
|---|
| Let's start with paper craft : |
|---|
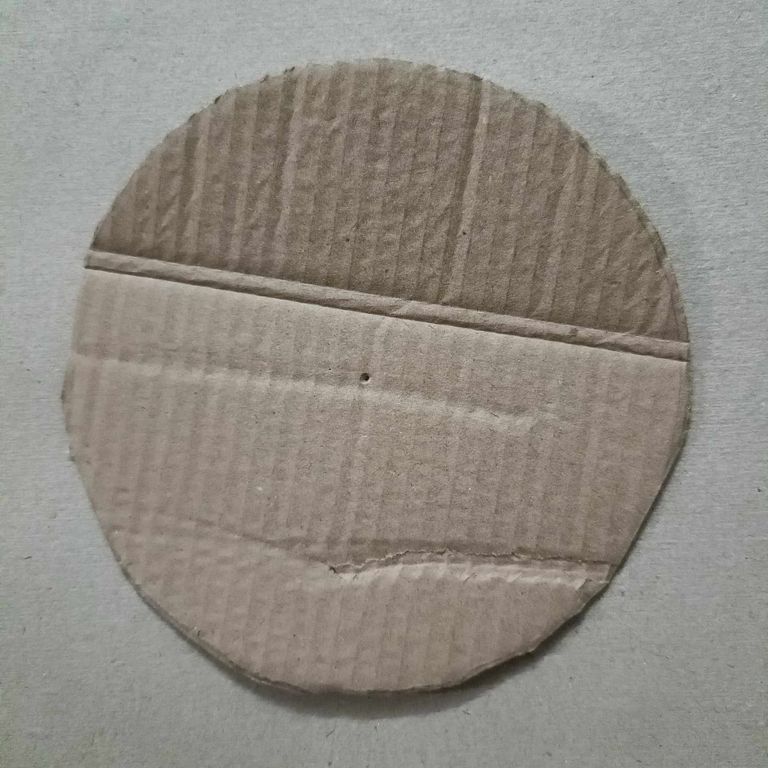
| 🍀Step 1 🍀 |
|---|
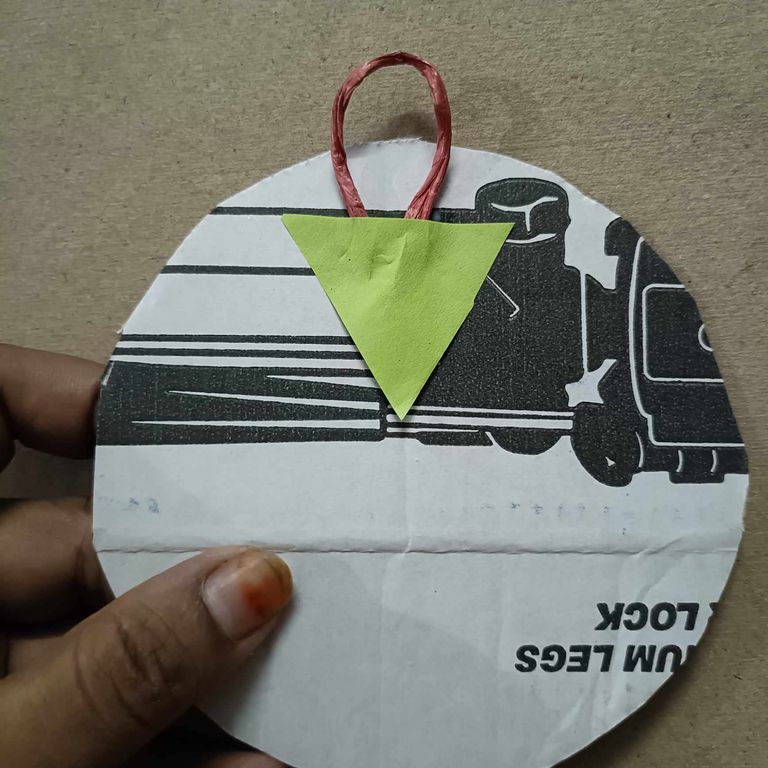
▣First, I cut cardboard paper into a big circle,
▣then I cut it into square shapes using some red colour paper.
 |  |
|---|---|

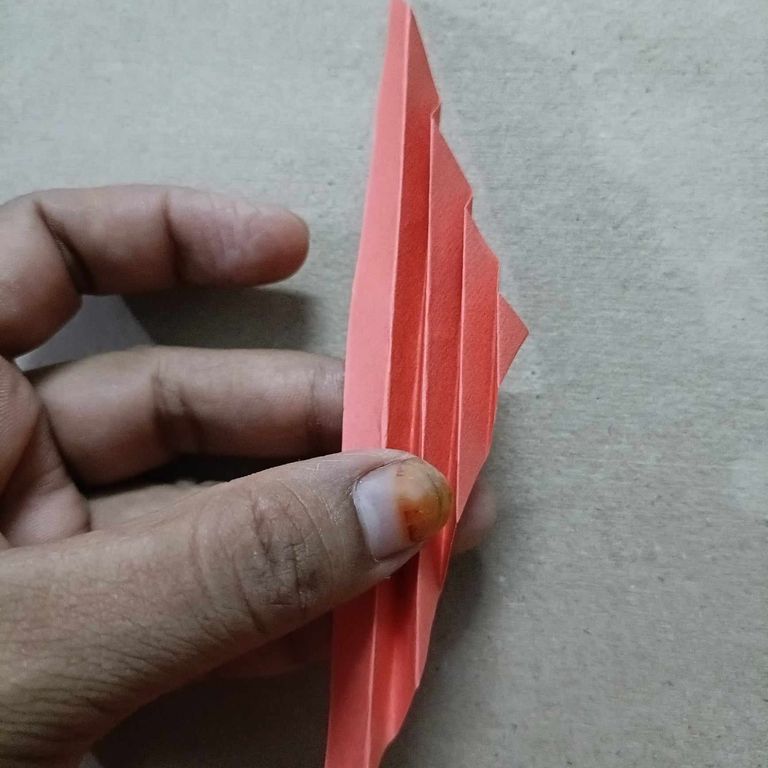
| 🍀Step 2 🍀 |
|---|
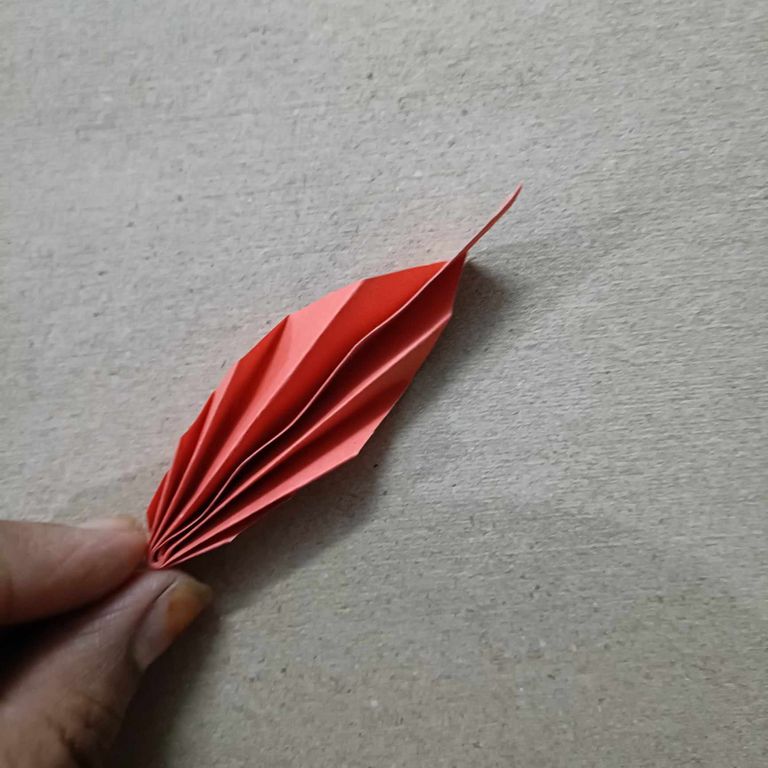
▣I folded pieces of paper into small pieces, as you can see in the picture.
▣Then I the paper folded in the middle and glued it to make it like a long leaf.
 |
|---|
 |
|---|
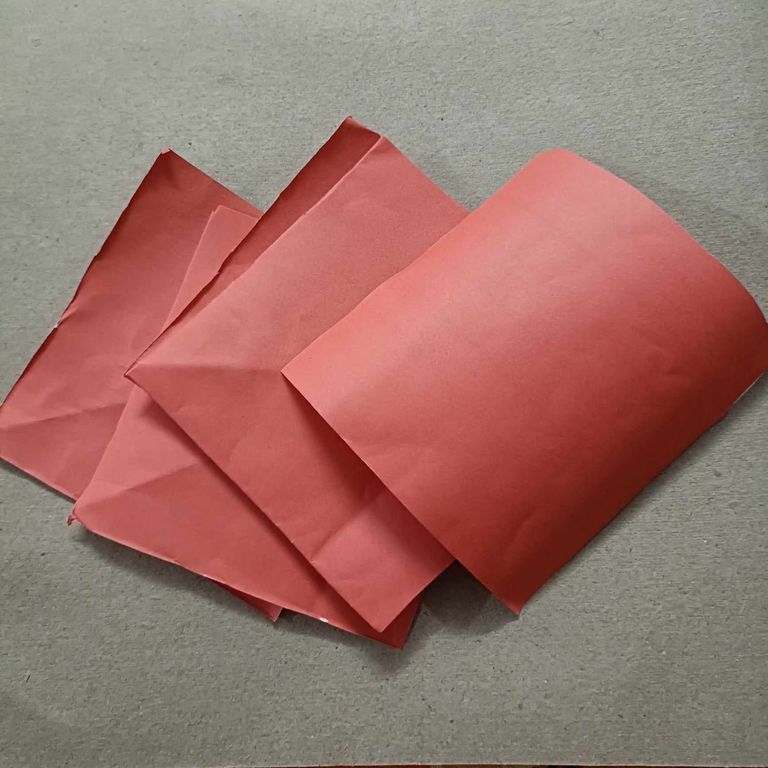
| 🍀Step 3 🍀 |
|---|
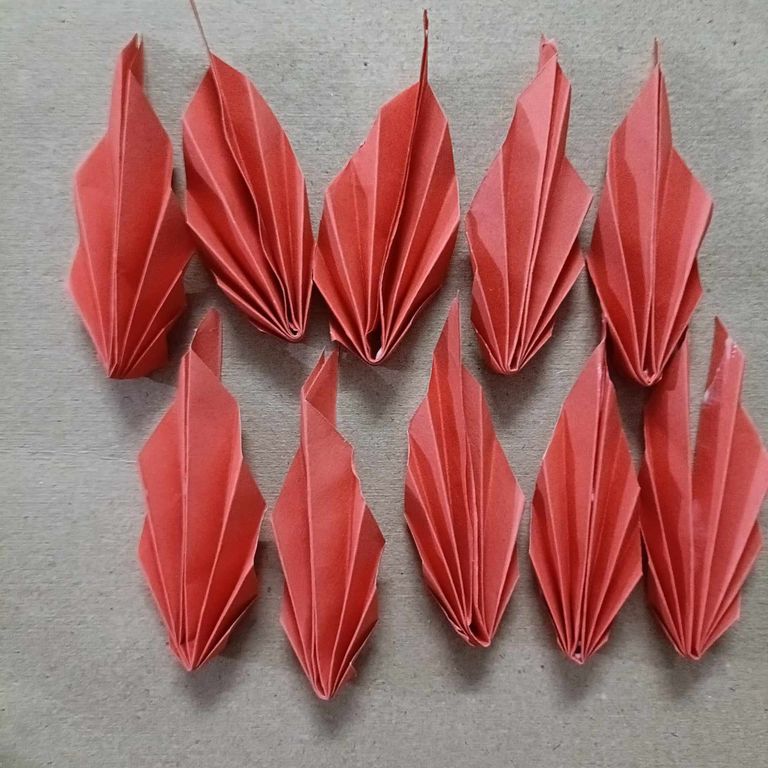
▣In this way, I made several leaves.
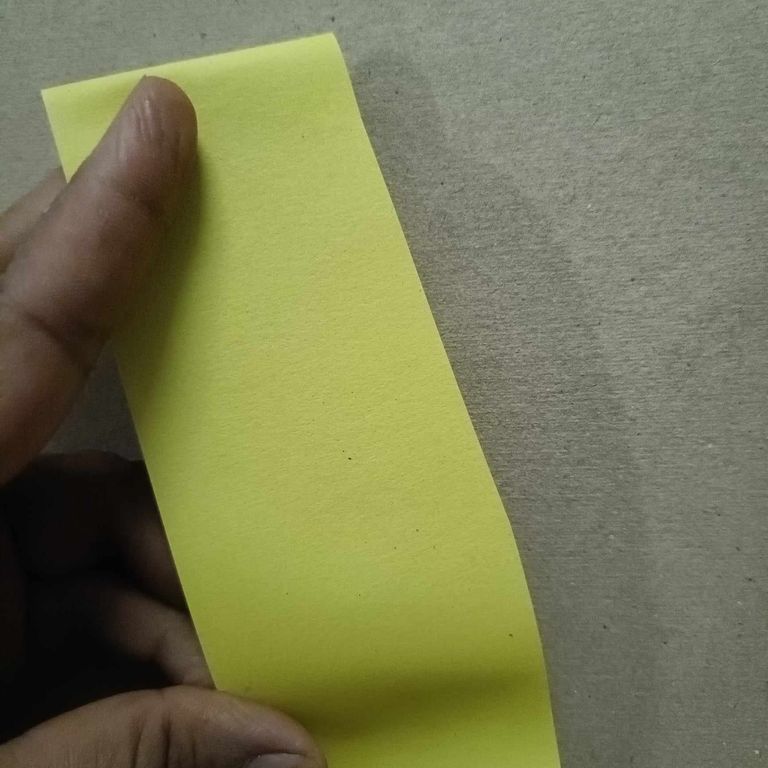
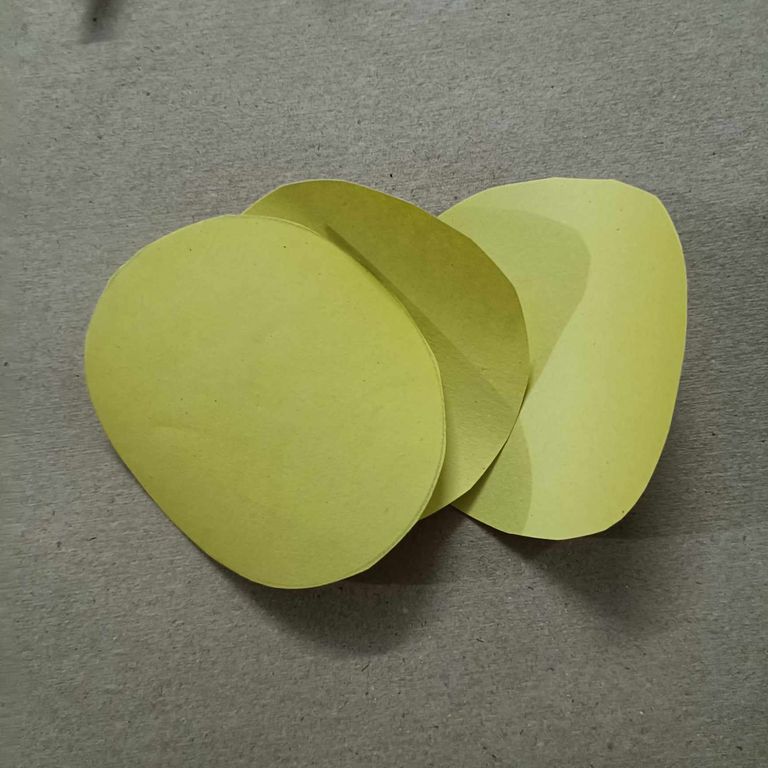
▣Then I took the yellow-colored paper
 |
|---|
 |
|---|
| 🍀Step 4 🍀 |
|---|
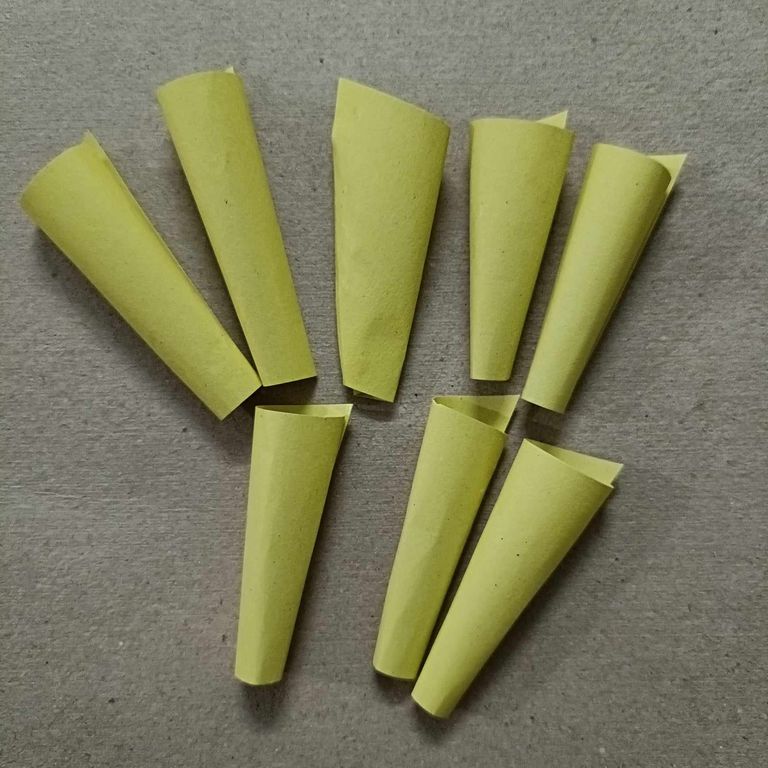
▣and cut it to size and made it long Chunga . I glued them to it.
▣then,I glued the huk back of the round cardboard paper with glue.
 |
|---|
 |
|---|
| 🍀Step 5 🍀 |
|---|
▣Then I glued the red leaves on the sides of the cercle cardboard paper opposite side attached them to the square side of the whole flower.
▣ then, i took yellow colour paper , cut it into round shape.
 |
|---|
 |
|---|
| 🍀Step 6 🍀 |
|---|
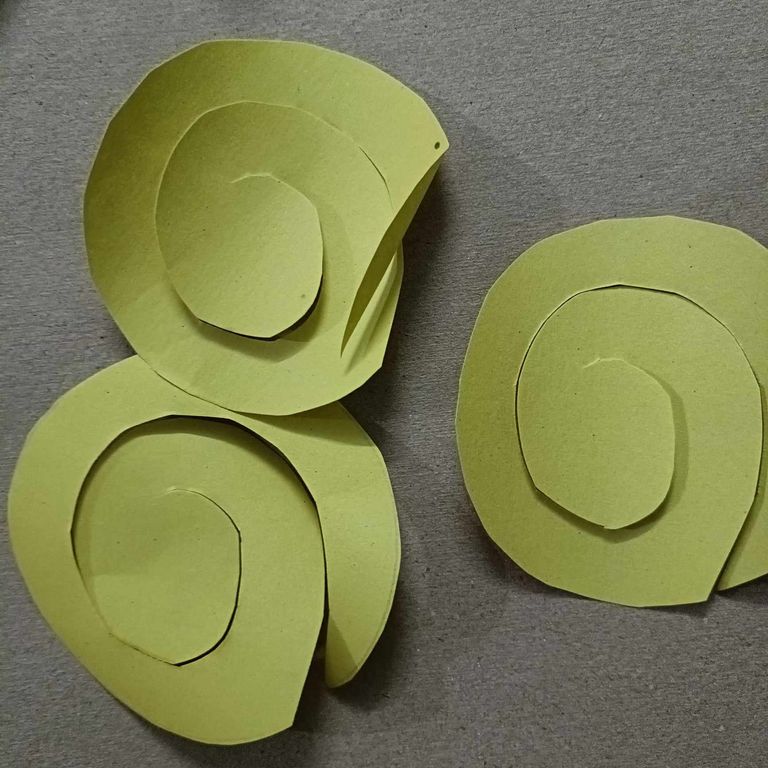
▣Then I rolled them thinly and cut them into pieces.
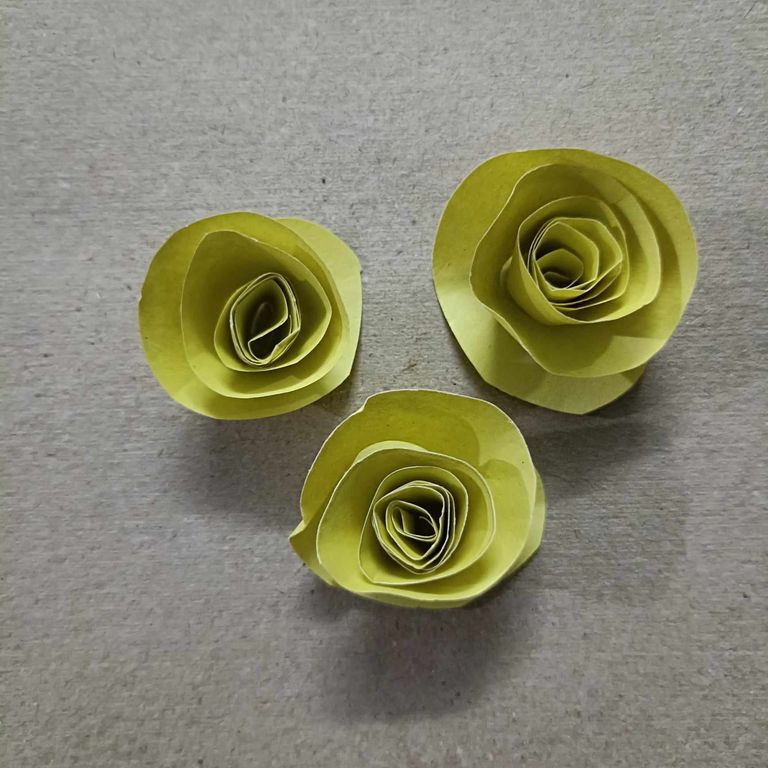
▣Then I turned the twisted parts and glued them together to make three large yellow roses.
 |
|---|
 |
|---|
| 🍀Step 7 🍀 |
|---|
▣Then I glued the roses in the middle of the cardboard.
▣Then I glued the long chunga of yellow randomly around the roses.
 |  |
|---|---|
| 🍀Step 8 🍀 |
|---|
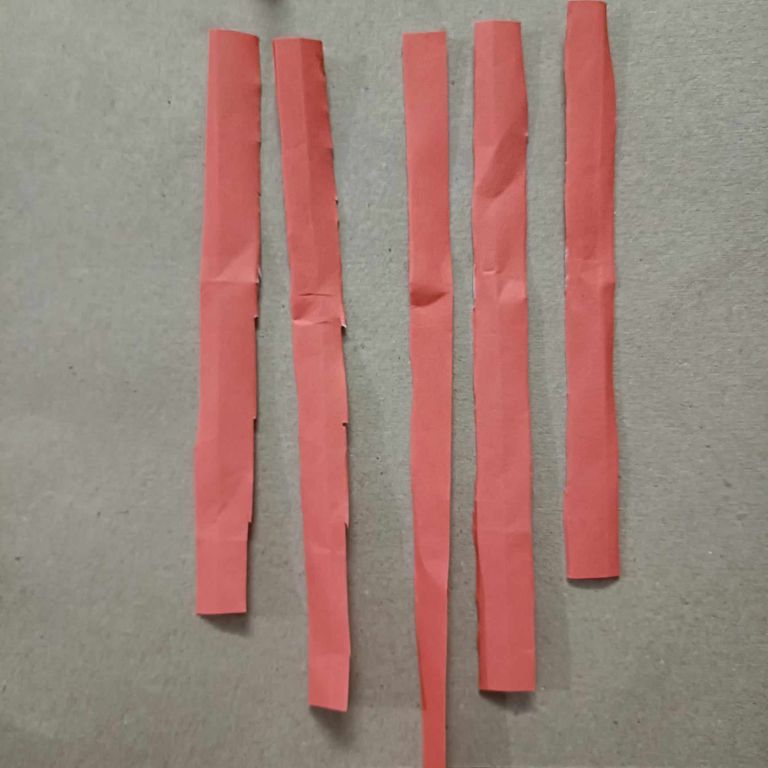
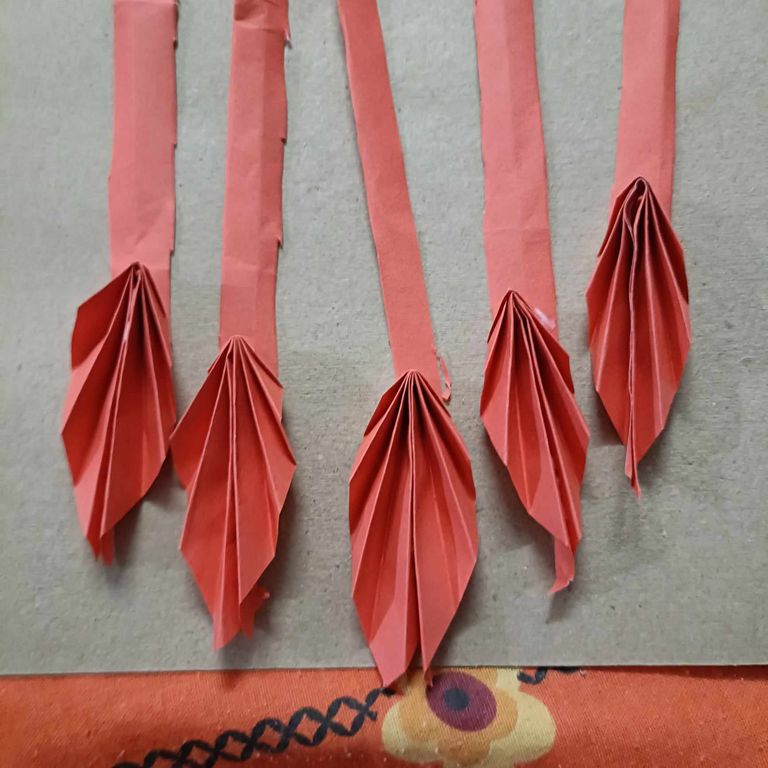
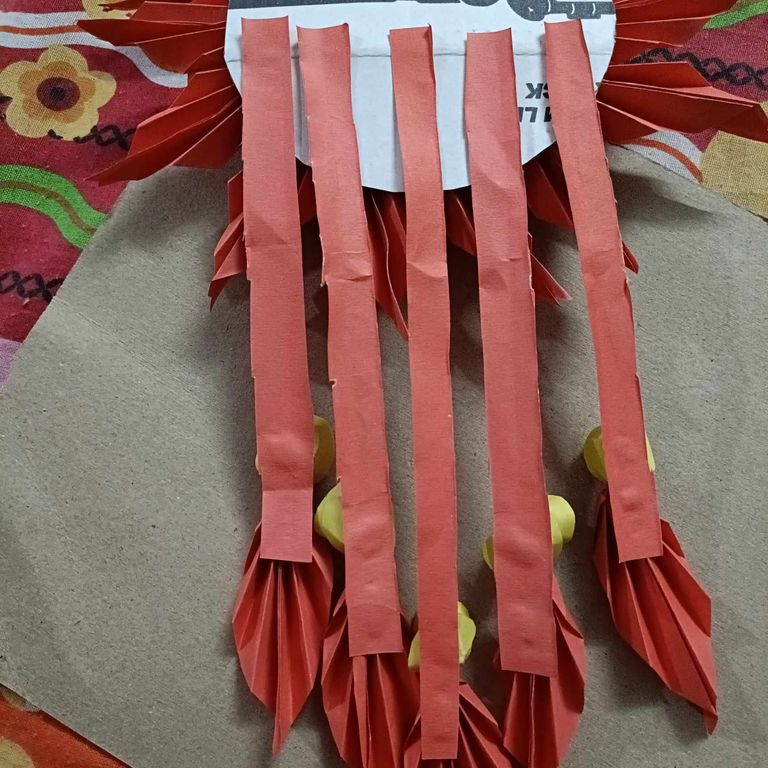
▣Then I cut five long pieces of red paper.
▣Then I glued five red leaves on the bottom of the long paper.
 |  |
|---|---|
| 🍀Step 9 🍀 |
|---|
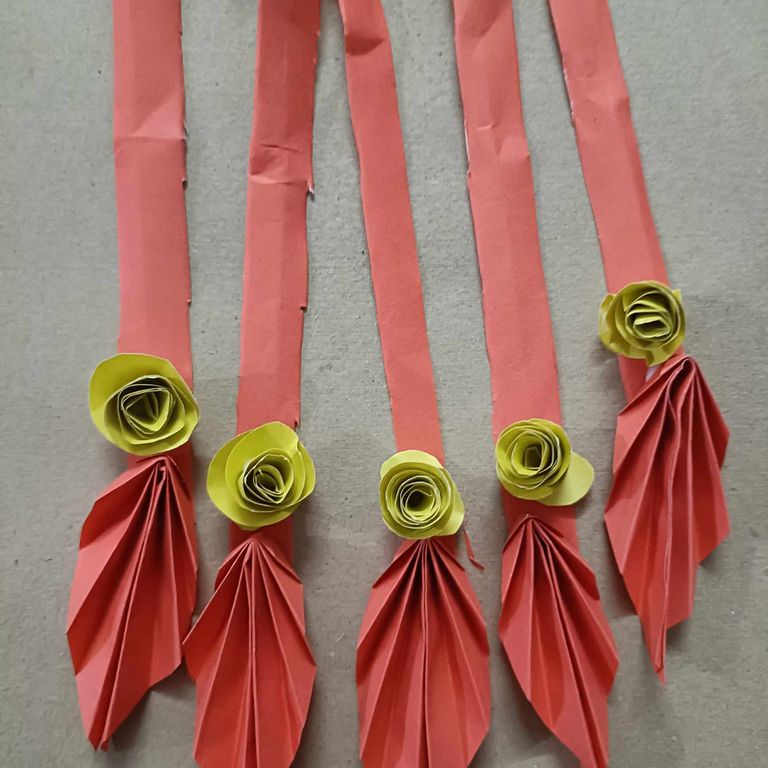
▣Then I glued five small yellow rose flowers on top of the leaves.
▣Then I glued the long papers in a row on the back side of the cardboard.
 |
|---|
 |
|---|
| 🍀Step 10 🍀 |
|---|
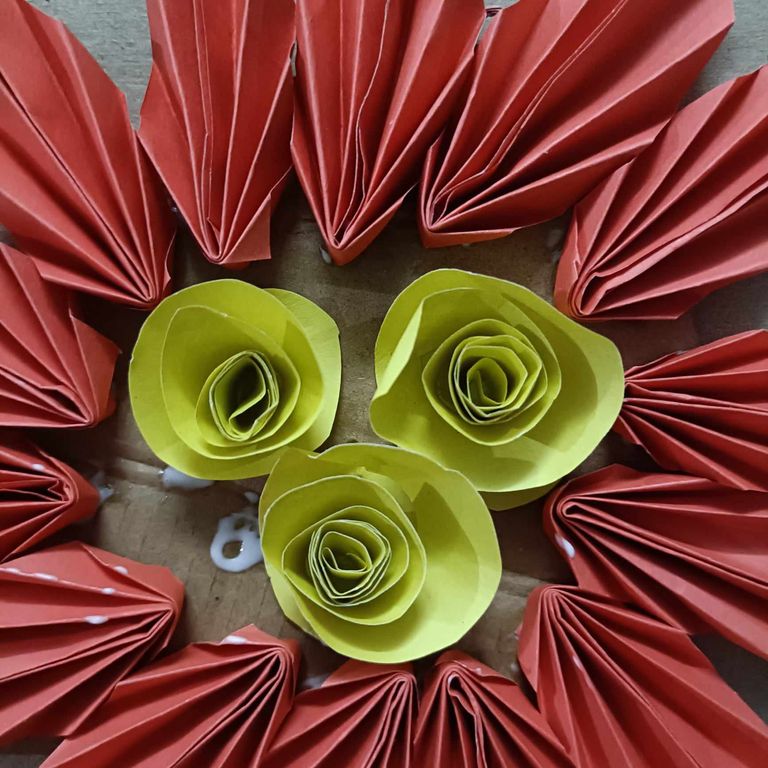
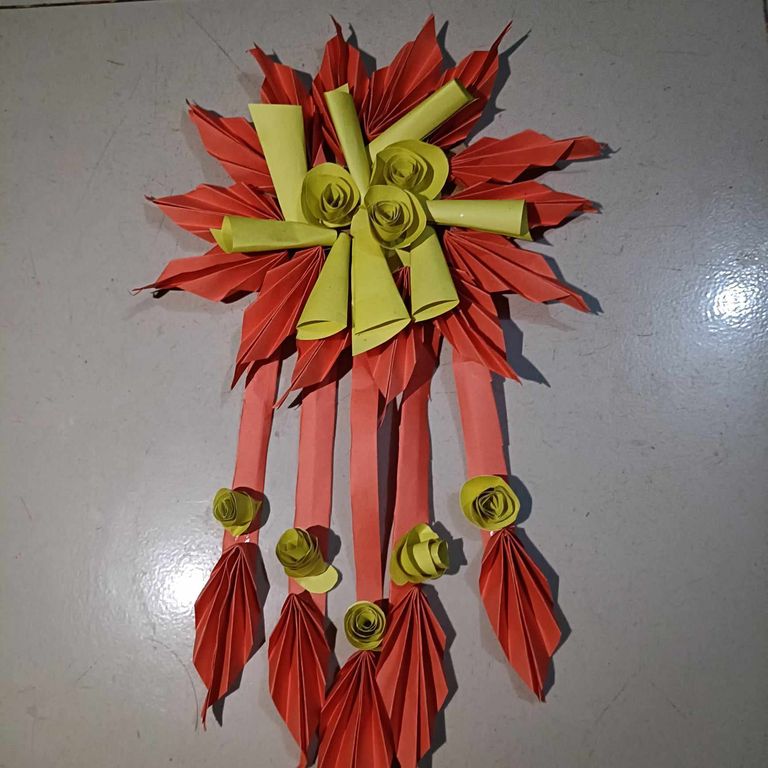
▣Then it was ready.
▣ Then I made paper wallmate and put it on the wall of the house, which looked incredibly beautiful,
 |  |
|---|---|
✅ How did you get the idea of making paper craft?
I love making paper craft from any type or colour of paper, and the thing I love making the most with colour paper is making wallmate . I love making different types of wallmate . In this way, I enhance the beauty of my house and I like to decorate my home in a new way, so in my free time, I search for different types of wallmate on YouTube and create the ones I like and then enhance the beauty of my house.
✅ Briefly tell us how you felt while making the papercraft
Every time I make a wallmate I get a little nervous thinking about how nice it will look when it's completely finished. While making today's wallmate I thought maybe it's this one. This is what this wallmate would look like, but after making the wallmate I was surprised because it was a different kind. I had the wallmate and it looked great, so I was very pleased with my wallmate.
আমার প্রিয় বন্ধুরা কেমন আছো সবাই? আশা করি সবাই ভালো আছো এবং আমিও ভালো আছি, আলহামদুলিল্লাহ। আমরা আমাদের সৃজনশীলতা উপস্থাপন করতে পারবো এবং আমার বন্ধুদের সৃজনশীলতা দেখতে পারবো। আমার ভালো লেগেছে। আজ আমি রঙিন কাগজ দিয়ে একটি ওয়ালমেটও তৈরি করেছি। আমি কীভাবে এটি তৈরি করেছি তার সমস্ত বিবরণ নীচে উল্লেখ করা যাক।
✅ কমপক্ষে 4টি ধাপে আপনার কাগজের কারুকাজ আমাদের কাছে উপস্থাপন করুন।
| প্রয়োজনীয় উপকরণ👇🏾 |
|---|
| 🟤কার্ডবোর্ড কাগজ |
| 🟤কাঁচি |
| 🟤আঠা |
| 🟤রঙিন কাগজ |
▣প্রথমে, আমি কার্ডবোর্ড কাগজকে একটি বড় বৃত্তে কেটেছি,
▣তারপর আমি কিছু লাল রঙের কাগজ ব্যবহার করে বর্গাকার আকারে কেটেছি।
▣আমি কাগজের টুকরোগুলোকে ছোট ছোট টুকরো করে ভাঁজ করেছি, যেমনটি আপনি ছবিতে দেখতে পাচ্ছেন।
▣তারপর আমি কাগজটি মাঝখানে ভাঁজ করে লম্বা পাতার মতো আঠা দিয়ে আঠা দিয়ে লাগিয়ে দিলাম।
▣এইভাবে, আমি বেশ কয়েকটি পাতা তৈরি করলাম। ▣তারপর আমি হলুদ রঙের কাগজটি নিলাম
▣এবং আকারে কেটে লম্বা চুঙ্গা তৈরি করলাম। আমি সেগুলো এতে আঠা দিয়ে আঠা দিয়ে আটকে দিলাম।
▣তারপর, আমি গোলাকার কার্ডবোর্ড কাগজের হুক পিছনে আঠা দিয়ে আটকে দিলাম।
Congratulations, your post has been upvoted by @dsc-r2cornell, which is the curating account for @R2cornell's Discord Community.
Enhorabuena, su "post" ha sido "up-voted" por @dsc-r2cornell, que es la "cuenta curating" de la Comunidad de la Discordia de @R2cornell.