"Bismillahir Rahmanir Raheem"
This is @tammanna from #Bangladesh.
 |
|---|
I took this picture with oppo 11 pro mobile
How are you all my dear friends hope all are well and I am also well alhamdulillah Prove yourself as the best artist for the week. darun, this contest I try to participate in every week and I try to present my creativity With friends I am fascinated by my friends' creative paintings but today I am starting my painting,
✅ Explain what you draw in your own words
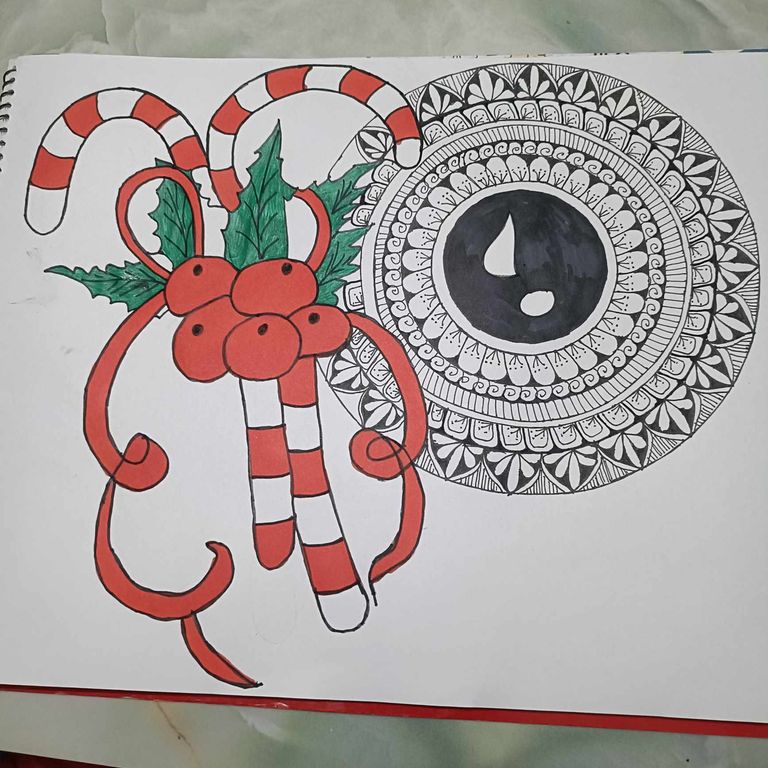
Today I will present here a picture of a Christmas tree and here I put two sticks with it and draw a perfect Mandela picture with it. It looks wonderful and exceptional. I tried to present here. I hope all my friends will like this Mandela. image
✅ Share your drawing step by step with us( Note this important point 👉🏽 write your username and date at any point on your drawing space before you start your drawing.)
| Drawing tools 👇🏾 |
|---|
●A drawing book
●A pencil
●A rubber
●A compass
● A scale
●A black marker pen
●A black gel pen
●red marker pen and
● green pen
The Process of Drawing
Step 01
At the beginning of the drawing, first I noted my username and date on the upper right side of my drawing book,
Step 02
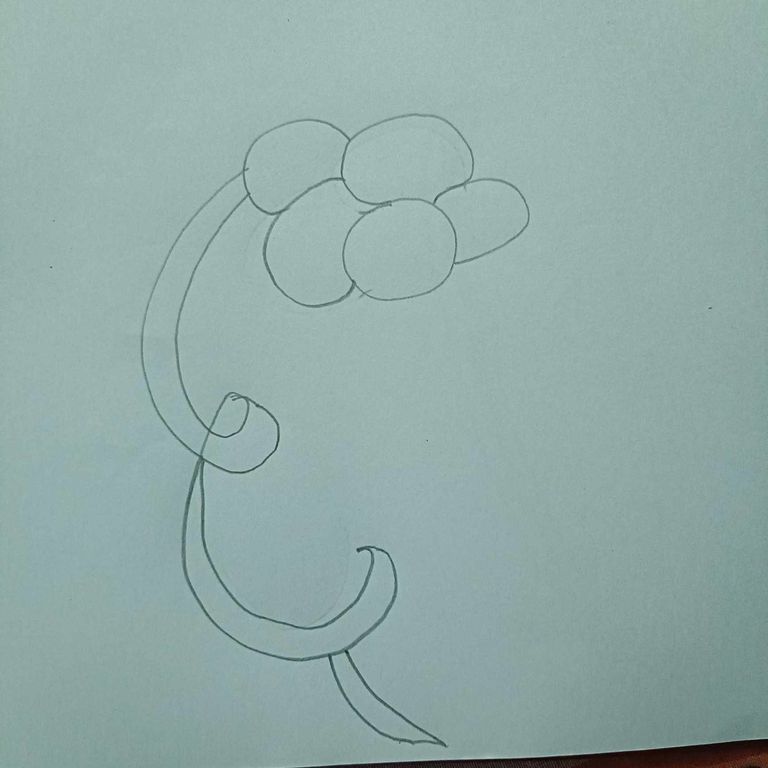
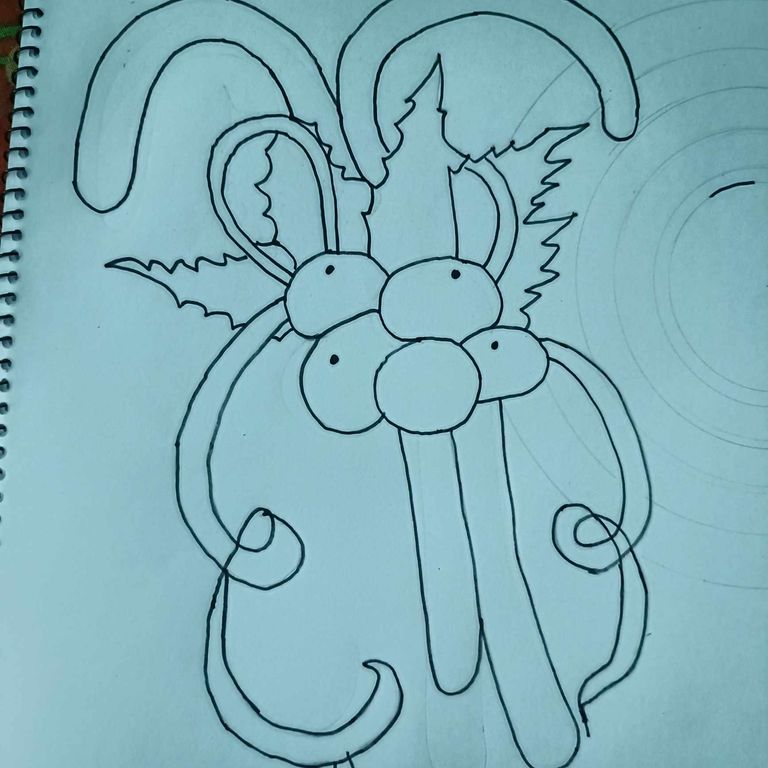
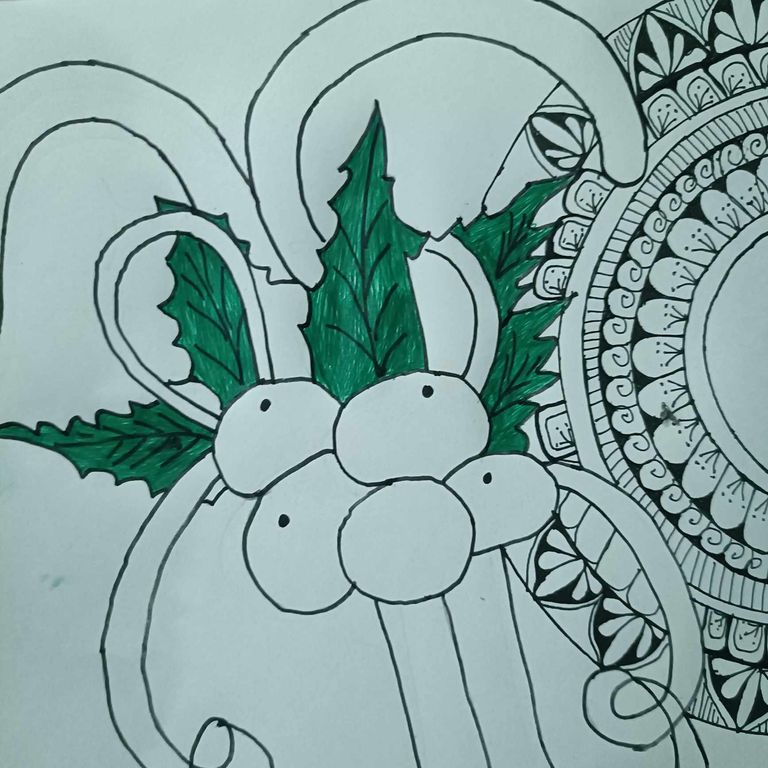
then I drew five medium-sized balls with a pencil on the left side of the drawing book, and three curved branches below them,
Step 03
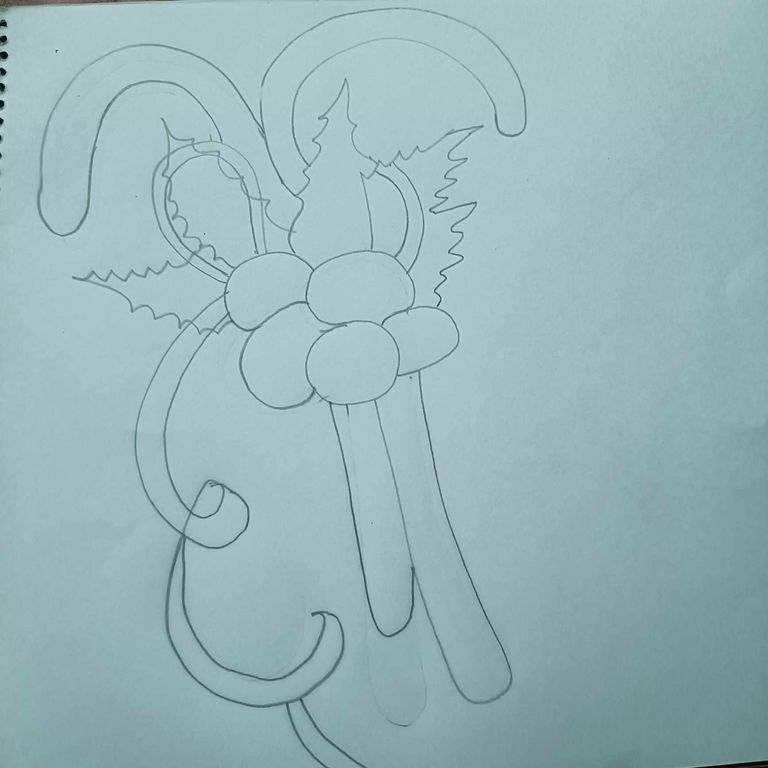
then I drew the bottom of two stick below the ball and drawing four leafs I drew the top part of the leaf and the top two stick
Step 04
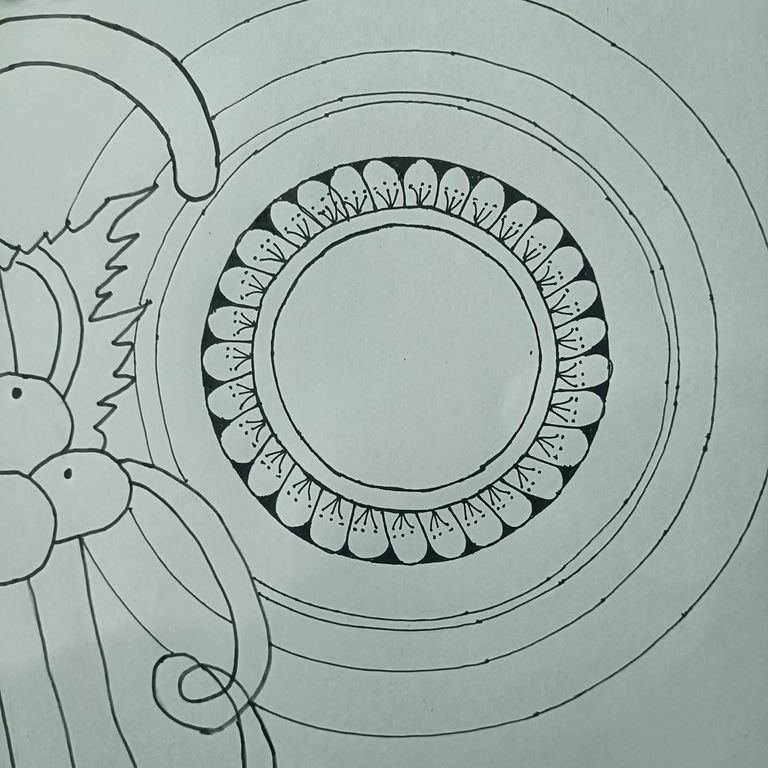
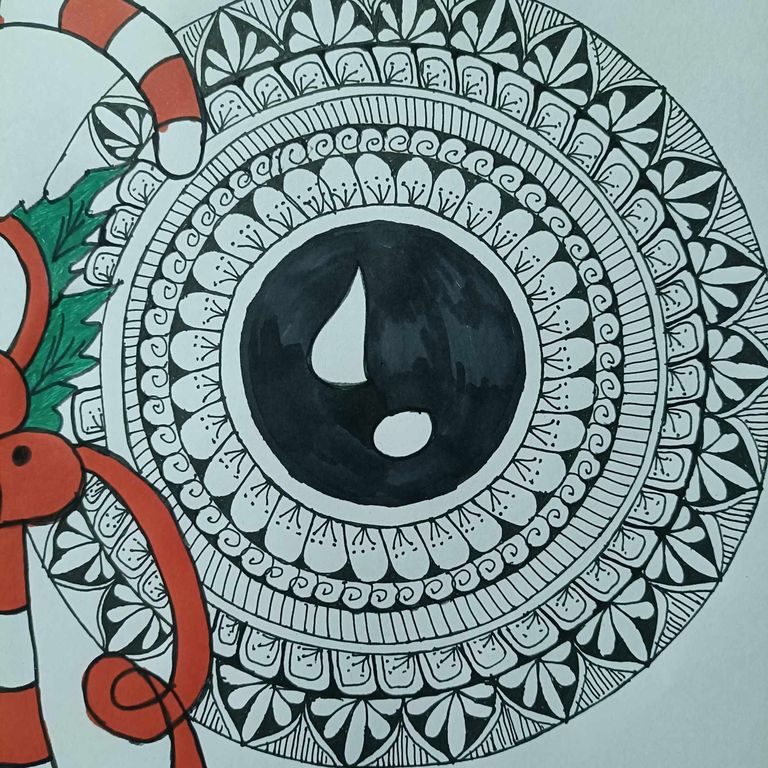
then I drew six circles with the compass right side of the After drawing the circle,

Step 05
I drew the entire part of the stick with black pen and then I drew all the parts of the circle with black pen and erased the excess pencil marks, this made my image much clearer and visible.

Step 06
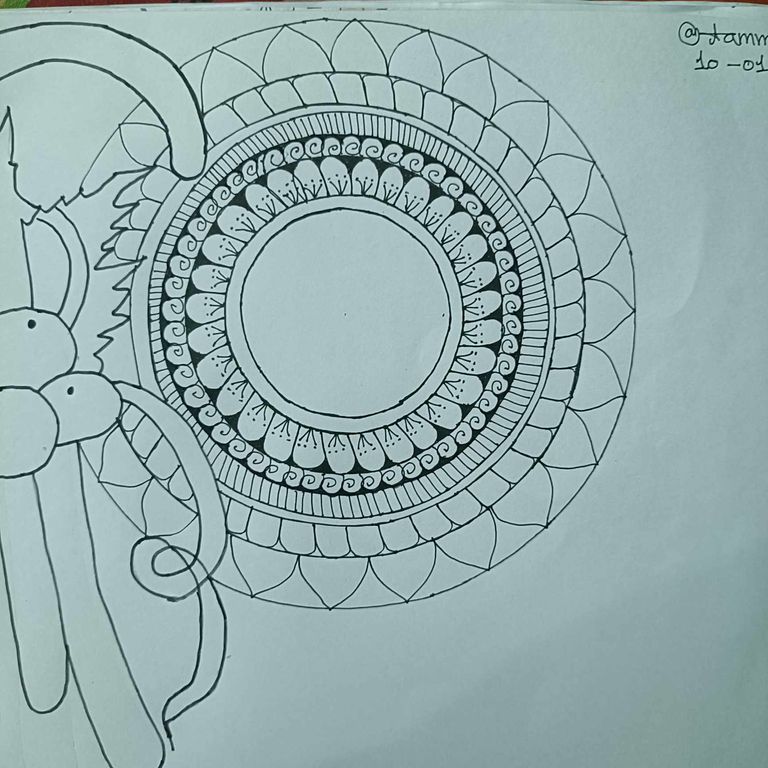
Prepared for Here mandala drawing I first completed the first line with small flower calligraphic images
Step 07
then I made a small twist design and long design and then again flower koli and big flower design and I completed the full mandala design with flowers and long spot

Step 08
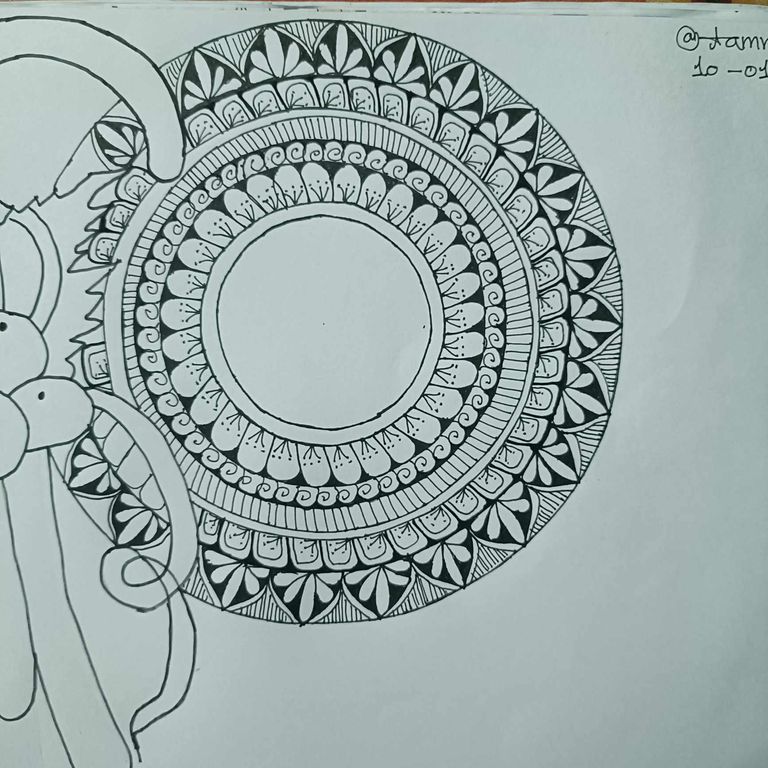
then I completed four leaves on the stick with green color and black color between them leaf veins. I drew the inside of the leaf like a vein
Step 09
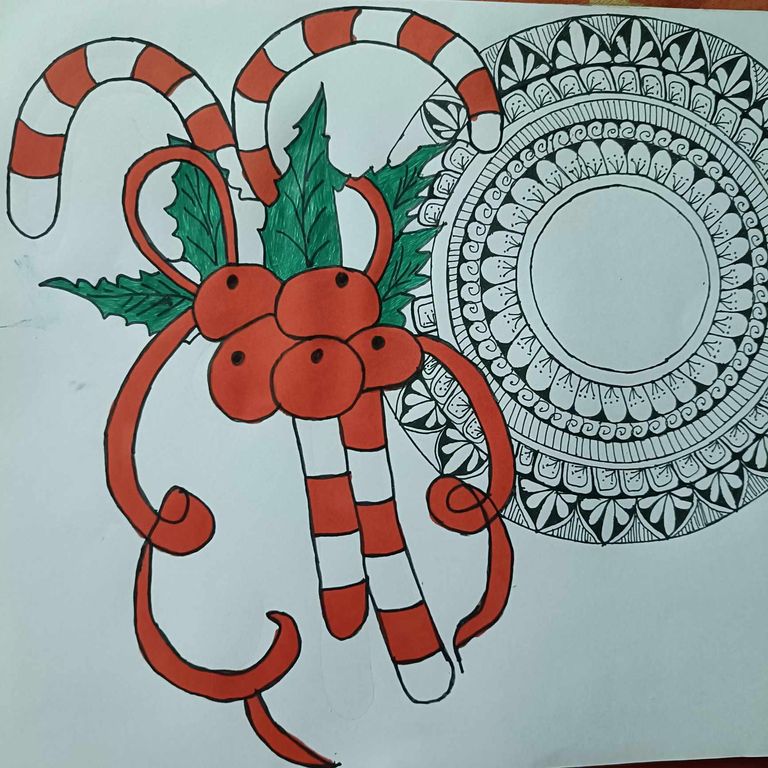
then I filled in the whole stick part and the side wraps with red colour here on the stick I put some parts white and red colour
Step 10
then I filled in black the part between the round mandala leaving the two long parts and the round part blank I have done the whole part
Step 11
and then I am completely done drawing Mandela.
✅ How long did take to complete your drawing and how do you feel about it?
It took me about 40 minutes to draw today's picture and I felt quite happy to draw this picture because I love drawing Mandela pictures and I love to see the final look when I complete my whole picture with small designs. Much better as I was very happy to draw the picture today
✅ Give us a beautiful selfie with your creation and where you got the inspiration from.
To draw different types of pictures I follow YouTube and different channels and from there I try to collect my favourite pictures and draw from those channels I try to get ideas on how I can draw the picture or present my picture beautifully today's picture I collected from youtube channel.
✅ তুমি কী আঁকো তোমার নিজের ভাষায় ব্যাখ্যা করো
আজ আমি এখানে একটি ক্রিসমাস ট্রির ছবি উপস্থাপন করব এবং এখানে আমি এটির সাথে দুটি লাঠি রেখে এটি দিয়ে একটি নিখুঁত ম্যান্ডেলার ছবি আঁকবো। এটি দেখতে অসাধারণ এবং ব্যতিক্রমী। আমি এখানে উপস্থাপন করার চেষ্টা করেছি। আমি আশা করি আমার সকল বন্ধুরা এই ম্যান্ডেলার ছবি পছন্দ করবে। ছবি
✅ আপনার অঙ্কনটি ধাপে ধাপে আমাদের সাথে শেয়ার করুন (এই গুরুত্বপূর্ণ বিষয়টি লক্ষ্য করুন 👉🏽 আপনার অঙ্কন শুরু করার আগে আপনার অঙ্কন স্থানের যেকোনো স্থানে আপনার ব্যবহারকারীর নাম এবং তারিখ লিখুন।)
| অঙ্কন সরঞ্জাম 👇🏾 |
|---|
●একটি অঙ্কন বই
●একটি পেন্সিল
●একটি রাবার
●একটি কম্পাস
●একটি স্কেল
●একটি কালো মার্কার কলম
একটি কালো জেল কলম
●লাল মার্কার কলম এবং
●সবুজ কলম
ধাপ ০১
অঙ্কনের শুরুতে, প্রথমে আমি আমার অঙ্কন বইয়ের উপরের ডানদিকে আমার ব্যবহারকারীর নাম এবং তারিখ লিখেছিলাম,
ধাপ ০২
তারপর আমি অঙ্কন বইয়ের বাম দিকে একটি পেন্সিল দিয়ে পাঁচটি মাঝারি আকারের বল এবং তাদের নীচে তিনটি বাঁকা শাখা আঁকলাম,
ধাপ ০৩
তারপর আমি বলের নীচে দুটি কাঠির নীচের অংশ আঁকলাম এবং চারটি পাতা আঁকলাম, আমি পাতার উপরের অংশ এবং উপরের দুটি কাঠি আঁকলাম
ধাপ ০৪
তারপর আমি কম্পাস দিয়ে ডানদিকে ছয়টি বৃত্ত আঁকলাম বৃত্তটি আঁকার পর,
ধাপ ০৫
আমি কালো কলম দিয়ে কাঠির পুরো অংশ আঁকলাম এবং তারপর আমি কালো কলম দিয়ে বৃত্তের সমস্ত অংশ আঁকলাম এবং অতিরিক্ত পেন্সিলের দাগ মুছে ফেলা হয়েছে, এতে আমার ছবি অনেক স্পষ্ট এবং দৃশ্যমান হয়েছে।
ধাপ ০৬
এখানে মন্ডলা আঁকার জন্য প্রস্তুত আমি প্রথমে ছোট ফুলের ক্যালিগ্রাফিক ছবি দিয়ে প্রথম লাইনটি সম্পূর্ণ করেছি
ধাপ ০৭
তারপর আমি একটি ছোট টুইস্ট ডিজাইন এবং লম্বা নকশা তৈরি করেছি এবং তারপরে আবার ফুলের কোলি এবং বড় ফুলের নকশা তৈরি করেছি এবং ফুল এবং লম্বা দাগ দিয়ে সম্পূর্ণ মন্ডলা নকশাটি সম্পন্ন করেছি
ধাপ ০৮
তারপর আমি কাঠিতে চারটি পাতা সম্পূর্ণ করেছি যার মধ্যে সবুজ রঙ এবং তাদের মধ্যে কালো রঙ রয়েছে পাতার শিরা। আমি পাতার ভেতরের অংশটি শিরার মতো এঁকেছি
ধাপ ০৯
তারপর আমি পুরো কাঠির অংশটি পূরণ করেছি এবং পাশের মোড়কগুলি লাল রঙ দিয়ে এখানে কাঠিতে রেখেছি আমি কিছু অংশ সাদা এবং লাল রঙ দিয়েছি