"Bismillahir Rahmanir Raheem"
This is @tammanna from #Bangladesh.
I took this picture with oppo 11 pro mobile
How are your friends? I hope everyone is well and I am well too, Alhamdulillah. I have drawn it several times before, so today I tried to draw the picture very easily and in a very short time. And let's see the detailed description of how I completed the drawing again in a very easy way.
| Drawing tools 👇🏾 |
|---|
◓Drawing notebook
◓A pencil
◓An eraser
◓Black marker pen and
◓Colored pencils
The Process of Drawing
Step 01
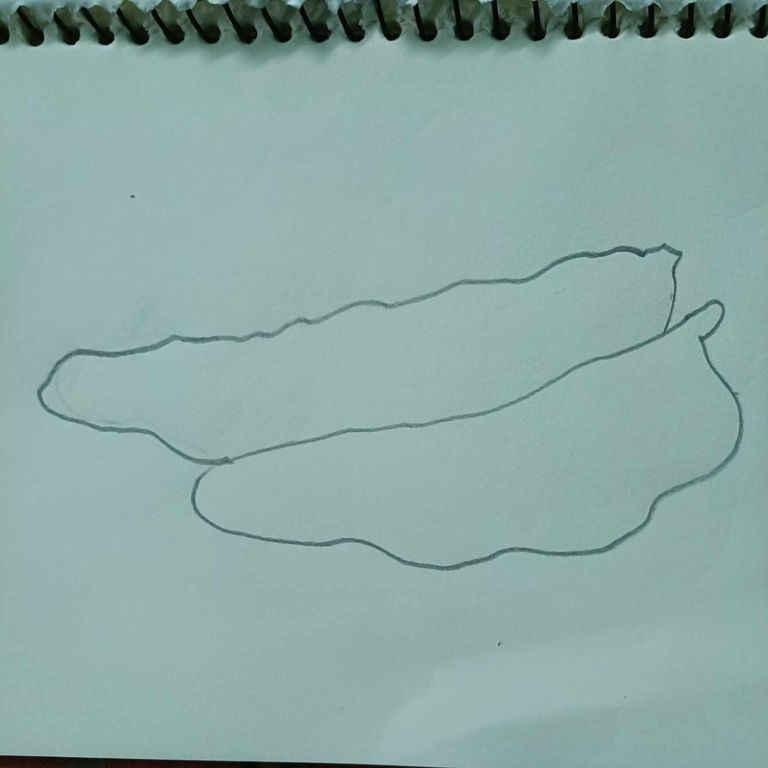
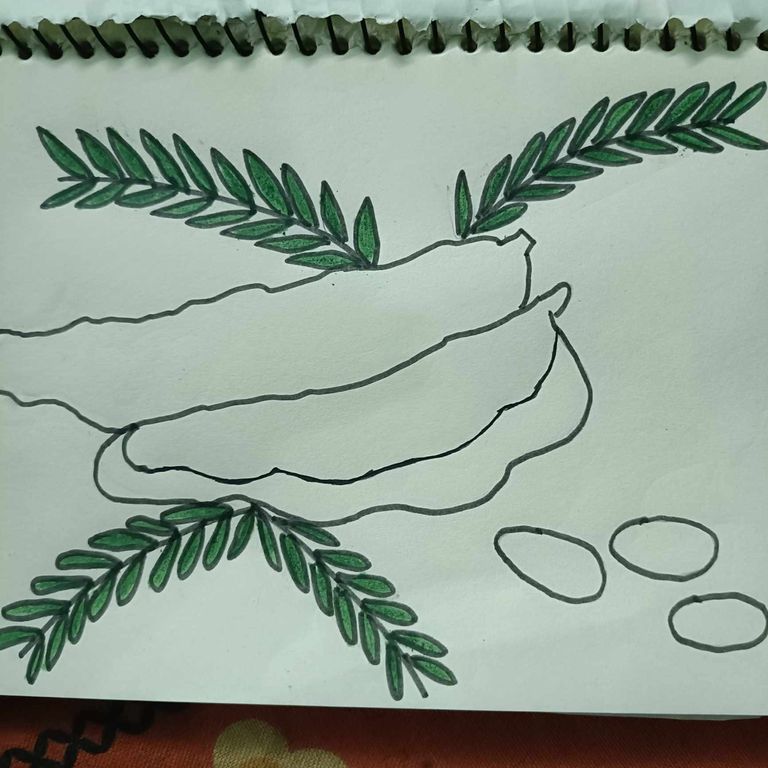
At the beginning of the drawing, I first drew two long-shaped tamarind with a pencil in my drawing book.
Step 02
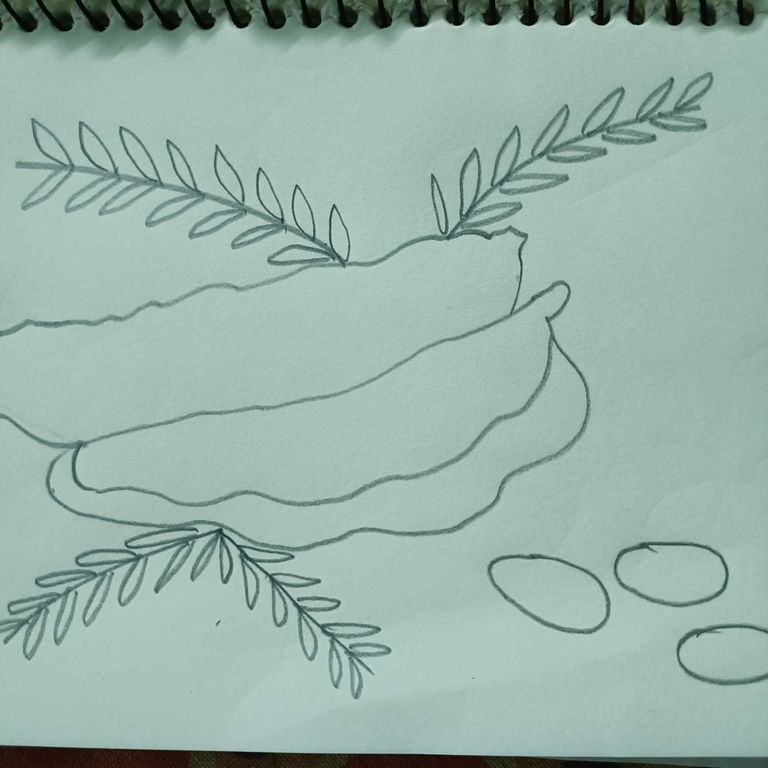
Then I drew thin leaves with two tamarind stem on the top of the tamarind , and then I drew thin leaves with a tamarind stem on the bottom of the tamarind , and I drew three seeds on the right side of the tamarind .
Step 03
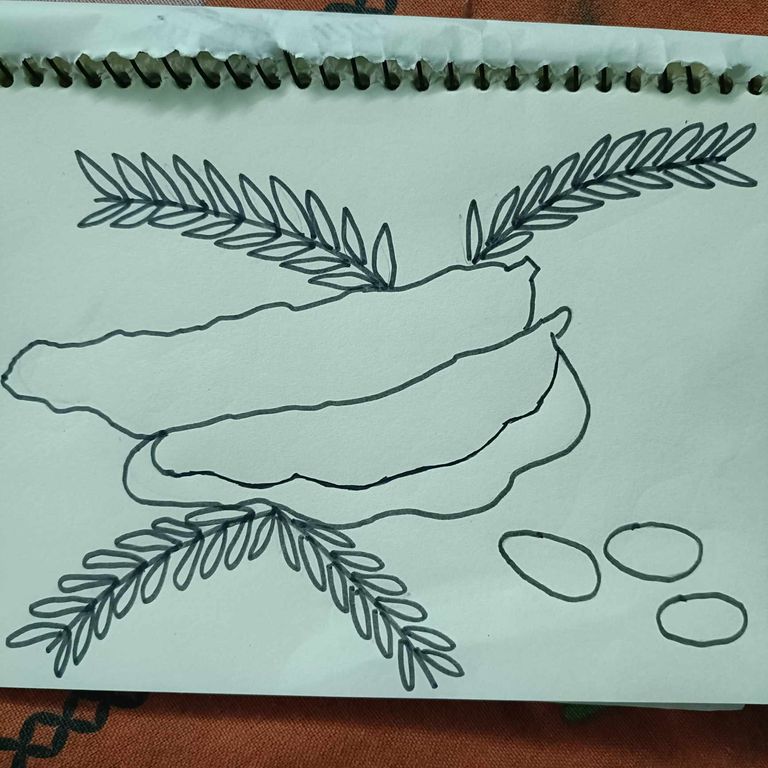
Then my , to make the whole picture clearer, I drew it with a black pen and erased the extra pencil marks with an eraser.
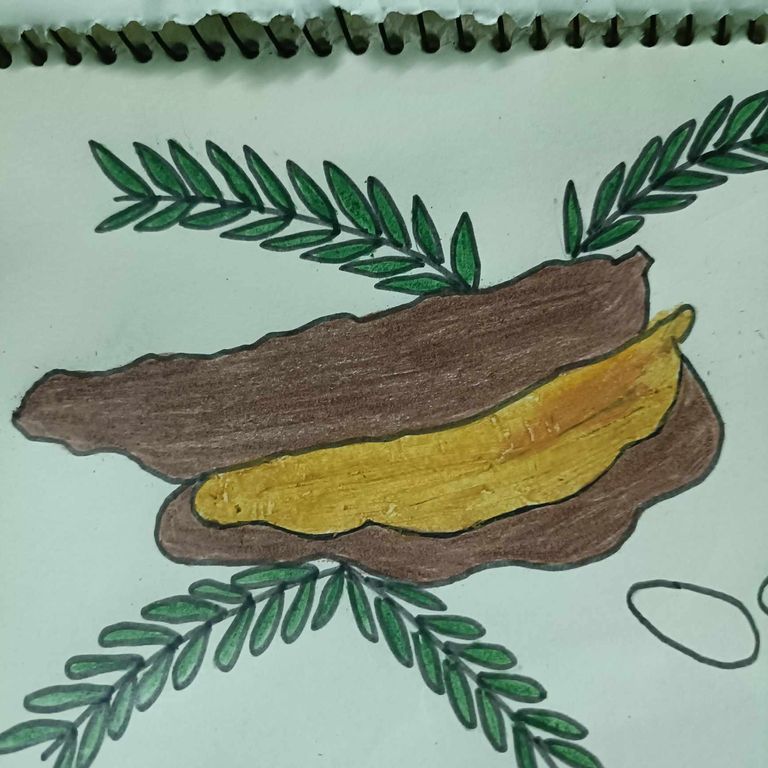
Step 04
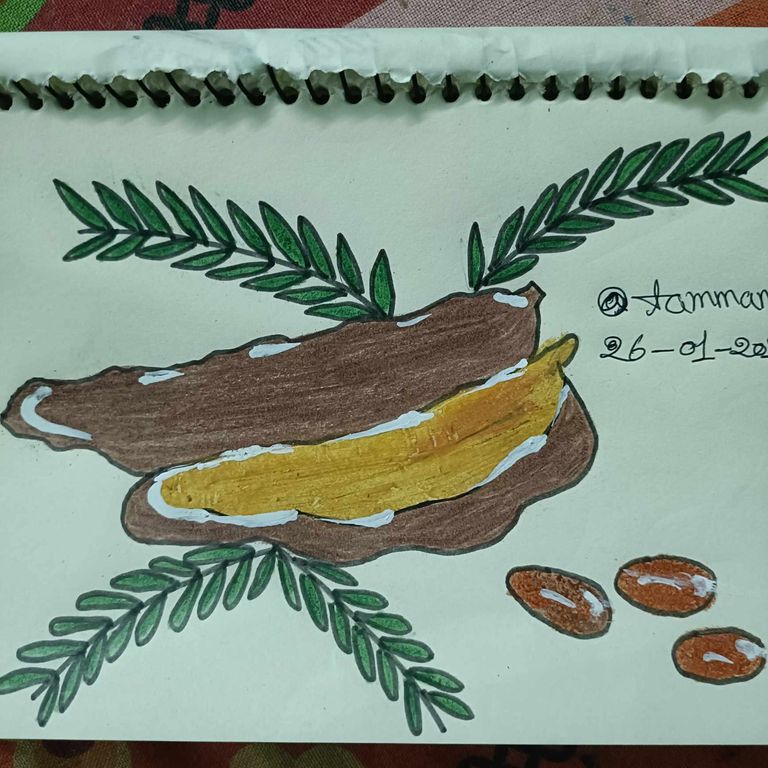
Then I prepared to color my picture. Here, I have completely drawn the tamarind leaves with a dark green colour.
Step 05
Then I drew the tamarind. I have completed the tamarind with brown colour and I have completed the empty part in the middle of the lower tamarind with yellow colour and in the middle I kept a light orange colour,
Step 06
then I completed the tamarind seeds with the same brown colour, and then I lightly drew on the tamarind and tamarind seeds again with a white pen.
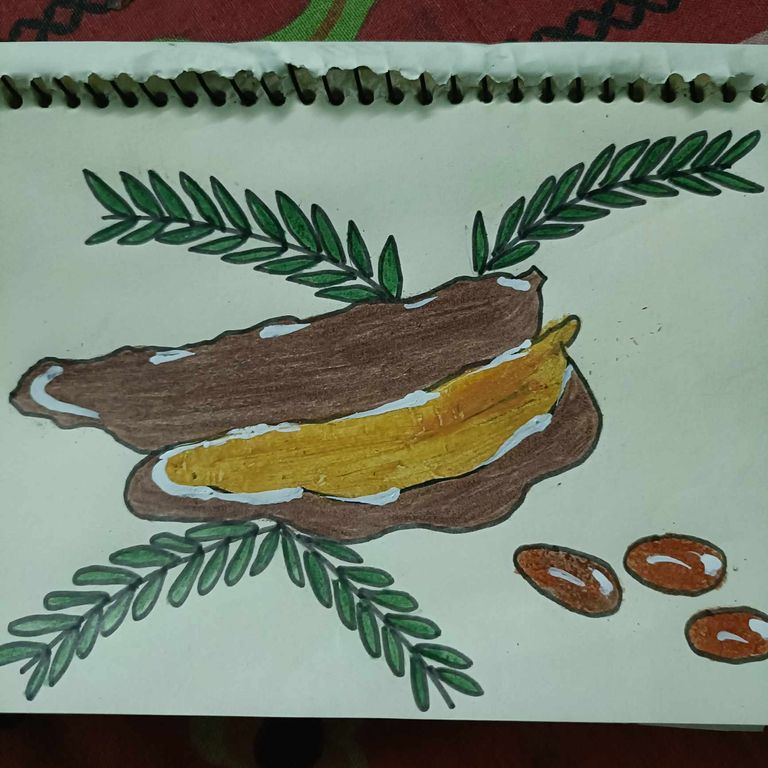
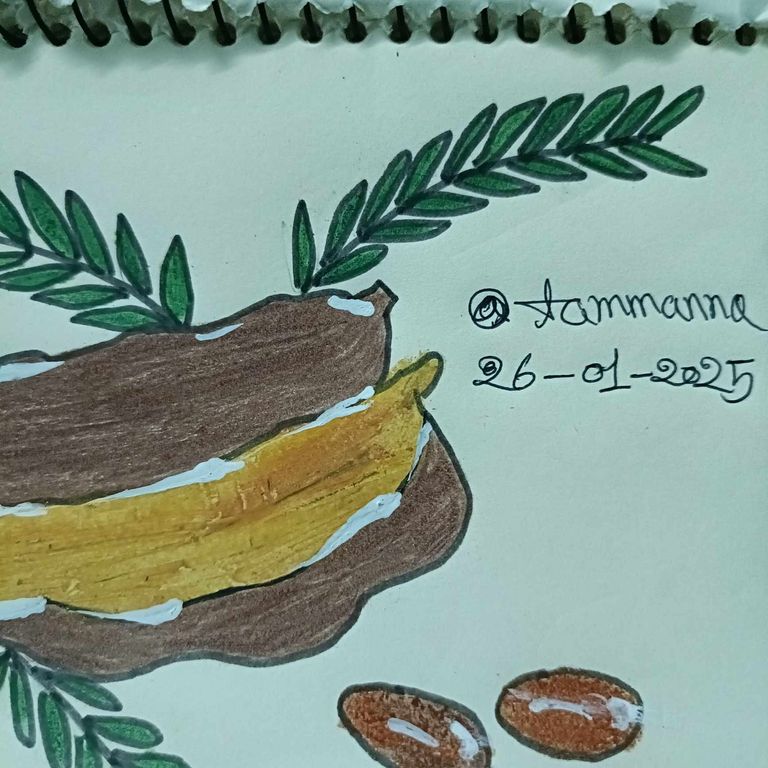
Step 07
Then I mentioned my username and date next to my picture. Then the drawing of tamarind was completely completed.
Today's picture seemed very easy to me and I was able to draw the picture in a very short time by adopting a very simple method. It took me about half an hour to draw today's picture and after drawing the picture I liked it very much. It looked like a real tamarind. I liked it very much. I hope my friends like it. See you again and I wish everyone well. May Allah Hafez.
| ছবির সরঞ্জাম 👇🏾 |
|---|
◓ছবির নোটবুক
◓একটি পেন্সিল
◓একটি ইরেজার
◓কালো মার্কার কলম এবং
◓রঙিন পেন্সিল
ধাপ ০১
ছবির শুরুতে, আমি প্রথমে আমার অঙ্কন বইতে একটি পেন্সিল দিয়ে দুটি লম্বা আকৃতির তেঁতুল আঁকলাম।
ধাপ ০২
তারপর আমি তেঁতুলের উপরে দুটি তেঁতুলের কাণ্ড দিয়ে পাতলা পাতা আঁকি, তারপর তেঁতুলের নীচে একটি তেঁতুলের কাণ্ড দিয়ে পাতলা পাতা আঁকি, এবং তেঁতুলের ডান পাশে তিনটি বীজ আঁকি।
ধাপ ০৩
তারপর, পুরো ছবিটি পরিষ্কার করার জন্য, আমি একটি কালো কলম দিয়ে এটি আঁকি এবং একটি ইরেজার দিয়ে অতিরিক্ত পেন্সিলের চিহ্ন মুছে ফেলি।
ধাপ ০৪
তারপর আমি আমার ছবিটি রঙ করার জন্য প্রস্তুত হই। এখানে, আমি তেঁতুলের পাতাগুলি সম্পূর্ণরূপে গাঢ় সবুজ রঙে আঁকি।
ধাপ ০৫
তারপর আমি তেঁতুলের কাণ্ড আঁকি। আমি বাদামী রঙ দিয়ে তেঁতুল শেষ করেছি এবং নীচের তেঁতুলের মাঝখানের খালি অংশটি হলুদ রঙ দিয়ে শেষ করেছি এবং মাঝখানে হালকা কমলা রঙ রেখেছি,
ধাপ ০৬
তারপর আমি একই বাদামী রঙ দিয়ে তেঁতুলের বীজ সম্পূর্ণ করেছি, এবং তারপর আমি আবার সাদা কলম দিয়ে তেঁতুল এবং তেঁতুলের বীজের উপর হালকাভাবে আঁকলাম।
ধাপ ০৭
তারপর আমি আমার ছবির পাশে আমার ব্যবহারকারীর নাম এবং তারিখ উল্লেখ করেছি। তারপর তেঁতুলের অঙ্কন সম্পূর্ণরূপে সম্পন্ন হয়েছে।
আজকের ছবিটি আমার কাছে খুব সহজ মনে হয়েছে এবং খুব সহজ পদ্ধতি অবলম্বন করে আমি খুব অল্প সময়ের মধ্যে ছবিটি আঁকতে সক্ষম হয়েছি। আজকের ছবিটি আঁকতে আমার প্রায় আধ ঘন্টা সময় লেগেছে এবং ছবিটি আঁকার পর আমার খুব পছন্দ হয়েছে। এটি দেখতে আসল তেঁতুলের মতো দেখাচ্ছিল। আমার খুব পছন্দ হয়েছে। আশা করি আমার বন্ধুরা এটি পছন্দ করবে। আবার দেখা হবে এবং আমি সকলের মঙ্গল কামনা করছি। আল্লাহ হাফেজ।
| Device | oppo 11 pro |
|---|---|
| Photographer | @tammanna |