"Bismillahir Rahmanir Raheem"
This is @tammanna from #Bangladesh.
I took this picture with oppo 11 pro mobile
How are you guys? I hope everyone is well, and I am fine,But let's go. Today, I have again appeared with images and am presenting them in front of my friends. Let's start.
✅ Explain what you draw in your own words.
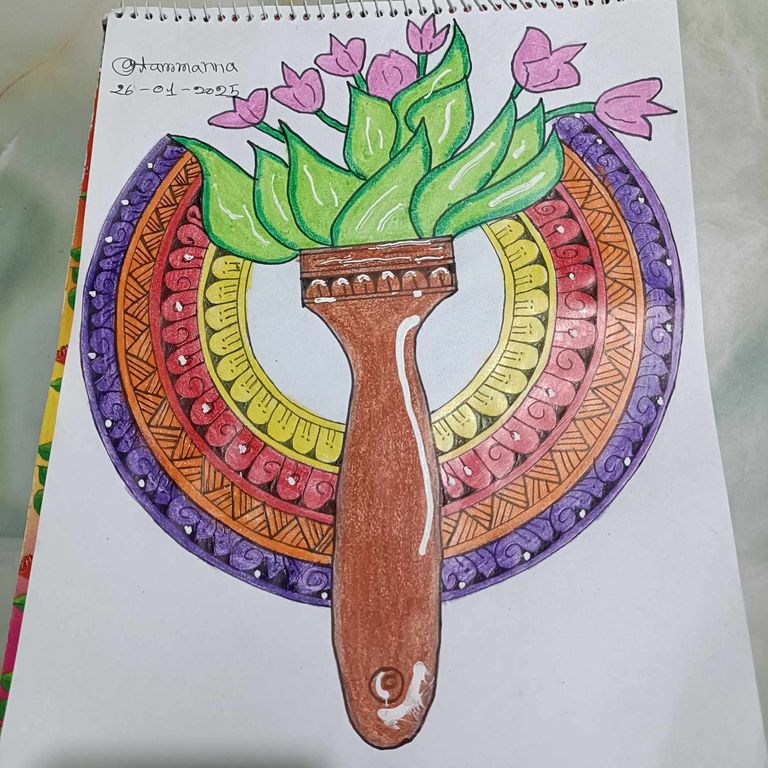
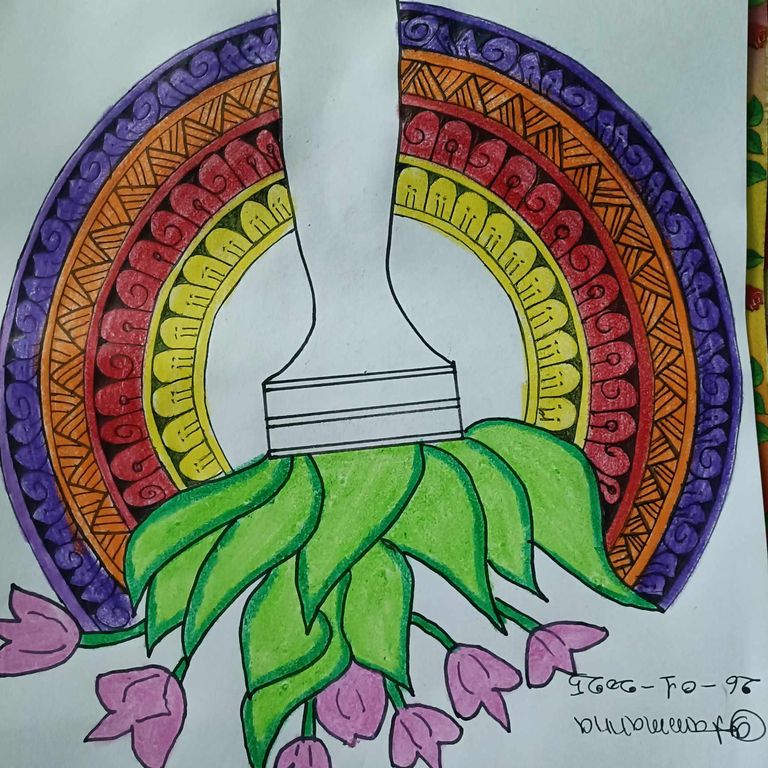
In today's great contest, I appeared with a picture of a mandala, but today's mandala picture will be a little different. In this picture, I have tried to present a great picture by expanding the picture of a flower with a mandala. I hope everyone will like it.
✅Share your drawing step by step with us( Note this important point 👉🏽 write your username and date at any point on your drawing space before you start your drawing.)
| Drawing tools 👇🏾 |
|---|
▣ A pencil
▣ A rubber
▣ Drawing notebook
▣ Black pen
▣ pencil and
▣ compass
The Process of Drawing
Step 01
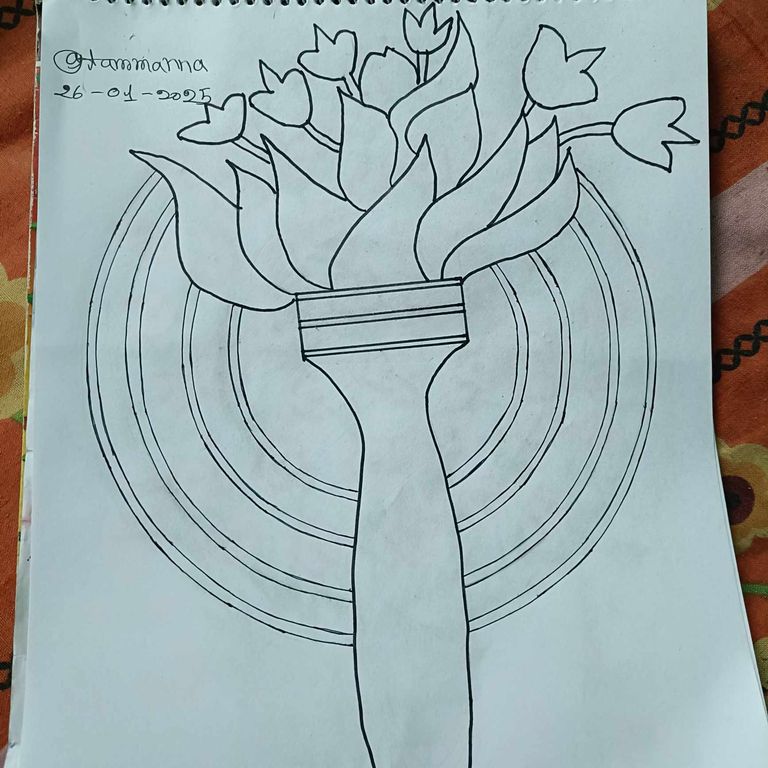
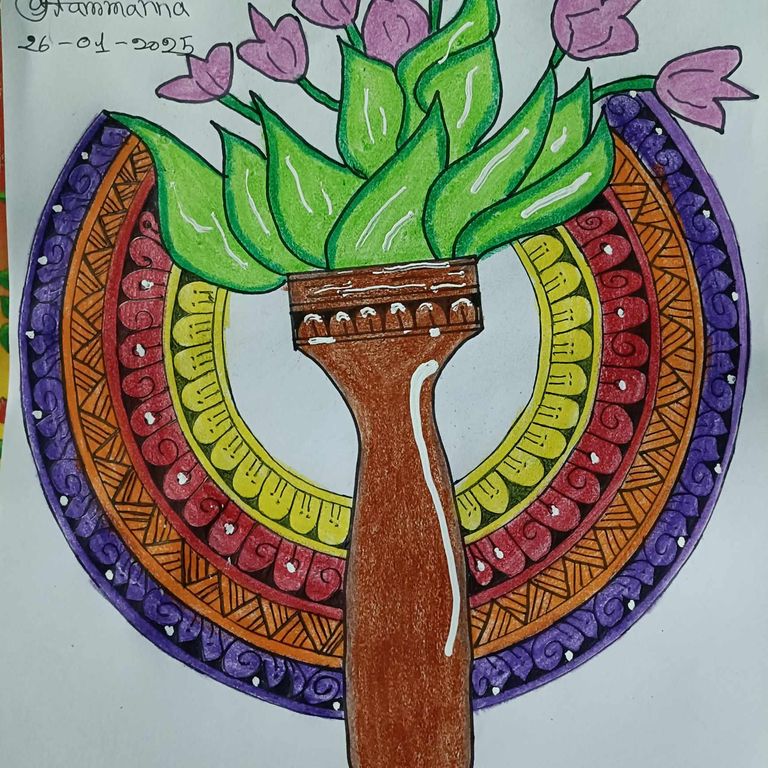
At the beginning of the drawing, I first mentioned my users name and the date on the top left side of the drawing book.
Step 02
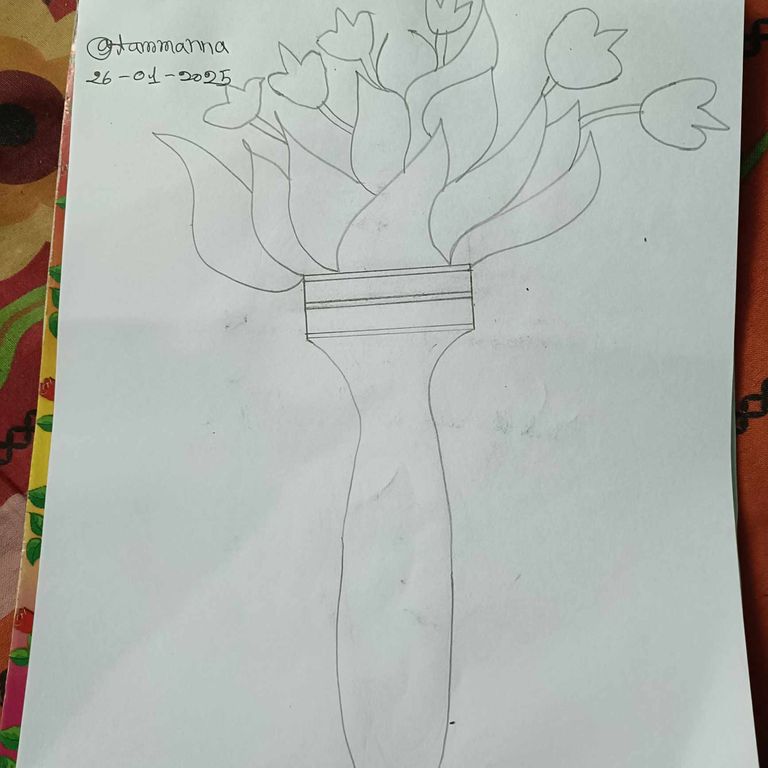
Then I drew a long brush handle with a pencil on the drawing book and on top of it I drew several leaves and on top of that, I drew small flowers.
Step 03
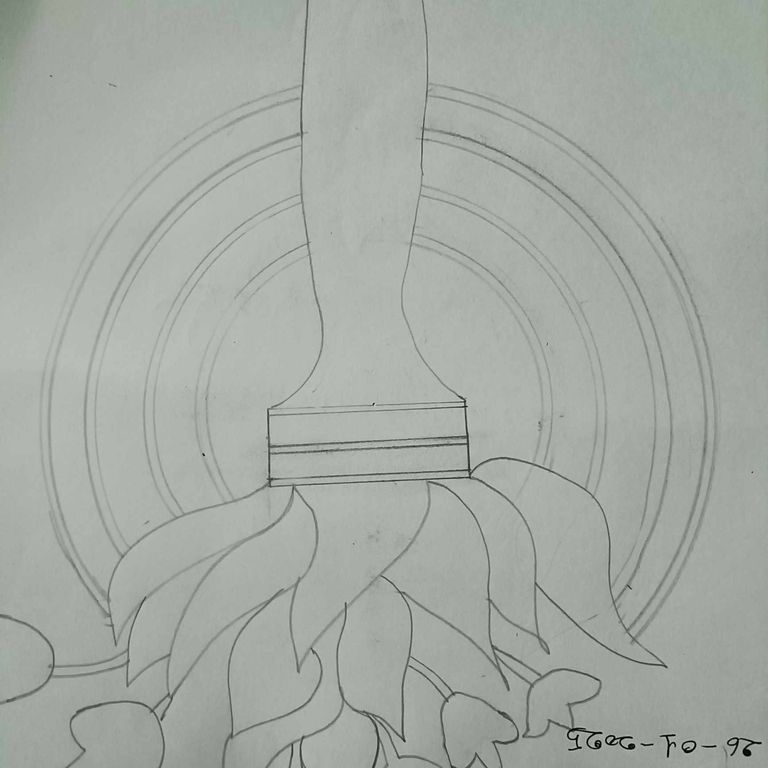
Then I drew eight circles upside down with a compass on the bottom of the leaves and flowers.
Step 04
It looks very beautiful.Then I drew my entire image with a black pen, which makes the image easier to see and looks much better.
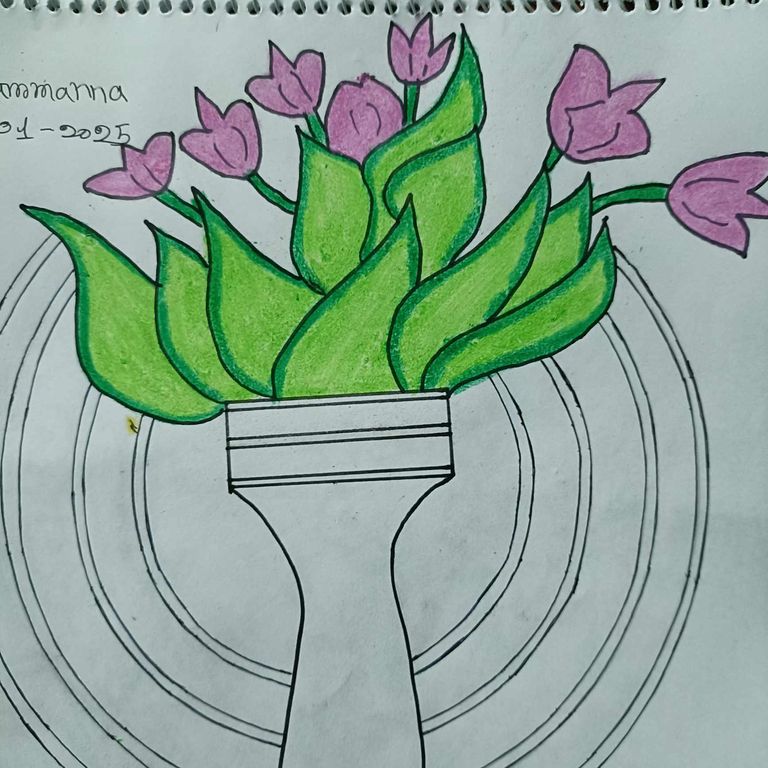
Step 05
Then I prepared to do it again colour. Here I painted the leaves at the top of the picture with dark green and light green colors and completed the flowers with pink color.
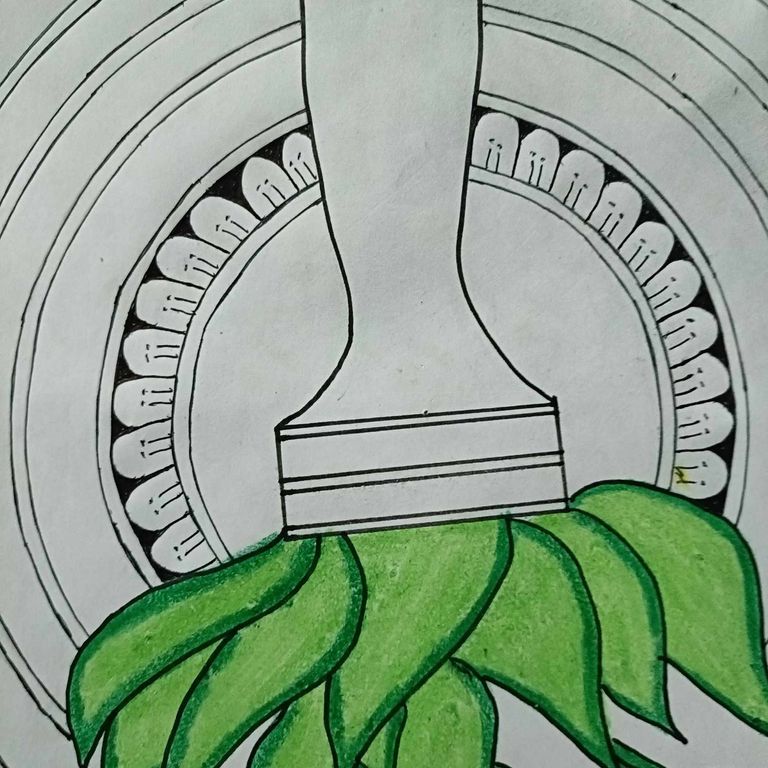
Step 06
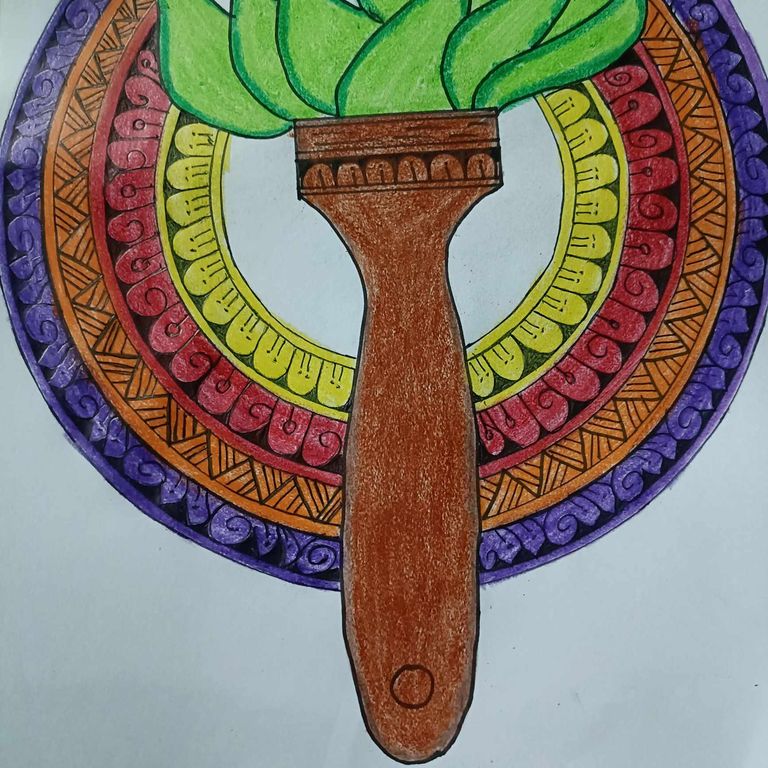
Then I half cercle drawing then I drawing the bottom line of the circle to mandala design. Then I added the remaining three lines small mandala design shapes and zigzag shapes.
Step 07
Here I filled each line with yellow, red, orange and purple colour.
Step 08
Then I filled the long part of the bottom of the image with brown color and drew a slightly
mandala image on the top.
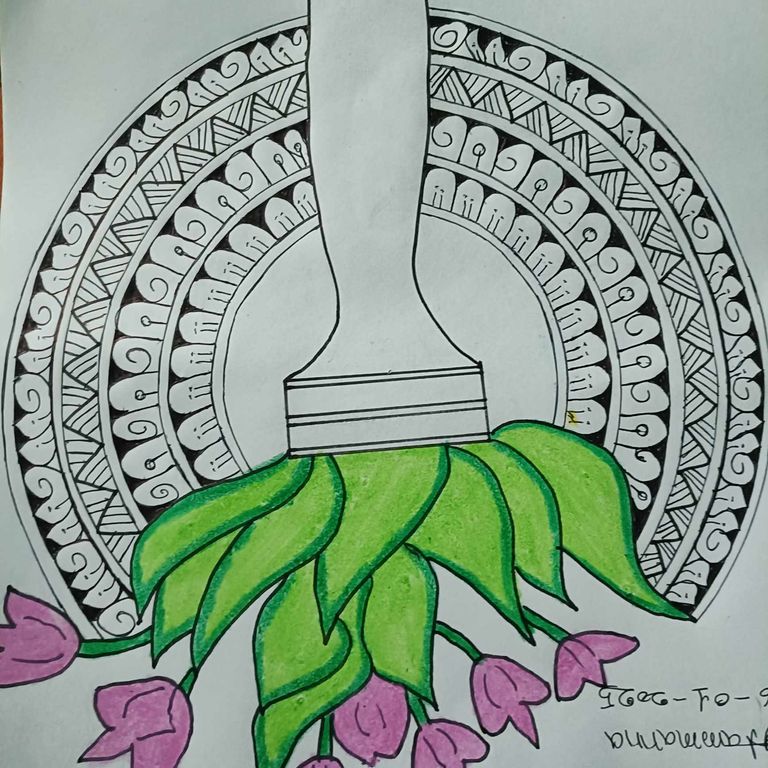
Step 09
Then I filled the entire image with a white pen and lightly re-shot the entire image, then the entire image was finished.
✅ How long did take to complete your drawing and how do you feel about it?.
it took me about an hour to draw today's picture and I was quite happy to drawing this picture because I like to do different types of pictures, but for today's picture I tried to do the design a little differently and I was quite happy to do the colour on today's picture.
✅ Give us a beautiful selfie with your creation and where you got the inspiration from.
We can find different types of images by searching different YouTube channels and we can choose our favourite images from there and make them our own. Today, i have collected the image from the YouTube channel.
✅ তুমি কী আঁকো, তা নিজের ভাষায় ব্যাখ্যা করো।
আজকের দুর্দান্ত প্রতিযোগিতায়, আমি একটি মন্ডলের ছবি নিয়ে হাজির হয়েছিলাম, তবে আজকের মন্ডলের ছবিটা একটু আলাদা হবে। এই ছবিতে, আমি একটি মন্ডলের সাথে ফুলের ছবি প্রসারিত করে একটি দুর্দান্ত ছবি উপস্থাপন করার চেষ্টা করেছি। আশা করি সবাই এটি পছন্দ করবে।
✅আপনার অঙ্কন ধাপে ধাপে আমাদের সাথে শেয়ার করুন (এই গুরুত্বপূর্ণ বিষয়টি লক্ষ্য করুন 👉🏽 আপনার অঙ্কন শুরু করার আগে আপনার অঙ্কন স্থানে যেকোনো স্থানে আপনার ব্যবহারকারীর নাম এবং তারিখ লিখুন।)
| অঙ্কন সরঞ্জাম 👇🏾 |
|---|
▣ একটি পেন্সিল
▣ একটি রাবার
▣ অঙ্কনের নোটবুক
▣ কালো কলম
▣ পেন্সিল এবং
▣ কম্পাস
ধাপ ০১
অঙ্কনের শুরুতে, আমি প্রথমে আমার ব্যবহারকারীর নাম এবং অঙ্কন বইয়ের উপরের বাম দিকে তারিখ উল্লেখ করেছি।
ধাপ ০২
তারপর আমি অঙ্কন বইয়ের উপর একটি পেন্সিল দিয়ে একটি লম্বা ব্রাশের হাতল আঁকলাম এবং তার উপরে আমি কয়েকটি পাতা আঁকলাম এবং তার উপরে, আমি ছোট ফুল আঁকলাম।
ধাপ ০৩
তারপর আমি পাতা এবং ফুলের নীচে একটি কম্পাস দিয়ে আটটি বৃত্ত উল্টে আঁকলাম।
ধাপ ০৪
এটি দেখতে খুব সুন্দর।তারপর আমি একটি কালো কলম দিয়ে আমার সম্পূর্ণ ছবিটি আঁকলাম, যা ছবিটি দেখতে সহজ করে তোলে এবং দেখতে অনেক ভালো লাগে।
ধাপ ০৫
তারপর আমি এটি আবার রঙ করার জন্য প্রস্তুত হয়েছি। এখানে আমি ছবির উপরের পাতাগুলিকে গাঢ় সবুজ এবং হালকা সবুজ রঙ দিয়ে রঙ করেছি এবং ফুলগুলি গোলাপী রঙ দিয়ে সম্পূর্ণ করেছি।
ধাপ ০৬
তারপর আমি অর্ধেক বৃত্ত অঙ্কন করেছি তারপর বৃত্তের নীচের রেখাটি মন্ডালা নকশায় আঁকছি। তারপর আমি বাকি তিনটি লাইন ছোট মন্ডালা নকশার আকার এবং জিগজ্যাগ আকার যুক্ত করেছি।
ধাপ ০৭
এখানে আমি প্রতিটি লাইন হলুদ, লাল, কমলা এবং বেগুনি রঙ দিয়ে পূর্ণ করেছি।
ধাপ ০৮
তারপর আমি ছবির নীচের লম্বা অংশটি বাদামী রঙ দিয়ে পূর্ণ করেছি এবং উপরে একটি সামান্য
মন্ডালা ছবি আঁকছি।
ধাপ ০৯
তারপর আমি একটি সাদা কলম দিয়ে পুরো ছবিটি পূরণ করেছি এবং হালকাভাবে পুরো ছবিটি পুনরায় শট করেছি, তারপর পুরো ছবিটি শেষ হয়েছে।
✅ তোমার অঙ্কন সম্পূর্ণ করতে কত সময় লেগেছে এবং তুমি এটি সম্পর্কে কেমন অনুভব করছো?.
আজকের ছবিটি আঁকতে আমার প্রায় এক ঘন্টা সময় লেগেছে এবং আমি এই ছবিটি আঁকতে বেশ খুশি হয়েছি কারণ আমি বিভিন্ন ধরণের ছবি করতে পছন্দ করি, কিন্তু আজকের ছবির জন্য আমি নকশাটি একটু ভিন্নভাবে করার চেষ্টা করেছি এবং আজকের ছবিতে রঙ করতে পেরে আমি বেশ খুশি হয়েছি।
✅ আপনার সৃষ্টি এবং আপনি কোথা থেকে অনুপ্রেরণা পেয়েছেন তার একটি সুন্দর সেলফি আমাদের দিন।
আমরা বিভিন্ন ইউটিউব চ্যানেল অনুসন্ধান করে বিভিন্ন ধরণের ছবি খুঁজে পেতে পারি এবং সেখান থেকে আমাদের পছন্দের ছবিগুলি বেছে নিতে পারি এবং সেগুলিকে আমাদের নিজস্ব করে তুলতে পারি। আজ, আমি ইউটিউব চ্যানেল থেকে ছবিটি সংগ্রহ করেছি।
| Device | oppo 11 pro |
|---|---|
| Photographer | @tammanna |
Telegram and Whatsapp