Hello My dear friends, I hope everyone is well? Alhamdulillah! I am also well with your prayers and love.
I am @sheikhtuhin
From #Bangladesh
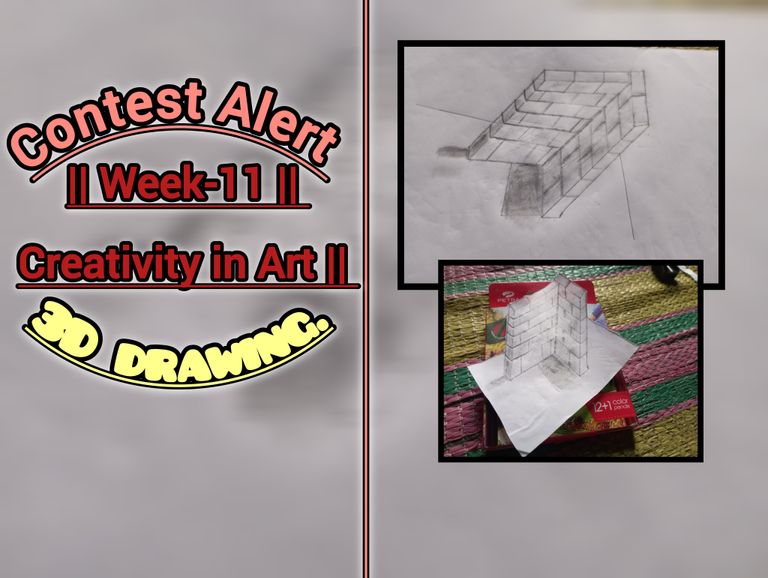
The ongoing contest on Steam for Bangladesh community is "Contest Alert || Week-11 || Creativity in Art || 3D drawing."Today I have drawn a 3D wall to join this contest, I will try to write about it step by step, inshallah.But before that I want to do my important work.
 |
|---|
I will tell you in the beginning what materials I needed to make this drawing:
- Paper
- Pencil
- Eraser
- scale
- Caesar etc
First step: |
|---|
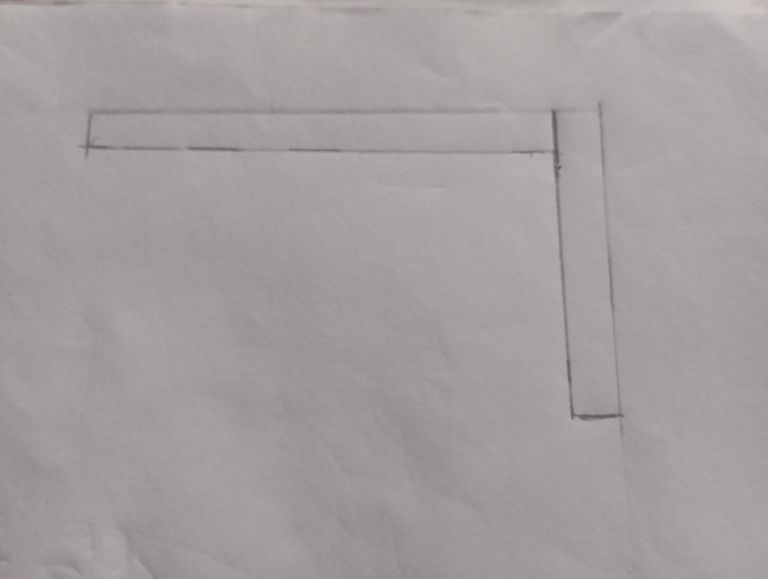 |
|---|
 |
|---|
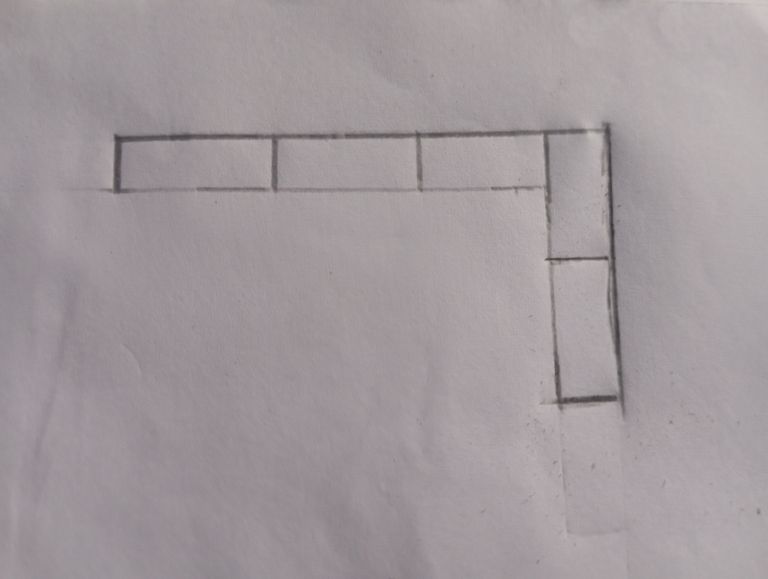
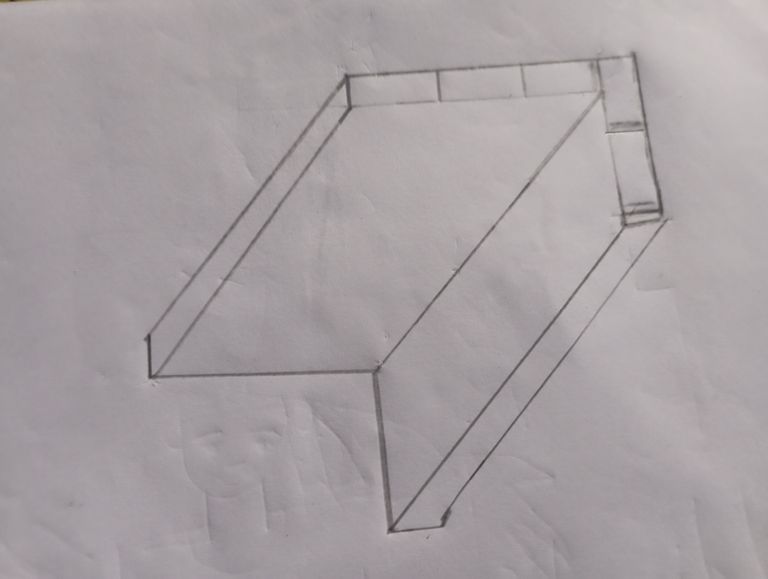
Step number two: |
|---|
 |
|---|
In this step, you have to pull straight from the part that is drawn on the top from the middle.At the same time, from both sides, 3D style should be drawn and bent, then the two parts below should be added.
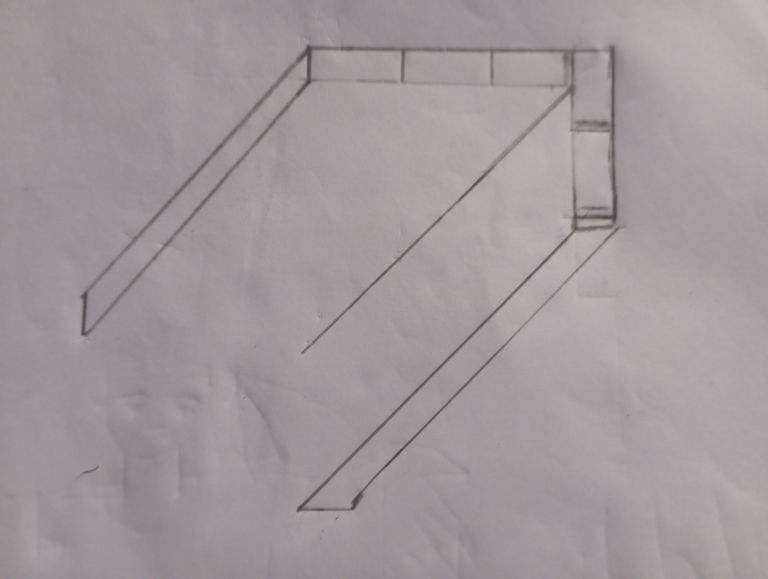
 |
|---|
At this stage the image will look like an open book.But in a short time it will be possible to bring it into shape like a 3D wall.And the steps we are trying to take will be easily reached.
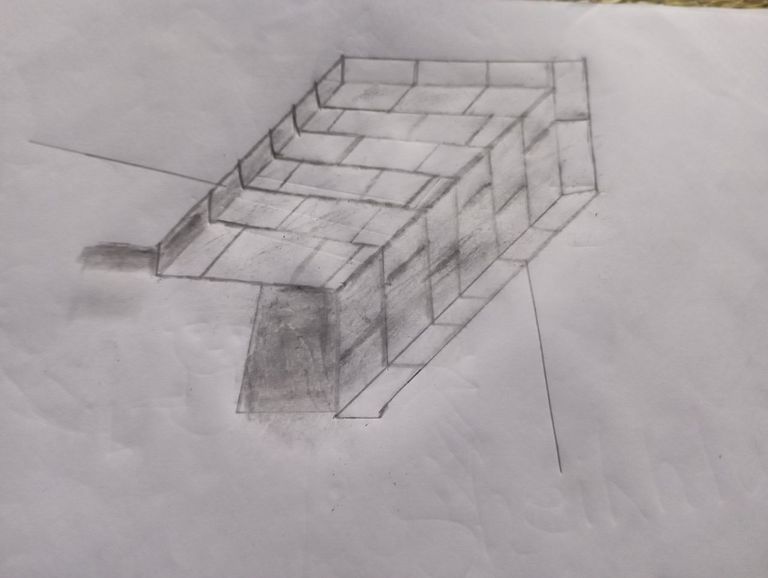
Step number three: |
|---|

At this stage, marks should be drawn in the middle places.We need to make a wavy shape with spots as needed to give a rough 3D impression.And to do these tasks you can take the help of scale if necessary.
Step number four: |
|---|
 |
|---|
Do not play crooked waves between the spots and measure them nicely with the help of a numbering scale and leave one cell blank and cut the spots like a brick shape.In this case, the first room through which the next room will be cut should be cut with the space between it, thus the complete wall bricks should be completed and the aspects of light and shadow should be considered.
Step number five: |
|---|
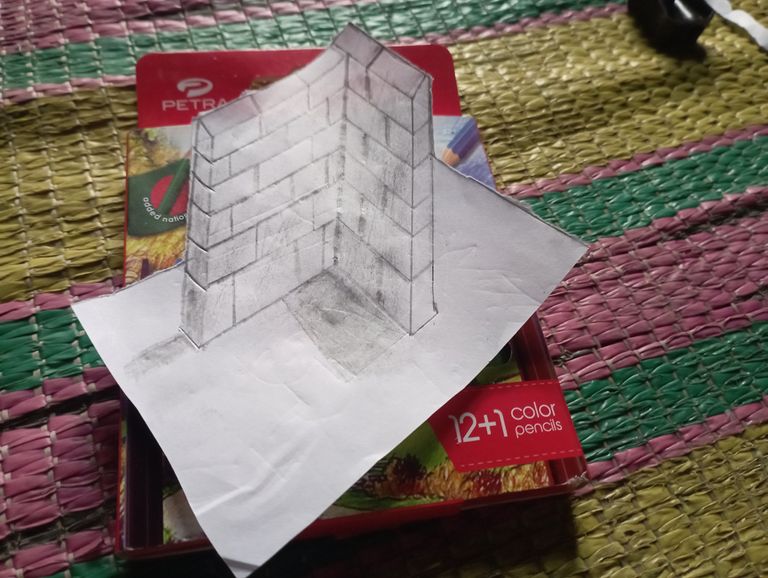 |
|---|
 |
|---|
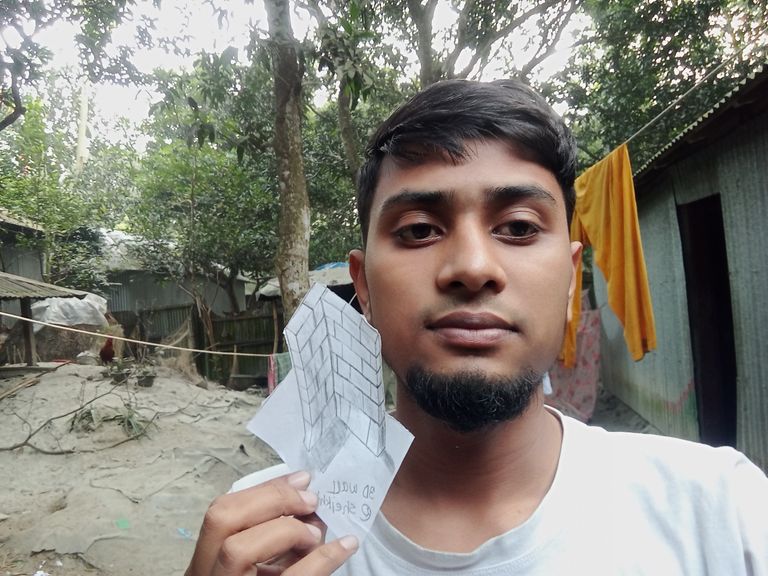
Finally I took a selfie with the drawing even though it's getting crooked due to drawing on thin paper but I did the photography to follow the rules.I specially thank Enamul bhai again for organizing such a contest.

Thank you very much everyone |
|---|
| Photo | Redmi 10c |
| Art by | @sheikhtuhin |