My dear blurt friends,
I am @samadbro08 from Bangladesh
Today is Tuesday , November 05/2024
Assalamu Alaikum. Ecoer members, hope everyone is well. Today I will present to you a beautiful airplane made of colored paper. Let's start.
আসসালামু আলাইকুম। Ecoer সদস্যগণ, আশা করি সবাই ভাল আছেন। আজ আমি আপনাদের মাঝে রঙিন কাগজ দিয়ে সুন্দর একটি উড়োজাহাজ তৈরি করে তা আপনাদের সামনে উপস্থাপন করব। চলুন শুরু করা যাক ।
 |  |
|---|
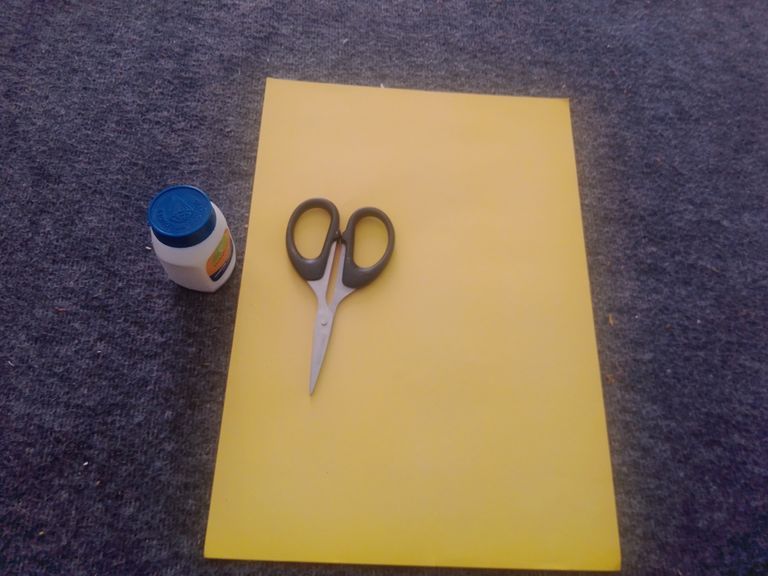
Materials needed to make aircraft
Materials needed to make aircraft
1/ Cutter or scissors 1.
2/ A small glue.
3/ 1 colored paper
4/ A pen
১/ কাটার বা কাইচে ১টি ।
২/ ছোট একটি আঠা।
৩/ ১টি রঙিন কাগজ
৪/ একটি কলম
 |  |
|---|
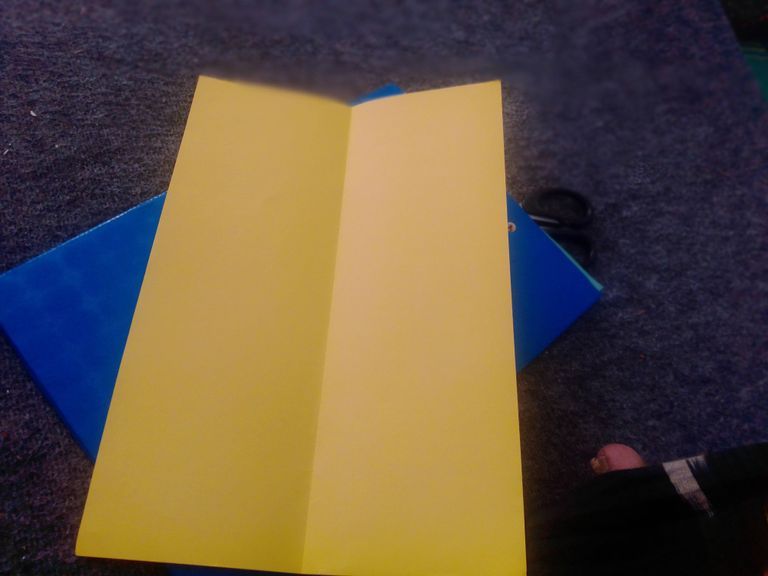
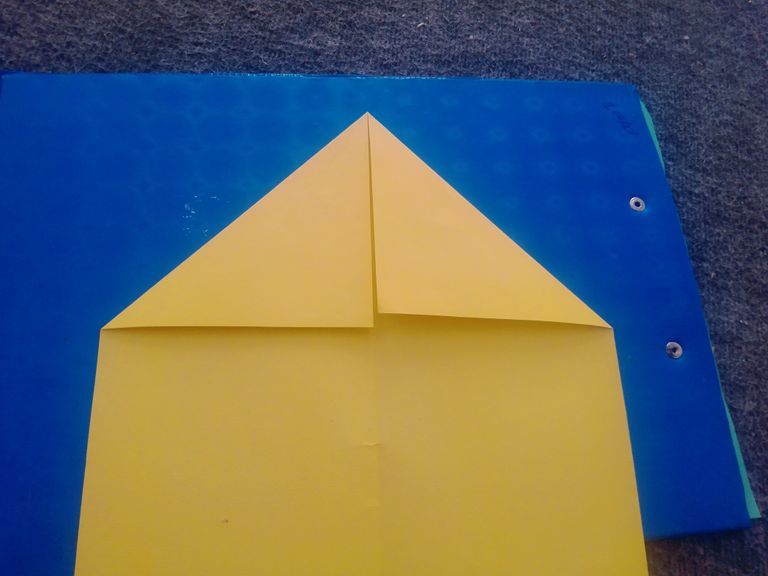
First I take color paper to make aircraft. And after taking the colored paper, fold it perpendicularly. After folding perpendicularly, let's make two head triangles along that length.First I take color paper to make aircraft. And after taking the colored paper, fold it perpendicularly. After folding perpendicularly, let's make two head triangles along that length.First I take color paper to make aircraft. And after taking the colored paper, fold it perpendicularly. After folding perpendicularly, let's make two head triangles along that length.
উড়োজাহাজ তৈরীর জন্য প্রথমে আমি রঙিন কাগজ নেয়। এবং রঙিন কাগজ নেয়ার পর সেটি লম্বালম্বিভাবে ভাঁজ করি। লম্বালম্বিভাবে ভাজ করার পর এবার সেই লম্বালম্বি বরাবর দুই মাথা ত্রিভুজাকৃতির তৈরি করি।উড়োজাহাজ তৈরীর জন্য প্রথমে আমি রঙিন কাগজ নেয়। এবং রঙিন কাগজ নেয়ার পর সেটি লম্বালম্বিভাবে ভাঁজ করি। লম্বালম্বিভাবে ভাজ করার পর এবার সেই লম্বালম্বি বরাবর দুই মাথা ত্রিভুজাকৃতির তৈরি করি।উড়োজাহাজ তৈরীর জন্য প্রথমে আমি রঙিন কাগজ নেয়। এবং রঙিন কাগজ নেয়ার পর সেটি লম্বালম্বিভাবে ভাঁজ করি। লম্বালম্বিভাবে ভাজ করার পর এবার সেই লম্বালম্বি বরাবর দুই মাথা ত্রিভুজাকৃতির তৈরি করি।
 |  |
|---|
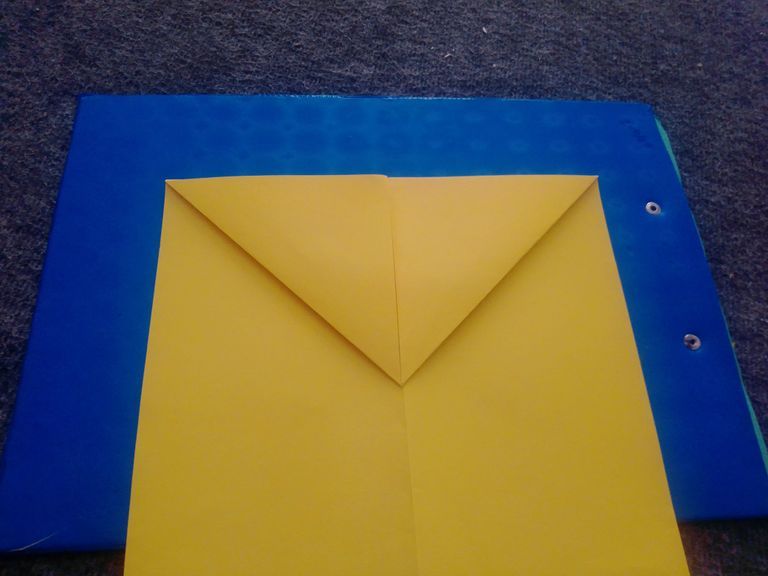
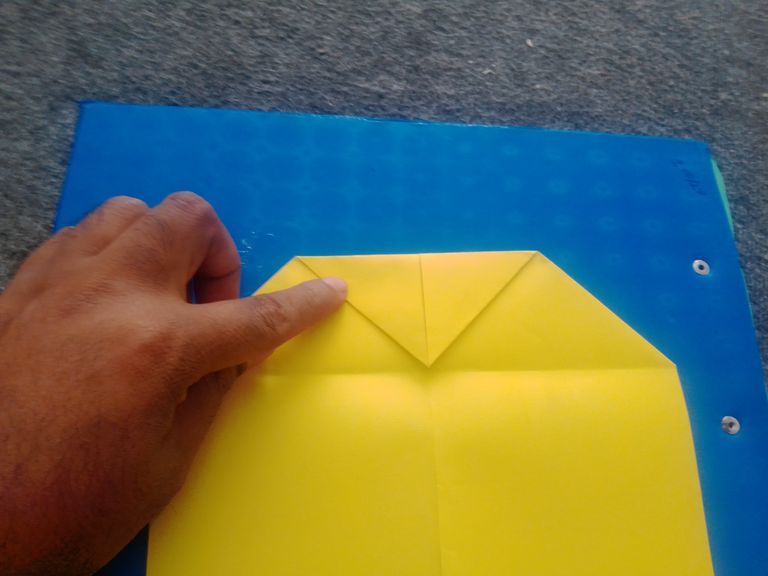
Now I fry the triangle shaped portion on its back side. When the back side is fried, straighten it again and then fold it again along the middle of the triangle and push it along the line of the triangle.Now I fry the triangle shaped portion on its back side. When the back side is fried, straighten it again and then fold it again along the middle of the triangle and push it along the line of the triangle.Now I fry the triangle shaped portion on its back side. When the back side is fried, straighten it again and then fold it again along the middle of the triangle and push it along the line of the triangle.
এবার আমি সেই ত্রিভুজাকৃতি তৈরি করা অংশটি তার পিছন সাইডে বাকিয়ে ভাজ করি। পিছন সাইডে বাকিয়ে ভাজ করা হয়ে গেলে আবার সোজা করে তারপরে ত্রিভুজের মাঝ বরাবর আবার ভাঁজ করে ত্রিভুজের লাইন বরাবর ঠেকিয়ে দেয়।এবার আমি সেই ত্রিভুজাকৃতি তৈরি করা অংশটি তার পিছন সাইডে বাকিয়ে ভাজ করি। পিছন সাইডে বাকিয়ে ভাজ করা হয়ে গেলে আবার সোজা করে তারপরে ত্রিভুজের মাঝ বরাবর আবার ভাঁজ করে ত্রিভুজের লাইন বরাবর ঠেকিয়ে দেয়।এবার আমি সেই ত্রিভুজাকৃতি তৈরি করা অংশটি তার পিছন সাইডে বাকিয়ে ভাজ করি। পিছন সাইডে বাকিয়ে ভাজ করা হয়ে গেলে আবার সোজা করে তারপরে ত্রিভুজের মাঝ বরাবর আবার ভাঁজ করে ত্রিভুজের লাইন বরাবর ঠেকিয়ে দেয়।
 | 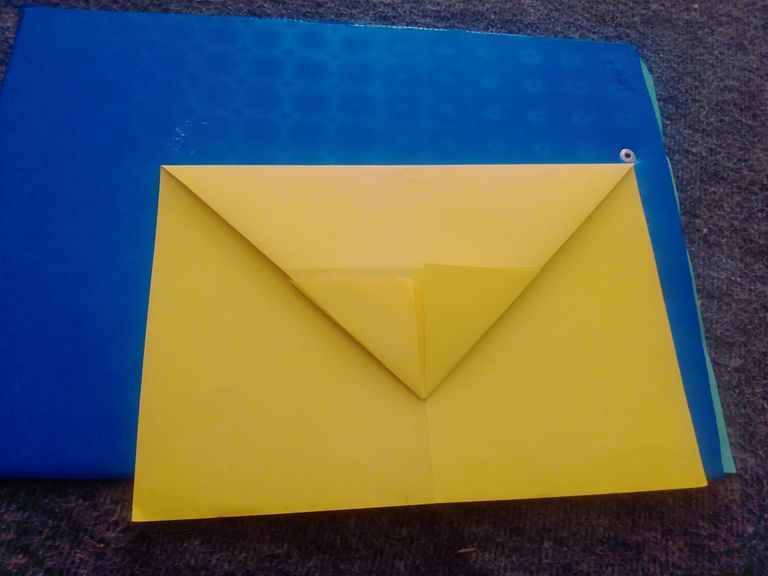 |
|---|
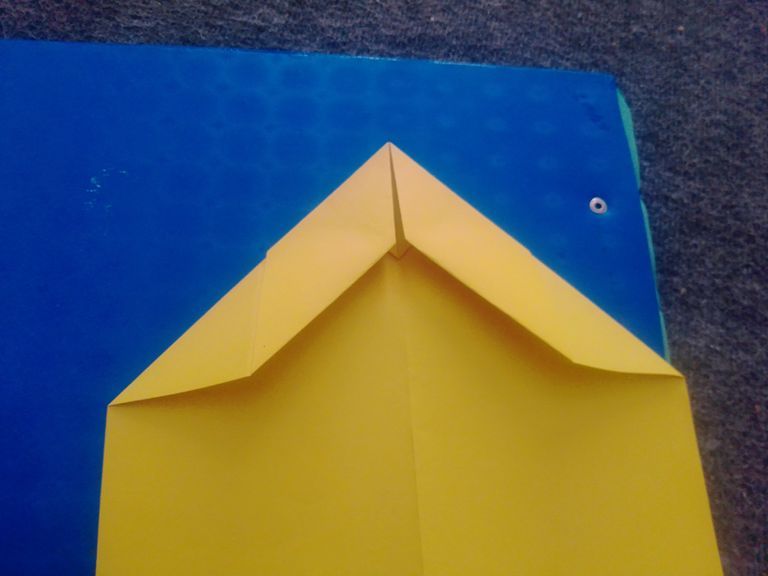
After covering the line, divide the large triangle down the middle. Now fold it again and make a triangle shape. And turn it back to make a triangular corner again.After covering the line, divide the large triangle down the middle. Now fold it again and make a triangle shape. And turn it back to make a triangular corner again.After covering the line, divide the large triangle down the middle. Now fold it again and make a triangle shape. And turn it back to make a triangular corner again.After covering the line, divide the large triangle down the middle. Now fold it again and make a triangle shape. And turn it back to make a triangular corner again.
বড় ত্রিভুজটি মাঝ বরাবর ভাগ করে লাইনে ঢেকিয়ে দেওয়ার পর। এবার সেটিকে আবার দুই মাথা ভাঁজ করে ত্রিভুজের কোন আকৃতি তৈরি করি। এবং সেটিকে পিছন দিকে ঘুরিয়ে আবার ত্রিভুজাকৃতির কোনা তৈরি করে ফেলি।বড় ত্রিভুজটি মাঝ বরাবর ভাগ করে লাইনে ঢেকিয়ে দেওয়ার পর। এবার সেটিকে আবার দুই মাথা ভাঁজ করে ত্রিভুজের কোন আকৃতি তৈরি করি। এবং সেটিকে পিছন দিকে ঘুরিয়ে আবার ত্রিভুজাকৃতির কোনা তৈরি করে ফেলি।বড় ত্রিভুজটি মাঝ বরাবর ভাগ করে লাইনে ঢেকিয়ে দেওয়ার পর। এবার সেটিকে আবার দুই মাথা ভাঁজ করে ত্রিভুজের কোন আকৃতি তৈরি করি। এবং সেটিকে পিছন দিকে ঘুরিয়ে আবার ত্রিভুজাকৃতির কোনা তৈরি করে ফেলি।বড় ত্রিভুজটি মাঝ বরাবর ভাগ করে লাইনে ঢেকিয়ে দেওয়ার পর। এবার সেটিকে আবার দুই মাথা ভাঁজ করে ত্রিভুজের কোন আকৃতি তৈরি করি। এবং সেটিকে পিছন দিকে ঘুরিয়ে আবার ত্রিভুজাকৃতির কোনা তৈরি করে ফেলি।
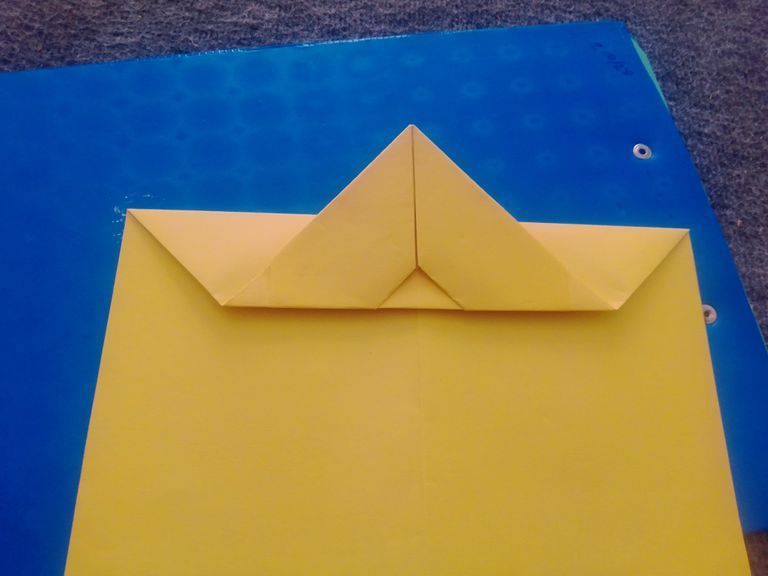 | 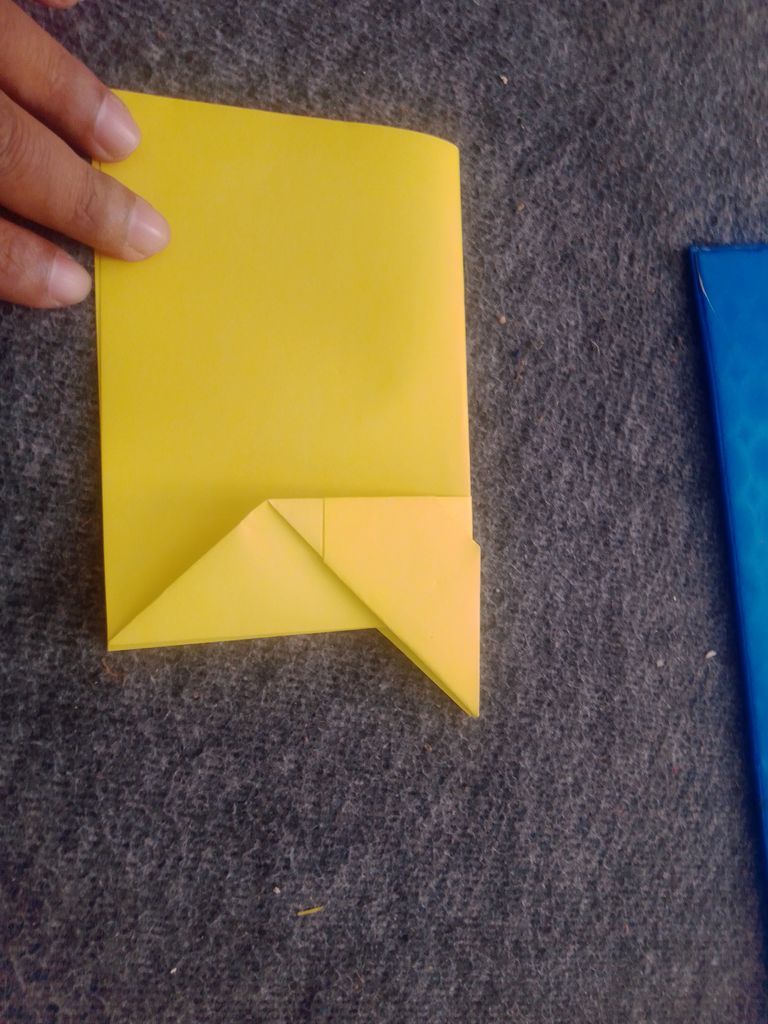 |
|---|
Fold the triangle back and fold it forward again. So that a head of the aircraft is formed. Then keep it along the line that comes along the middle and divide it equally on both sides. Then it looks like this.Fold the triangle back and fold it forward again. So that a head of the aircraft is formed. Then keep it along the line that comes along the middle and divide it equally on both sides. Then it looks like this.Fold the triangle back and fold it forward again. So that a head of the aircraft is formed. Then keep it along the line that comes along the middle and divide it equally on both sides. Then it looks like this.Fold the triangle back and fold it forward again. So that a head of the aircraft is formed. Then keep it along the line that comes along the middle and divide it equally on both sides. Then it looks like this.
ত্রিভুজটি পিছন দিকে বাঁকিয়ে আবার সামনের দিকে ভাজ করি। যাতে করে উড়োজাহাজের একটি মাথা তৈরি হয়। এরপর সেটি মাঝ বরাবর যে লাইনে আসে সেই বরাবর রেখে দুটি দুদিকে সমান করে ভাগ করে ফেলি। তারপর যেটি এমন দেখায়।ত্রিভুজটি পিছন দিকে বাঁকিয়ে আবার সামনের দিকে ভাজ করি। যাতে করে উড়োজাহাজের একটি মাথা তৈরি হয়। এরপর সেটি মাঝ বরাবর যে লাইনে আসে সেই বরাবর রেখে দুটি দুদিকে সমান করে ভাগ করে ফেলি। তারপর যেটি এমন দেখায়।ত্রিভুজটি পিছন দিকে বাঁকিয়ে আবার সামনের দিকে ভাজ করি। যাতে করে উড়োজাহাজের একটি মাথা তৈরি হয়। এরপর সেটি মাঝ বরাবর যে লাইনে আসে সেই বরাবর রেখে দুটি দুদিকে সমান করে ভাগ করে ফেলি। তারপর যেটি এমন দেখায়।ত্রিভুজটি পিছন দিকে বাঁকিয়ে আবার সামনের দিকে ভাজ করি। যাতে করে উড়োজাহাজের একটি মাথা তৈরি হয়। এরপর সেটি মাঝ বরাবর যে লাইনে আসে সেই বরাবর রেখে দুটি দুদিকে সমান করে ভাগ করে ফেলি। তারপর যেটি এমন দেখায়।
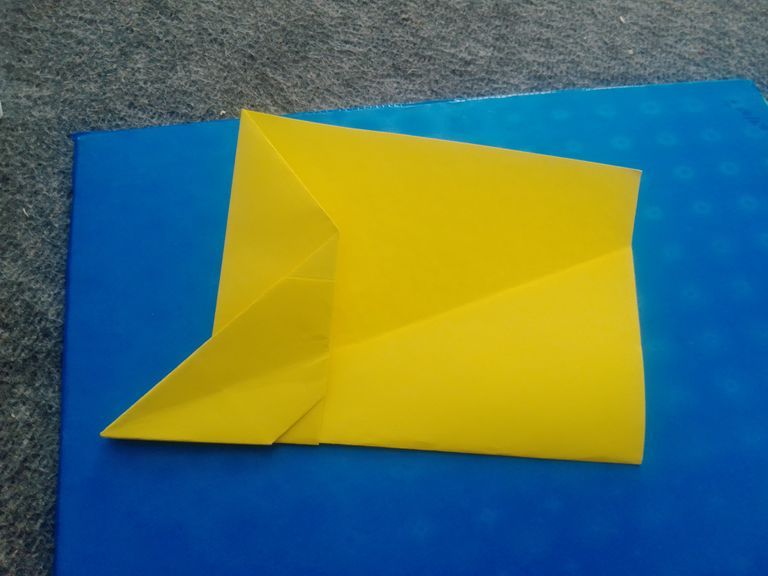 |  |
|---|
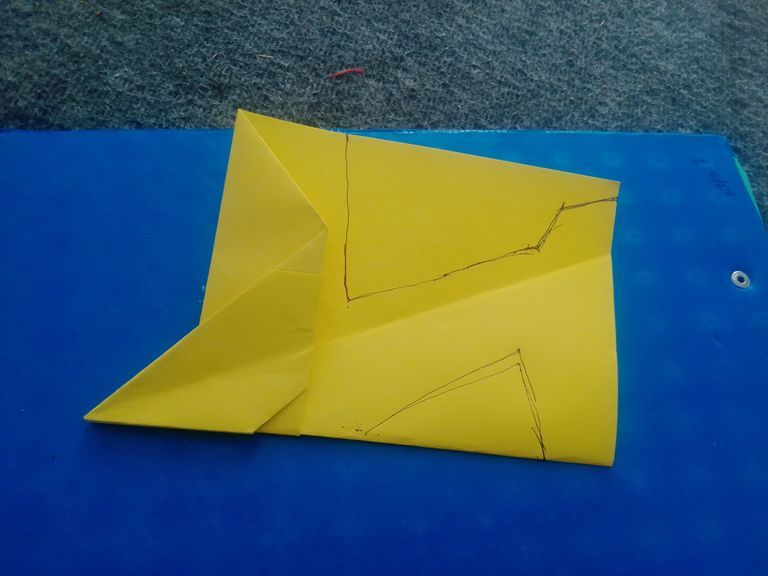
After that, we fried the head in a more smooth way and made it into the head of the airplane. Then he opened it and took a pen and after taking the pen drew the design of the aircraft on it.After that, we fried the head in a more smooth way and made it into the head of the airplane. Then he opened it and took a pen and after taking the pen drew the design of the aircraft on it.After that, we fried the head in a more smooth way and made it into the head of the airplane. Then he opened it and took a pen and after taking the pen drew the design of the aircraft on it.After that, we fried the head in a more smooth way and made it into the head of the airplane. Then he opened it and took a pen and after taking the pen drew the design of the aircraft on it.
এরপর সেই মাথাটিকে এবার আরো সুচালো ভাবে ভাজ করে উড়োজাহাজের মাথায় তৈরি করি। তারপরে সেটিকে খুলে একটি কলম নেয় এবং কলম নেয়ার পর তার উপরে উড়োজাহাজের ডিজাইন দেয়।এরপর সেই মাথাটিকে এবার আরো সুচালো ভাবে ভাজ করে উড়োজাহাজের মাথায় তৈরি করি। তারপরে সেটিকে খুলে একটি কলম নেয় এবং কলম নেয়ার পর তার উপরে উড়োজাহাজের ডিজাইন দেয়।এরপর সেই মাথাটিকে এবার আরো সুচালো ভাবে ভাজ করে উড়োজাহাজের মাথায় তৈরি করি। তারপরে সেটিকে খুলে একটি কলম নেয় এবং কলম নেয়ার পর তার উপরে উড়োজাহাজের ডিজাইন দেয়।এরপর সেই মাথাটিকে এবার আরো সুচালো ভাবে ভাজ করে উড়োজাহাজের মাথায় তৈরি করি। তারপরে সেটিকে খুলে একটি কলম নেয় এবং কলম নেয়ার পর তার উপরে উড়োজাহাজের ডিজাইন দেয়।
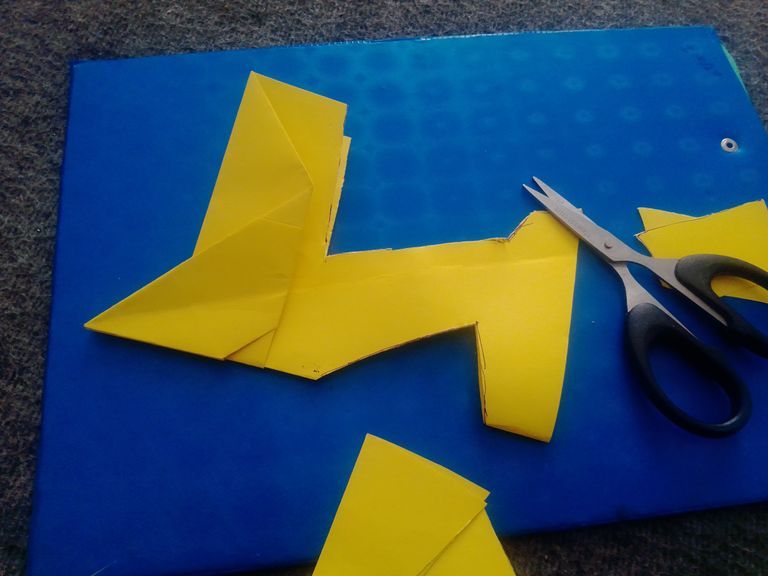
After giving the design of the aircraft, now take a scissors and after taking the scissors, cut the designs and make the aircraft.After giving the design of the aircraft, now take a scissors and after taking the scissors, cut the designs and make the aircraft.After giving the design of the aircraft, now take a scissors and after taking the scissors, cut the designs and make the aircraft.After giving the design of the aircraft, now take a scissors and after taking the scissors, cut the designs and make the aircraft.
উড়োজাহাজের ডিজাইন দেয়ার পর এবার একটি কাইচে নেয় এবং কাইচে নেওয়ার পর ডিজাইন গুলো কেটে উড়োজাহাজ তৈরি করি।উড়োজাহাজের ডিজাইন দেয়ার পর এবার একটি কাইচে নেয় এবং কাইচে নেওয়ার পর ডিজাইন গুলো কেটে উড়োজাহাজ তৈরি করি।উড়োজাহাজের ডিজাইন দেয়ার পর এবার একটি কাইচে নেয় এবং কাইচে নেওয়ার পর ডিজাইন গুলো কেটে উড়োজাহাজ তৈরি করি।উড়োজাহাজের ডিজাইন দেয়ার পর এবার একটি কাইচে নেয় এবং কাইচে নেওয়ার পর ডিজাইন গুলো কেটে উড়োজাহাজ তৈরি করি।
 |  |
|---|
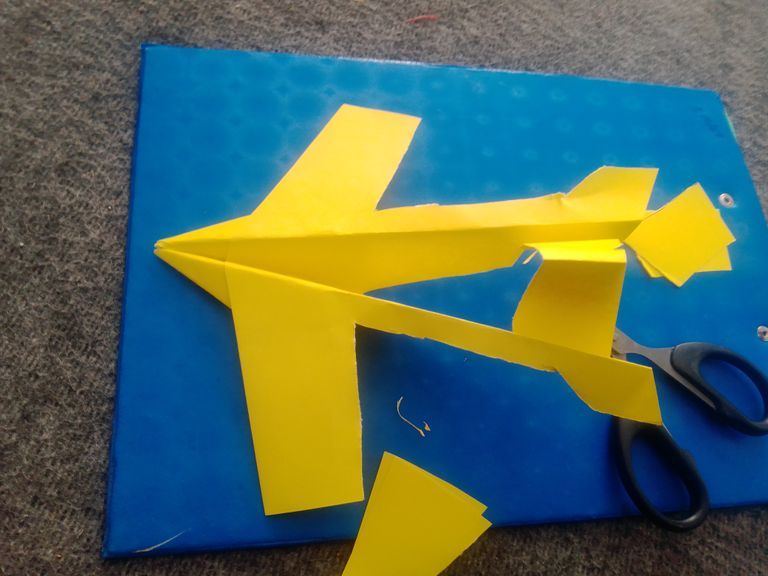
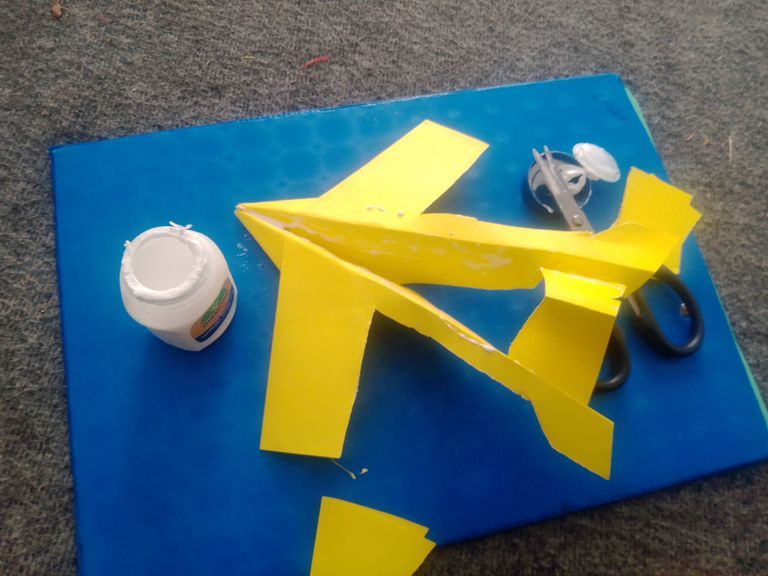
After the design was cut out and the airplane was made, I used glue to attach it and glued it together.After the design was cut out and the airplane was made, I used glue to attach it and glued it together.After the design was cut out and the airplane was made, I used glue to attach it and glued it together.
ডিজাইন কেটে উড়োজাহাজ তৈরি হয়ে যাওয়ার পর, এবার সেটিকে জোড়া লাগানোর জন্য আমি আঠার ব্যবহার করি এবং তার সাথে আঠা লাগিয়ে দেয়।ডিজাইন কেটে উড়োজাহাজ তৈরি হয়ে যাওয়ার পর, এবার সেটিকে জোড়া লাগানোর জন্য আমি আঠার ব্যবহার করি এবং তার সাথে আঠা লাগিয়ে দেয়।ডিজাইন কেটে উড়োজাহাজ তৈরি হয়ে যাওয়ার পর, এবার সেটিকে জোড়া লাগানোর জন্য আমি আঠার ব্যবহার করি এবং তার সাথে আঠা লাগিয়ে দেয়।

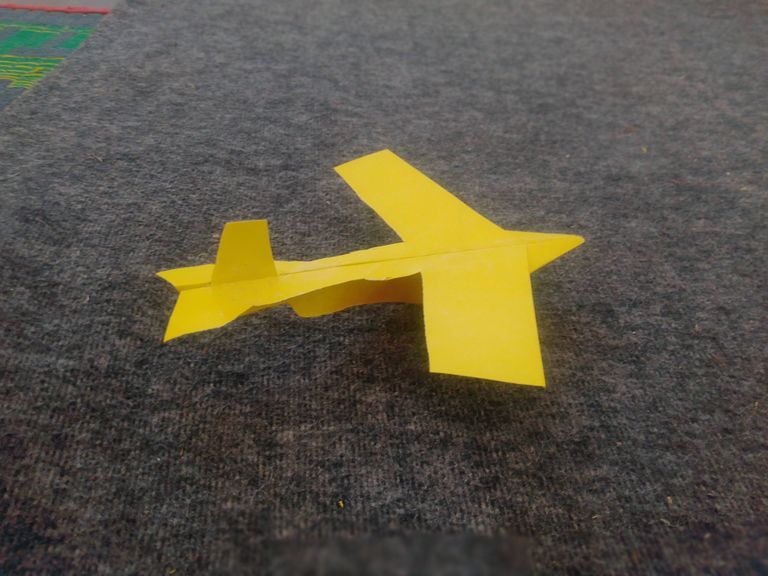
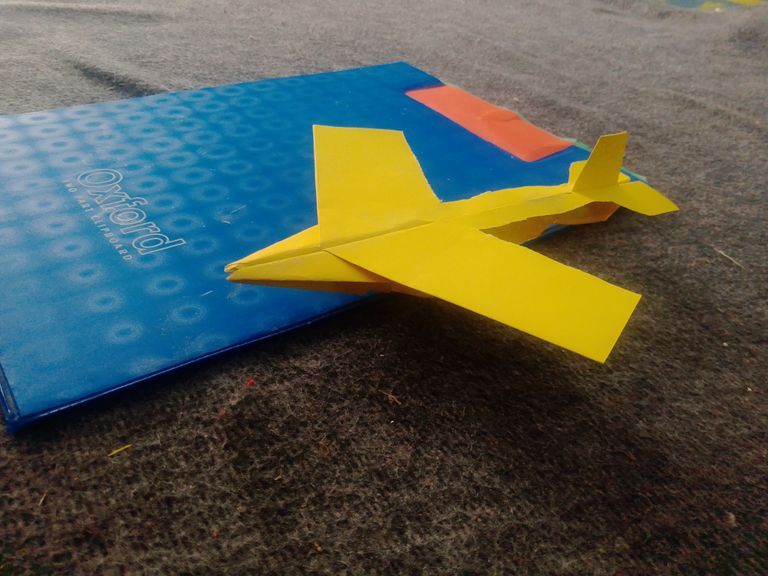
This is what my airplane looks like in the end when the gluing is done. Then I take this last picture with my phone.This is what my airplane looks like in the end when the gluing is done. Then I take this last picture with my phone.This is what my airplane looks like in the end when the gluing is done. Then I take this last picture with my phone.
আঠা লাগানো শেষ হলে সর্বশেষে আমার উড়োজাহাজটি এমন দেখায়া। তারপর আমি আমার ফোন দিয়ে সর্বশেষ এই ছবিটি তুলি।আঠা লাগানো শেষ হলে সর্বশেষে আমার উড়োজাহাজটি এমন দেখায়া। তারপর আমি আমার ফোন দিয়ে সর্বশেষ এই ছবিটি তুলি।আঠা লাগানো শেষ হলে সর্বশেষে আমার উড়োজাহাজটি এমন দেখায়া। তারপর আমি আমার ফোন দিয়ে সর্বশেষ এই ছবিটি তুলি।
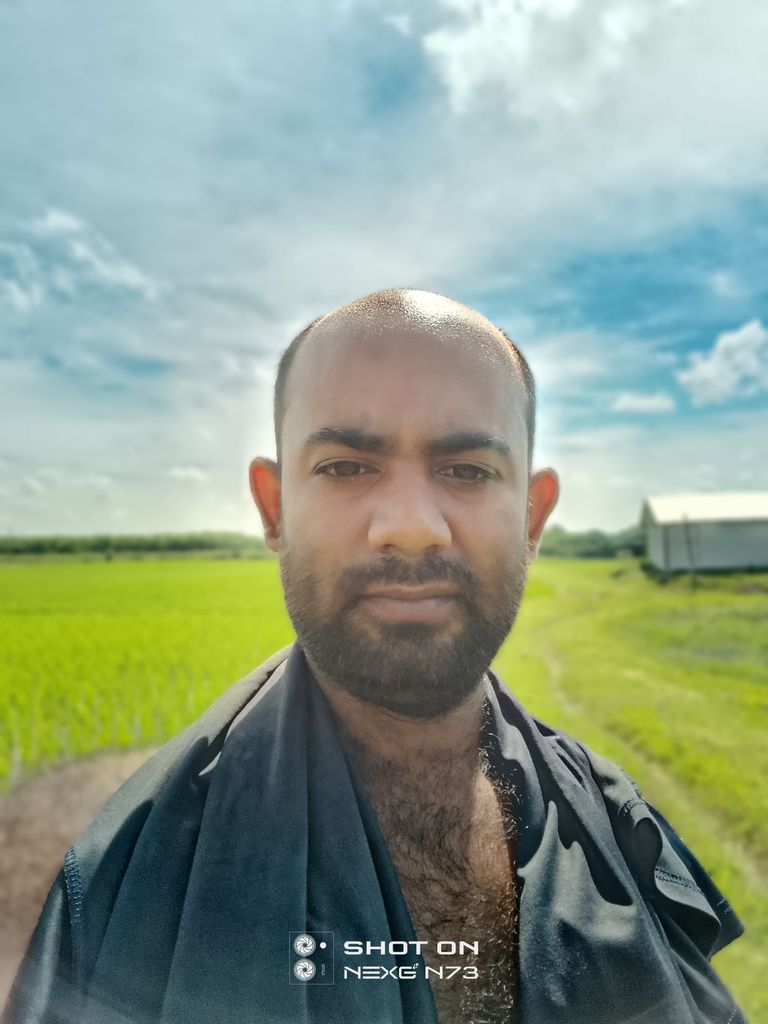
My name is Md. Abdus Samad. I am a Bangladeshi. My district name is Meherpur and Thana Gangni. Union sixteen taka. My village name is Jugirgofa. Currently there are four people in my family. Especially we are two brothers of parents. I am the eldest son of the family. My educational qualification is I am an honors 4th year student of Bengali department. My college name is Gangni Government College.
আমার নাম মোঃ আব্দুস সামাদ। আমি একজন বাংলাদেশী। আমার জেলার নাম মেহেরপুর ও থানা গাংনী। ইউনিয়ন ষোল টাকা। আমার গ্রামের নাম জুগিরগোফা। বর্তমানে আমার পরিবারে চারজন। বিশেষ করে আমরা বাবা-মায়ের দুই ভাই। আমি পরিবারের বড় ছেলে। আমার শিক্ষাগত যোগ্যতা হল আমি বাংলা বিভাগের অনার্স ৪র্থ বর্ষের ছাত্র। আমার কলেজের নাম গাংনী সরকারি কলেজ।
** Your post has been upvoted (12.11 %) **
Curation Trail is Open!
Join Trail Here
Delegate more BP for bigger Upvote + Daily BLURT 😉
Delegate BP Here
Upvote
https://blurtblock.herokuapp.com/blurt/upvote
Thank you 🙂 @tomoyan
You explained each step so clearly!!
it’s super easy to follow along. Can’t wait to try making my own paper airplane!!
Overall fantastic tutorial!!