My Dear blurt-friends,
I am @rjraju001 from Bangladesh
Today is Saturday, January 25/2025
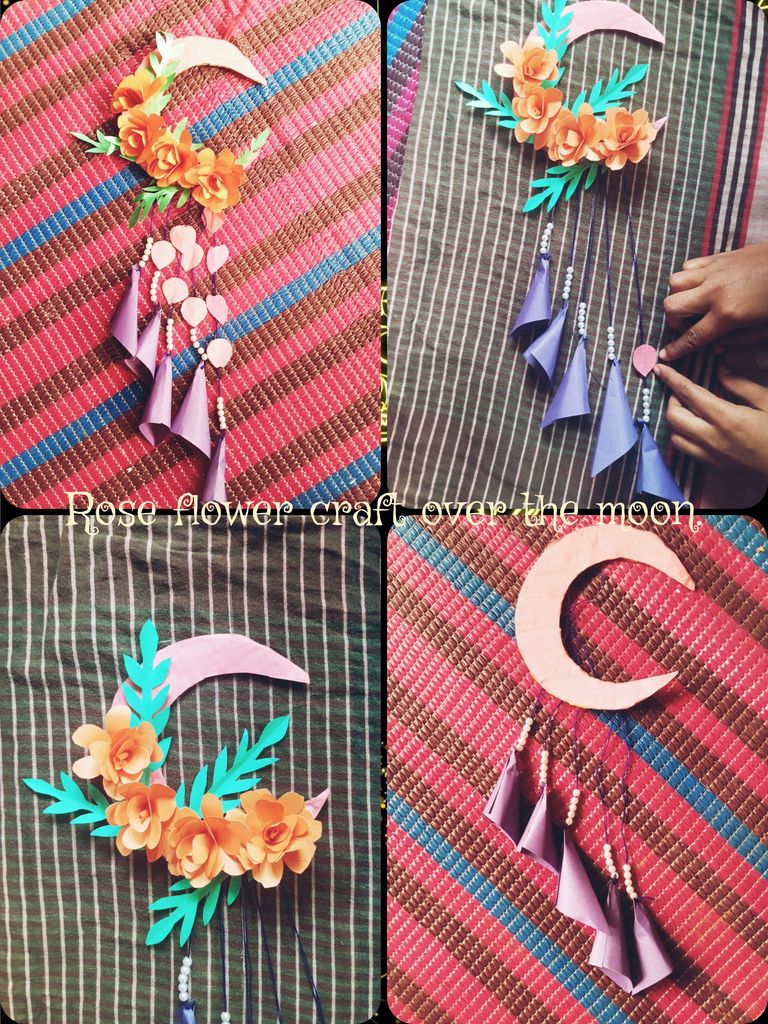
I'm a new member of the @DIYHub community.I'm going to make a third post today in the DIYHub community with my hard work. Welcome everyone to my blog. Hope you all are well. Today I am going to share with you how to make rose flower craft on moon for home wall decoration with colored paper. Let's get started.
Necessary materials for making Walmate |
|---|
| Serial number | Name of the material |
|---|---|
| 1 | A4 Paper |
| 2 | Scale |
| 3 | Pencil / pen |
| 4 | Gum |
| 5 | Kaichi |
| 6 | Cardboard |
| 7 | puthi |
| 8 | Needle and thread |
Steps to make Steps to Rose flower craft over the moon. |
|---|

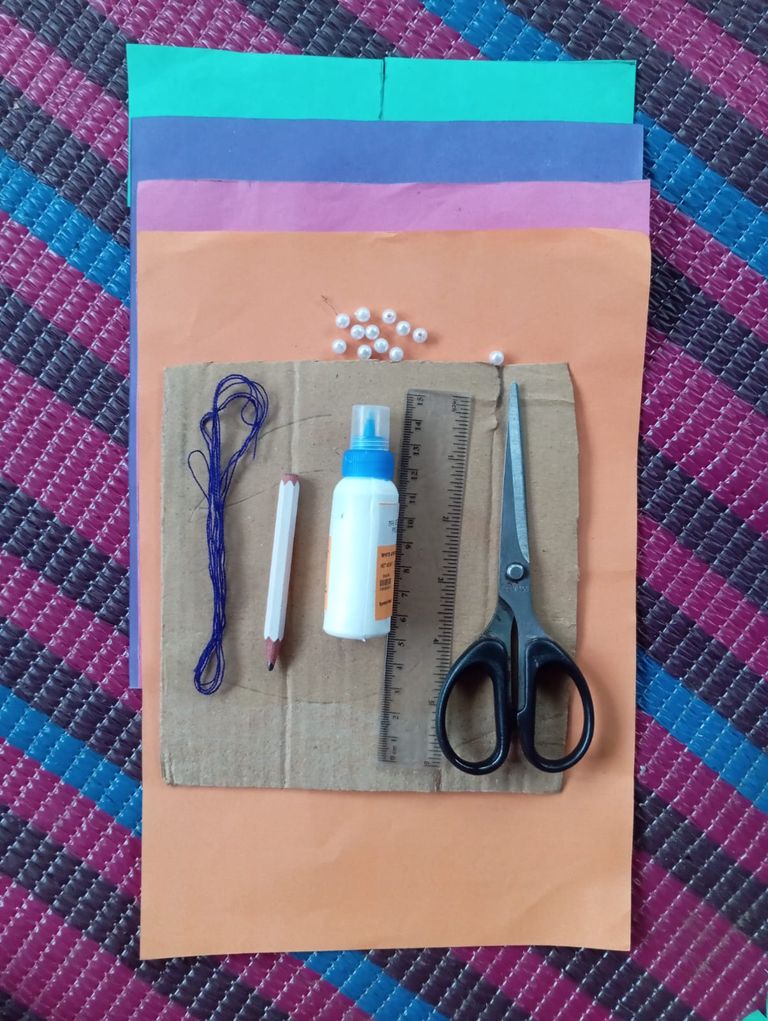
- In the first step I took all the materials for the rose flower craft over the moon.

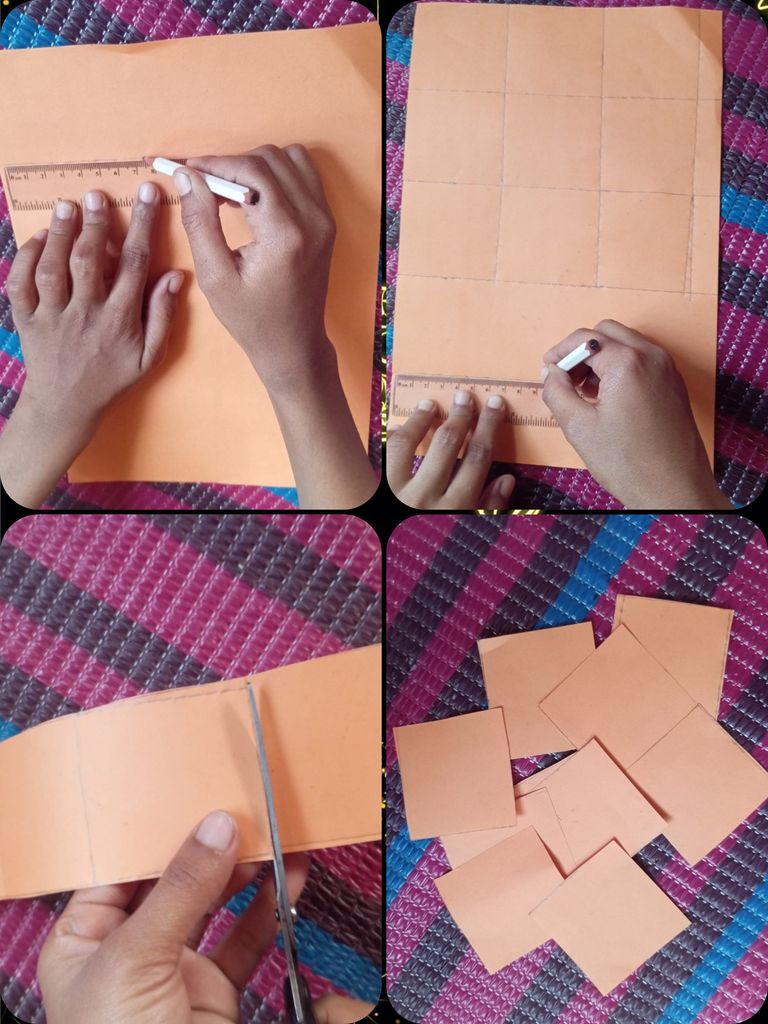
- Now I will draw 8 by 8 cm pencil marks on the yellow colored paper. Then finely chop with apricots. You can see that a lot of the yellow paper has already been cut out.

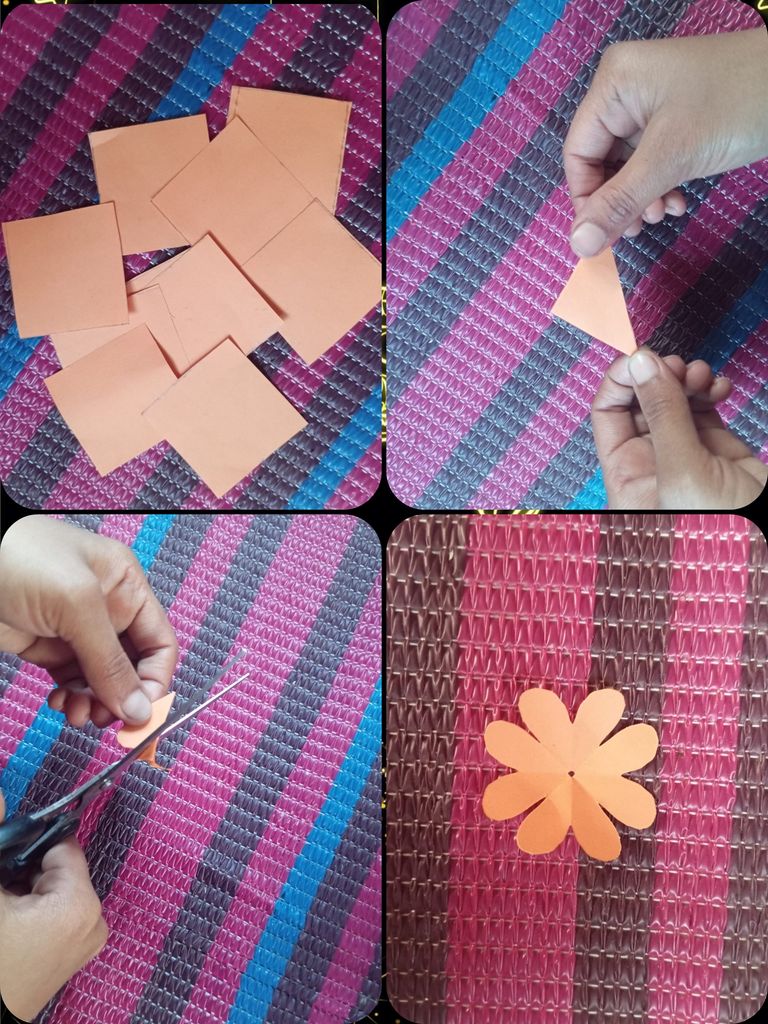
- To make the flower I have shaped and folded the corners step by step. Now round the front of the corner and cut it with scissors. If you want to make flowers like this, then like me, you have to fry them step by step and cut them nicely with scissors.

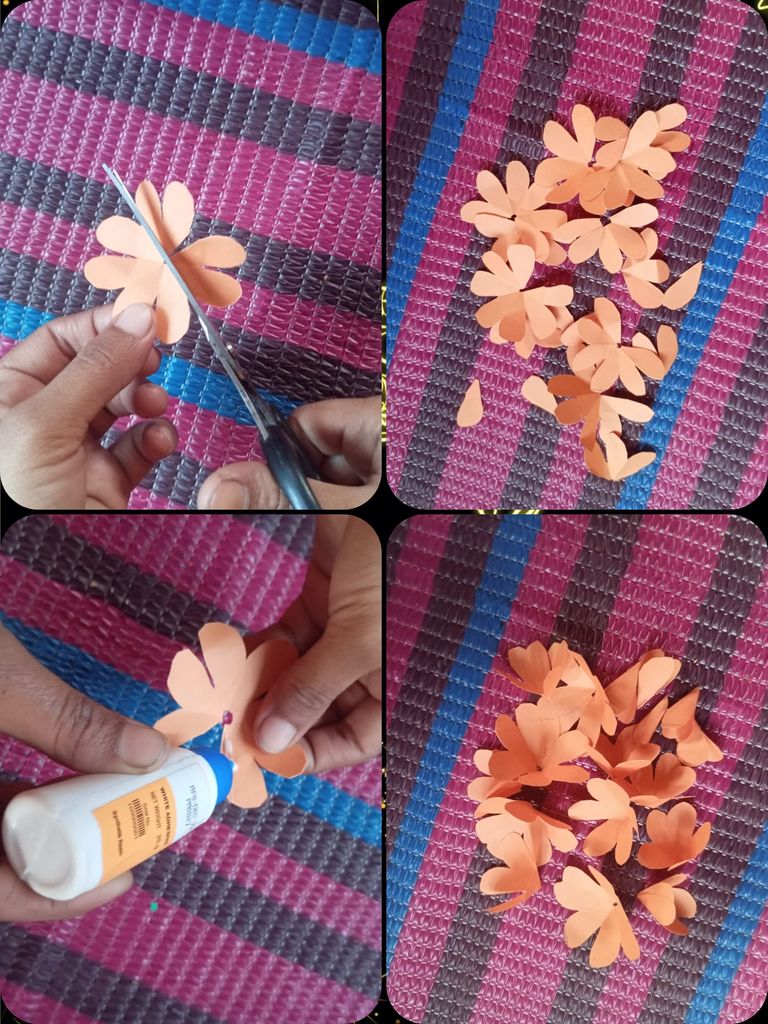
- Now I will cut the petals step by step to make the rose flower. Then I'll start applying the petals with gum. As you can see the petals needed to make my rose flower are attached.

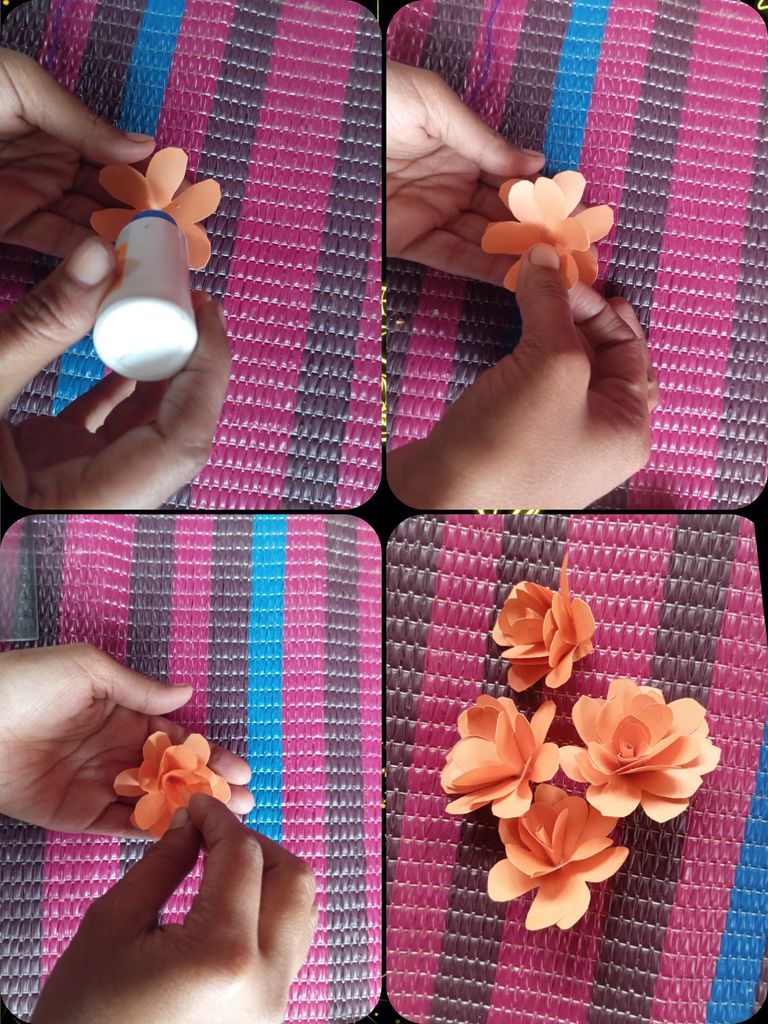
- Arrange the flower petals one by one with gum to join them together. When all the petals are attached by the gum, it takes the form of a rose flower.

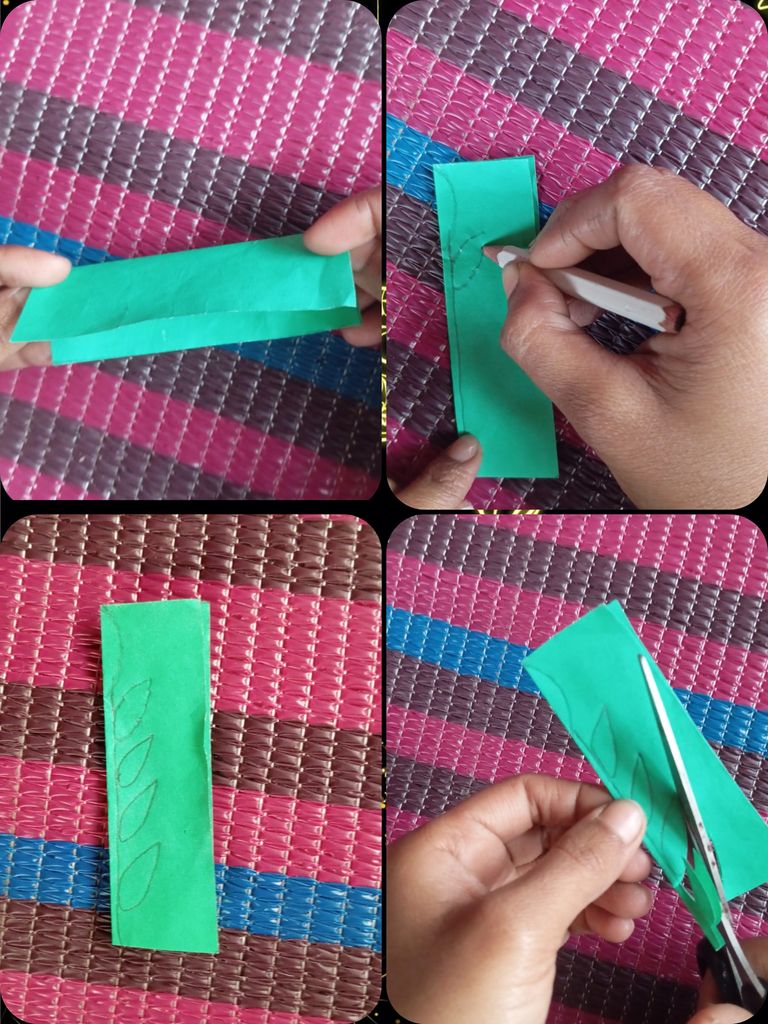
- Now I will cut a green paper 6 by 10 cm with scissors. Then with a pencil I will draw a picture of the leaf. As you can see I have tried to paint the page as best I can. Now I start cutting my drawn page very nicely with scissors.
এবার আমি একটি সবুজ কাগজ ৬ বাই ১০ সেন্টিমিটার করে কাইচি দ্বারা কেটে নেব।তারপরে পেন্সিল দ্বারা আমি পাতার ছবি আঁকাবো। আপনারা দেখতে পাচ্ছেন আমি আমার সাধ্যমত পাতার ছবি আঁকানো চেষ্টা করেছি। এবার আমি কাইচি দ্বারা খুব সুন্দর ভাবে আমার আঁকানো পাতাটি কেটা শুরু করি।

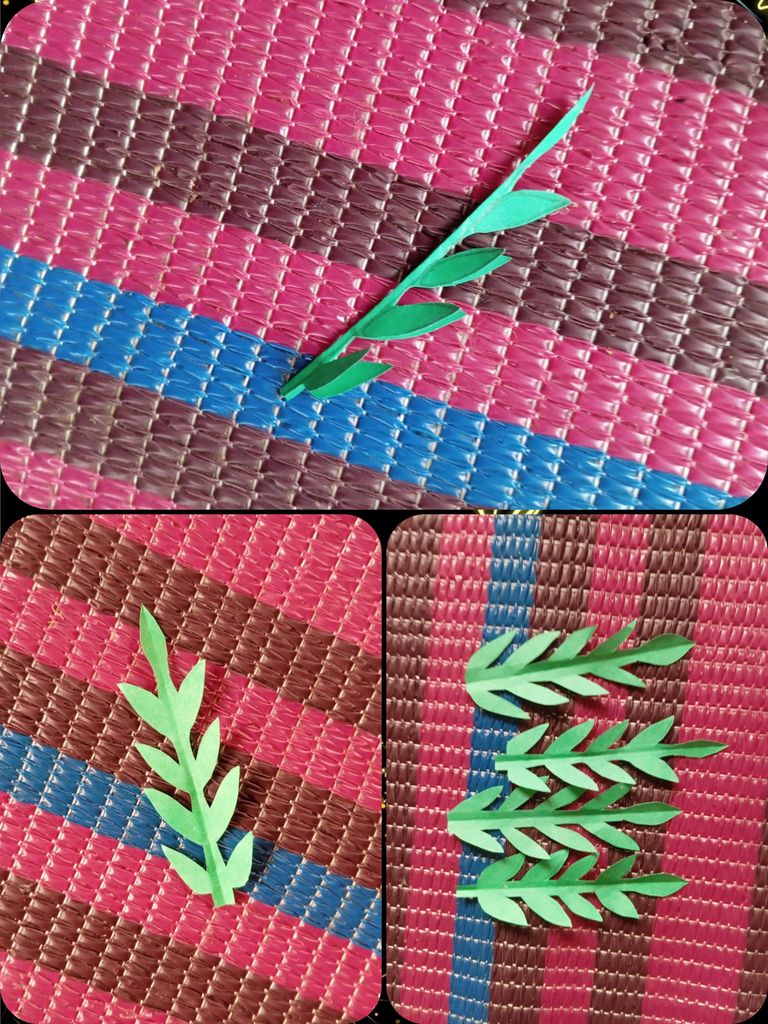
- Here you can see my pencil drawing step by step with scissors. I put all the leaves in one place and took a picture.
এখানে আপনারা দেখতে পাচ্ছেন আমার পেন্সিল দ্বারা আঁকানো পাতাটি কাইচি দ্বারা ধাপে ধাপে কাটা হয়ে গেছে। আমি সবগুলো পাতা এক জায়গায় রেখে দিয়ে একটা ছবি তুলেছি।

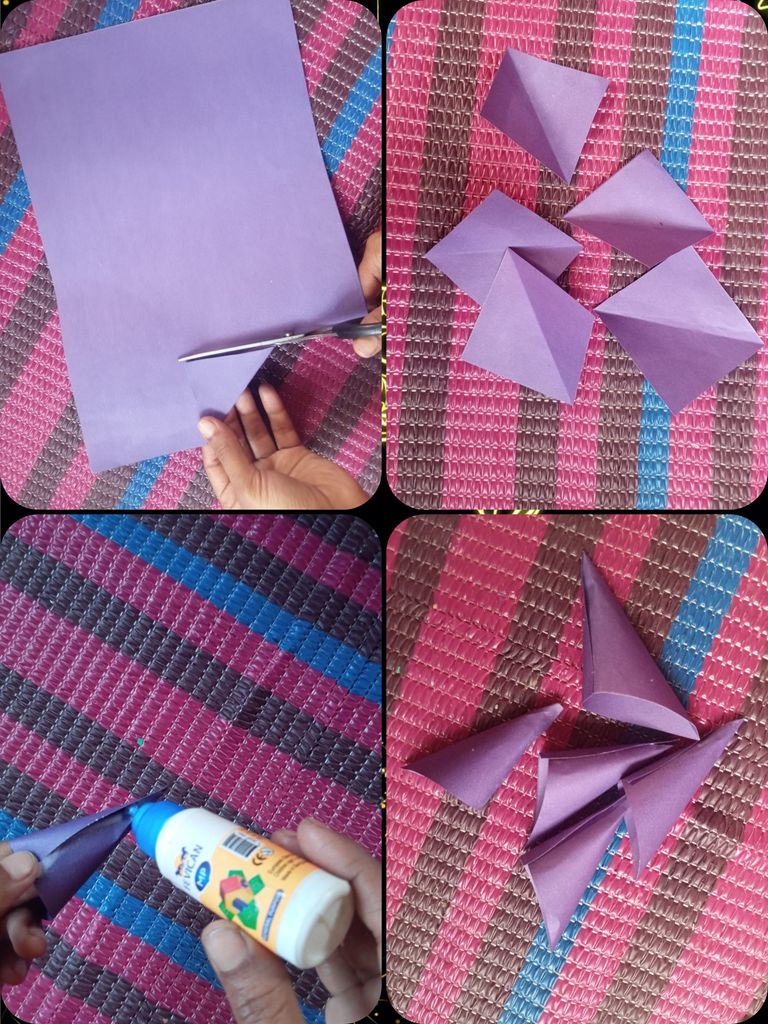
- In the eighth step, I will draw a mark of 6 cm on the purple colored paper with a scale and pencil. Then I will cut it very nicely with scissors and separate it. Then I will shape the corners of the purple colored paper and stick it nicely with gum. Now I have put all the flowers in one place and took a picture.
অষ্টম ধাপে আমি বেগুনি কালারের কাগজের উপরে স্কেল ও পেন্সিল দ্বারা ৬ সেন্টিমিটার করে দাগ টেনে নেব।তারপর কাইচি দ্বারা খুব সুন্দর ভাবে কেটে আলাদা করব। তারপরে কাঁটা বেগুনি কালারের কাগজগুলো কোণ আকৃতি করে সুন্দর ভাবে গাম দ্বারা লাগিয়ে নিব। এবার সবগুলো কোন আকৃত ফুল এক জায়গায় রেখে ছবি উঠেছি।

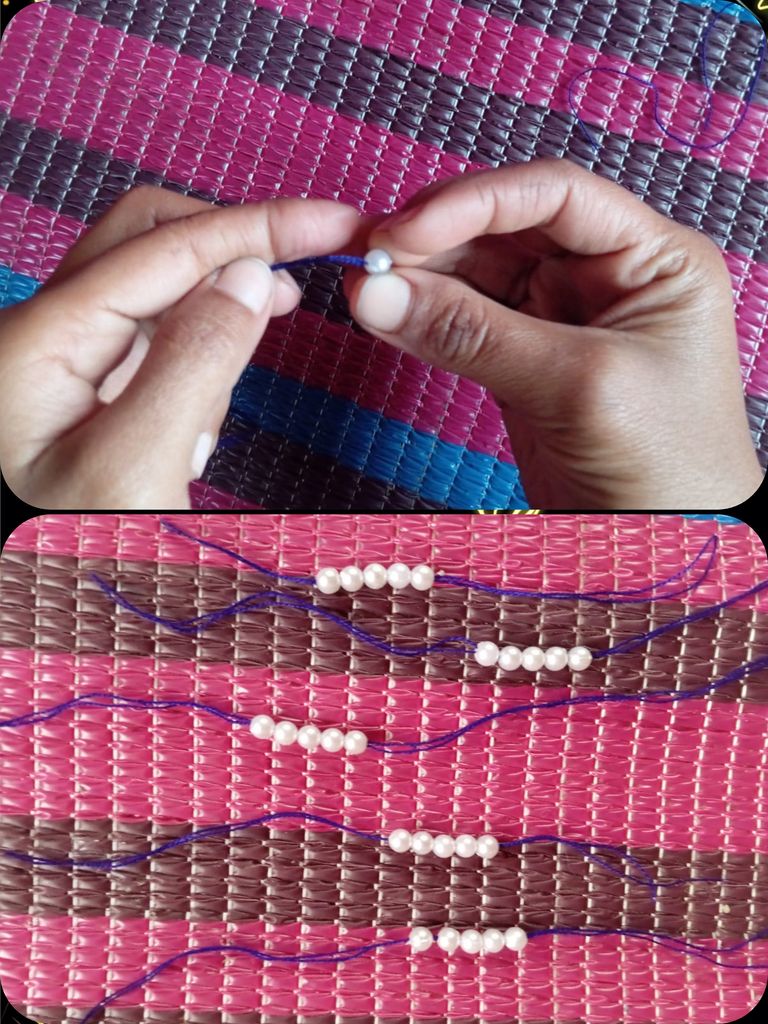
- Now I will knit the white beads one by one with needle and thread. As you can see all my stories are already done.
এবার আমি সুই ও সুতা দিয়ে সাদা পুঁথি গুলো একে একে গেঁথে নিব। আপনারা দেখতে পাচ্ছেন ইতিমধ্যে আমার সবগুলো পুঁথি গাথা হয়ে গেছে।

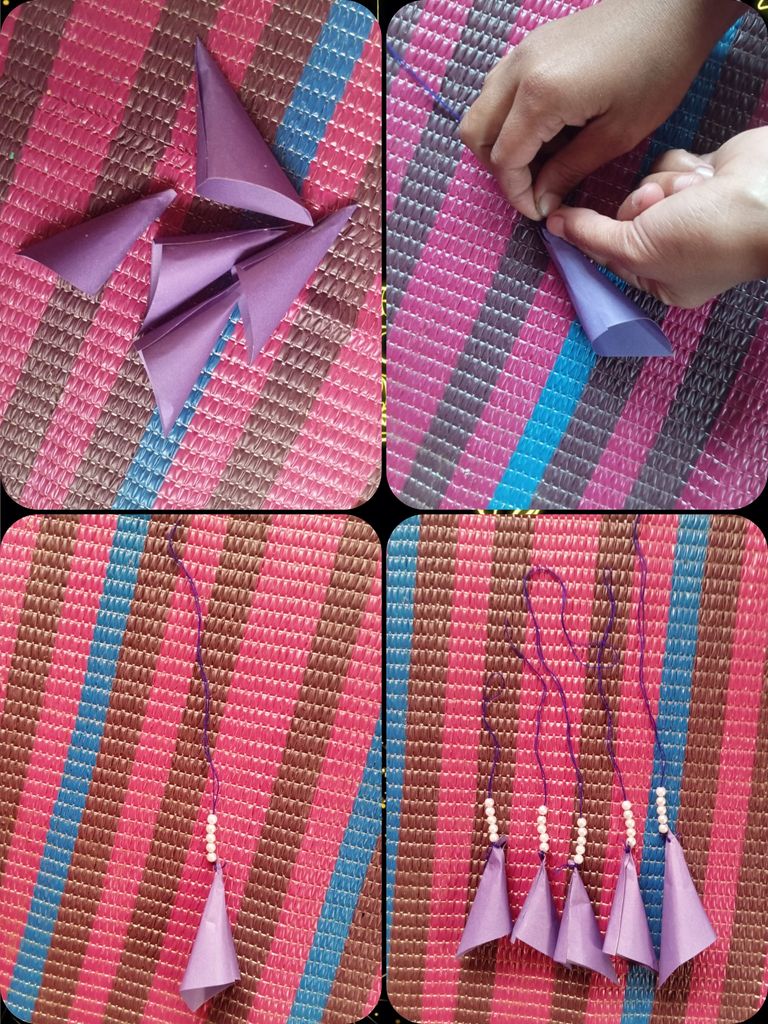
- In the tenth step, you can see that I will attach the corner-shaped purple flowers just below the beads that I have attached to the thread. All my flowers are already added.
দশম ধাপে আপনারা দেখতে পাচ্ছেন যে,সুতায় যে পুঁথি গুলো লাগিয়েছি ঠিক তার নিচে অংশে কোণ আকৃত বেগুনি কালারের ফুলগুলো লাগিয়ে নিব। ইতিমধ্যে আমার সবগুলো ফুল যুক্ত করা হয়ে গেছে।

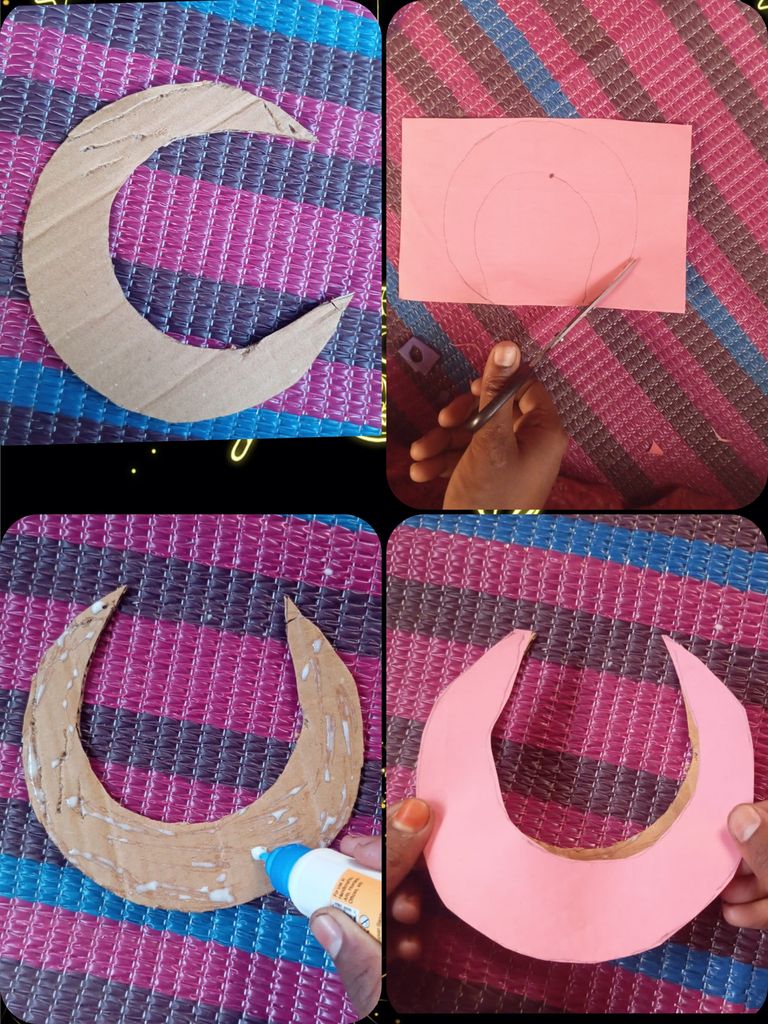
- Now I made a moon with a pencil on a piece of cardboard and cut it out with scissors. Then I took a pink paper. I put the hard moon paper on it. Then drawing the mark with a pencil, I cut out another moon the same size as the moon with scissors. Now I put gum on the hard moon drawing paper. Then I added the pink paper. I am presenting my post in front of you in simple step by step way to make you understand. I think you will understand.
এবার আমি একটা শক্ত কাগজের উপরে পেন্সিল দিয়ে চাঁদ বানিয়ে কাইচি দ্বারা কেটে নিয়েছি। তারপরে গোলাপি রঙের একটি কাগজ নিয়েছি। সেটার উপরে ওই শক্ত চাঁদ আঁকানো কাগজটি রেখেছি। তারপরে পেন্সিল দিয়ে দাগ টেনে নিয়ে, আমি চাঁদের সমপরিমাণ আরেকটি চাঁদ কাইচি দ্বারা কেটে নিলাম। এবার শক্ত চাঁদ আঁকানো কাগজের উপরে গাম লাগিয়ে নিলাম। তারপরে গোলাপি কাগজটি যুক্ত করলাম। আমি আপনাদের বোঝানোর জন্য আমার পোস্টি সহজ ভাবে ধাপে ধাপে আপনাদের সামনে উপস্থাপন করছি। আমার মনে হয় আপনারা বুঝতে পারবেন।

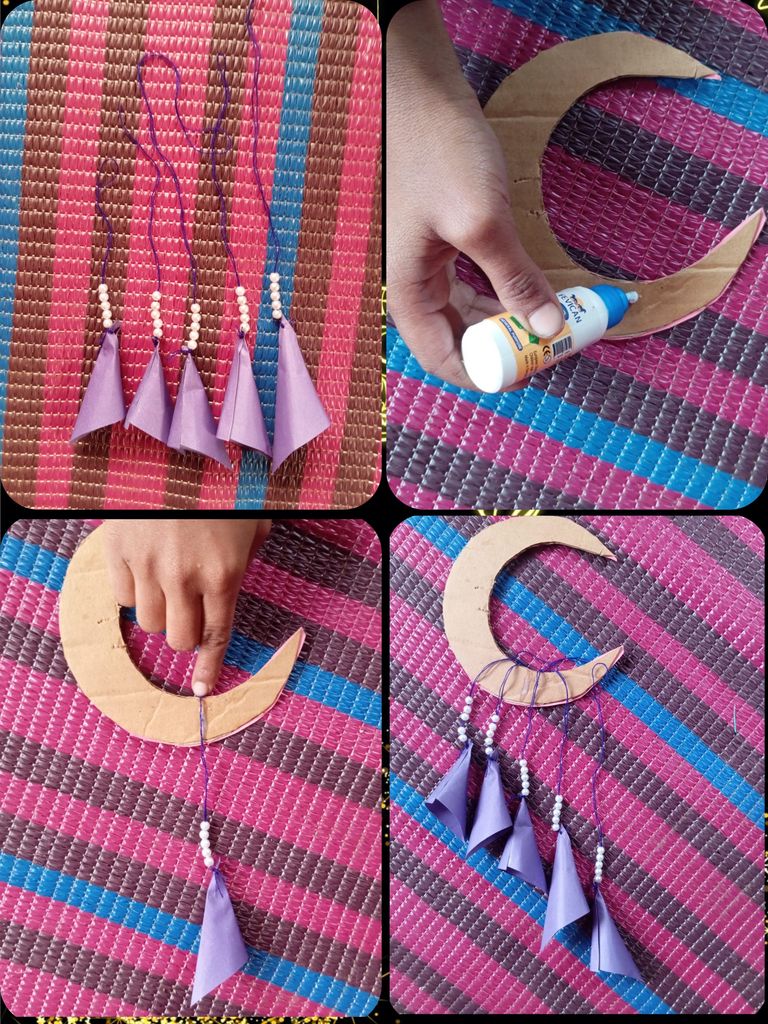
- Step 12 is very important point. Because the rose flower that I am going to make on the hand-made moon of colored paper, will start to take shape from now on. In the tenth step, the purple paper flower that is made with yarn and beads. Now I will hang it under the moon with a thread of gum, to enhance the beauty of the moon. As you can see all my flowers are already hung.
১২ নম্বর ধাপ খুবই গুরুত্বপূর্ণ পয়েন্ট। কারণ হাতে বানানো চাঁদের উপরে রঙিন কাগজের যে গোলাপ ফুলটি তৈরি করতে যাচ্ছি, সেটা এখন থেকে রূপ নিতে শুরু করবে। দশম ধাপে সুতার ও পুঁথির সাথে যে বেগুনি কাগজের ফুল তৈরি করা হয়েছে। সেটা এখন আমি চাঁদের সৌন্দর্য বাড়ানোর জন্য, গাম দ্বারা সুতা দিয়ে চাঁদের নিচে ঝুলিয়ে রাখবো। আপনারা দেখতে পাচ্ছেন ইতিমধ্যে আমার সবগুলো ফুল ঝোলানো হয়ে গেছে।

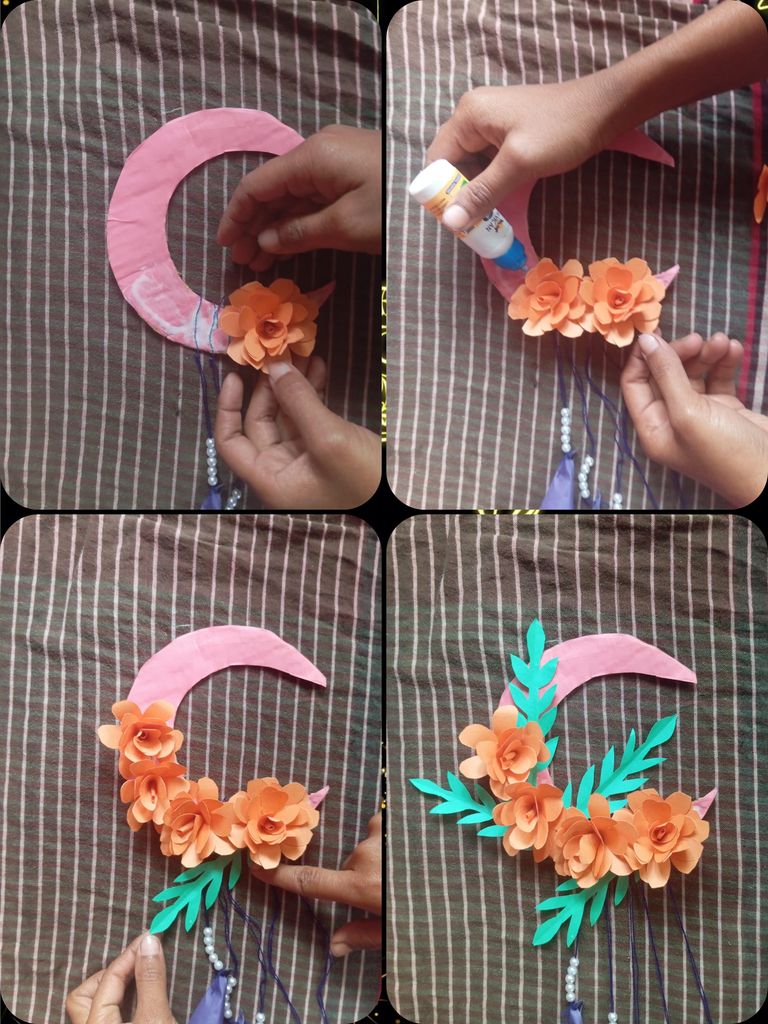
- In step 13 you can see that the beauty of the moon is increasing. Now I made the rose flower that I made in the fifth step. It will now be added step by step by gum to enhance the beauty of the moon. As you can see I have already added it. Then I thought if I use leaves here then the beauty of the moon will be doubled. And that's what I did. I will now add the leaves that I created in step seven with the occasional gum of the rose flower. I think you will find Posti very easy. Because I am trying my best to convince you. Keep watching.
১৩ নম্বর ধাপে আপনারা দেখতে পাচ্ছেন চাঁদের সৌন্দর্য বাড়তেই চলেছে। এবার আমি পঞ্চম ধাপে যে গোলাপ ফুলটি তৈরি করেছি। সেটা এখন চাঁদের সৌন্দর্য বাড়ানোর জন্য গাম দ্বারা ধাপে ধাপে যুক্ত করব। আপনারা দেখতে পাচ্ছেন আমি ইতিমধ্যে যুক্ত করে ফেলেছি। তারপরে ভাবলাম আমি যদি এখানে পাতা ব্যবহার করি তাহলে চাঁদের সৌন্দর্য দ্বিগুণ বাড়বে।আর সেটাই আমি করলাম। সপ্তম ধাপে যে পাতা আমি তৈরি করেছি সেটা এখন গোলাপ ফুলের মাঝে মাঝে গাম দ্বারা যুক্ত করব। আমার মনে হয় পোস্টি আপনাদের কাছে অনেক সহজ মনে হবে। কারণ আপনাদের বোঝানোর জন্য আমার সাধ্যমত চেষ্টা করে যাচ্ছি। আপনারা দেখতে থাকুন।

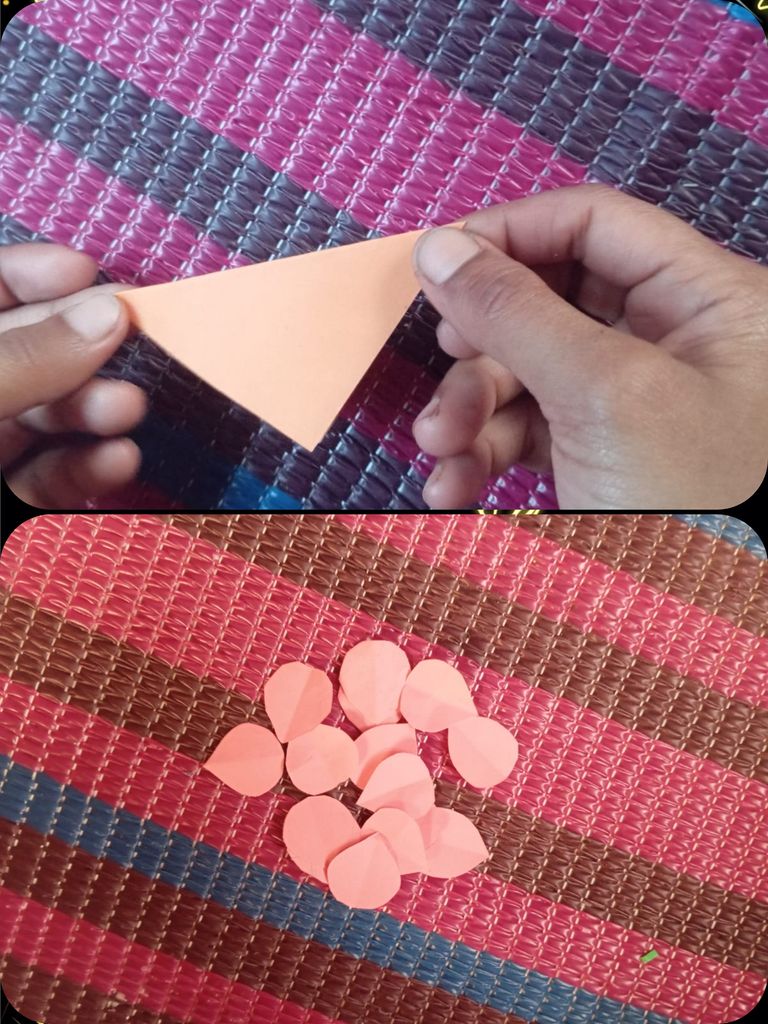
- In step number 14, I again took a four by four cm pink colored paper. Then I tried to make a small love symbol with scissors. It seems to hold some love symbol.
১৪ নাম্বার ধাপে আমি আবারো চার বাই চার সেন্টিমিটার গোলাপি রঙিন কাগজ নিয়েছি।তারপরে কাইচি দ্বারা এটা ছোট love চিহ্ন বানানোর চেষ্টা করেছি।মনে হয় কিছুটা love চিহ্ন আঁকার ধারণ করেছে।

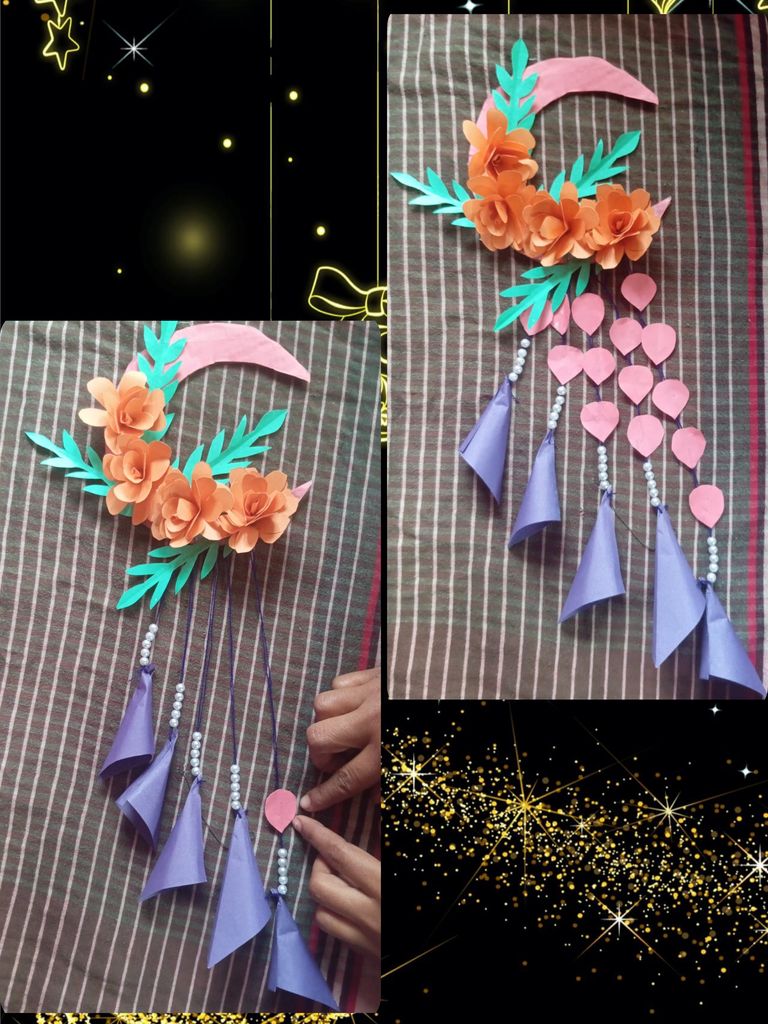
- You will notice step number 15 very well. I have here the rose flower craft on the moon to enhance the beauty of the thread and flowers below. On top of that, I added the pink love marks step by step with gum. You can see it has already been added.
১৫ নম্বর ধাপটি আপনারা ভালোভাবে লক্ষ্য করবেন। আমি এখানে চাঁদের ওপরে গোলাপ ফুলের কারুকাজটি সৌন্দর্য বাড়ানোর জন্য সুতোই নিচে যে পুঁথি ও ফুল দেওয়া আছে। তার উপরে গোলাপি রঙের লাভ চিহ্ন গুলো ধাপে ধাপে গাম দ্বারা যুক্ত করলাম। আপনারা দেখতে পাচ্ছেন ইতিমধ্যে যুক্ত করা হয়ে গেছে।

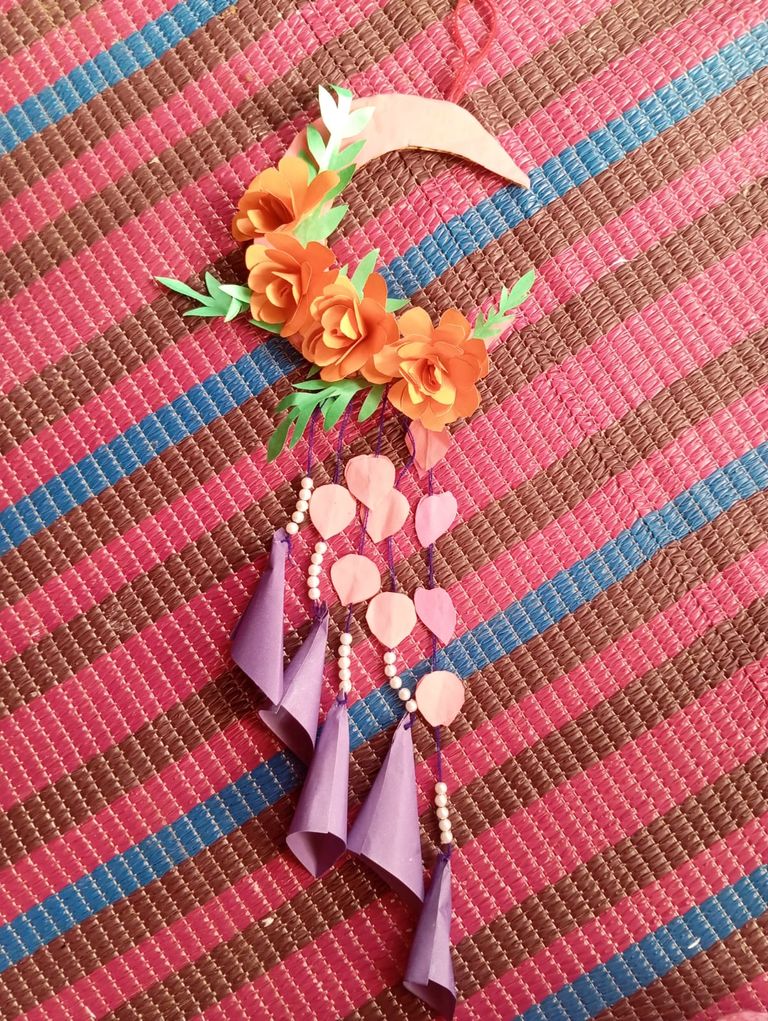
- Finally, finished a Diy moon over colored paper rose flower craft with my labor. I have shared the handcraft step by step well to make you understand. I think you'll love a Diy moon over colored paper rose flower craft I made in the @DIYHub community. You all pray for me. May I show you some good handicrafts in the coming days. You will all be well. I am ending here today by wishing you all the best. Allah Hafez.
Thanks for reading my post.

Follow Our Social Media
I am Md. Roknuzzaman Raju. I am a Muslim. I live in Gangni Police Station, Meherpur District, Khulna Division, Bangladesh. I feel proud as a Bangladeshi citizen. I love my native Bangladesh very much.I love to do photography and I love to hang out with my friends.I love to serve the poor and needy people. You all pray for me.May I reach my destination inshallah.
Congratulations, your post has been upvoted by @dsc-r2cornell, which is the curating account for @R2cornell's Discord Community.
Enhorabuena, su "post" ha sido "up-voted" por @dsc-r2cornell, que es la "cuenta curating" de la Comunidad de la Discordia de @R2cornell.