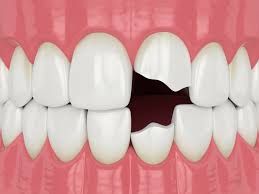
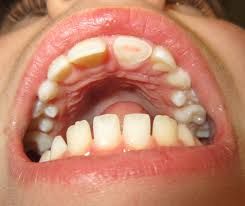
Injuries to the hard dental tissues is one of the most common trauma occuring mostly in younger children especially the males. Maxillary anterior teeth which in most cases are usually traumatized due to the nature of its location and falls are mostly directed towards its long axis.
There are lots of dental trauma depending on the nature and pattern exhibited by the trauma as it occurs. Some of it will be highlighted in this write-up as follows;
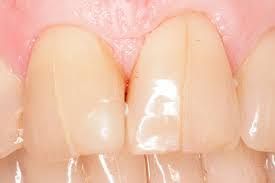
Enamel Infraction
These are incomplete fractures that occurs without loss of tooth substance and might not be noticeable without proper illumination are and as such they tends to be easily overlooked.
Review of these cases of trauma is highly necessary as the energy of the blow may have been transmitted along to the supporting tissues or the pulp within the tooth 🦷 itself.
Dental adhesives may be applied on the location of infraction for preventive purposes against demineralisation or bacteria penetrations which can eventually lead to caries.
Enamel Fracture
Enamel fracture with no extension to dentine requires no restoration. For the purpose of treatment, if there is any rough edges smoothening can be done and assisted with splinting if there is any associated mobility.
Periodic review and follow up is necessary in order to maintain effective and reliable treatment.
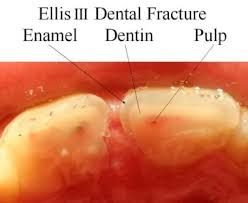
Enamel-dentine (uncomplicated) Fracture
These are fractures that have not reach the puplal chamber and as such needs urgent treatment to avoid extension to the pulpal tissues.
In this case, immediate treatment is warranted and the pulp requires protection against harsh conditions such as thermal osmotic irritation and from bacteria which can penetrate via the dentinal tubules.
Restoring crown morphology also stabilizes and maintains the position of the tooth in the dental arch.
Exposed dentine can be protected by obeying the following approaches;
1- A composite resin application after acid etching or Compomer bandage
2- Glass ionomer cement application within an orthodontic band or incisal end of a stainless-steel crown to avoid bacteria invasion, if there is insufficient enamel available for acid-etch technique.
Sometimes intermediate restoration of enamel-dentine fractures maybe be required for long term restorative procedures as follows:
1- Acid-etched composite restoration can be done freehand or celluloid crown former usage. The majority of these restorations can be regarded as interim, provisional or sometimes semi-permanent/permanent.
Larger fractures have enough available enamel surface area for bonding or it can be done also by employing a complete celluloid crown former to construct a composite crown. This fabricated crown can later be formed to a core and be covered with partial or full porcelain veneer restorations.
2- Reattachment of crown fragment. Some long term studies and researches have been reported that the durability of this type of restoration is uncertain and may not last for long term usage.
Furthermore, there is a tendency for the distal fragment may turn opaque or even require further restorative procedures such a veneer or full coverage crown
Depending on proximity to the pulp, the following interceptive procedure should be made to avoid extension to the pulpal tissues.
In case the fracture line via the dentine is not very close to the pulp tissues then the fragment may be reattached and sealed immediately.
However, in case it runs close to the pulp then it is highly advisable to place a suitably protected
material such as calcium hydroxide dressing over the exposed dentine for at least 1 month the fragment is stored in saline and renewed weekly.
Technique of the Restoration of Enamel-Dentine Fractures;
1- Observing the fit of the fragment and tooth vitality.
2- Clean the fragment and tooth with pumice-water slurry.
3- Isolate the tooth with rubber dam.
4- Attach fragment to a piece of sticky wax to ease handling.
5- Etch enamel surface for 30s on both fracture surfaces and extend it for 2 mm from fracture
line on both surfaces.
6- Wash for 15 s and dry for 15 s.
7- Apply bonding agent which can include dentine primer or not according to producer's instructions and light cure for 10s.
8- Place appropriate shade of composite resin over both surfaces and position the fractured fragment. Remove gross excess and cure 60 seconds both labially and palatally.
9- Remove any excess composite resin with sandpaper discs as it would have been solidified
10- Remove a 1-mm part of gutter of enamel on each side of fracture line both labially and
palatally to a depth of 0.5 mm using an appropriate bur. The finishing line should be irregular in outline to assist in retention of composite resin restoration.
11- Last but not least, etch the newly prepared enamel, wash, dry, apply composite, cure, and finish and smooth it properly.
That's all as regards the write-up and more would be discussed further in the subsequent posts for more information and points. Thanks for the unalloyed and unconditional support and decorum given to the write-up till this segment of the paragraphs and happy blogging.
Happy Blogging and Reading 💥💥🦷🌴🌴
Video from Mental Dental YouTuber


Telegram and Whatsapp