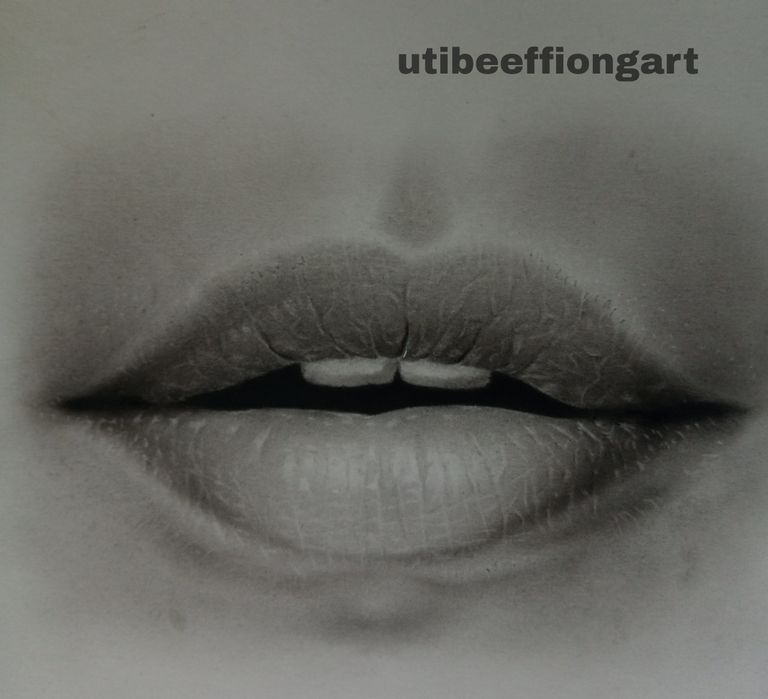
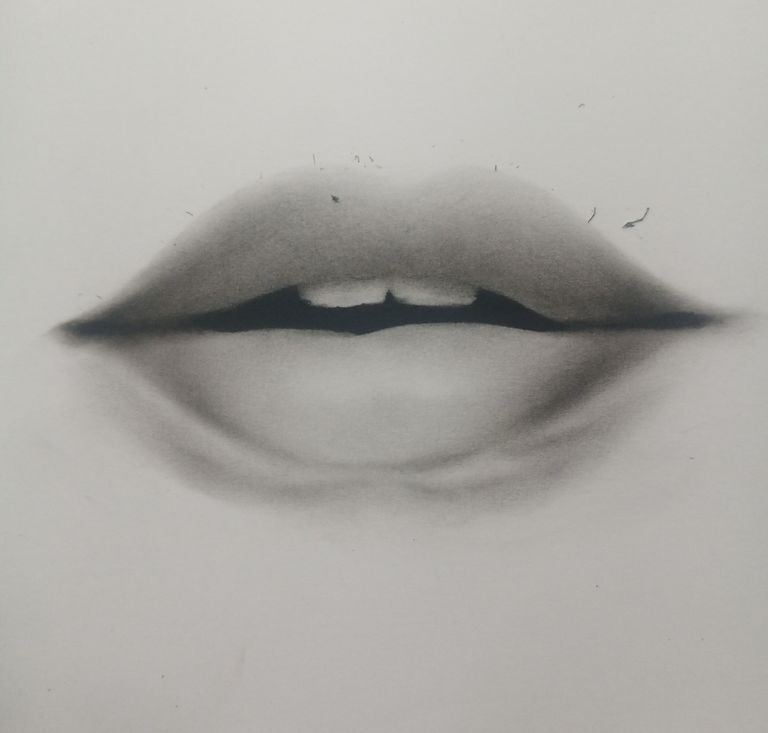
To make this possible, the materials you use are important in order to achieve your artistic goal. So below are stated the materials I used to achieve the art piece above.
- Strathmore Paper
- General Charcoal Pencil
- Mono eraser
- Graphite pencil
- Charcoal dust
- Tissue paper
- Brushes
- Blending stump
After we have established the materials, let's proceed to the processes and build up proper.
Step 1
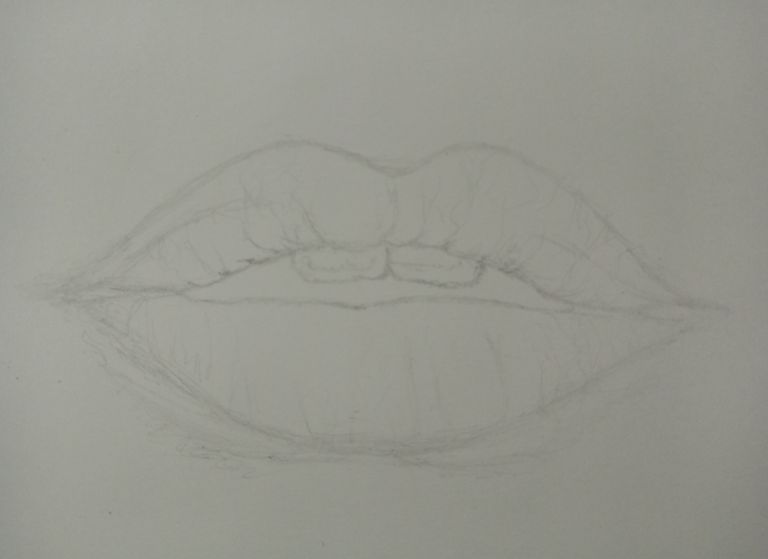
With the use of your graphite pencil (non-charcoal pencil) carefully draw out the sketch of the mouth you are about to replicate. Try as much as possible to replicate the outlines of the same image you are seeing. And it is good to note that, there Different sketching an artist can adopt in order to achieve a perfect sketch. And these are;
- Free hand sketching
- Grid-line application method
- Tracing method
- Use of projector.
With any of the following methods, an artist could achieve a perfect sketch depending on the one the artist is good at.
Step 2
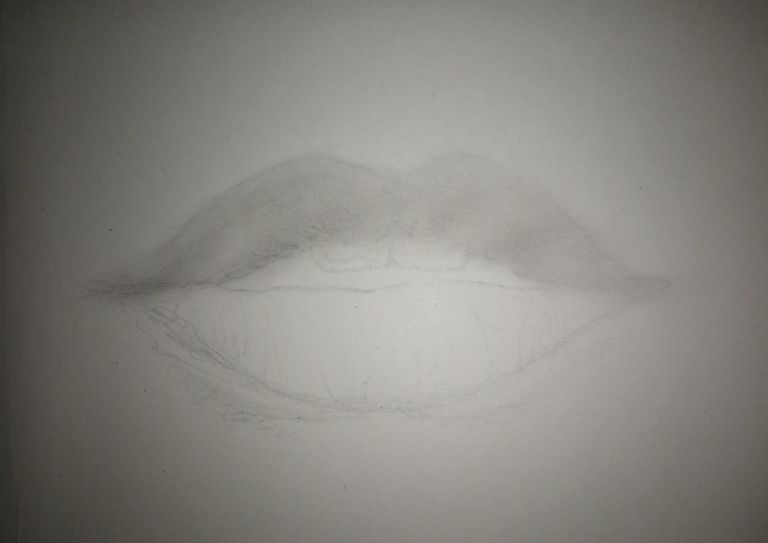
After the sketch begin your build up by making some light sketch. And this case I started with the upper lips by just the application of my graphite pencil and Shading it out with the brush. Some artist can proceed to use of charcoal dust or pencil. After that we proceed.
Step 3
Now I proceeded to make the upper lips even more visible by application of the charcoal dust with my brush as seen above.
The charcoal dust could be purchased from an art shop or you could just screp it off a charcoal pencil, like I did mine.
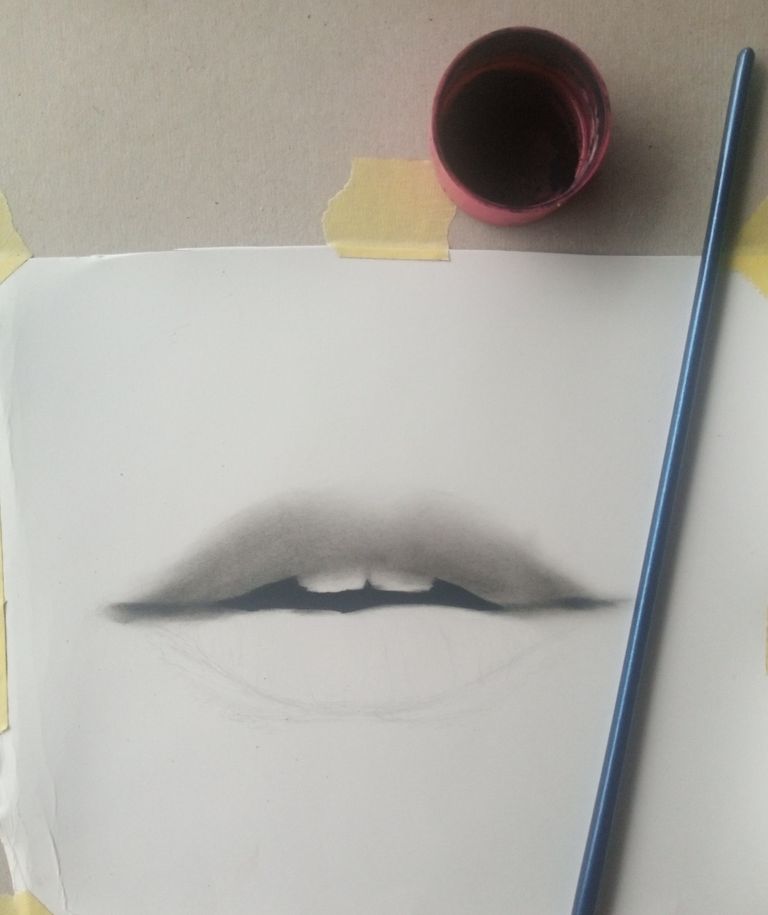
Step 4
I repeated the same method for the lower lips but this time, I really made use of my reference photo. The lower lips was not as dark as the upper so I have to be careful to take into consideration my dark and light areas so I can get a perfect replica of my reference photo, remember we are making hyper-realistic Drawing.
Step 5
At this stage you have finished with the blending of the upper and lower lips, it's time to apply details. And the details is what will help you bring out the Realistic nature of the Drawing. The details in this case will be to represent the cracks on the lips.
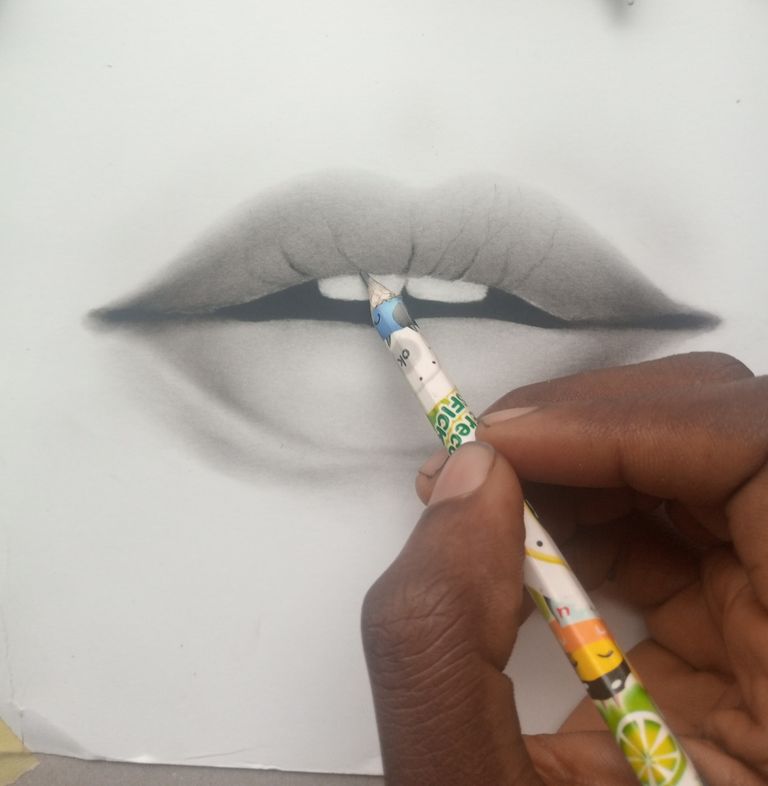
How to achieve cracks. Step 5
Now this is a very simple thing to do, though not all together easy but with simple guides you can achieve them.
- after blending out the surface
- use your graphite pencil and draw some light thin lines on that surface, make sure to try to get it the way it is on the reference photo.
- after drawing those lines, try to make it visible While still keeping it natural e.i. an onlooker should not be able to totally identify the line from a glance.
- after that use mono eraser to creat white lines or light behind or in front of the line you made with your graphite pencil. If you did it perfectly well, you will be surprised by the beautiful piece you will produce.
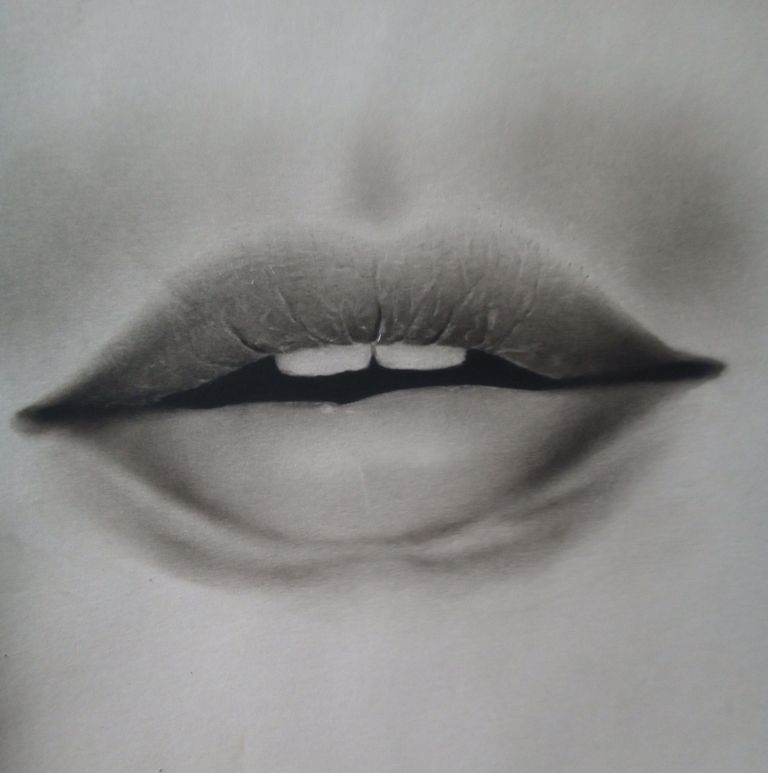
Step 6
Repeat the same process in Step 5 to obtain the a natural crack. But then, the thin lines you will be applying will be very much lighter than the one you applied during the upper lips process.
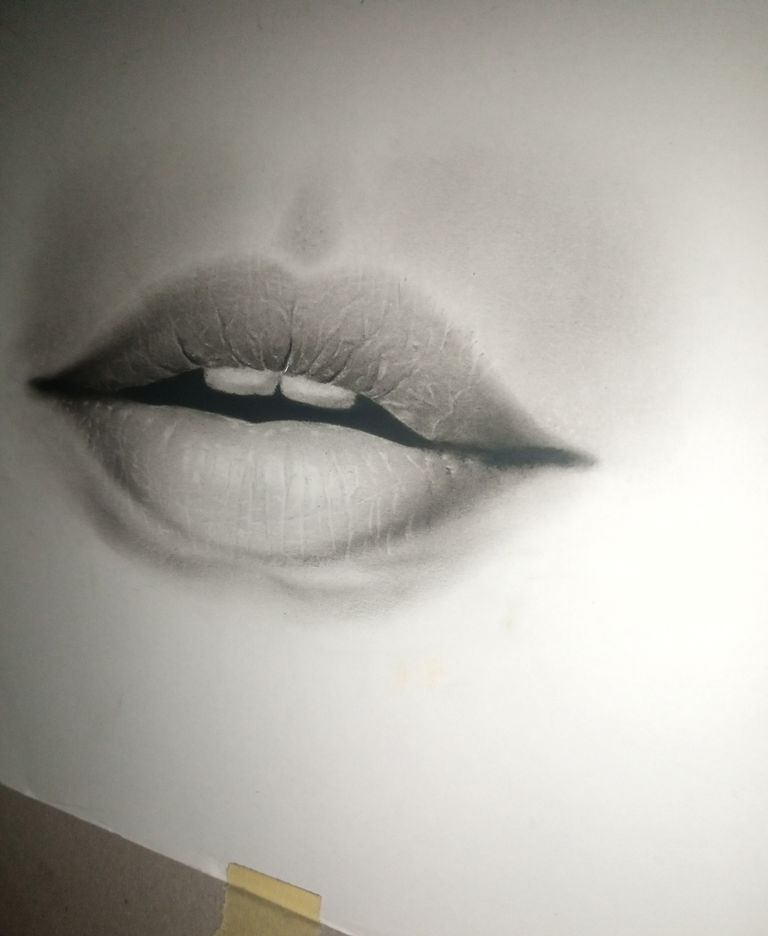
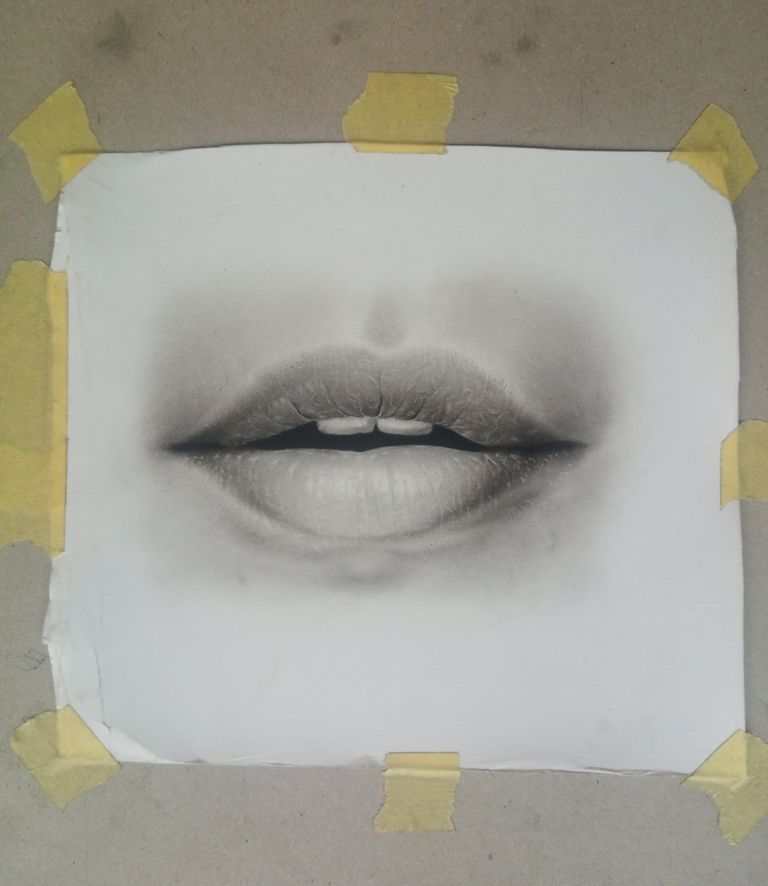
Make some Shading around the lips to make it look more natural and realistic according to the reference photo.

Am open to any question in the comment section. Thank you for looking through my blog. Stay tuned for more great pieces.
